
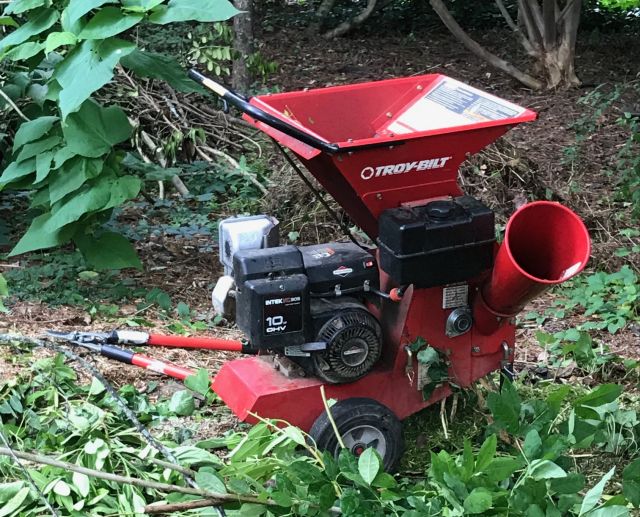
I extend the life of appliances so they can age gracefully as I am also attempting to do. But they need attention and repair. I previously posted how I repaired (or had someone repair) the circuit boards of the wall oven, fridge and treadmill all of which are >15 years old and still work fine. In August 2013 I posted how I rebuilt the engine of my chipper/shredder (see picture above) after the oil plug came off, the oil escaped and the engine seized. I believe I bought the chipper new in the 90’s and have used it regularly. Other than the engine repair, I also replaced the fuel tank (costly part), the drive belt, and the axle bearing.
I heard loud thunking from the chipper this week and noticed that the axle bearing was broken and again needed replacement after some 10 year’s use.
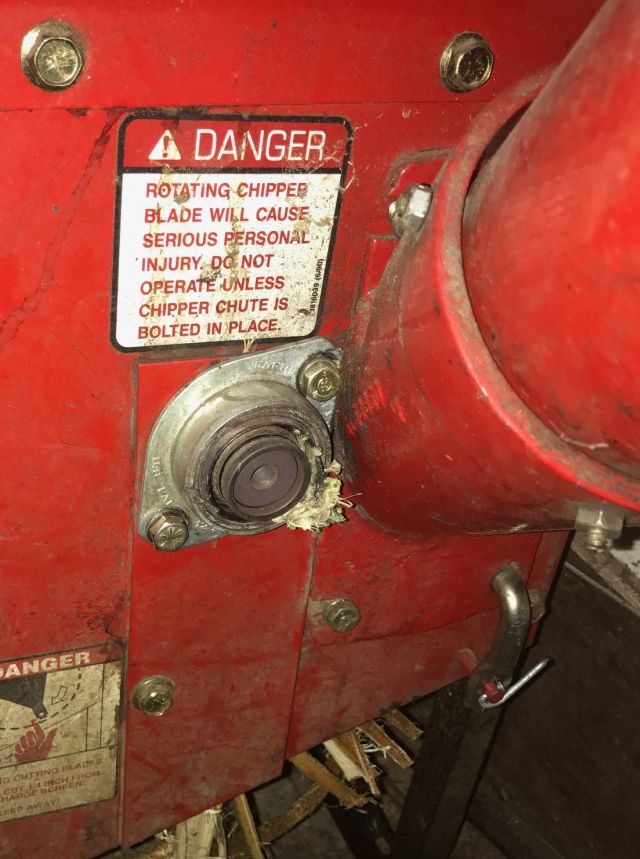
What I refer to as the “bearing” is actually 2 components – a housing, and a bearing inserted into the housing.
When I last replaced the assembly some 10 years ago I am sure the price was <$20. Today the price >$60 on all the websites I visited. Seems a lot. To find lower prices it helps to use a generic sku (part #) and not the manufacturer’s sku. I had no success. But it occurred to me that since the housing was ok, why not just buy the bearing separately?
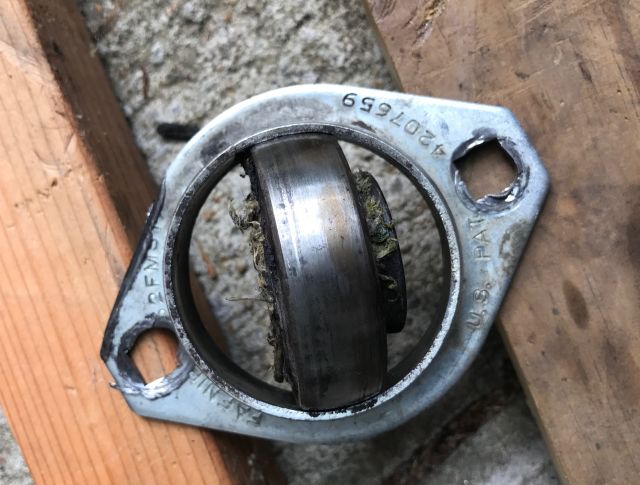
By magnifying the website picture of the >$60 replacement assembly I was able to identify most of the part number of the bearing. And by googling various combinations of the number I located the standalone bearing (Timken RA100RRB wheel bearing) and on Amazon prime it was available (including tax) for $17.19. It arrived a couple days later and matched the defective bearing.
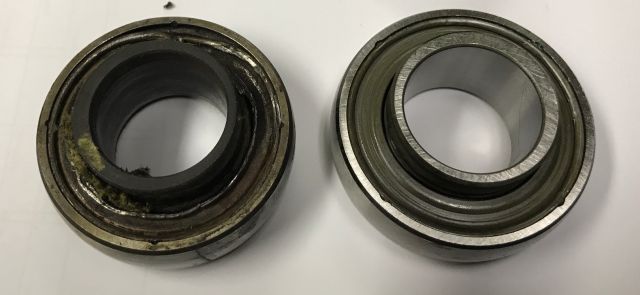
However, I could not press the bearing into the housing. Youtube guidance suggested I freeze the bearing and heat the housing. Just freezing didn’t work and I was under increasing pressure from M. to chip the accumulating pile of branches and to “”just pay the $65 and get the right part”. So I put pride aside and visited the local tractor dealer and they fitted the 2 together, and refused payment. With hindsight I realize I was using the wrong technique. Instead of trying to align the bearing with the housing and then force the bearing into the housing, I should have forced it in edgewise and then rotated it. My lesson for next time.

It was quick work to reinstall the bearing on the chipper and today I chipped >2 hours and the new bearing appears fine. I should mention this is the chipper I use at the Atlanta house. North of Atlanta where I have my growing operations I use a large chipper driven by the PTO of my 60hp Case 585 tractor.