new growing area and contour ditch

In a previous post I mentioned the repercussions experienced from locating my muscadine grape plantings too close to my vegetable beds.  Just as the vines of the muscadine grow interminably so do their roots and the raised beds, tomato planting sites and other vegetable sites were mined by muscadine roots.  I relocated half (6) of the muscadines earlier in November and have now prepared a site for relocating the remainder.

contour ditch
new terrace with contour ditch after recent rain

The site is on the slope of a small hill which has blueberries at the top and a fruit tree orchard lower down.  I decided to carve out a terrace between the two, approximately 8 ft wide and 100 ft long, with my bobcat.  Terracing the first 50 ft was uneventful and then I hit the rocks.  It seemed the slope was made from rocks.  With the teeth of the loader I jiggled the rocks loose and then manually lifted the rocks and stacked them above the terrace.  Seemed interminable.  Eventually a terrace appeared.  But it sloped from the north end to the south end, which meant the intended contour ditch would be more drain than a container of rainwater.

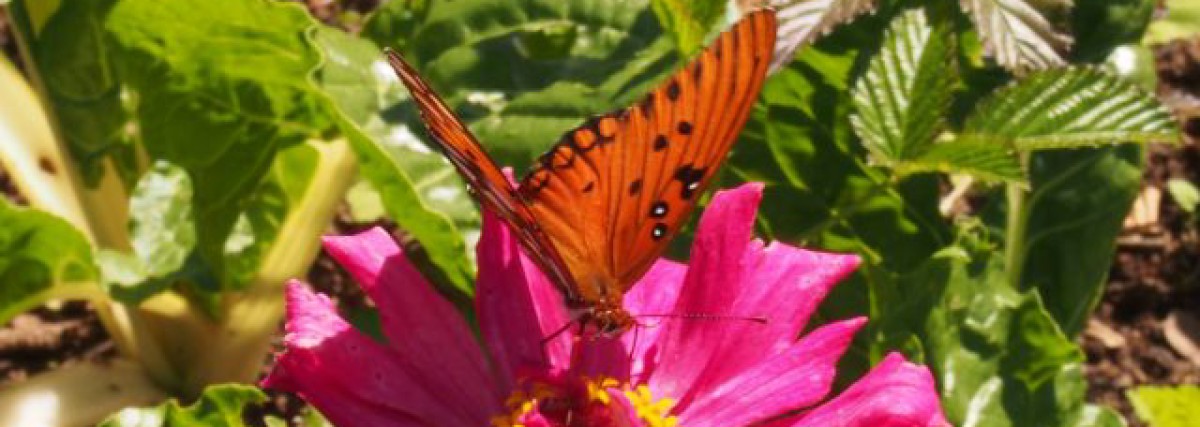
I hammered in 6 – 4ft  metal rods equidistant along the terrace and then with my transit level and surveyors tape tied to the rods, I identified the grade (you can see some of them in the above ‘photo).  With my bobcat I then pretty much leveled the terrace, though there is still some dip from the north end to the south end.

Next step was to dig a trench/ditch down the middle.  I replaced the loader on the bobcat with a trencher/stump remover attachment and after pulling out more rocks had a rough ditch.  A lot more work with a shovel was required to make it presentable.

contour ditch
some of the rocks embedded in the slope which had to be removed

Now I had bare clay earth and the prospect of oncoming wintry rains and erosion.  I discussed with the owner of the local farm supply store whether I could still seed with clover.  He suggested winter rye grain was a better bet for a cover crop.  So I sowed the rye and hope it will germinate.

With the terrace now done, next tasks will be chain sawing some anchor posts for the cables for the muscadine grapes.  There is a toppled maple tree which I may use – though toppled, it is off the ground and its wood hasn’t rotted.  Also a poplar which needs to come out since it blocks my tractor when I go chipping in the woods.  Oak would be a better bet for longevity but I cannot justify (yet) cutting down a good oak for fence posts.

preparing for winter

Yesterday morning I did not need a weather forecast to know cold was incoming and that it was time to protect some of the plantings.  Of the 12 fruit trees installed earlier this year, the Gold Nugget loquat was the most vulnerable.  The loquat is suited for sub-tropical to mild temperate zones and freezing temperatures will kill the buds if not the tree.  My loquat did not do very well this summer, probably too hot for it, but I will do what I can to help it and first steps was to winterwrap it.  Since it is only a few feet tall, it fitted easily into one of my tomato cages, which I had made from welded steel wire re-mesh.  I then wrapped the cage and the space above the tree with agripon AG-30 row cover, as shown below.

loquat in tomato cage wrapped with row cover

Next to the vegetables.  I have two raised beds where I am growing several varieties of lettuce as well as spinach, kale etc.  Rather than using a hoop system my thought is to drape row covers over the beds just above the vegetables.  This should be less vulnerable to strong winds and may offer better protection.  For my first bed I bridged the long sides of the bed with two cedar posts and then strapped a 4″ pvc drain pipe to the posts and draped the row crop over this.  Below is the finished product as it appeared this morning (you can see the frost on the adjacent strawberries):

raised vegetable bed covered with row cover

If the description was difficult to follow, here is a shot with the row cover removed:

raised vegetable bed with fixtures for row cover

Only half of this bed is being used for vegetables.  I have extensively planted the other half and also the spaces between the vegetables with garlic.  For my second bed I simply placed the row cover over the vegetables and secured with 3 2×4 untreated planks, as shown below:

vegetable bed covered against frost

The temperature fell to 22 degrees and the vegetables did fine, though it was not a heavy frost.  Since temperatures are predicted to stay above freezing for the next five days, I removed the covers this morning, a simple task which took just a few minutes.

long raised vegetable bed with lettuce interplanted with garlic

My new chicken coop is working out great.  Air can flow freely out the rafters at the top and I leave two of the windows slightly ajar. I was curious to learn how cold it really gets.  I transplanted my two min max thermometers from my greenhouse to the coop and sited one outside at the door and the other on the partition which divides the coop into the old flock and new flock areas.  This morning the outside temperature was 22 degrees and the inside temperature was 36 degrees, higher mostly I would think because of the heat of the birds.  My greenhouse, which is fully enclosed, only provides a differential of about 10 degrees between outside cold and inside temperatures.

thermometer reading 22 degrees
min max thermometer on coop door


Since power outages may be expected, I checked my flashlights and found that my large 4 cell mag-lite was not functioning. Two of the 4 batteries had leaked and corroded the inside. Removing the batteries proved near impossible. I decided to drill a hole into the bottom of the battery and screw a large lag eye bolt into the battery and, with the assistance of a helper, pull them apart. After much tugging the bolt separated from the battery and the battery remained, unmoved, in the flashlight body. I then located a larger diameter hanger bolt and screwed this into the battery.

hanger bolt on left shown inserted in a battery, and lag eye bolt on right

I no longer had my helper but additional help was unnecessary since, with a assortment of 2×4’s I established a platform for the nut on the hanger bolt to leverage against. It was then a simple matter to tighten the hanger bolt nut with a wrench and slowly extricate the two damaged batteries. After rinsing out and scrubbing the flashlight interior with a liquid mix of baking soda (sodium bicarbonate) and installing new, and a better brand of, batteries, the flashlight is good to go.

tighten the nut and the bad battery comes out (slowly)

November tasks

No pics for this post since my camera informed me the battery pack had to be replaced and refused further negotiation.

A pleasurable task, this time of year, is collecting the flower seeds. I did my first Cosmos seeding early 2010 and, from the seeds gathered last November and spread this past spring, I enjoyed a whole new expanse of Cosmos. By November 8, as was the case last year, most of the seeds have dried and spread and are easy to grasp in one’s hand and release into a shopping bag. Lots of Cosmos and every few days I gather more. Also collecting Marigold and Zinnia seeds for new plantings next year.

I am heavily studying permaculture and a recommended plant is the Gumi/Goumi (Elaeagnus multiflora), native to China, Korea and Japan, which provides edible fruit, fixes nitrogen and apparently has medicinal uses. Rather than buy a plant, I bought 12 seeds which arrived after a 2 week trip from NS, Canada accompanied with a note “Has a long germination requirement, often taking 2 full winters before germination.” This will surely test my propagating abilities. For starters, I moistened some seed starting mix and placed, with 6 seeds, in a zip loc bag in the refrigerator. To mimic two years I may remove from the refrigerator in a month’s time and allow to warm for a while and then back into the refrigerator to trick the seeds into thinking this is their second winter. I suspect I will find these seeds are not easily tricked – that’s why I kept 6 seeds in storage for a second go round.

I am also trying, for the first time, to propagate cuttings. I have had success with layering where you pin a low branch of a shrub on the ground, maybe roughen the underside, cover with compost and soil and leave for a few months and, when you return the pinned branch has developed roots and can now be cut from the mother plant and transplanted. Works very well with azaleas and forsythias. But cuttings is something new and, when I have definitive progress, I shall include some pics. I am aware that the best time to be doing this is in spring when the plant is in growth mode, not at the end of fall when systems are shutting down. And spring next year I shall also be trying grafting on my fruit trees.

Next week I should receive some root cuttings of Comfrey, Goldenseal and Jerusalem Artichoke, and also two varieties of mulberry, black bamboo and everbearing strawberries. Just in time to plant before the real cold settles the ground. I have been growing early season strawberries for several years and they were very sweet and spread prolifically. However, their fruiting season is too short, and so I hope to be similarly lucky with the everbearing variety.

With the cooling temperatures I have been progressively winterizing the bee hive. A couple months ago I removed the big sun umbrella which protected them from overhead sun, then I removed the board fence on the west side which protected them from afternoon sun, now I have stapled the plastic sheeting to the frame which encompasses the hive, and I slid in the bottom board, so only the entrance side and the top are open to the elements. I also have left them with a lot of their honey (my last harvesting was August 5) so I hope they will have enough to get through the winter without my having to give them sugared water. Since I do not use any chemicals, I want them as healthy and strong as possible to survive the challenges of winter and their own honey will be infinitely better than a sugared substitute.

And the chicken? The 6 older hens are delivering 3 eggs a day which is ok for now, given the shortening daylight hours. The flock of eight (7 hens and 1 rooster) are now about 6 months old and only one of them (one of the Golden Comets) is egg producing. They love their new coop and seem to be having a great time so I have had a few chats with them about the importance of delivering more eggs – “eggs or the pot” I say to them. In December, if egg production is down, I may use artificial lighting on a timer to get them 14 hours of light and more into an egg laying frame of mind.

compost making time, again

The leaves have been tumbling down and my Atlanta neighbors, or more accurately, their gardening services have begun bagging the leaves and curbsiding them, an open invitation to initiate compost making. Today, Saturday, was my first early morning sweep and, with 12 full bags secured and tarp covered in the bed of my pickup, I headed north to my farm. After uncooping the chickens, I made my first compost heap of the season.

It is really a quick, relatively painless process (you can find detailed instructions under the tab “Growing organic”). Under the oak tree, where many compost heaps were previously made, I cleared a 6ft square area; opened and spread the contents of two leaf bags; then added a layer of weeds, bramble and vines from areas cleared during the week; then a fork load of finished compost; and then repeated the process several times. In fact, since I started with 12 leaf bags and there were two bags per layer, I had 6 layers of leaves separated by 6 layers of vegetation, intermingled with helpings of finished and semi-finished compost. Because the leaves were dry, I watered continuously with a hose connected to my rainwater storage tank. Earthworms are included in the compost supplements and will migrate from the soil to the heap.

The end product is a dishevelled looking compost pile. As I collect more bags in the coming days I shall continue to build the heap. I shall also revisit the horse stables for manure and add a generous helping of manure to the brew. I also recycle kitchen leftovers such as egg shells, vegetable scraps and coffee grounds, and contributions (poop) from the chicken coop.

In cold conditions I usually cover the top with a tarmac weighted down with stones or lumber, to retain the heat and accelerate the process. For now I shall leave it open since we still have warm days and I want it to receive the benefit of rains. After the heap is fully built up I shall turn it a couple of times with my bobcat and by next April, I should have compost ready to go.

compost
an adjacent finished compost heap - ingredients fully broken down except for some recently landed fall leaves
compost
beginning stages, to the left vegetation ingredients, to the right a finished heap of compost
compost
some leaf bags awaiting transformation to compost
compost
watering the compost heap which includes 12 leaf bags and a lot of vegetation

transplanting muscadine and fixing a mistake

Muscadine grapes (vitis rotundifolia) grow in the wild throughout the Southeastern United States. There are well known varieties and my favorite is the Scuppernong. When I established my vegetable garden 3 years ago I had a small growing area and, in my wisdom, ignored the instructions to “set the plants 20 feet apart in 10 foot rows”. Instead, I set up 3 horizontal wires, 5 ft high, 1 ft apart, and ran this down the middle of my vegetable garden. I figured the horizontal wires would give the plants adequate sun exposure, the 1 ft spacing would allow air circulation and my heavily composted soil would support a larger number of closely planted muscadines. Sounds good in theory. What I did not know is that muscadine roots can travel long distances (I heard one grower say up to 70 ft). I suppose the roots are a bit like the vines, which also grow interminably. Result was the muscadine roots began invading my raised beds, my tomato plantings, in fact all my plantings.

So I waited until first frost (a few days ago) and am now replanting 6 of the vines. Not a simple task. It is easy enough to trim the vines to 10 ft lengths, but extricating 10 ft lengths of root without damaging them is more difficult. Where the root forks you have to be careful not to tear off and strip of the root.

I previously had run a 5 ft high cable between my fruit trees to support tomato cages for my tomato plants. Also not a good idea. While the vegetable garden is circled by a 5 ft fence which keeps out squirrels, deer etc. my fruit orchard is not protected and a lot of wildlife visitors enjoyed my tomatoes this year. So I removed the tomato cages, dug a ditch below the cable and aligned the roots of the muscadine down the trench, covered with compost and soil, and watered. And I hope the muscadines will survive and grow. This took care of 3 of the 6 muscadines, but I had to develop a location for the other 3 muscadines.

I decided to extend the cable further down the orchard which meant inserting another post to carry the cable. I attached the augur to my tractor and used a large drill to dig a 3 ft hole. Then with a chain attached to my tractor bucket I hoisted my post (an 8 ft cherry tree trunk) into the air and lowered the trunk into the hole. Remaining steps are to extend the cable and transplant the remaining muscadines. A lot of work to correct a mistake made 3 years ago.

muscadine
muscadine awaiting transplanting
muscadine
muscadine with trimmed vines and roots prior to going into trench
muscadine
muscadine in situ with roots along trench
muscadine
tractor driven augur drilling hole for post
muscadine
tractor transporting cherry trunk to hole
muscadine
cherry trunk in vertical position prior to being moved to and lowered into hole
muscadine
new post installed to carry cables for muscadine
muscadine
new muscadine plantings
muscadine
simple contraption made out of 4x4's to support augur when not in use

succession

“Succession” has been in the news, more so in England than the United States, when last week (October 28) the rules for succession to the British throne were amended to ensure that the first born of any future monarch, whether male or female will inherit the crown. However, though related, this is not the succession I have in mind when I look at my yard, which previously was regularly scalped by a lawn mower, now transforming itself into an impenetrable mass of “weeds”.

When we selected a house in the suburbs of Atlanta I wisely ensured there were no neighborhood covenants requiring all houses conform to a manicured appearance. I guess my priorities are different from most homeowners who stress curbside appearance by which is meant that the house should look good to passersby. For me this entails a loss of privacy – I would rather my dwelling be obscured to passing traffic. So I displaced the rolling lawn between the house and the street with many tree plantings. There still is some lawn and, yes I do mow it, especially when the weeds are about to seed since it would be unfair for my neighbors’ yards to become infested with my “weeds”. These changes did not pass without comment from the subdivision and I became aware of the common sentiment when a visiting teenager said she loved the wildflowers and I should not be influenced by what everyone was saying about my yard (up till that time I didn’t know that anyone was saying anything). I heard more directly when, at a neighborly New Year’s party, after some quaffing of the spirits, and when everyone was encouraged to make a new year wish, someone said they hoped Disney would use our yard as their site for the next Tarzan movie – the guffaws, in which I participated, showed that most everyone knew about our yard.

Succession doesn’t really work in a suburban setting because at some point the local authorities will become involved as complaints escalate. But it is great for my rural property. Basically, succession means stepping back and doing nothing and letting nature take over the yard. The grasses which used to be mowed are taken over by more aggressive annuals (pioneer plants) which thrive in an untended natural setting. In time the annuals will be shaded out and displaced by larger perennials, which in turn, some years later, will be displaced by natural seeded trees (in my case pine trees and tulip poplars). Succession is a natural process and maintaining an immaculate lawn is an unnatural process i.e. we are going against nature, which is why so much effort and dollars are expended on herbicides (pre-emergent, post-emergent), pesticides, fertilizer, mowing, spiking, irrigating and leaf clearing operations – we are trying to hold the lawn at an early stage of development while nature is trying to progress matters (my neighbors will quibble with the word “progress”).

So I am allowing succession to occur on my rural property in the areas where I am not growing food. Actually, in some cases I am doing accelerated succession, which means that in addition to allowing the pines and poplars, maples et al. to seed and grow, I visit the woods and extricate white and red oak seedlings and plant them amidst the growing host. Oaks are very difficult to transplant – they send down long tap roots and success is only possible if you select a seedling which means some trial and error since what may appear to be a small oak seedling could be a specimen which has been waiting in the understory for 5 or more years and has a 4 ft taproot. However success is possible.

Perhaps my succession is not that different from the new rules for the British monarchy – whoever arrives first rules (for the time being).

succession
previously mowed area - you can spot pine, tulip poplar and a transplanted oak
succession
previously mowed area, now pine, tulip poplar, and perennials including pokeberry
succession
this looks a mess, but within various saplings are growing and will one day take over

new chicken coop – completed

I completed the chicken coop project over the past weekend. I did all the work myself except for the assistance of a friend who helped me hoist 5 of the 6 windows into place and fit the entrance door. In previous posts I mentioned my progress on its construction. It is built on sloping ground so I started by using my bobcat to build a level pad, half of which was cut into the slope and the other half was infill from soil removed from the slope. Then with my trencher/stump remover attached to the bobcat I dug drainage trenches on the two sides of the pad which cut into the slope. The building is 18 ft by 10 ft and secured by posts concreted into the ground. Digging the post holes took a lot more time than anticipated since there were a number of largish stones (boulders) which had to be removed and this resulted in some cases in very wide holes. With the posts finally in place, construction went quickly. A time consuming task was digging the trenches between the posts for the cement blocks which I lined up 8″ deep to form my barrier against predator tunnels. I am concerned that predators can dig deeper than 8″ tunnels and will keep a lookout for perimeter activity.

The first photo is the entrance. The only 6ft wide gate available at the time of purchase is for larger animals rather than chicken, so I used some of my fence wire to cover the gaps between the horizontal bars.


coop
coop seen from entrance gate

I screened all openings which remained after construction with hardware cloth. I also added the hardware cloth to two of the windows (lower half which opens) so that I can leave the windows ajar during the nights. To attach the cloth to the timber I used a pneumatic stapler (and safety glasses) and this sped up the work considerably.

coop
coop south facing side with four 4 ft windows

There are a total of 6 windows, four in the front and one on each side. This photo shows the entrance, with my $8 front door purchased from the thrift store and my rainwater storage tank. I will use the rainwater to irrigate the tree and shrub plantings I am installing in the chicken range areas.

coop
coop front entrance at rainwater storage tank

The coop is divided into two halves – one for the 8 younger chicken and the other for the 6 older hens. I intended to keep them all in the one half and use the other for growing and other activities. However, it appeared too cramped and there is still some friction between the two flocks. Each half has its own water container, food container, perches and nesting box. This photo shows the half closest to the entrance in which the 6 older girls now live, and the large nesting box inherited from my neighbor as well as the steps (4.5″ spacing) on the inclined plank to facilitate accessing the perch (horizontal, non pressure treated 2×4 at top left).

coop
coop area for older hens

The two areas are separated by fencing material and a gate I salvaged.

coop
coop partition

The other half is outfitted much as the first. Incidentally, in one of the nest boxes is a Golden Comet and, I discovered later, she is in the process of laying her first egg. Maybe living in close quarters with the older egg laying hens accelerated the process.  The step spacing in this coop is 6″ which I think is a bit too far apart – you can see Lady Macbeth on her way up to the perch.

coop
coop for younger hens

I spray painted the exterior with a block stain. This photo of the rear of the coop shows the slanting gutter leading to the storage tank and the drainage ditch on the north, slope side, of the coop.

coop

And, finally, this photo shows the west side with the drainage ditch between the slope and the pad on which the coop is built.  I have used 4 ft fencing which a number of the birds can easily fly over, but as longer as there is habitat and things to scrounge for they appear content to stay within the fenced areas.

coop
coop west side, showing drainage ditch

Finally, I must plant up the soil which surrounds the coop before it is eroded by the rains. I may transplant sod from the hill or try seeding it. With temperatures beginning to fall, it may be too late for seeding.

progress on the coop and a simple replacement fix

The future chicken coop

Chicken coop

The future chicken coop is progressing. I installed the windows and door with the help of a friend. Just outside of Atlanta there is a large employee owned window manufacturer and they custom manufacture windows which are occasionally returned because of wrong specs, finish, customer couldn’t pay etc. Nothing actually wrong with the windows. These returned windows are stored separately and are advertised on Craig’s list. I bought 6 of these windows (dimensions 4 ft by 4 ft) for about $50 to $60 each, and now I am putting them to use.

Incidentally, the coop building will be used for more than just the chickens. I intend this year to propagate cuttings of various fruit trees and berries and a ledge along the south facing windows will be a good spot for the cuttings, once they have rooted. I read in a permaculture book that CO2 from the chickens will also help plants stored in this area. However, no vegetables for concern of contamination – they will be grown under cover or in the greenhouse.

I found the exterior door for the coop at the local thrift store for $8. It really didn’t make sense buying an exterior door for >$100 from one of the big box DIY stores.

Click to see details of the finished coop.


A simple fix
I have a Sears industrial circular saw purchased in the 80’s which has provided excellent service. Recently it would fail to start and I overcame this by turning the saw blade a few inches. Eventually it wouldn’t start at all and I figured it was time to replace the brushes. This usually is the problem when a motor won’t start initially but then starts after you slightly turn the part driven by the motor (or at least in my experience this has been the case). I downloaded the parts diagram, found the part #, found the cheapest supplier (you have to combine part price with shipping cost since the latter can vary greatly) and ordered the part. Except, a few days later the supplier fessed up they didn’t have the part and credited me (they shouldn’t have charged me until they had shipped, but I got the credit). So I paid more, got the part, opened up the saw and replaced the brushes – the whole procedure took less than 10 minutes. There are two brushes and when I removed the first it looked fine and I had real misgivings about my diagnosis. However, as you can see from the photo the second brush was completely worn. And – the saw now works fine and just in time, since I needed it to cut the 4 ft by 8 ft sheathing.

my trusty circular saw
shows brush in holder pressing on commutator
there are 2 brushes, the first looks ok
however, the 2nd brush is completely worn down


Mushrooms

I am seeing more and more mushrooms in the woods following the recent rains. The young mushrooms are rounded at the top and then, when they release their spores they open up and become flat at the top.

a young mushroom
an older mushroom which has released its spores


Permaculture

I am becoming increasing interested in permaculture. A few years ago I read the book by Bill Mollison but, though I understood the concepts, they did not resonate with me. Last year I read The One Straw Revolution by Fukuoka and I just finished the permaculture book by Sepp Holzer and am working my way through Gaia’s Garden by Hemenway, which is excellently written. Since I acquired the property I have been doing more than just organic gardening – my contour ditches, my allowing natural growth to overtake the mown areas, my working in the woods – these various projects are neatly encompassed by the permaculture approach. Next step is for me to go on a PDC (permaculture design course). Below is a photo showing fall colors in the opening I cleared in the woods (the “edge” in permaculture):

sourwood fall colors and opening in woods

support the little guy!

the roof is on the future coop - underside view showing rafters and purlins
topside view of future coop

Today I finished installing the roof of the future coop.  For the rafters I used 2″x6″x12 ft kiln dried wood, not pressure treated; for the purlins I used 2″x4″ pressure treated, and for the roofing 2ft x12ft galvanized steel crimp roof panels.  I painted with exterior enamel paint those parts of the rafters which would be exposed to either rain or carpenter bees.

I deliberated long on how to transport the 12 ft lengths of wood and roof panels.  My pickup has a 6 ft bed so either I would have had 6 ft hanging out the back of the truck, or I could have slanted it over the cab, but I was concerned I would further scratch and dent the cab roof (not the first time I have transported 12 ft lengths of material) and that the roof panels could buckle from wind pressure as I was driving.  So I thought I might rent a truck from one of the two big box DIY chains.

I priced the materials at both chains and they were identical and, to my mind, expensive.  So I thought I would visit a local family owned builder supply store.  There used to be two such stores within 15 miles of my property and both were dependent on building contractors for their business.  And then one, which have been operating for over 80 years, closed down in 2009.  So I visited the remaining store.  They were very friendly and said they would ship the lumber and roof panels to my property for a $20 delivery charge.  An even bigger surprise was their prices – the lumber was about 3% less than the price at the big chains and the roof panels were 20% less.  And they were so knowledgeable and helpful!  I decided to make additional purchases at their store and all the prices were competitive. 

Which brings me back to my heading – where possible we should support the little guys, not because we want to be nice or considerate but because it is in our own self interest to do so.  We benefit from the price competition which whittles out the independents but, once they are gone through either liquidation or consolidation, and there are just a few big operators left, as is happening with the airlines, the telecom industry, the banks, the consumer retail stores etc. etc. then we become the victims as the few remaining competitors abandon price competition and gradually price up.  So, support the little guy when you can.

new chicken coop

I am making slow progress with construction of the new chicken coop.  The present coops are well located for summer weather since they are at the bottom of the hill with large trees to the east and west and well screened from the sun, except when it is overhead.  The coops are enclosed by walls on two sides and netting/fencing on two sides, so cold winter winds will easily find the residents.  I considered closing in the remaining sides, but decided an extra coop will be handy in the future and, since it will have many windows,  a portion may be hived off and pressed into service as a greenhouse.  My new location is on slightly higher ground and has much better sun exposure.  Since it is on a slope my first task was to level the ground  with my bobcat and create a level pad.  I dug a perimeter trench between the pad and the two higher sides of the slope so the rain water coming down the hill will be diverted around the pad.

I determined the width by examining roofing materials and noting that most are either 8ft or 12 ft long.  Since I would like an overhang of approximately 1 ft on each side, I decided to use 12 ft long roofing over a 10 ft wide coop.  The coop is on an east-west axis and the higher side faces south.   The most difficult part was digging some of the post holes since there were large rocks in the ground, some bigger than a foot wide, which had to be removed.   Below is a photo of the framing which I installed.  The horizontal braces between the high side and the lower side are to hold them in place until I can install the roof rafters at which time they will be removed.

Click on these links to follow progress:  roof installation and final completion.

framing for new chicken coop