first apple harvest

My Pristine apple tree is the first to ripen in my orchard and each day drops many apples.  In Atlanta and northwest Georgia we have had record making rains, so the apples are relatively large, very juicy and, for the Pristine, relatively sweet. I do not spray so, inevitably, there are occasional visitors but these are easily removed with my pocket knife as I gorge away.   Nice thing about not spraying is I don’t wash my fruit and I eat the skin.

the Pristine apple tree - it had a lot more apples last week
the Pristine apple tree – it had a lot more apples last week

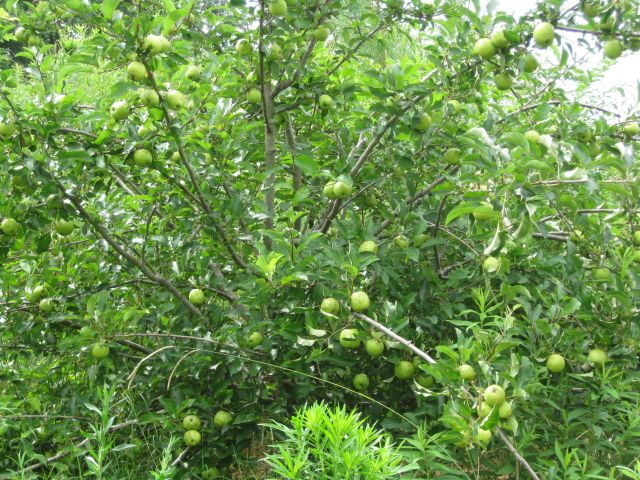
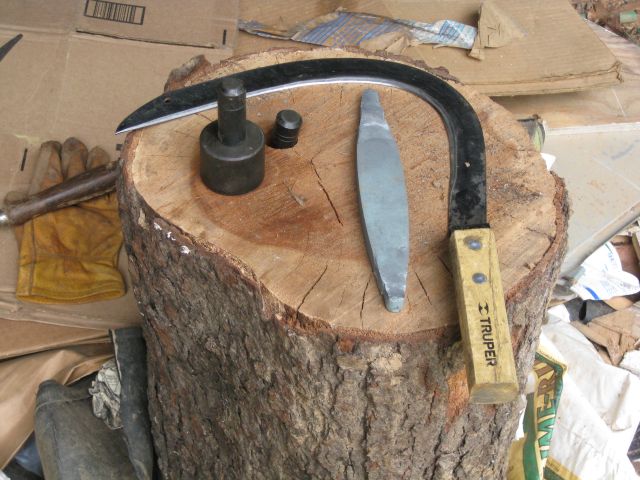
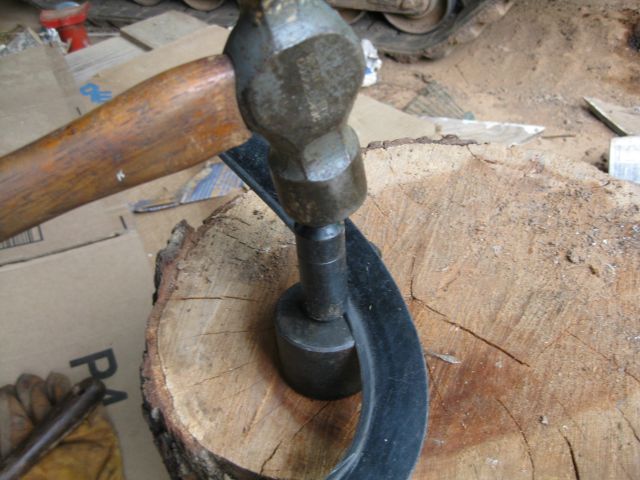
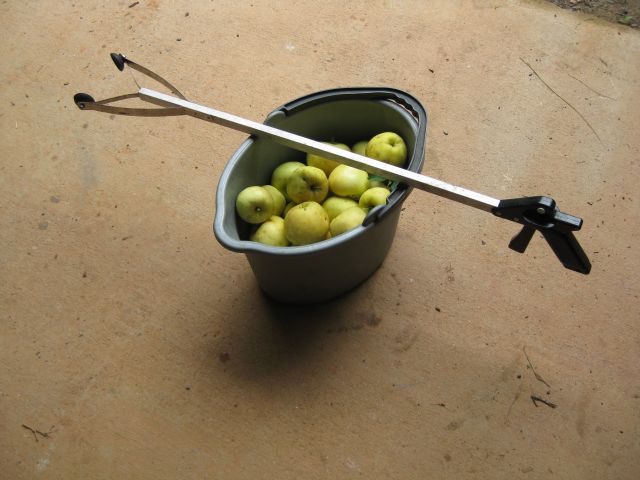
Since there are too many apples for consumption I decided to dry and store them.  We had a rigorous debate about using apples which had fallen to the ground.  My view is they fell because they were ripe for eating and, provided I clear them each day, they are relatively fresh.  The more informed view was that there is a risk of contamination (salmonella) which even washing and skinning does not allay and, if I was the only one eating them – fine, otherwise no ground apples.  So I hand pick the apples from the tree – the trick is to test only the yellow ones (ripe Pristine apples are yellow) and if they need more than a nudge, leave them for tomorrow.  I also use my arm extender shown below.  (see update)

my extension arm apple picker

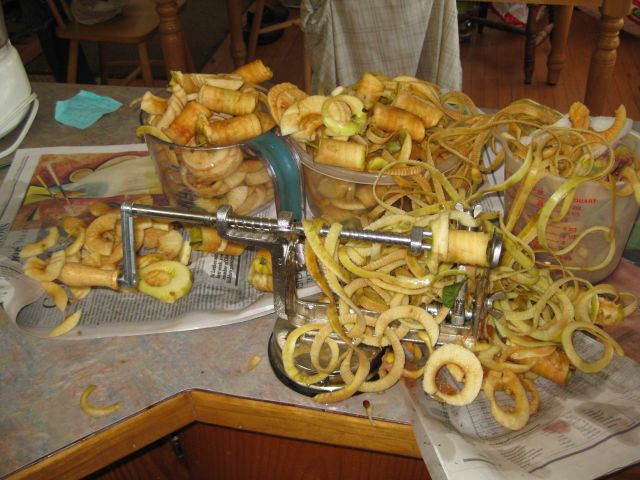
Then to the coring station – I use a handy contraption which peels, cores and slices at the same time, and very quickly too.  Since the slices are thin it is easy to notice any ingredient other than apple and to exclude that segment from the lineup for the dehydrator.

the handy apple peeler, corer and slicer

I do not pre-treat the apple slices since I don’t mind some discoloration and I want to keep out all additives, even fruit juice.  Then I load each of the trays which come with the dehydrator.


one of five dehydrator trays

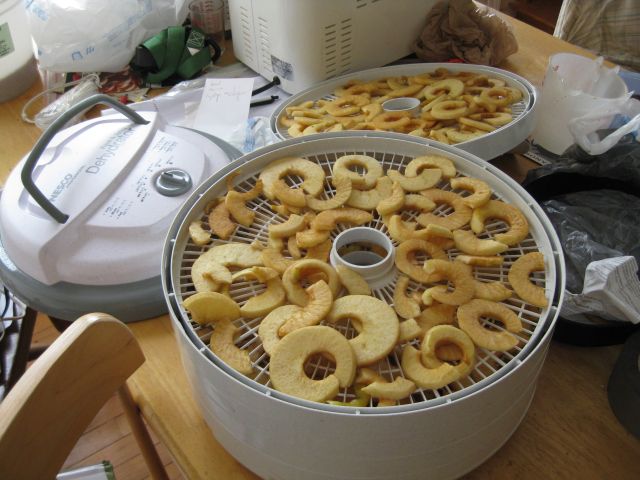
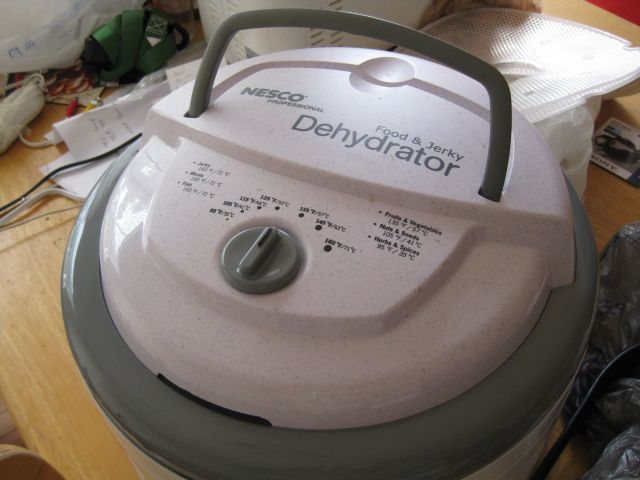
Finally, close up the dehydrator, set the temp initially to 155 deg for 15 mins and then back off to 135 deg and take a look see 6 hours later.  When the slices are leathery dry I pack into zip lock bags and freeze.  And they taste so good.

my Nesco dehydrator
my Nesco dehydrator

Update

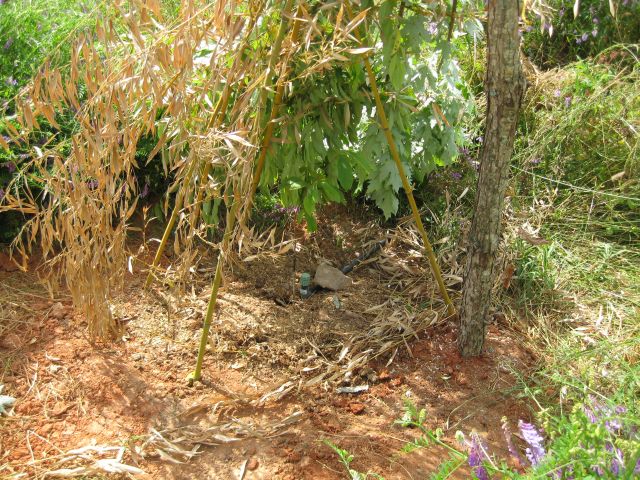
Picking, processing and dehydrating apples is now a regular first thing in the morning event.  To avoid wastage and missing out on the ripest apples, I cut 2 6′-10′ sections of 6mil clear plastic sheets which I located under the apple tree.  Now each morning, rather than picking from the tree I simply collect the apples which fell the previous day.  Because they have not come into contact with my animal fertilizer, compost or the ground we are not concerned about contamination.


goodbye Red

I inherited Red from departing neighbors.  She had been rescued from a commercial hatchery and came with a snipped beak.  She was the smartest of them all.  In the early days I borrowed her and some of her companions to help prepare the vegetable growing area and she would hover close to my digging implements to examine and gulp down whatever edibles I unearthed – whilst the other chicken stayed as far away from me as possible.  And when she and the others were given to me, it was Red who first identified the presence of a young rooster (Buffy) in my second flock, as I wrote in September 2011:

“she paces the fenceline and he saunters closer
though pretext is food, a purposeful loiter,
he faces and tip toes, his chest full of swagger
she responds just as quickly with unrestrained vigor
and then he departs and she wistfully eyes
the untutored young rooster and if she could,
sighs,
but tomorrow will come and who knows by then
Buffy be back and gladden the hen”

She had been ailing for some time and seemed to recover after I administered some antibiotics and gave her a spa bath with epsom salts.  But the past week was tough and she got weaker and weaker and today she was gone.

What to do with the body?  I remember when I was caring for my neighbors’ chicken while they were away and one died and I buried it.  When I told them they were incredulous so, not understanding their response, I asked if they would have liked me to freeze the body for their later digestion, which provoked a similar response.  So I asked what they did with their  chicken and they said they tossed them into the garbage bag,  which to me is wasteful of recyclable nutrients and somewhat discourteous of a loyal retainer.  In fairness I should mention that my neighbors used to slaughter, process and eat healthy chicken, they drew the line with a chicken dying of unknown causes.

A number of chicken have died over the past 2 years and I have an area where I buried them side by side under biggish stones to deter scavengers.  But I decided today that Red would be better honored if she were buried amongst my fruit trees – perhaps I am thinking of a tradition where a dead fish was buried at the bottom of a hole dug for new fruit trees.

Red about to be buried in a hole alongside a young fig tree

So she has moved on but her remains will contribute to the soil and its inhabitants, the small fig tree and to the fruit it will bear one day.

bluetooth & my basic truck

I have a base model Toyota Tacoma 2005 pickup (base means manual shift, windup windows and small but efficient engine) which came with a simple radio and CD player.  The challenge for me has always been playing podcasts (especially during the NPR fundraising season – 4 weeks a year).  I have downloaded my podcasts via my computer to MP3 players and then connected them to a  speaker which I have jammed between my shoulder and ear as I drove along.  Pretty basic, distracting and difficult to adjust while driving, plus the sound was poor.  My next stratagem was to download the podcasts onto CD’s and use the CD player – sound was fine but this took time and I now have a lot of one time use CD’s laying around.

Just returned from my son’s wedding in San Francisco where, in the tradition of exchanging gifts, he upgraded me to the 21st century by giving me a FlexSmart x2, which is a wireless bluetooth FM transmitter.   I have been catapulted into a new listening experience.

The setup steps are relatively simple.  I have an Apple iPhone, so I visited the App Store and downloaded the free podcast app.  I then visited  my favorite source of podcasts – www.permies.com and downloaded the 10 most recent Paul Wheaton permaculture podcasts.  I can simply play the podcasts on my iPhone, which is an improvement on the mp3 route since the downloads are easier to do, I can subscribe for automatic downloading of future podcasts, and the sound is louder than my previous convoluted configuration.  But, this is not as good as playing the podcasts through the car’s audio system.  To do this I use FlexSmart.

I inserted the FlexSmart DC adaptor into the cigarette socket as you can see below.

FlexSMART plugged into cigarette lighter

Then I pressed a button for the device to enter pairing mode and told the iPhone to search for a bluetooth connection.  The two devices quickly found each other.  The play, pause, advance and previous song controls on the FlexSmart operate those functions on the iPhone.  With the two devices in sync, I switched on the radio and instructed the FlexSmart to autoseek a free FM station.  It told me which FM frequency was available and I tuned the radio to that frequency.  And, crystal clear and as loud as I wished, I can listen to my podcasts and control them via the FlexSmart rather than groping for the iPhone and risk an irritable growl or snap from Trudy when the iPhone has settled under her.  I can also take calls via the FlexSmart.  I realize this is old hat for recent model car owners but is a big step forward for me.


I have an Apple iPhone

mullein is an unusual plant

The Permies permaculture website recommended mullein.  So last year I bought seeds of 3 varieties and grew them.  In their first year they are low lying with large very soft leaves.  The leaves can be used for various purposes and apparently the plant has some medicinal uses.  But they appeared to contribute little to my vegetable garden.  Unlike comfrey (one of my favorites which sends its roots deep to mine nutrients) the mullein roots run horizontal and suck the nutrients out of the adjoining soil.  True I cut the leaves and drop them as a mulch and they will return nutrients to the soil but this seems to add little for the work involved.

But in the second year they are a spectacle. A central stem emerges all soft and downy.

mullein in its 2nd year taken 4/26

Then little yellow buds appear on the stem and it begins rapid growth. I heard it would grow to 5 feet, which I thought implausible but the tip of the specimen below is almost 6.5 feet above the ground.


a tall mullein plant

And the yellow buds develop into a complex maze of flowers.

masses of little yellow mullein flowers

The flowers are small but attractive.

a single mullein flower

And attract hosts of visitors.

a bumble bee at work

Then suddenly it is over and all the central stem is a skeleton of its former self, and the mullein is gone.  Perhaps to return next year?

new camera old lens (continued)

In my previous post I mentioned the challenges of crisp focusing, the flatness produced by the flash directly above the camera (it should be to the side), camera shake and the need for a tripod.  I discovered among our possessions an old tripod (a Velbon VE-3, >30 years old) and today I returned to the field.  When using a macro lens the slightest jarring of the body blurs the image.  One answer could be to increase the speed of the shutter.  But then less light reaches the sensor.  So I could open the aperture of the lens to allow more light to reach the sensor but depth of field (clearness of image in front and behind the point of focus) is sacrificed.  Or I could increase the sensor ISO speed but this results in “noise”.  So if I want to shoot with a small aperture (say f22) and a slow film speed (say ISO 400) on a cloudy day (to avoid bright sunlight bleaching) I have to use a tripod.

flower with some depth of field

flower with some depth of field

 I also have to choose a time when there is no wind since the slightest movement of the flower produces blurring.

some varieties of onion are going to seed and I am leaving a few heads to see if they can self seed

Now I am looking at flowers more carefully, I am noticing lots of small pollinators I had not seen before.

OLYMPUS DIGITAL CAMERA
a small visitor I had not previously noticed

I continue to be attracted to patterns – here the pattern of a fig leaf.

fig leaf with the clouded sun behind it

I took several snaps of small red bugs which are teeming around a vegetable growing area.  Never saw them on the plants but they parade everywhere else.  They gather in clusters and one of my pics reveals why.

OLYMPUS DIGITAL CAMERA
they probably did not kill the centipede so they may be scavengers rather than predators?

This flower stood out from the others so I had to take a snap.

a luminescent attractive offering

I notice that my tripod, which is sturdy, is still unsteady – this is because the tripod feet rest on mulch and soft soil.  So the slightest touch can move the platform – I may need a shutter release cable in due course.  Also the pics on my website are compressed, typically as in those above, below 100 kilobytes.  The original pics are >3 megabytes so the compression is more than 30 times and yet the pics look decent, but there is an inevitable loss of definition.

new camera and old lens

I have taken photographs since I was a kid.  Initially with a box camera, then my Dad’s Zeiss Ikon f2.8 bellows camera, then a single lens reflex and then most recently for this website a Canon PowerShot SD1100.  The PowerShot has been fine but it has limitations for good close up pictures.  I recently found a boxed assortment of Pentax lenses, one of which is an Asahi SMC Macro Takumar f4 100mm, which is about 40 years old.  This lens should be great for close ups I thought, so why not pair it with a modern digital camera.  After considerable research I decided to buy the Olympus EPL-5, which arrived this week and I snapped a few pictures.  Using an older lens has some disadvantages – there is no automatic focusing, you have to do it yourself.  Also the aperture does not automatically open for focusing and the stop down for exposure, you have to manually step it down.  So it takes time to develop these lost skills.  But I don’t take action photos and I will try master these techniques.

comfrey leaf early morning rain backlit by sun

I should mention that for this website I compress photos considerably, so if they are not razor sharp attribute this to compression or user error, but not the equipment.

The photographs were taken using a monopod but this is not stable for long exposures.  I will use a more rigid platform and then I will be able to stop using a flash which tends to flatten the subject.  The centipede appeared suddenly as I was focusing on the log oyster mushrooms.

millipede amongst oyster mushrooms
centipede amongst oyster mushrooms

With all the recent rains (my property is fortunate it receives rain from the Gulf  i.e. the southwest and also the northwest) the kale was sparkly with raindrops.kale leaf with raindrops

kale leaf with raindrops

The only chicken to co-operate with my slow manual focusing requirements was the New Jersey Giant who was attracted to the distinctive click of the Olympus.

New Jersey Giant attracted to the sound of the camera


my new hand sickle

The winter rye is tall and surrounds and shades my berry plants.

rampant winter rye
rampant winter rye

Now it is summer the winter rye is drying out and will soon drop its seed.  I like the wilderness of this luscious growth and see no point in cutting it down, except where it dwarfs my plantings.  It is shallow rooted and after a rain comes easily out of the ground, but that leaves an open spot quickly invaded by weeds and Bermuda grass.  For clearing the rye away from my plantings my large scythe is ill suited since it requires large two handed sweeps which can easily slice off the unintended.  I remembered the one hand sickle from my childhood days, googled it and found several variations for sale.  I wanted something solid and not with a serrated blade.  The Truper 33576 grass hook (as it is called) with a riveted handle best suited my requirements and cost $18.11 on the internet.  It arrived with a slight bevel on the blade but completely blunt, as is customary.  I have a peening jig mounted on a broad oak log.

you can see the sickle, my sharpening stone and the peening jig with two caps

The peening procedure is fairly simple – you place the blade between the anvil and the cap and then you tap the #1 cap along the length of the blade and then the #2 cap.  Peening flattens and expands the blade making it thinner for better sharpening.

peening the blade - my right hand usually holds the blade flat on the anvil, but it was holding the camera instead
. peening the blade – my right hand usually holds the blade flat on the anvil, but it was holding the camera instead

I then hand sharpened the blade with the stone.  Which was not a good idea since it took an inordinate time.  So, instead I fitted a small grinding wheel on my dremel  and this sped things up.

I am very happy with the hand sickle.  Cutting grass is simple but needs care.  With one hand you grasp the tall grass and pull it taut.  You place the sickle blade at the base of the grass and with a slicing motion you sever the grass.  Since some force is exerted pulling the sickle toward you and it can come quickly swinging clear, you should keep limbs well out of the way of its path.  Also take care not to slice the hand holding the grass.  You can fold the grass in half (if it is several feet long) and use it to border the planting.  This acts as a mulch, keeps the ground moist and dissuades weeds.  A weed whacker would work but it flings the grass about and could damage the plantings.  The sickle is very precise since you encircle the grass to be cut with the hook before cutting it.  And since you now have the cut grass in your hand it is easy to place it where you wish.

a blueberry bush with its tall neighbors removed and at its feet

And here is a row of raspberry and blackberry plantings liberated from the rye which concealed them.

blackberry and raspberry plants now accessible


planting out the tomatoes

My main ritual early each summer is the planting out of the tomatoes.  I grow these from seed, initially in the basement (0.75″ soil blocks) then in the greenhouse (2″ soil blocks).  My first year was a glorious year, since then hard going.  Not beginner’s luck but a case of slipping under the radar the first time.  Now each year the pests and problems await me.  Though I rotate the growing site, this does not thwart the soil borne diseases – there is an interesting piece in this morning’s NYT on using grafted tomatoes – maybe next year.  The biggest problem is the stink bugs, which each year multiply and love despoiling my tomatoes.

Undaunted I press ahead.  This year I planted 32  plants, less than last year.  And, for the first time in two adjoining rows of 16 plants each.  Previously I took care to wrap the stems just above and below the ground with aluminum to foil soil disease transmission – this year I just mulched with shredded paper waste.

Each plant has a name tag, but these frequently go missing, so I also noted the details on a post which carries the cable securing the wire cages.

0531 tomato a
16 plants in the right row listed sequentially

The varieties, which include heirloom and hybrid, are:  Mortgage Lifter, Rutger, Sweet Olive, Cherokee, Jelly Bean (new), Georgia Steak, Yellow Pear (new), BrandyWine, Siletz, Sugar Cherry, Black Prince, and Beef Steak.  The other 16 plants are also listed on the post and are of the same varieties.

I also adjusted my irrigation system.  I use bubblers for each plant, gravity fed from my rainwater tanks.  In the past the lines and bubblers were at ground level.  Advantage was they were somewhat protected from the sun and degradation.  Disadvantage was that if the bubbler was raised, say 45 degrees, the water from the bubbler ran to the base of the bubbler and not on to the plant and if the bubbler was horizontal it was difficult to see if water was flowing.  With my gravity fed system blockages occur and, if not identified, no water leaves the bubbler.   So this year I raised the lines and the bubblers so it is much easier to check that the water is flowing.  Will see how it works out.

0531 tomato c
irrigation loop with lines and bubblers raised above the ground

The irrigation lines form a loop enclosing the 16 wire cages so the water pressure equalizes and all the bubblers should flow about the same, though of course they don’t, even after cleaning.  So everything in place and awaiting quick growth and the stink bugs.

0531 tomato b
the 32 wire cages each containing a tomato plant and each fed water through a bubbler, with the prominent shredded paper to conserve moisture and delay weeds

Wildflowers

Some of the wildflowers are glorious, this near the chicken coop.

0531 wildflower


shading the PawPaw

Last September I purchased two PawPaw trees from HiddenSprings Nursery – a Mango and an Overleese.  Initially I planted them in an extended area of my new orchard but when a sickly apple tree had to be removed from my old orchard I decided to transplant the two small PawPaws close together where the apple tree had stood.  Incidentally this apple tree was purchased from a big box store to replace an apple tree which had previously failed.  So either there is a problem with the soil in this specific area or both trees were unsuited to my conditions.  Generally I purchase all my trees from specialist nurseries or develop them from cuttings.

The instructions which accompanied the PawPaws said shade is needed for the first year or two, so I decided to construct a simple shelter.  I am averse to buying materials when I can make do with what is around me.  After experimenting with a tripod arrangement made from bamboo, which worked ok, I decided to utilize 10ft oak branches as the post for each shelter. I first dug a 2ft hole with a clam shell digger to anchor the posts.

0531 pawpaw a
oak post with horizontal 12″ carriage bolt to which are strapped branches and bamboo to provide shade from sun in south and west

The two shelters are about 8 ft apart.  On the right is a trellis of various muscadines and in front is hairy vetch which loves my area and is self propagated from a seeding several years ago.  I let it and the winter rye and clovers go to seed each year.  This ensures winter cover and slows down the spread of bermuda grass.

In my first shelter I have a watering stop for my bees.  The irrigation is arranged that the bubbler fills the basin (upturned trashbin cover) and then dribbles over onto the site of the PawPaw.  The flat stones in the water are landing pads for the bees.

0531 pawpaw b
you can spot the PawPaw. it is the small stem with a few leaves between the watering station and the oak post

And my second shelter is similar, a post, surplus branches attached to the bolt on the post and a small pawpaw sheltering underneath.

0531 pawpaw c
this PawPaw is more difficult to spot though it is larger – its leaves are amongst the green leaves and its graft union is just discernible


“spa treatment” for Red

Of the 6 chickens inherited from my neighbor, Red has always been my favorite.  On one occasion I borrowed them to assist in the new vegetable area.  5 huddled in the furthest corner, Red came up to where I was forking up the soil and she focused on each upturning and snatched any worms or grubs that were unearthed.  I was told she was rescued from a commercial operation and that was why her beak was snipped – to minimize damage amongst stressed confined birds.  The bigger birds respected her and let her alone.

And all was well until last week when her behavior changed – not amongst the birds at the paddock corner scrounging for handfuls of seed, comb faded,  more time in the coop than out.  And last night I was sure she was at her end – standing in the corner with head drooped to the ground.  I separated her from the others and this morning I set out to take her body for burial – I dig a deep hole for the departed and, when covered, mark it with a boulder.  But there she was on her feet!

So I rolled out the “spa treatment” recommended at www.hencam.com.  A long soak in an epsom salt bath.  Which she enjoyed as you can see below.

epsom salt bath - warm water and quarter cup epsom salts
epsom salt bath – warm water and quarter cup epsom salts

Followed by pieces of whole wheat home made bread doused liberally with olive oil.

Red enjoying whole wheat bread and olive oil

The least I could do for a real character.  So we wait and see.