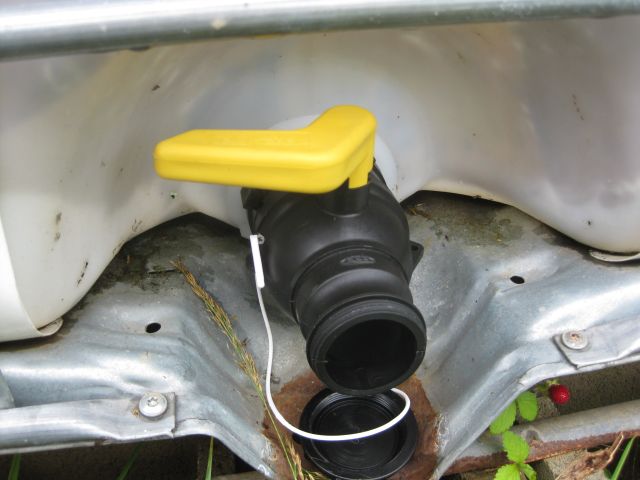
My rainwater harvesting system includes 5 IBC (intermediate bulk container) totes, each with a 1,000 litre (280 gal) capacity. It was inevitable that the valve at the bottom of one would misfunction – in this case a crack developed at the handle shaft housing and water came out steadily.
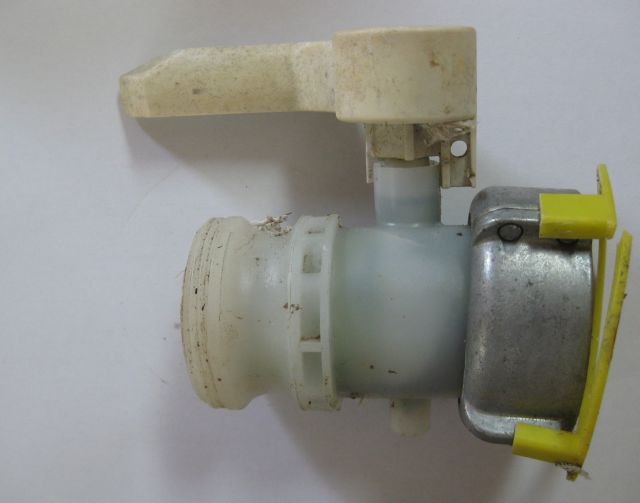
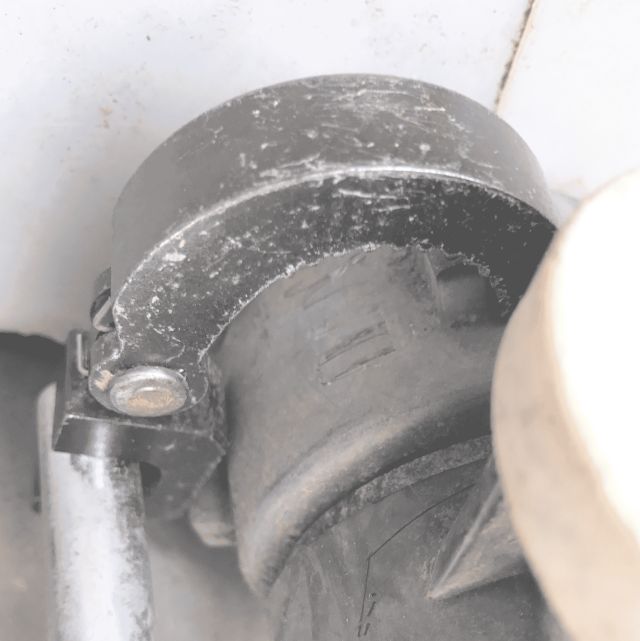
This meant I had to study up on how to replace a tote valve. The valve is removed by turning anti clockwise the ridges on the metal coupler shown below.
the female thread on the right fits into the tank
There are ibc valve spanner wrenches offered at around $80 which seems steep for a simple tool. Instead I requisitioned my basin wrench tool which was able to undo the defective valve.
my basin wrench tool on display gripping a marker
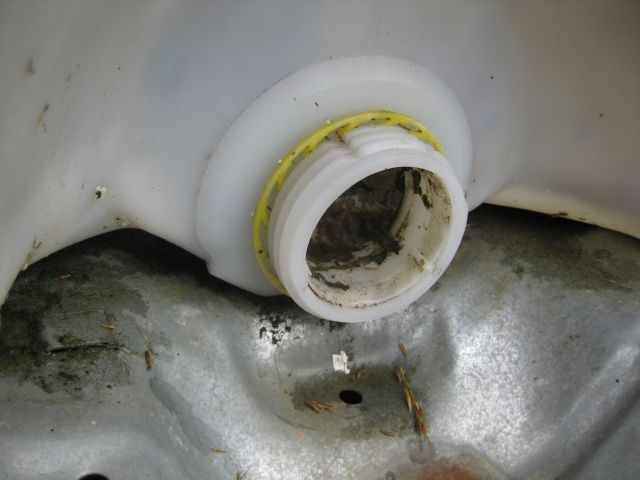
When the valve is removed you clearly see the male thread of the tank.
male thread of tote – this is called a buttress thread
The thread is called a buttress thread which means the thread has one side that is vertical, the other side is inclined and a flat top and bottom. The water exits the tank through the male thread above. There were various female buttress threads on internet offer such as S60x6 and S75x6. Which was the right one for me? The “60” or “75” refers to the outside diameter in mm of the male thread or, equivalently, the inside diameter of the female thread. The inside diameter of my defective valve is 75mm. The “6” refers to the pitch or distance between threads – since the products on offer had the same pitch I didn’t worry about this.
I ordered the new valve through Amazon since a) I know if a problem Amazon will fix it; and b) although the product cost the same on the suppliers website the Amazon delivery charge was less.
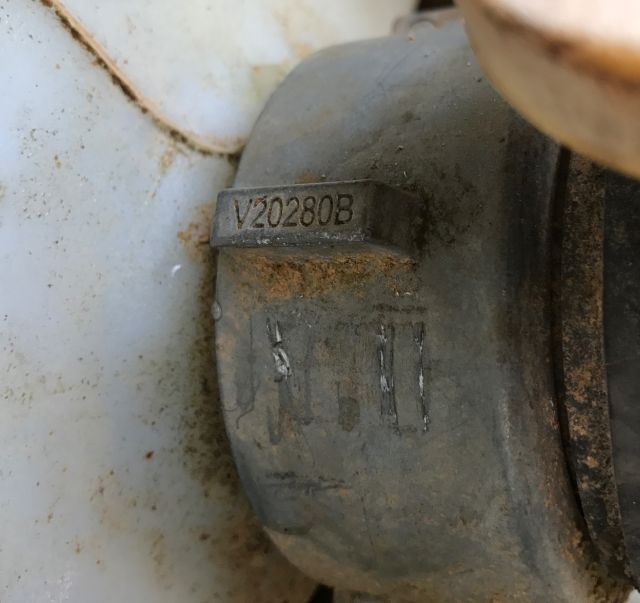
The part arrived in 2 days (impressive) but it did not fit – the female thread was too large. Had I messed up? I checked and rechecked my measurements and it appeared that the valve I received was an “80” dimension rather than the “75” I had ordered. What was frustrating was there were no markings on the valve body to identify what size it was. With the Amazon trump card up my sleeve I called the supplier whose sales rep initially gave me a hard time but when I said that I would simply file a complaint with Amazon there was a sea change and he assured me the replacement part would be shipped that day. When it didn’t arrive 4 days later (Tuesday) I called again and he, being adroit, thanked me for calling and said he didn’t know how to contact me (duh!) so my call was welcome and they were going to ship that day and I would receive it that Friday plus they would let me keep the wrong part for no change. I called the following Monday and he said it would arrive that day and IT DID. And it fitted!
new tote valve installed
So the Amazon viaduct was helpful, I was not seriously inconvenienced by the delay and I have an extra wrong sized valve which I may be able to cannibalize when the next valve fails.
Follow up
I received 2 comments – 1 below and 1 which I managed to lose, sorry, – questioning whether the basin wrench shown in the photo above could actually grasp the ridges or lugs of the valve. So I decided to go back to the tank with my basin wrench and take photos of it accomplishing this task. And I made a discovery – it does grasp the ridges of the valve shown in the first picture but not the ridges of a more recent valve.
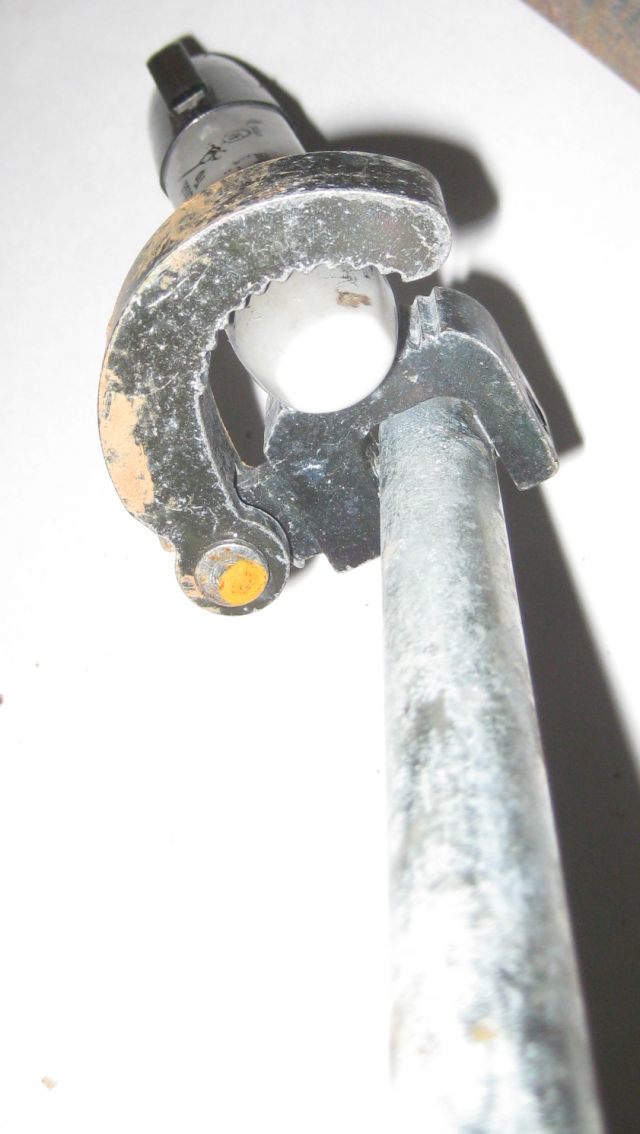
Below is a pic of the basin wrench gripping (just) the ridges of the valve with sufficient force to turn it.
fully extended basin wrench can grip both ridges
The reason why it works on some valves but not others has to do with the width of the ridge. If you think of 2 ridges, one on the left and one on the right, the wrench has to extend from the left side of the left ridge to the right side of the right ridge. So, if the ridges are equally spaced on the circumference of the valve, the wrench has to cover a lesser distance with narrow ridges (which it can) than with wider ridges (which mine cannot). Below are pics of a narrow ridge and a wide ridge.
this is a narrow ridge and my wrench is wide enough to grasp 2 narrow ridgesand this is a wide ridge and my wrench cannot simultaneously grasp 2 such ridges
In the past week I have seen many instances of young life. I became aware that this was the season from a local news report about a 5 year old kid bitten by a young copperhead – he survived, the snake did not. The ranger said that young venomous snakes are the most dangerous because they have not yet learned to get out of the way.
The next day my companion, Trudy, barked furiously as I worked my 3 sister row (corn, bean & squash) and there was a blur of something large moving ungainly to a niche alongside the fence. Trudy’s incessant barking spurred it to flight again and Trudy quickly caught it and I, just as quickly (almost), freed it and took a snap.
With Trudy removed, the groundhog disappeared after a few moments. Then later that day while I was replenishing water in the coop, I saw a small rat in the middle of the coop. It didn’t know what to do. I seized a shovel to bash it and it ran to the corner but could not climb the wall. I saw its chest and heart heaving below the ribcage. I felt this was too one sided and guided it toward the door and when it saw the sunlight it ran out past the squawking chicken.
Then I saw a most pleasing sight. I noticed a large wasp on a kale leaf. I wondered why it was there. And peered closer and saw it was straddling a small green caterpillar. I have seen a mass of yellow jackets attack a large caterpillar which I had unearthed during digging but never a solitary wasp. Here was evidence that my no spray regimen was working – a beneficial predator at work. A couple days earlier I had read Michael Crichton’s “Micro” which featured a wasp stinging and paralyzing a victim for subsequent feeding to its young, and the moment had poignancy for me.
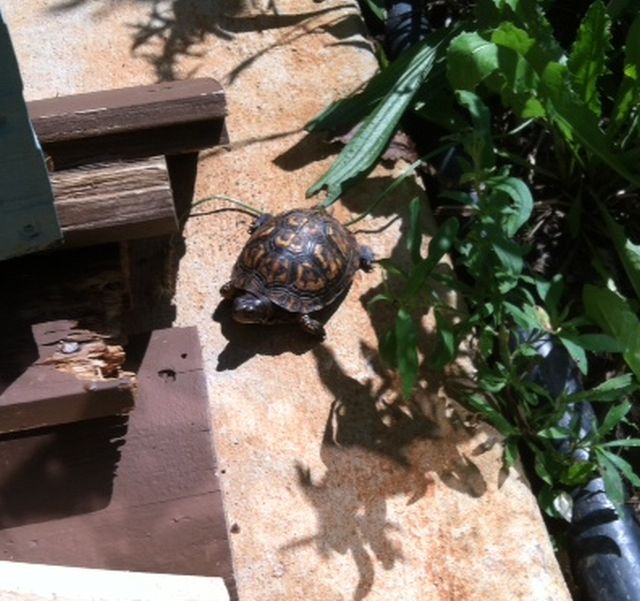
And I was to see more young over the next few days. The baby squirrel at the bird feeder and the baby birds including a bright blue baby bunting. The turtle on the carport pad.
And just a few minutes ago, during a visit to the compost heap, a movement caught our attention.
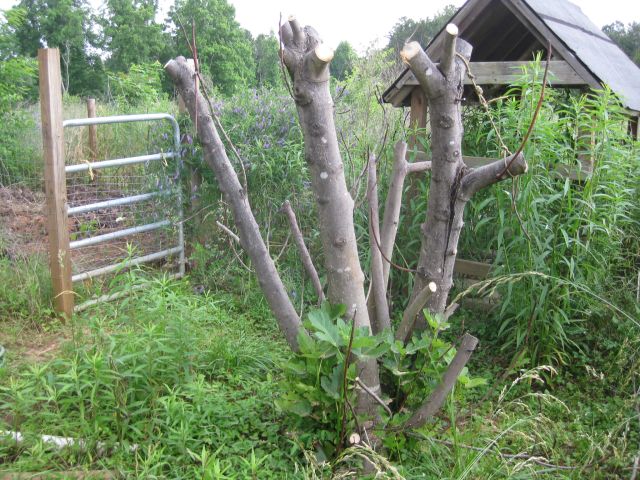
The property came with a big fig tree about 15 ft high and 15 ft broad which bore delicious figs each year for the wasps and me. Then came the cold January weather when the temperature fell close to 0 deg F, which is cold for this area and unaccustomedly cold for fig trees which had not seen less than 10 deg F in the past 30 years. Most of the fig tree died and, as they will do, it has produced growth at the foot of the tree. My neighbor came by and nicked the tree in various places and suggested I prune the dead wood and leave the green tissue bearing trunks. Which I did.
the still live trunks of the fig tree
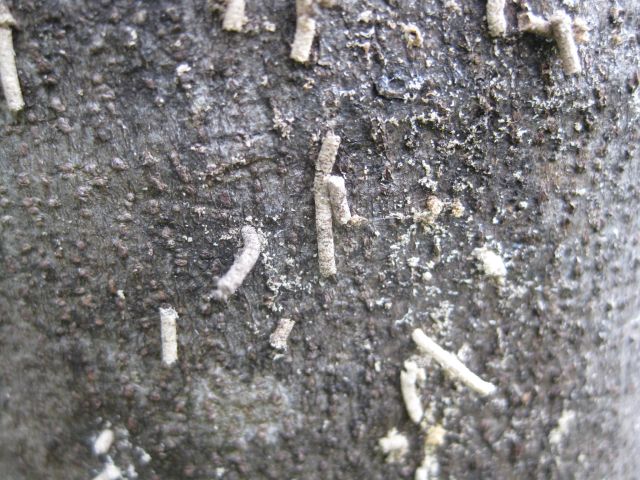
But the trunks did not sprout any growth and the activity which I noticed was not what I wanted to see.
excrement from borer attack on fig tree trunks
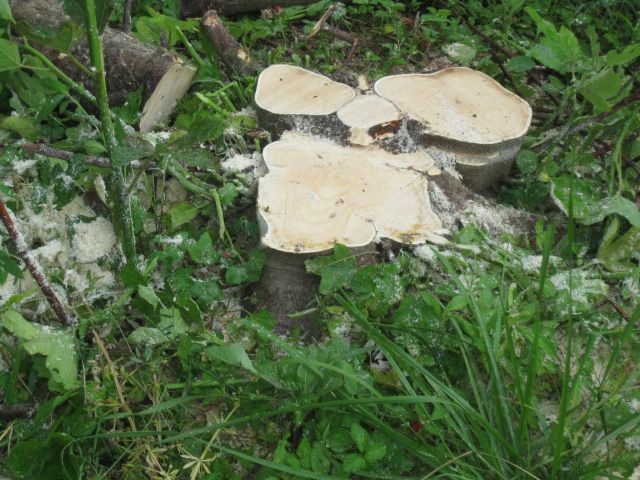
So the nutrition provided by the roots was feeding borer insects. Another neighbor confirmed that all the fig trees in the area had died and the advice he had received was to cut them down to ground level. Which I did.
my decapitated fig tree
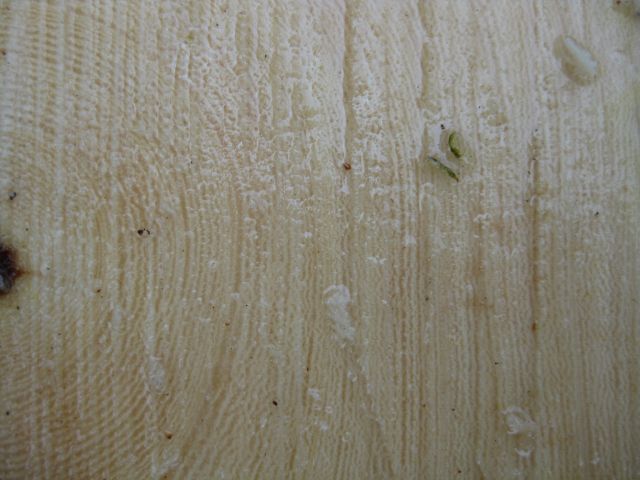
I was curious as to the age of the tree and looked at the annual rings but could not make sense of them – there appeared to be over 80 rings, perhaps they were not all annual rings.
many many tree rings – surely the tree was not that old!?
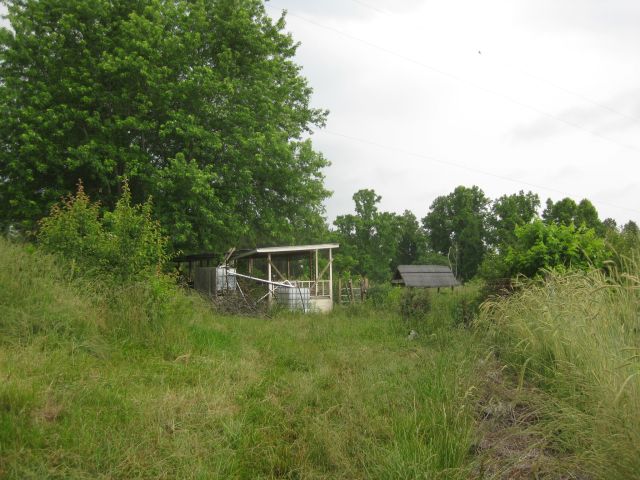
And what to do with the trunks. A few paces from the fig tree site is my tree nursery – I call it so because when I receive (purchase or cultivate) trees after early spring I grow them in this area until the fall when, with cooler weather, they have a better chance of surviving. I am preparing the site for 40 nut trees expected in June. This area is shaded from the setting sun by a huge maple tree.
the “tree nursery” is to the right (east) of the deck and the large maple tree
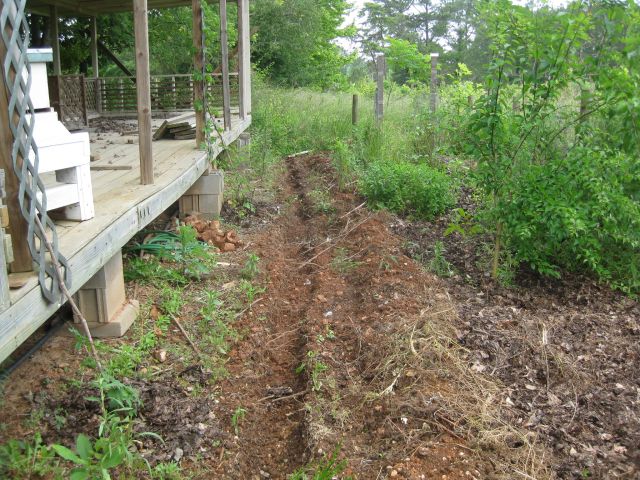
Only problem with the maple tree is its roots which sneak in and feed on my composted soil. So I dug a trench between the growing area and the maple tree and severed offending roots.
to the right of the trench are a couple of black locust saplings – their roots are supposed to fix nitrogen and I am leaving them in place
And then I placed the fig tree trunks in the trench where they will keep soil out of the trench, prevent weed growth, provide stepping stones for easy movement, absorb rainwater coming down the slope and add nutrients to the soil.
ditch partially filled with fig tree members
And while I was doing this I mulled over the events which produced such a cold winter with a polar vortex during an otherwise warming cycle. My more conservative friends have explained to me that there is a silver lining to the warming in that mineral and fossil reserves in formerly ice covered lands will now be available for our benefit (I would say exploitation) as well as sea passages previously barred by ice (let’s ignore Miami, Florida and other low lying areas for the moment). And even gardening enthusiasts have found solace from the expectation of growing less hardy trees such as citrus further and further north. But if we have severe cold every few years then these southern transplants will be nailed. It seems ironical and no cause for celebration, and perhaps nature is saying “if you f**k with me, I will with you”.
During my working days I owned a luxury used car which I purchased with 28k miles on the clock and traded in at 140k miles 10 years later – a decision I regret, since it had character (a big wrestler looking badge for the front grill) and I should have kept and nurtured it. At about 110k the Bose sound system deteriorated and I arranged for an audioshop to replace the tuner/CD player and, since they said the Bose speakers were incompatible with the new system, the speakers as well. But I requested they set aside the 4 Bose speakers for me, and for the past 12 years the speakers have sat on a shelf in the garage awaiting their destiny.
I enjoy most music genres and at my log cabin I incorporated various audio components into an acceptable sound system. Since I did not have speakers, I purchased a pair at the local thrift store – they seemed decent quality.
my thrift store speaker purchase
And for $18.91 what had I to lose.
caveat emptor – sold “as is” with no warranty implied
Actually, $18.91! I have bought solid wood desks ($6) and paintings ($8 – $25) at the thrift store and been very happy, but then I was able to inspect all the components of the purchase. A pair of good looking speakers on a shelf unconnected to a sound system can be a pig in a poke – after all why would anyone donate good quality, working speakers. Desks and paintings you can outgrow but good speakers are always useful. When I connected the speakers up at the house one worked fine and one was buzzy and noisy. I suspect the speakers were hammered at high volumes and the one was damaged.
this is the main speaker I replaced – you can see the damaged apron
So I have used just the one speaker until, with the advent of hot weather, I had time during mid-day heat to ponder a solution.
And then the Bose speakers came to mind. Why not replace the damaged speaker with one of the Bose speakers. But there is a problem – for whatever reason the Bose has a receptacle for 4 speaker wires while I have only 2 to provide.
see the blue box above the specs – it is anticipating 4 wires
I powered the sound system and tried touching my 2 speaker wires to all combinations of the 4 speaker tabs but no response. Then I inspected the Bose more carefully and saw that when all was said and done, just 2 wires headed for the speaker.
2 wires lead to the speaker
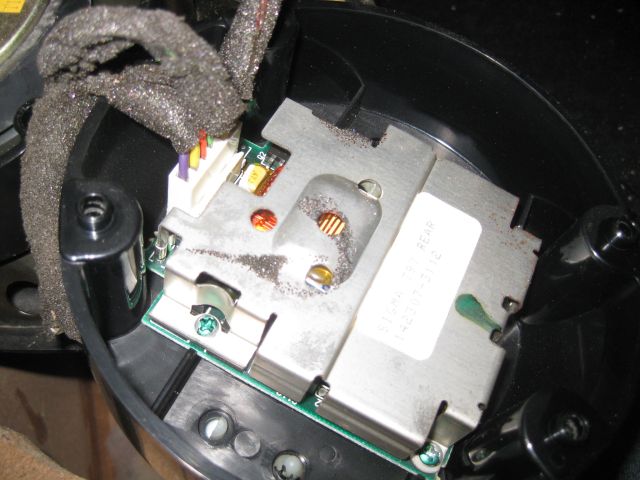
So I touched the speaker wires from the sound system to these 2 wires and the speaker came alive and sounded decent. I could have connected the speaker wires to these 2 wires and job finished but I thought it would be more elegant to connect to the interior tabs and I was curious to see how 4 input wires became 2. So I disconnected the back cover plate.
as I suspected 4 input wires did not simply become 2 wires, there is a circuit board and presumably fancy electronics fine turing the input from the speaker wires
Since I am a bit of a novice I decided to commit a travesty and sidestep all the embedded electronics and connect directly to the 2 wires going to the speaker. I reasoned that the Mitsubishi speaker box had its own electronics and these would have to suffice. So I made a short extension with connectors for the Bose tabs and a screw on connector for the 2 wires from the speaker box, ensuring I maintained polarity.
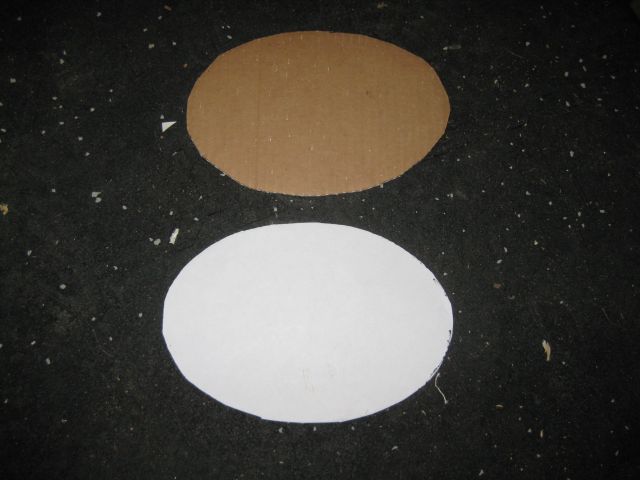
But first I had to fit the Bose speaker into the speaker box and since its profile was elliptical/oval it would not fit the rectangular shape of the speaker being replaced. I needed a template to mark out the shape on the speaker box so I could cut with my Skil jigsaw. I measured the length and width of the speaker where it would fit into the box , but how to draw an elliptical circle. Fortunately for my permaculture design course I have been working with Inkscape, freeware software, and so I produced the shape with the software to actual size, printed the circle, then copied it onto cardboard which I trimmed and then used the cardboard to sketch the shape on the speaker box.
the printed elliptical shape on the white paper and the cardboard template to which it was transferredI
With the jigsaw I cut out the pattern, the Bose speaker fitted well into the box, I connected the wires and fitted the lid cover and tried it out on my system and it sounds fine. Job accomplished.
my refurbished speaker – you can see the oval shape of the Bose speaker through the grill
In my previous two posts I described Randa the flying chicken who established a nest containing 15 eggs in the bush and how, after much debate, I relocated Randa and her eggs to the safety of a spare coop. The dilemma was what would I do if say half of the eggs hatched, since I have chicken enough and would wind down rather than expand my chicken operations.
The potential dilemma dematerialized. Although I had prevailed on Randa to sit on her transferred eggs in the new nest box she quickly abandoned both and stared longingly at the rest of the flock lounging in the tree shade outside. I think of the film cameras we used to use – the unexposed film sits in the dark behind the lens shutter and when you press the button the shutter opens for a period of time and light from the outside reaches the negative, and then it is dark again. For 15 days Randa was in the pull of nature – she was not a domesticated chicken but a wild jungle fowl with an established nest in the wild matching wits with roving predators. But once I caught her and moved her and her eggs to the coop the spell was broken, the shutter closed, and she became an ordinary chicken again. She was still broody but did not recognize her eggs or the nest box I had made.
After two days of coop isolation I released her yesterday to the flock and although she and Wanda, the other flying chicken, quickly overflew the paddock fence to the outside, both came willingly to the coop for shutdown in the evening. And the 15 eggs? They have sat untouched for the past few days in the coop and I will bury them beneath a fruit tree to recycle their nutrients.
All of this instructive for me. When we tinker with nature the processes are more complex than we think and the outcomes can be different than imagined.
In y’days post I outlined the dilemma with Randa, the flying hen who established a nest beyond the pale (paddock) and my provisional decision to leave her there and let nature take its course. Well my better half prevailed with the argument that once we take on pets (or chicken since they are not pets in our case) we assume responsibility for them and when we have domesticated them (select bred for egg productivity) they lose their instincts to survive in the wild. Ergo, we could not leave little Randa on her nest and should bring Randa and her eggs under our protection. A counter argument is that if she could survive for 10+ days out there she was perhaps not as vulnerable as we thought.
So, armed with secateurs to cut through the brambles and leather gloves I approached her hideout.
Randa on her nest as I approached
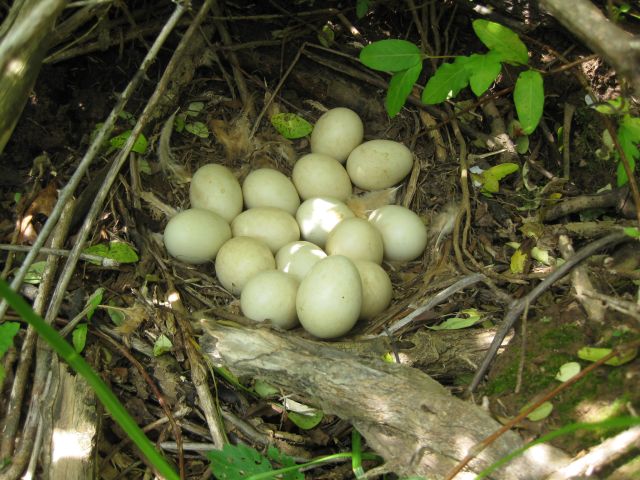
To my surprise she showed little reaction – did not hightail into the bush as I thought she would, and only protested as I reached out to hold her. I transferred her to a spare coop where she made a lot of noise to the chicken spectators looking in. Then I located a plastic container filled it with pine shavings and transferred the eggs from the nest. How many eggs were there?
there are 15 eggs, all pale olive green showing mixed line from Ameracauna and Buff Orpington
15 eggs! Wow this means she was accumulating eggs for the past 15 days. She had been awol for 13 days so probably the 1st 2 she laid she did not sit on consistently. Now here is a question – how many of these eggs are fertile. If the rooster did not have contact with her during the 13 days she was gone will the eggs she produced during that period be fertile? Bad news for me – apparently the rooster’s sperm can remain viable in the hen for 3 weeks so it is possible that all her eggs could have been fertilized.
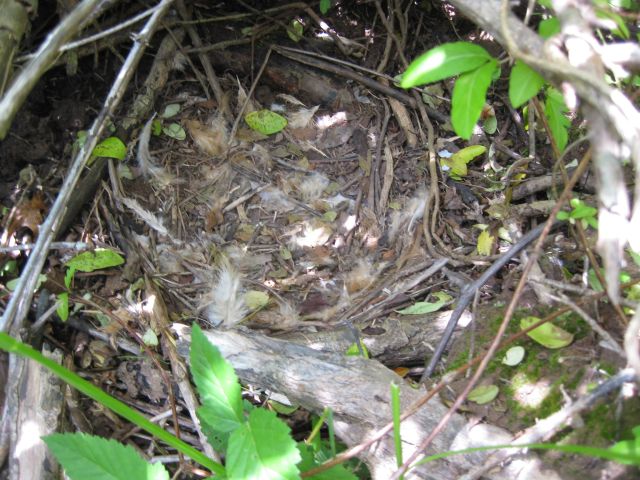
After I removed Randa and her eggs I took a pic of her nest, which is shipshape and furnished with some feathers.
Randa’s nest
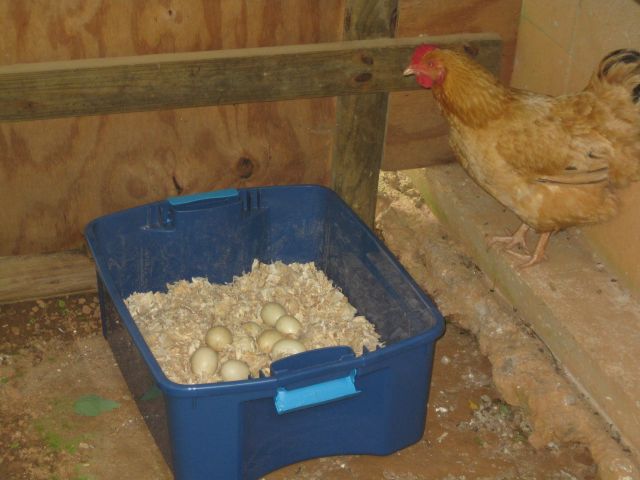
I introduced Randa to the blue plastic container which held the pine shavings and her eggs. She was not happy.
Randa does not take to her new nest
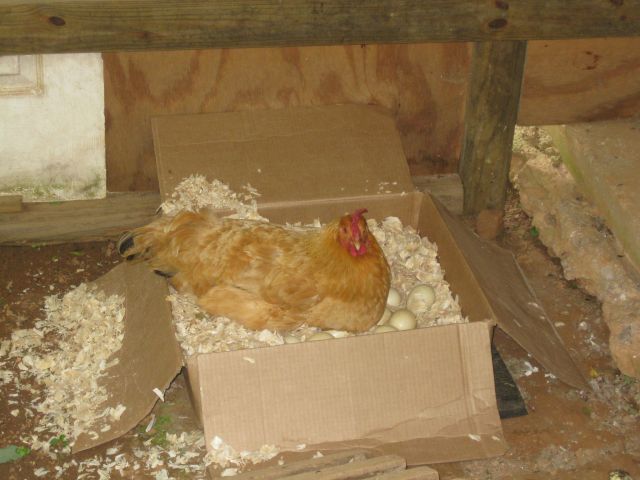
Perhaps the blue color was offputting, or the sides were too high or it was just too synthetic. So I decided to use a low rimmed cardboard box placed on a thick rubber mat to protect it from the damp in the soil. And I placed the aggrieved Randa on the new nest and stroked her for some time and then stepped back and she stayed put.
Randa on the new nest
So for the moment there is peace. But I have a looming dilemma – if a lot of eggs hatch viably what will I do with them?
I have a dilemma. Since I retired I have had few dilemmas – no more the quandary of whether I should attend an important business meeting or pitch, vs a child’s sporting event/concert performance or family function. But now I have a dilemma!
I mentioned in previous posts that we have 2 nimble chicken, Wanda and Randa, who easily fly over the paddock fence and that Randa had disappeared one evening but was there the next morning and we all celebrated with sunflower seeds. But the next night she disappeared again and was not to be seen for the next 9 days.
We searched everywhere – there were no telltale feathers signifying a predator attack but even without the evidence I had concluded she probably had been done in. And then yesterday (Monday) after a rain washed weekend, there she was outside the paddock, very bedraggled. She greedily ate the sunflower seed and chicken feed I offered her. I surmised that she had had a nest, that it had failed and that she had returned to the flock. But a few hours later she was gone again. What was going on?
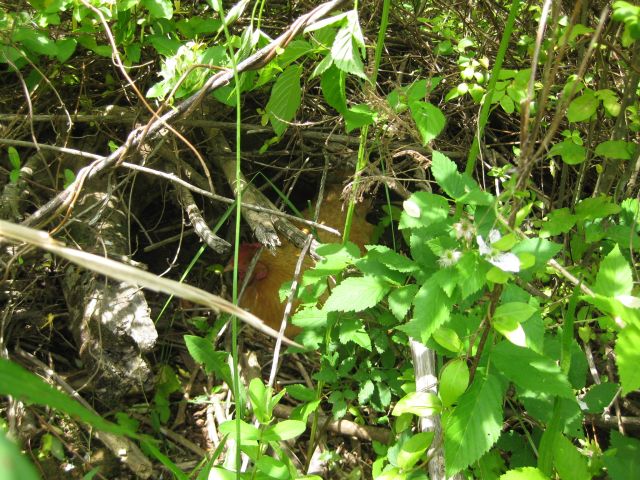
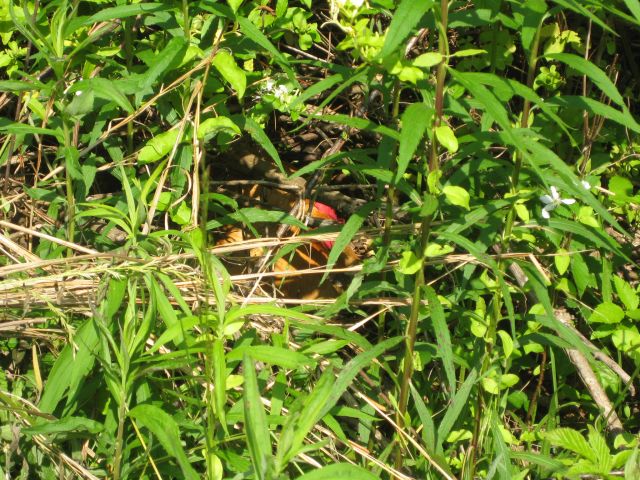
I decided that she must still have a nest and that it was probably close by. I began looking and there, not to far from where she had appeared on Monday morning, was Randa on a well concealed nest.
Randa on her nest in the bush
The dilemma is what to do. I can leave her be and there is a likelihood some predator (fox, possum, dog etc.) will find her. I can try capture her and relocate her and her eggs to a 2nd coop. Or I can chase her off the eggs, destroy the eggs and she will likely return to the flock. And if she remains broody I can provide the same treatment which worked successfully on Yellow Legs who is cured of her broodiness and is now a regular flock member.
Since I would like to wind down my chicken operations in the near future, the last option seems the most practical and perhaps the kindest since in following her natural impulse she has placed herself in dangers way and if she is not discovered now, then when the chicks hatch and chirp a predator may get to them all before I can relocate them.
Relocating her and the eggs to a coop seems the best compromise but I doubt she will allow herself to be caught and will take off and return to her nest when I have given up and will be more stressed.
Leaving her be could be considered cruel and uncaring. But I am leaving her alone for now. I feel at times that though we may delight in having pets and chicken there is something a little unnatural going on. After all, chicken were once forest birds which we have bred to produce an unnatural large number of eggs, which has stressed them and reduced their lifespan and deprived them of the most natural of events – producing offspring. Though with an incubator we do this for them as I have done a couple of times. Perhaps I am thinking too deeply since this reasoning applies to my Trudy who has been neutered and seems to enjoy being with me and keeps a vigilant eye out for me and barks whenever necessary and keenly undertakes her daily rodent patrols. But still I see nature’s hand here and will leave Randa alone for now, recognizing that each next morning all I may see of her are some scattered feathers.
The log cabin was built in 2002. I call it “the log cabin” actually its a house with basement and two levels and the exterior is “D” siding which makes it look like it is constructed from logs. An attractive finish but it requires annual care with repainting flaking spots and replacing bits of siding which have deteriorated. I purchased it in 2008 and have maintained it and upgraded it such as the wood stove recently installed. It appears well constructed but there are tells that some of the work was not up to grade. For example the concrete pad for the carport was a couple inches too short so the posts which support the roof are only partly seated on the pad.
concrete base incorrectly sized, so half supported carport post
But this is a fact not an aggravation. The leak in the steel roof and the ill designed gutter which poured water on the chimney exterior and caused a lot of damage was aggravation but the fixing is a story for another time.
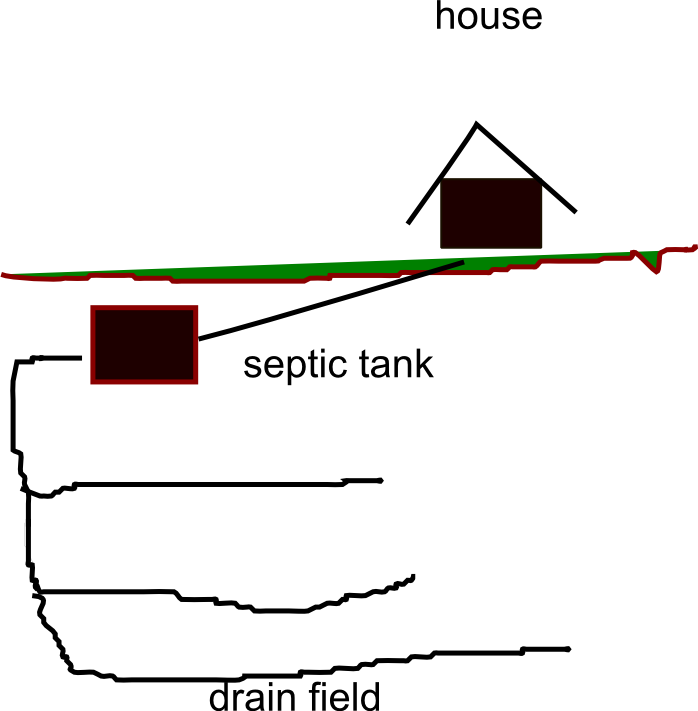
The two slip ups subject of this post were not quickly identified. The house has a septic system which means the waste water and contents are channeled to a septic tank where they biodegrade and then move to the leach field where they enter the soil via perforated pipes (the sketch below should not be interpreted to mean the perforated pipes are below the tank, they are to the side of the tank and a few feet below soil level). The tank is a rectangular concrete constructed box with a concrete lid and the lid is about 3 ft below soil surface. The sewer pipe from the house enters the tank about 2 ft below lid height so it is 5 ft below soil surface.
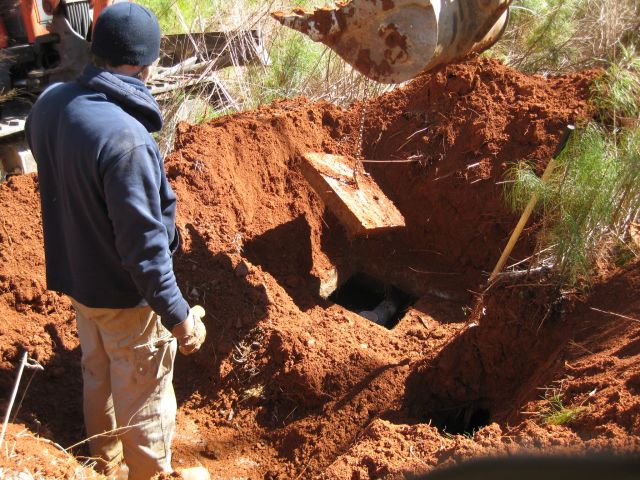
Recently the septic system stopped working. Quite easy to determine if you visited the area of the basement toilet and noticed the floor was wet. I ‘phoned Lenny (not his real name) who is the respected county expert on septic tanks. With his backhoe he quickly uncovered the septic tank lid and removed it with a chain fastened to the backhoe bucket.
removing the lid of the septic tank
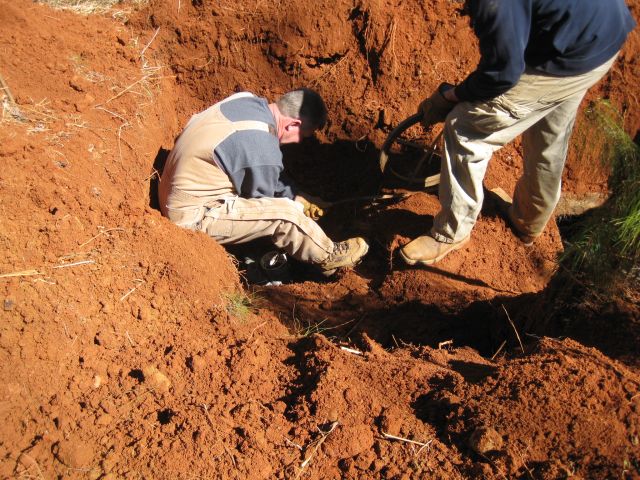
The good news was that the tank contents were at normal level which meant there was no problem with the tank or the leach lines. I had been concerned that the many volunteer trees had directed their roots to infiltrate the leach lines and that these had clogged. So therefore the problem was either a clog in the sewer pipes in the house or a clog in the pipe between the house and the tank. Lenny donned his elbow-high work gloves and with a “snake” vigorously attacked the pipe.
trying to clear the blockage
Almost immediately something gave and with a whoosh the dammed contents flooded the tank. But, while I was relieved Lenny was dissatisfied. He had me flush the toilets numerous times and worked the snake up and down and informed it it wasn’t right and there was a problem and I should call in a plumber. He refused to accept more than $50 for his work since he “hadn’t fixed the problem”. His parting words were “get a plumber”.
Well, the system seemed fine and I felt he had been over cautious and so naturally I did nothing until 2 weeks later when the problem recurred. Lenny had given me two references and one came over with a snake and in line camera, call him “Pete”. Even before starting, Pete said he was sure the line had parted and the pipe would have to be dug up. Nonetheless, at my urging he sent in the camera which did not give clear video since the line was filled with liquid. Next he sent in the powered snake which kept hitting something hard and was ineffective. Pete explained that the line had separated and the teeth of the snake were hitting the lip of the parted line. A few days later he returned with his backhoe and crew.
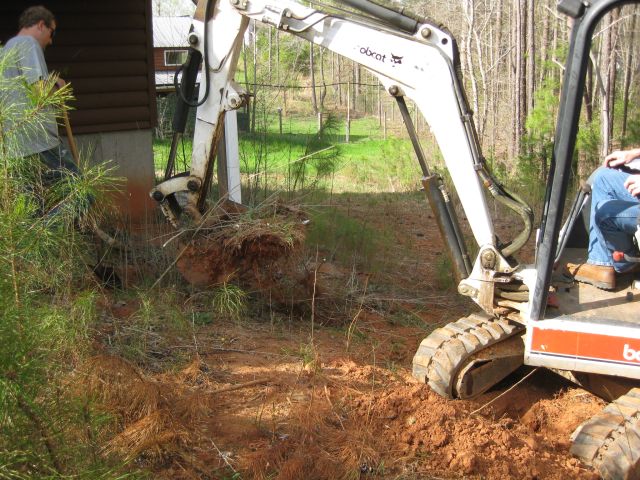
trying to locate the sewer pipe from the house
I showed Pete where the tank was buried. Between the house and the tank was a post supporting the deck (more about this later). The question was did the pipe run uphill of the post, under the post or downhill of the post. I was concerned the pipe had been buried under the post and that it was the weight of the post which caused the pipe to separate. I also noticed that the post was not vertical as though something had knocked the bottom of the post a few inches downhill. Pete first dug uphill of the post – he went down 4 feet but no pipe. With a backhoe digging a trench is quick and effortless. Then he dug downhill of the post and located the pipe.
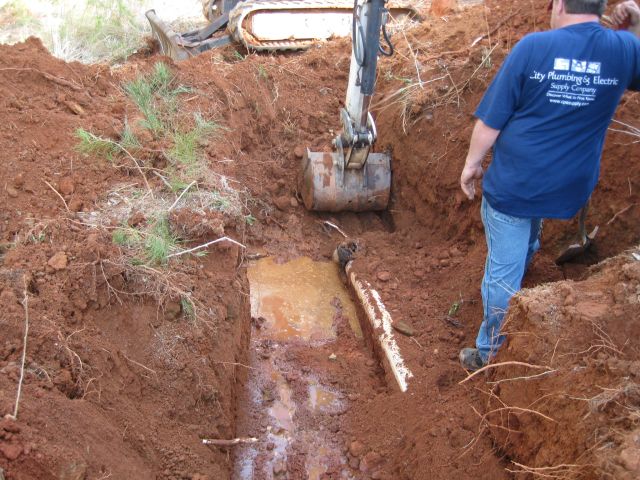
the sewer pipe is located and uncovered
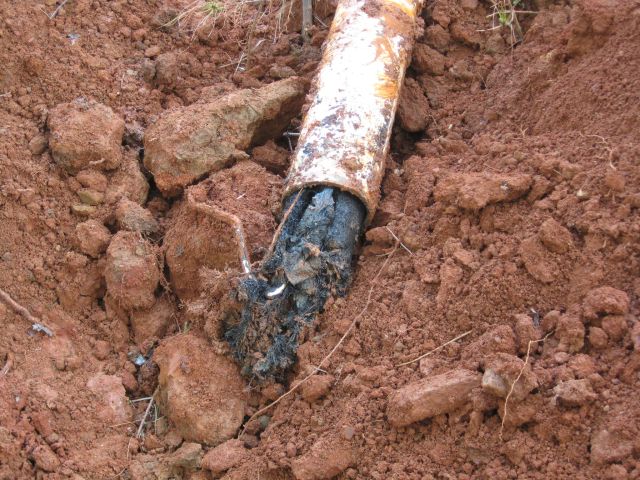
Prior to Pete beginning work I had wondered, idly, what he would do with the contents of the pipe – could be messy if it involved pumping or transferring. Actually the answer was simple – just dig a deeper trench next to the pipe and allow the contents to fill the trench and it all disappears when the excavation is backfilled. Towards the end of the pipe a couple feet from the tank we saw the problem – the pipe had been coupled with a collar to a short pipe which entered the tank, the two pipes had separated and a tree root had entered and grown in the pipe.
tree root gorged on sewer nutrients
Pete said immediately that the “old boy” who installed the line had not glued the collar to the pipes and that was why the pipes had split. We looked at the collar and it had never been glued. So this was slip up #1 – 20 cents of glue (a small can is a few dollars and a couple brush strokes would have sufficed) would have avoided the aggravation. Pete had brought with him an inspection port which he connected to the new pipe and then he and his crew backfilled the trenches and the job was done.
new inspection port
The inspection port is the white object to the right of the post. If I have a sewer problem again the first thing to do will be to unscrew the lid and look inside. If the chamber is empty then the blockage is in the house, if it is full (need to step back when you do this just in case!) then the blockage in either in the line or the tank is not discharging. For his two visits Pete charged a very reasonable $450 and I gave him and each of his crew a dozen fresh eggs from my free range chicken.
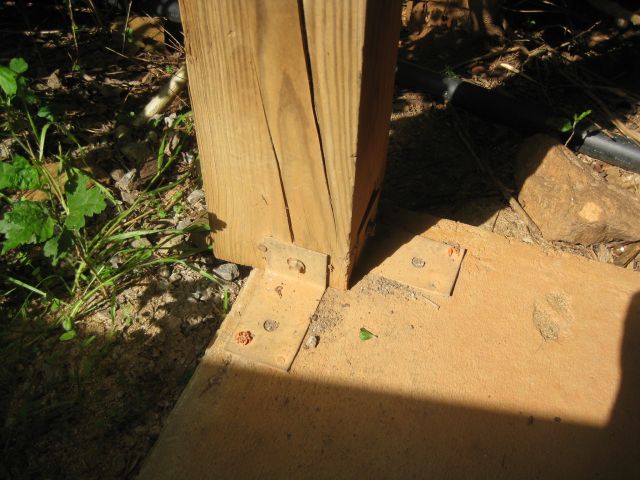
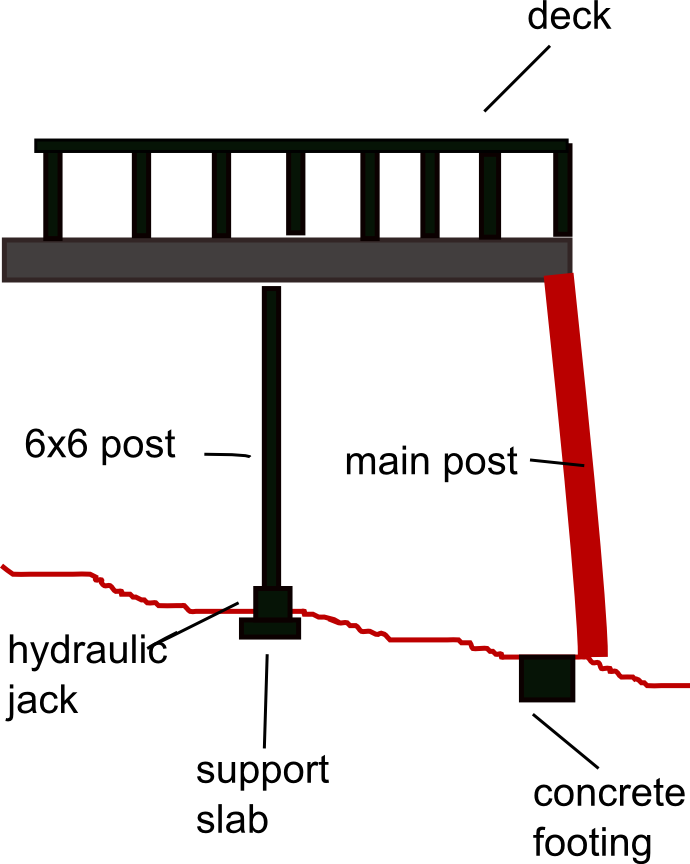
Finally, a quick note on construction slip up #2. Before purchasing the house I accompanied an inspector and one of his procedures was to ensure every post was on a solid foundation and he accomplished this by prodding the soil adjacent to the posts with a long half inch steel probe. All posts seemed fine. Yet during the sewer line work we discovered that the post near the sewer line was resting on soil, was not vertical and the deck, when I tested it with a level, was sloping down (slightly).
I have a hydraulic jack for working on my tractor.
20 ton hydraulic jack
I devised a plan to raise the deck and then I would straighten the post and place a concrete support below it. I purchased an 8 ft 6″ by 6″ post and some concrete slabs and dug a level base for the concrete slab, placed the jack on the slab and with the help of a buddy placed the post vertically on the jack and directly under the deck joists. I always have a buddy around when I am doing something potentially dangerous – in this case with the full weight of the deck on the new post on the small jack on the slab a miscalculation or sudden shift could explode out the post and jack and cause personal injury and property damage. I forgot to take a pic so here is a representation of the manoeuver.
With the main post raised a few inches I began digging under where it had stood to make a level pad for a new concrete block. And it was then I discovered that there was already a concrete footing – only problem it was about 4″ off from where it should have been. So when the house was built the post may have been located on the edge of the footing and had slipped off. This was construction slip up #2 located the concrete footing in the wrong place – carelessness I suppose and inadequate supervision. I placed a solid base under the post and hope this takes care of it.
As I experiment with compost teas my better half decided to go down the biodynamic compost route. My role was to locate and assemble the ingredients. It would be a small heap shaded throughout the day and well clear of my regular compost heaps which include manure from stables – a possible contaminant. I provided 3ft stalks from flowering vegetables for the base, I scythed my plentiful high growing grasses for the “green” material and carried to the assembly area three 5 gal buckets half filled with chicken litter and poop. I also produced 4 intact leaf bags gathered from neighbors the previous fall, which would be the “brown material”, and with my bobcat transferred a mix of well rotted (3 year old) wood chips and soil, which would provide the covering material. I connected a hose to a rainwater tank. Then I stood back and watched.
the leaves were added first, then the green material and then the chicken litter was spread on the top
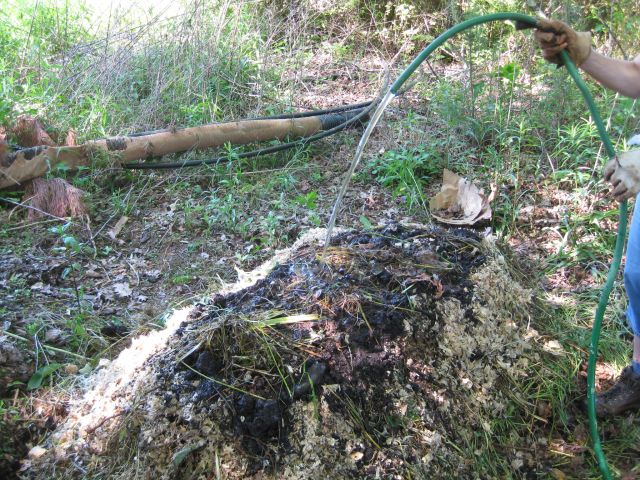
Next was adding the rainwater.
wetting the heap with rainwater
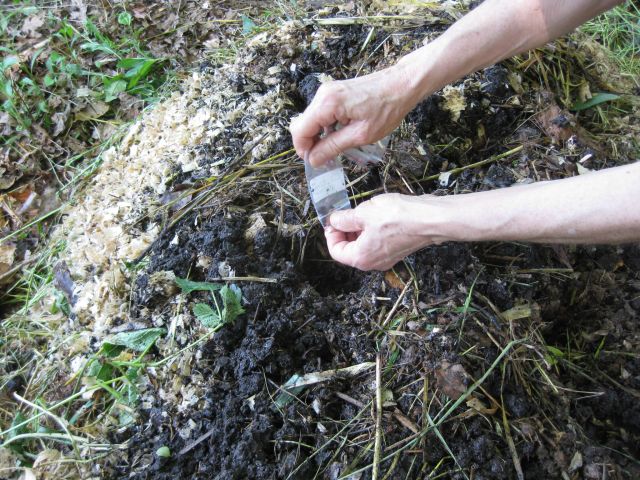
With a crowbar I made 6 spaced holes in the top to a halfway depth. Into each hole a different preparation was added: #502 yarrow; #503 chamomile; #504 stinging nettle; #505 oak bark; and #506 dandelion. The preparations were purchased from JPI (the Josephine Porter Institute). The first 5 preparations were in powder form, the sixth #507 valerian was a liquid which we added to a gallon of water, stirred vigorously and half added to the sixth hole.
adding the preparations to the compost heap
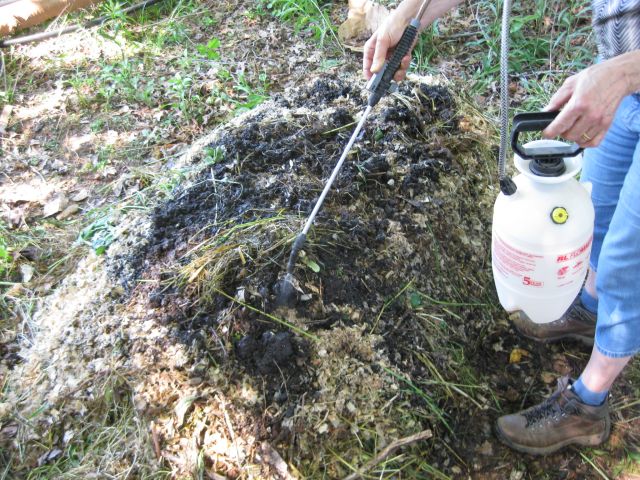
The remainder of the valerian solution was sprayed onto the heap.
spraying the valerian solution onto the heap
Finally the heap was crowned with the soil decomposed wood chip mix and then covered with some plastic bags to slow evaporation and retain warmth. And that was it for the time being.
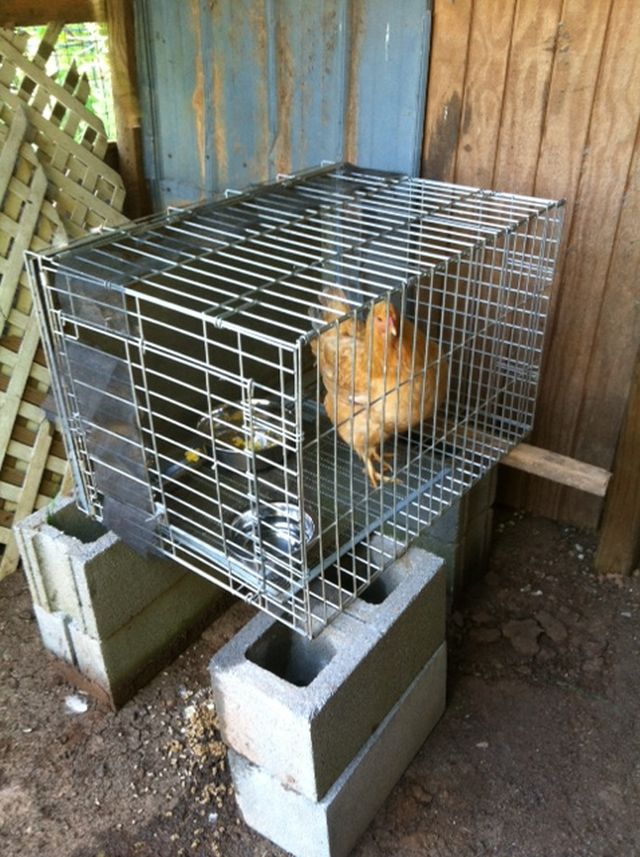
Our broody hen kept brooding. Each night I would remove her from the eggs she was safeguarding and, after a quick sup, she would go back to the nesting box. And so it continued night after night for a week. Our research indicated that if she was kept in a place where her underside was cool, she might desist. I located and positioned 6 cinder blocks on top of which I placed the wire cage we had used when they were newly born. Since the bottom of the cage was a solid removable tray, which would block air passage, I rotated the cage so the bottom was on the side. And I placed a queen bee restrictor grill on the bottom of the wire cage for her comfort.
temporary quarters for Yellow Legs
Yellow Legs was very unhappy with imprisonment – she kicked over the water and food dishes which I replaced with receptacles not easily overturned and, whenever I opened the door she made a dash for freedom, sometimes successfully. After a couple of days of mutual frustration I decided to release her to the flock and resigned myself to the evening turnover routine. But – to our delight she was cured and now roams with the flock. Success.
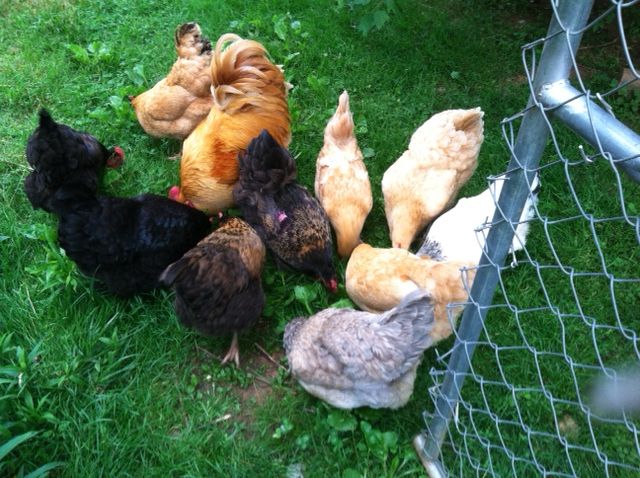
And for some other chicken news. Our rooster had a black mite infestation on his comb. I treated with a solution of neem oil mixed with olive oil (I usually use Johnson baby oil but couldn’t find it) and he was cured. One of the black speckled hens had feathers missing from her wing – feather plucking or maybe a failed predator attack? I treated with blue kote and it is healing well. And finally, the next pic shows a celebration of sorts. Last evening as I was leaving I couldn’t find Randa who is agile, flies easily over the paddock fence and likes to make the most of daylight hours and (it seems) when I am looking for her she hides in the overgrowth. I wandered around looking, called her and even the sunflower seed trick (rattle the seed in a plastic container) failed. So I departed not knowing if I would see her again. This morning there she was as usual in the yard. To celebrate I got more sunflower seed, had some myself and scattered the rest for the flock. Randa warily entered the paddock and participated.
10 hens and a rooster enjoying sunflower seed. the hen with the missing feathers is in the middle