what’s coming in

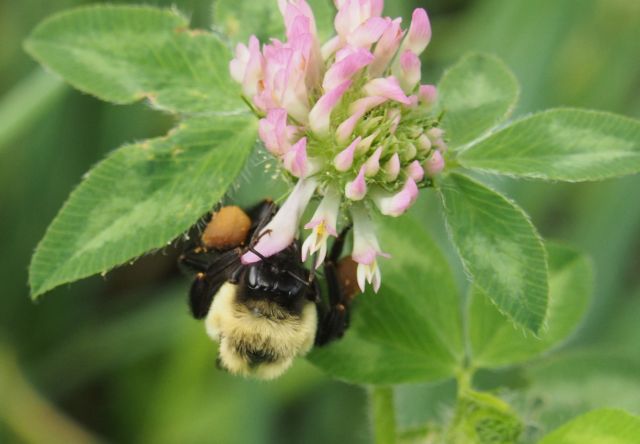
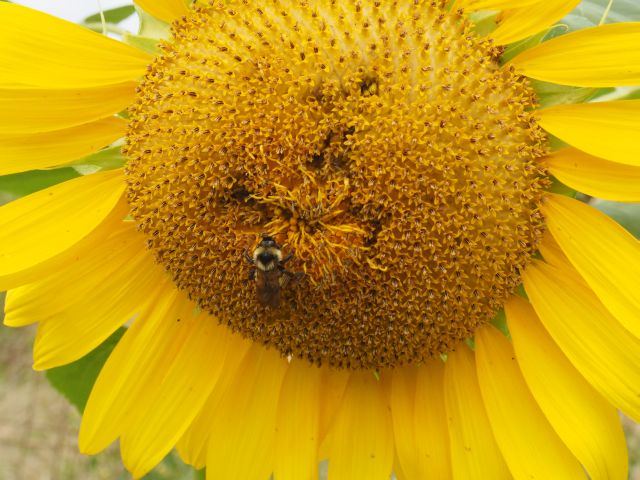
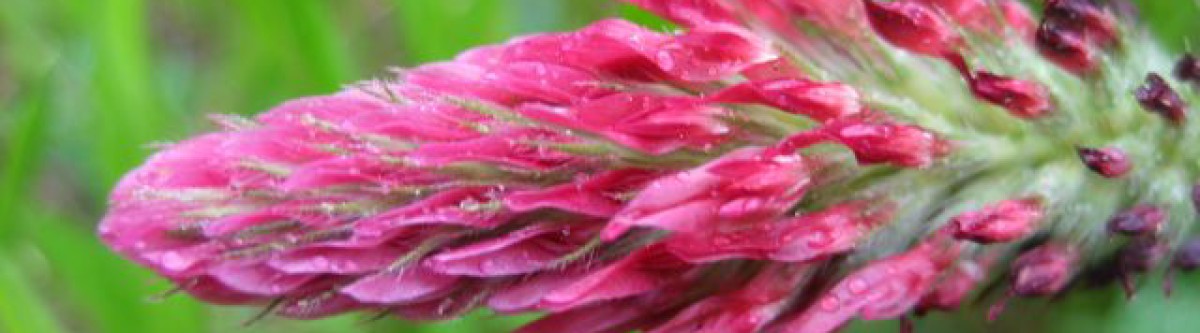
Before the harvesting roundup I must return to my favorite – the industrious bumblebee.    The Rose of Sharon, hibiscus, thrives alongside the deck and each morning their pollen offerings bring in the bumblebees.

pollen covered worker

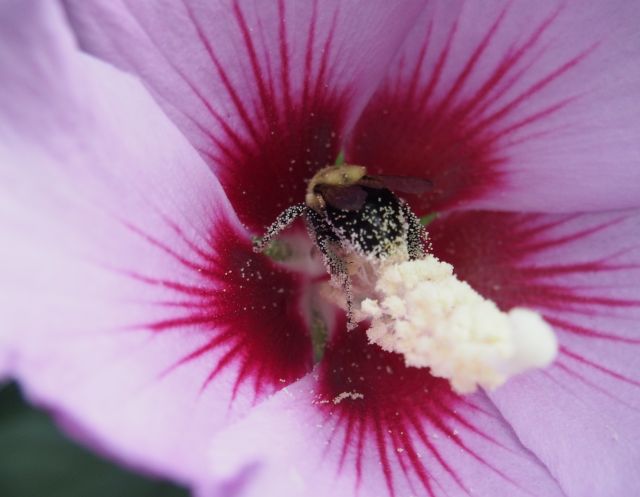
They scramble deep into the flowers and their activity sprays the air with pollen which bespeckles them.

OLYMPUS DIGITAL CAMERA
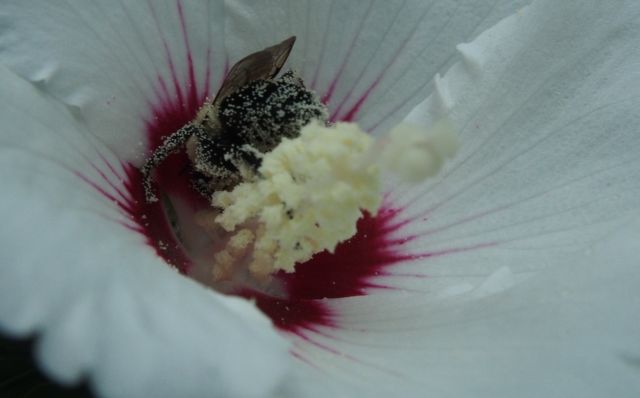
And they load their saddlebags with food.

OLYMPUS DIGITAL CAMERA
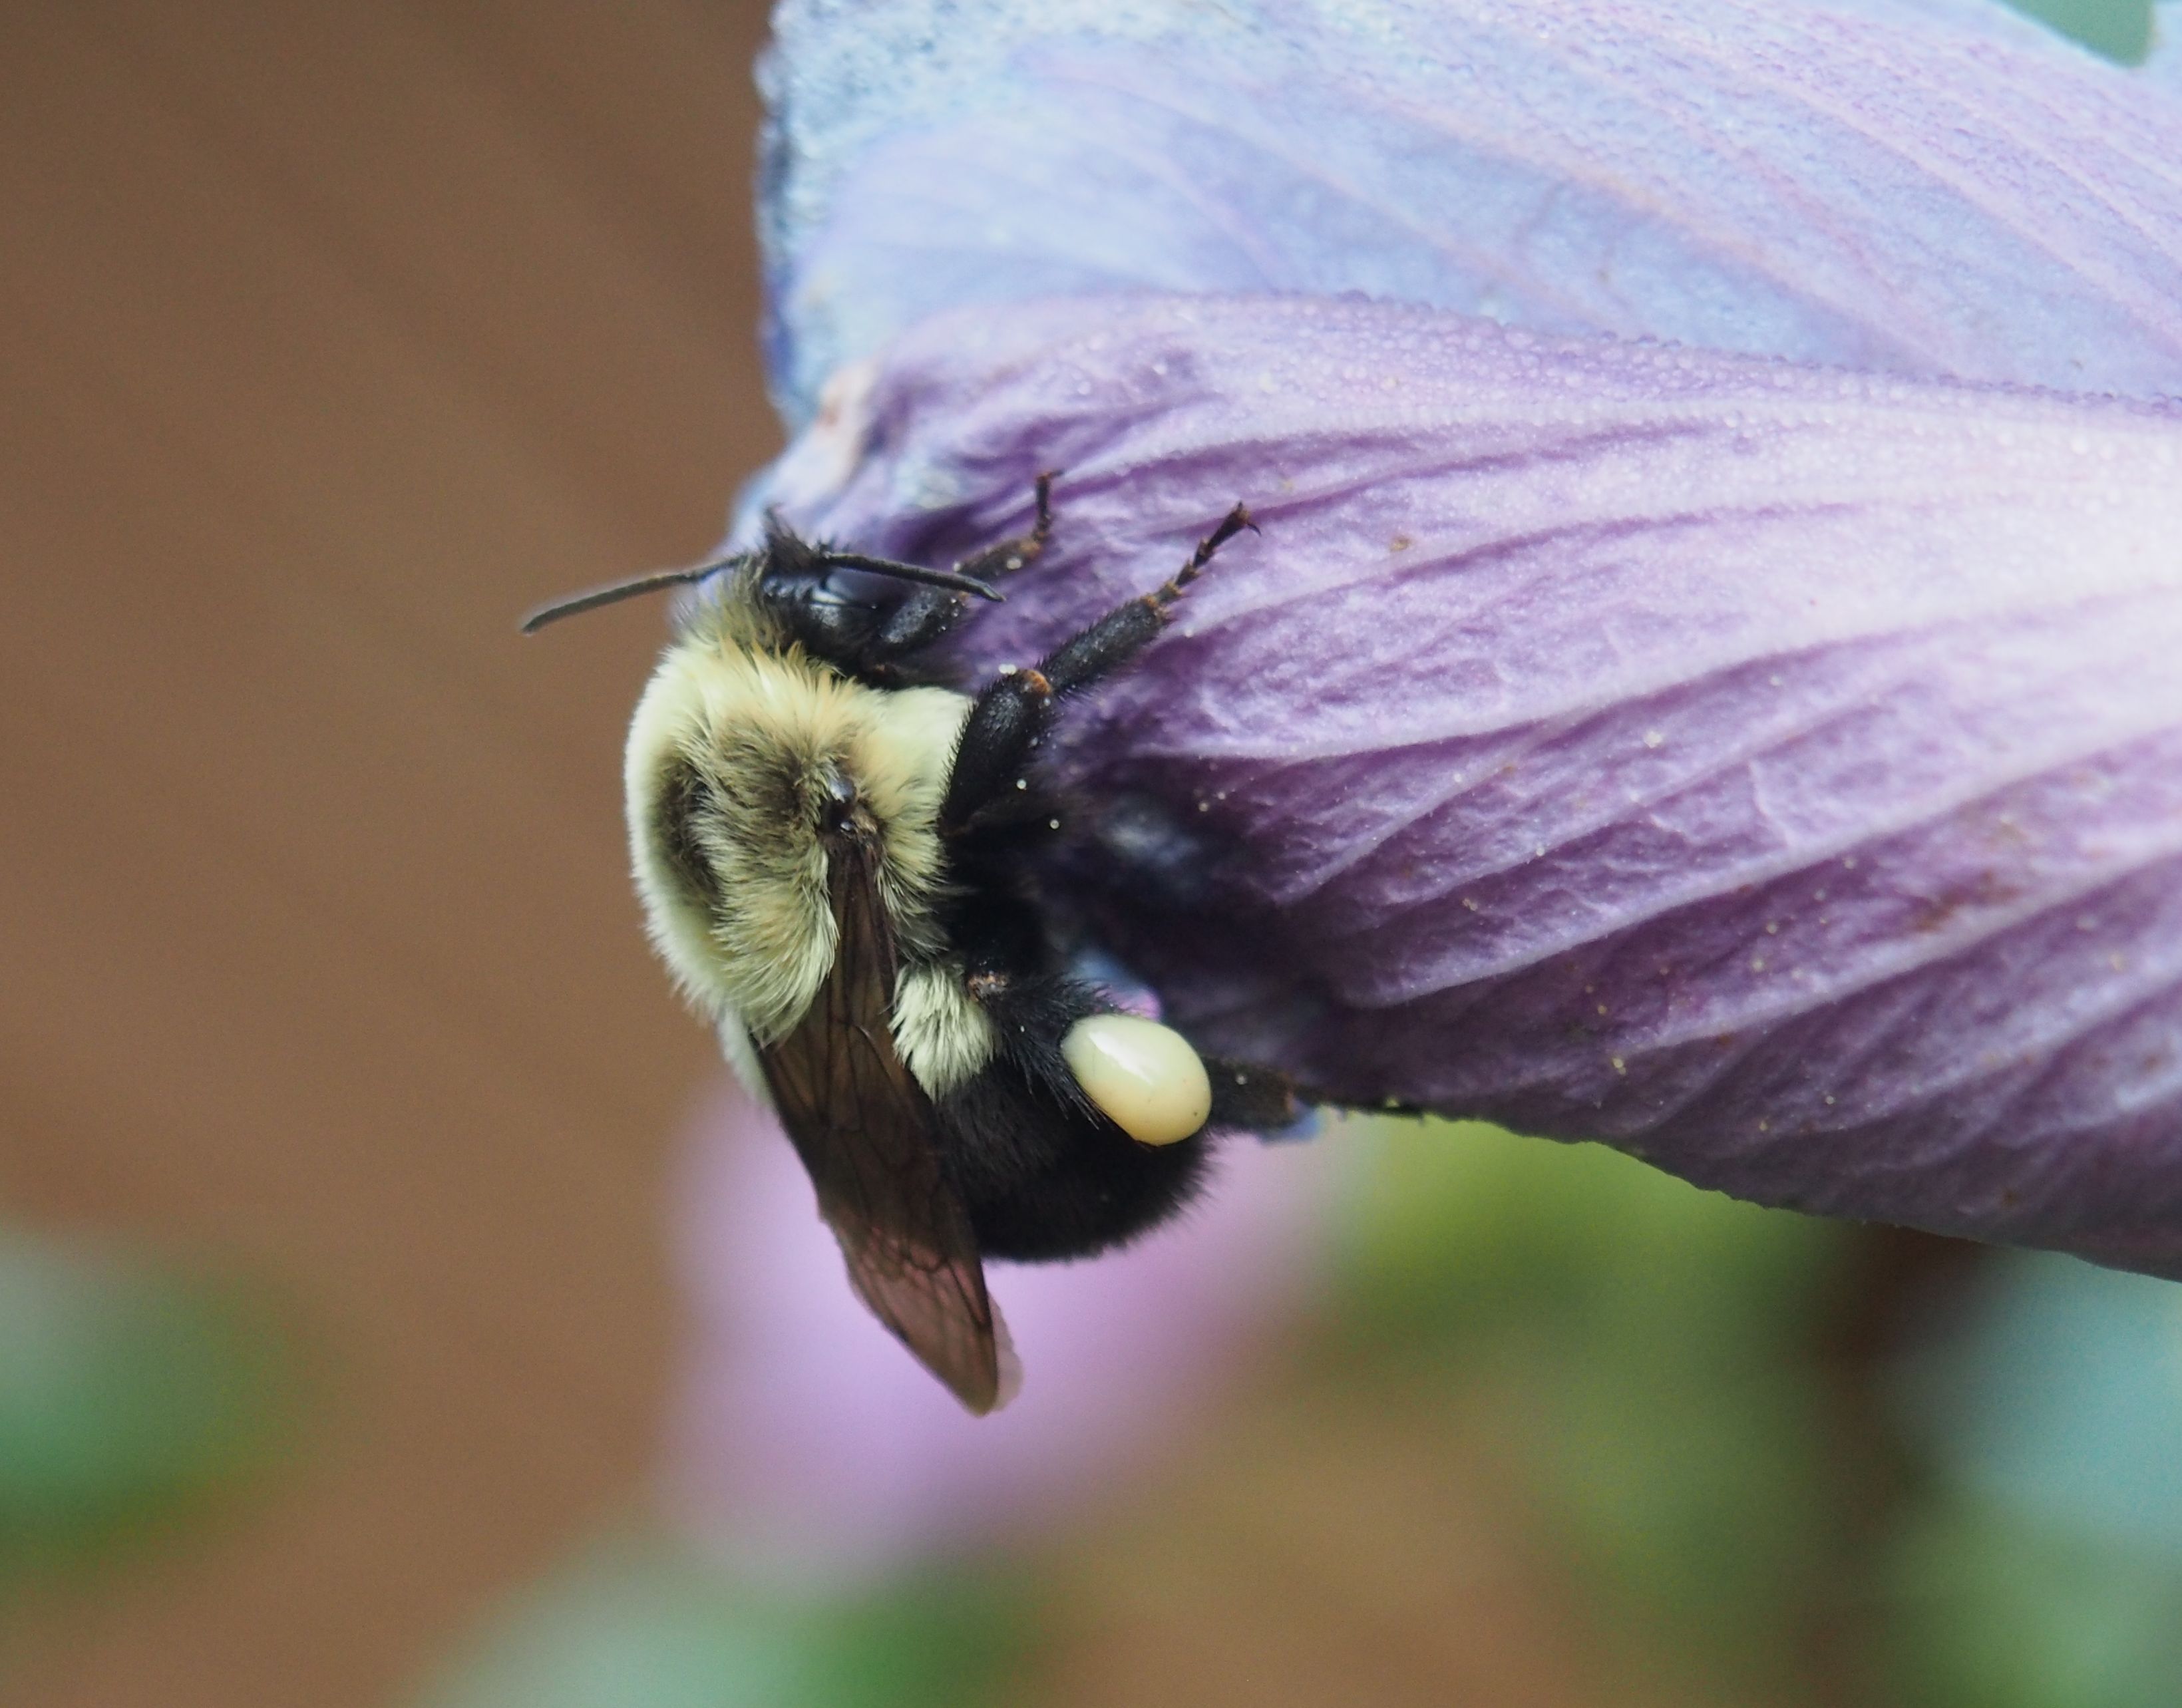
Much as I like my honey bees and appreciate their excellent honey, the bumblebees cannot be supplanted in my affections.

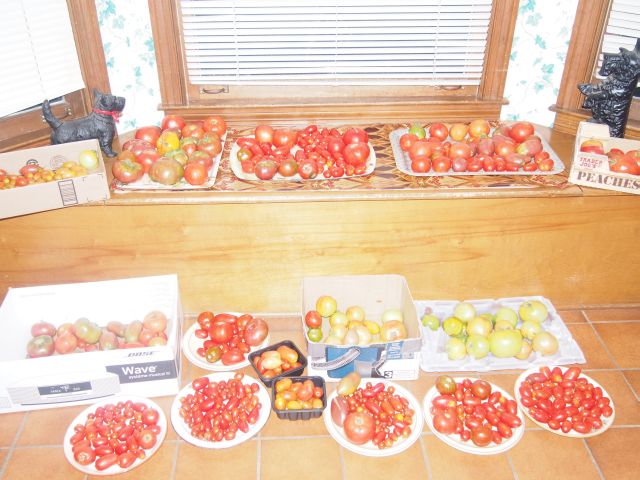
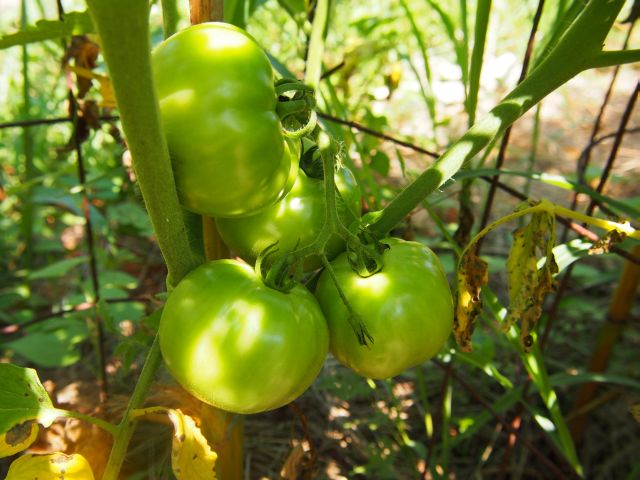
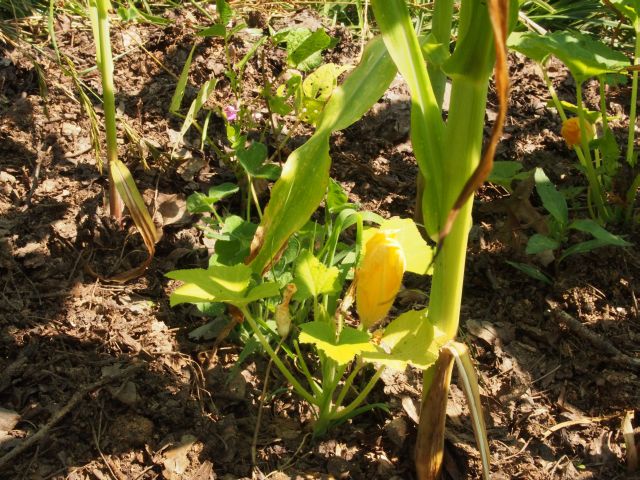
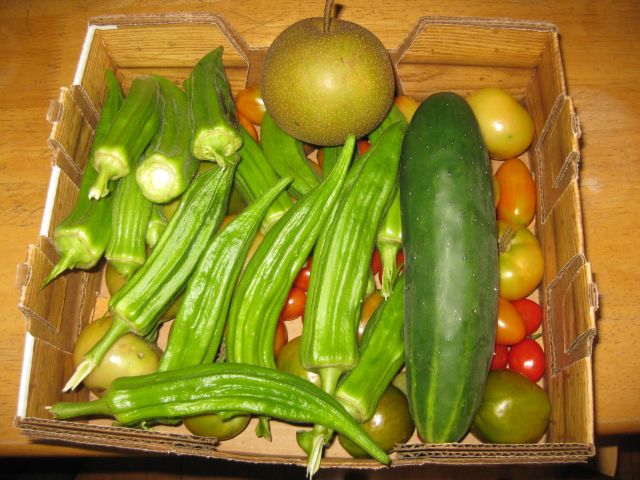
The tomato season will soon end.  What a luxury it has been eating delicious tomatoes at every opportunity specially tomato, cucumber and onion salad seasoned with vinaigrette.  And tomato sauce is in the freezer for the winter months.  A favorite in this region, but perhaps less well known elsewhere, is okra.  Best to pick them when small and they can be eaten off the plant or we grill them since we are not into frying.

some of these okra were picked too late, but the smaller ones were delicious

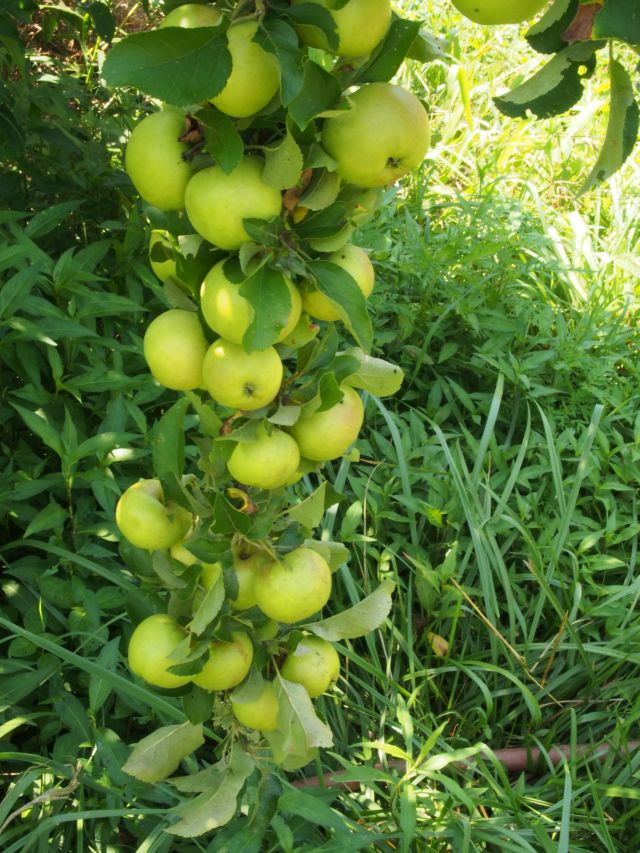
My apples are staggered throughout the season and there is always a tree with offerings, though up to 50% must be shared with the smaller apple lovers.  The one fruit tree which to date has been complete immune to pest pressure and which provides the best fruit of all is the Giant Korean Pear.  Unlike the regular pears which are soft and sweet, this has a firmer texture and a haunting delicate sweetness.  The pears are the size of baseballs and weigh around 1lb each, as shown below.

Giant pear on the scales

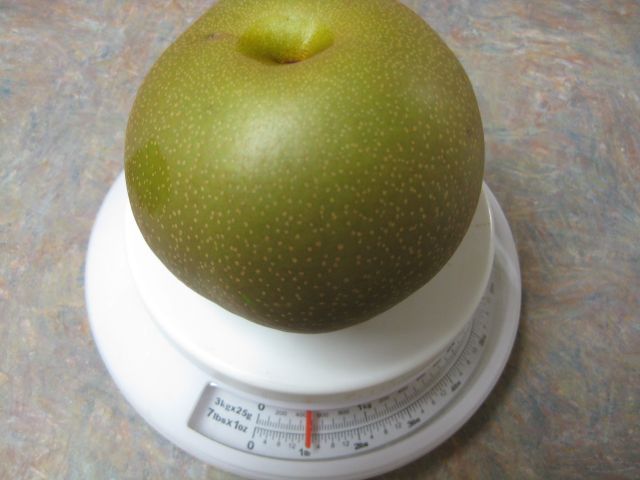
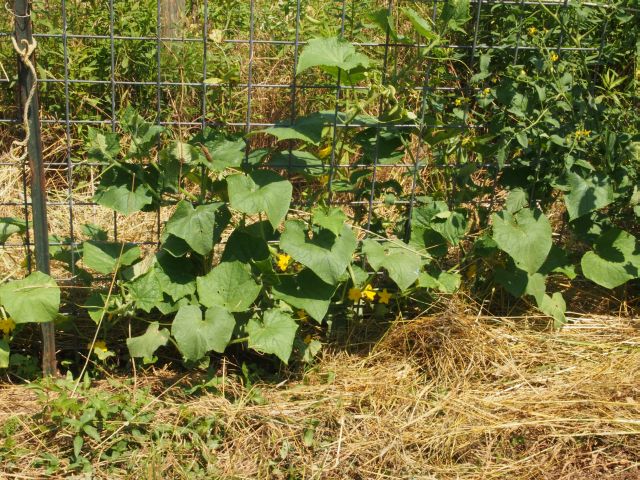
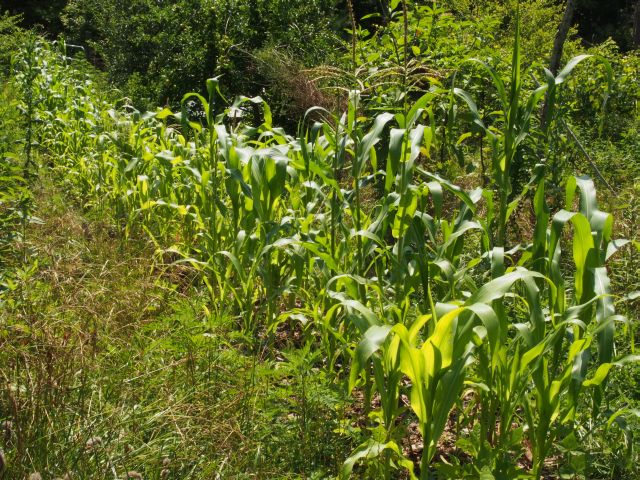
The pear tree is modest sized and provides about 20 pears a year, but they are all delicious.  The corn was disappointing probably because it was the first time I had grown corn in the area and I had under watered.  Cucumbers were delicious, the beans are still coming in, and a pleasant surprise has been the carrots which took their time to appear on the scene.  Unusual have been the purple carrots which I understand was their original color before they were re-colored for the House of Orange.  Next up will be the muscadine of which the scuppernong is the sweetest and most delectable.  And now too, my thoughts turn to fall planting and I am preparing the beds and provisioning the seeds.

remote surveillance – DIY is hugely frustrating

I had a break in and theft a couple years ago and so installed a home security system with a very powerful siren, camera system and dawn to dusk lights.  Being a DIYer I installed them myself.  The programming of the Ademco Vista 20p was challenging.  They work fine but I did not have remote access, which means if the alarm was triggered when I was away, then I depended on my neighbors to call me.  Which they did when the alarm went off last week for the first time in 2 years.  It was a false alarm caused by a loose wire in a new sensor installed a couple days earlier.

Which got me thinking.  Wouldn’t it be nice if I was electronically notified when the alarm was triggered and if I could then use my cameras to verify if there was an intruder.  If there was I could call the police and then head out to the property.  If not, I could reset the alarm and save the trip.

I started with the video cameras which feed into a dvr (digital video recorder).  I have dsl internet service at the property and it is easy enough to connect the dvr to the router with a cable.  But how do I enable the system so I can view the cameras remotely?  The router blocks intrusions from the internet and you have to open certain ports to internet traffic (called port forwarding).  You could also use UPnP (universal plug and play) but I decided against this route.  Since I didn’t really know what I was doing it took ages to set up the addresses and ports, BUT it still didn’t work.  You can tell success by going to a site aptly called “canyouseeme.org” and the site reports back whether it can see you i.e the port is open, or not.  I truly believed I had done everything correctly but I couldn’t be seen.  So I got help from my son who said that the dsl modem through which my router was connected to the internet was actually a 2nd router with a firewall and to get around this I had to establish a “DMZ” (demilitarized zone, reminds me of the Berlin days).  Once I did this canyouseeme promptly reported success.  I installed a neat app called KMEye on my iphone and I am now able to use the video cameras remotely (and also locally) on my desktop/laptop and iPhone.

Next was to have the Ademco security system notify me when the alarm was triggered.  As with the security cameras I went down several cul de sacs before success.  The Ademco can send pager alerts and several postings said this alert could be enabled to call your ‘phone.  I tried programing this and failed and gave up when a poster who provided a very detailed write up of his system=authoritative, said it wouldn’t work.  But I found a neat little module from EyezOn called EnvisaLink3, which was expensive >$90 but installed easily on my system.  You register with  EyezOn and they act as the intermediary between you and your system.  Alerts are emailed or text messaged to you and other selected contacts, and you use the smart phone app to see what circuit or condition triggered the alert and you can arm or disarm very easily using the app.  There is no additional charge for this service, though to register you have to exculpate and indemnify the provider against any loss from their system not properly working.

So I have now, after a week of mounting frustration, successfully established remote surveillance.  Incidentally, my security sensors are all wired to the control panel.  I read this week that wireless security systems can be hacked and neutralized.  Wired systems take a lot of work to install but since they don’t use batteries require less maintenance.


wood stove – details completed

In March 2014 I dedicated two posts to the process of removing the old fireplace and installing a new, efficient wood stove.  In the last post the stove was fully functional but looked “bleh”.

installed wood stove but a lot of finishing is needed

I had a lot of work to do – on the exterior the wood siding had deteriorated and had to be replaced and caulked.  And then on the inside the question was to either replace the sheetrock, not a real skill of mine, or do something extra.  I decided to tile the wall behind the stove, since the tiling would look nice and is not combustible.   So I installed cement backer board and spent ages looking for tiles which would match the new hearth pad.   I mentioned that the mantle of the old fireplace included good wood, which I decided to re-use for the surround.

So here is the finished product.

wood stove and surround

To reduce heat loss I connected the air inlet pipe at the rear of the stove to the exterior so the stove will not consume heated air from the room.

4" inch piping to duct exterior air to the stove
4″ inch piping to duct exterior air to the stove

Initially I used the concertina type ducting you install for clothes dryers, but I concluded that the concertina crinkles impeded the air flow and so I replaced that with standard duct piping, which seems to work well.

And on the exterior air inlet, I fitted a plastic grate to keep out animals.  It is hinged and during the summer, when the stove is not in use, I have also plugged the interior pipe with an empty 1qt yogurt container.

chimney exterior all of which had to be replaced

Whilst I was at it, I also installed a small door which provides access to the interior of the chimney chase so I can brush clean the chimney flue pipe, as needed.


repairing a bathroom exhaust fan

In the past, when a bathroom fan failed, I simply removed the cover, unscrewed and unplugged the insert and installed a replacement – this was the NuTone brand and the replacement cost <$15.  However, at the log cabin it was not so simple.  The fan was manufactured in Canada and a replacement blower assembly was not available locally or at Amazon.  It could be purchased from the manufacturer but the cost plus shipping was greater than the $70 cost for a complete unit from Amazon.

Since the manufacturer touted the reliability of its product I considered whether I could simply repair the fan.  When I removed the unit I noticed that the vanes of the blower were clogged with dust and debris.  This was why the fan had sounded weaker and weaker with the passing months – the motor had been struggling to turn the blower.  And perhaps this had burnt out the capacitor or the motor was defective.  If the motor was bad I would have to buy the Amazon unit.  I tested the capacitor with a capacitor meter and it seemed ok.  However this did not mean it was ok.

I could buy a new capacitor for <$4 from the manufacturer but with flat rate shipping of $11 this would be close to $15.  Or I could buy a similar capacitor with the same farad spec from Amazon for approx $5 with no shipping cost add on.  I invested $5 and when I installed the new capacitor the motor turned slowly.  Then I cleaned the vanes and the fan spun to life.  Fixed.  NB – don’t try this unless you know what you are doing, it can be dangerous.

why it failed - you can clearly see the accumulated dust and grime on the inlet vanes of the rotor
why it failed – you can clearly see the accumulated dust and grime on the inlet vanes of the blower

And the lesson – clean the blower vanes with a sized, soft paint brush regularly and you can avoid a lot of aggravation down the road.

roving chicken

We still have 11 chicken, the ever vigilant rooster and his 10 hens.  I may have quipped in the past about putting a chicken in the pot but we do not eat our chicken.  Since I began keeping chicken a few years ago I have lost only one to a predator.  I would say, comparatively, that they lead a pretty high class life style.  In the morning, when the sun has well risen, the automatic door opener hoists up the sliding door and they emerge to range the paddock and hang out under the tree and in the thicket.  Gimpie, she with the bad hip, manoeuvers over the door ledge and joins them later in the morning.  Wanda and Randa fly over the 5ft fence and head to their two favorite spots – under the deck to snack on birdseed from the deck feeder and now, more commonly, over to the compost heap where many snacks await.

Randa exploring the compost heap
Wanda working at a slot she has excavated at the base of the heap
a better shot of Randa on the prowl

While it is helpful to have the chicken on the compost there is a drawback.  I don’t want them on the finished heap which will soon be turned into the vegetable garden, since their poop could present salmonella issues.   To date they have focused on the unfinished compost where there are more goodies to eat.

When sunset approaches, Wanda and Randa will usually rejoin the flock when they head to the coop for dinner.  Except for Gimpie – she waits patiently for me to pick her up and carry her to the coop – she is our passenger chicken.

Gimpie awaiting her ride - the Passenger pigeon may be extinct, but not the passenger chicken
Gimpie awaiting her ride – the Passenger pigeon may be extinct, but not the passenger chicken


a surfeit of tomatoes

This has been a good tomato year for me.  I made several big changes to the way I grow tomatoes and perhaps this helped.  The big challenge right now is to use them all.

tomatoes in the kitchen to be pasted, gifted or eaten
tomatoes in the kitchen to be pasted, gifted or eaten.  we had a scotty and momentoes remain

I pick the tomatoes a little early when they show an orange or yellow tinge and allow them a couple days to ripen, therefore the green ones in the picture.  I may sacrifice some taste but this puts me ahead of the line.  Of whom you may ask?

just a glimpse if you are looking hard

These are the secretive ones which, like a squirrel, quickly move to the other side of the tomato or tree.  And only by circling the other side, do you see them.

though they look frail, they do a lot of damage

They are slow moving and have soft bodies and a quick jab with thumb or finger squishes them and squirts their fluids.  Quicker footed and less easily squashed are these guys.

there are 2 in this pic
there are 2 in this pic, perhaps a courting couple, and it is possible to hand catch them but then you have to crush hard, a quick squeeze will not suffice

And finally the fleet footed.

the uncatchables
the uncatchables

I now try hew the permaculture way which, unlike organic growing, means no spray.  Can there be exceptions?  Probably not.  Occasionally however I do spot spray with neem, which seems effective.

So what were the growing changes.  This year I will save tomato seed so my one thought was, rather than a group gathering, I would physically separate various heirloom types so they would be pollinated from the same variety and their seed would grow true.  Distancing them also complicates the smorgasbord for the pests.  A second change was to hand water with a hose rather than my gravity fed dripper irrigation system.  Therefore I was on hand to observe and respond to activities round the tomatoes.  I also applied compost teas and comfrey teas with a watering can, which may have helped.  Some plantings were on a north south axis, some on a east west axis and 14 plants were in a keyhole design.

a truncated view of the keyhole planting - tomato plants in a circle with access from the south east and south west
a truncated view of the keyhole planting – tomato plants in a circle with access from the south east and south west

This design worked fairly well.  You can see my 3/4″ hose and the mulched center.  Watering and harvesting was much easier since rather than going down a line you just rotate yourself in a circle.  I was concerned there would be less sun exposure but the plants were apparently not affected – though remember this is at the top of a hill with full Georgia sun exposure.    For watering at the top of the hill I did not use gravity feed, it would have taken too long.  Rather through a combination of various valves (see separate post on totes) I used the pump at the foot of the hill to provide the pressure, so watering was not a chore and was speedy.

Which varieties worked best.  Of my heirlooms, Rutgers again performed solidly.  My other heirlooms did not.  Remember it is humid and blighty down here.  I was given Ukrainian Purple seeds and followed them with interest.  A large percentage got a black rot at the bottom, which did not affect any other varieties.

Purple Ukraine tomatoes with black rot disease.
Ukrainian Purple tomatoes with black rot disease.

Otherwise they taste fine and have a distinctive shape.

Purple Ukraine - not yet purple but it gets there in stages
Ukrainian Purple  – not yet purple but it gets there in stages

A number varieties which did well in previous years failed miserably this year including Cherokee (heirloom), yellow pear and sweet olive.  Their seed was several years old and I wonder if there is degradation with older seed.  I researched varieties recommended for the southeast and bought 3 hybrids from Johnny’s and they all did well – Juliet F1, Big Beef F1, and Mountain Fresh Plus F1.   So, as an Italian  electrical goods advert from my UK days would say – you need “an appliance of science”.B

But – when it comes to taste, then the Cherokee purple heirloom triumphed.  So the hybrids produce well but the heirlooms generally taste better and perhaps that’s why I had to share so many with discerning insect tomato lovers.

they may not look great but these Cherokee tomatoes taste great


And finally a couple of shots of my favorite insect.

the bumblebee ever hard at work
and the sunflowers look gorgeous


permaculture pdc

I first heard of permaculture in the early 90’s when my father-in-law, who was a serious organic grower, showed me his copy of the Designer’s Manual.  I subsequently acquired a copy, began reading it and then gave up.  It was too much information for me at the time and my priority  was earning a living.  Since I acquired my property I have become much more interested.  My daily car trips provide me lots of time to listen to the many different podcast sources.  I am attracted to permaculure at several levels -Intuitively, intellectually and ethically.

I have mentioned on this website several permaculture designs I have installed but did not dwell on them since I did not wish to hold myself out as knowledgeable on the underpinnings.  But now I may be more forthcoming since I have taken and completed Geoff Lawton’s permaculture design course (“pdc”), and yesterday I received my certificate in the mail from Australia.

my pdc certificate (last name omitted)

I thought the course was excellent.  Geoff Lawton, other than Mollison himself, is probably the best qualified practitioner to instruct on the application of permaculture across the world from the tropics to deserts to high altitude to cold regions.  His 2014 permaculture class had students from numerous, widely differing countries.  The format was weekly video lectures following the chapter sequence in the designer’s manual.  The cost, just under $1k, was steepish for an internet course and I, being accustomed to the excellent Coursera courses, hemmed and hawed before taking the plunge.  But having made the financial commitment I worked hard at the course and basically read the whole designer’s manual as I watched and absorbed the videos.

Finally we had to submit a permaculture design and, for me this also took a lot of time.  Not the writing up of the design since in my earlier life I used to issue financial/investigative reports, but in learning how to manipulate images.  Which meant learning gimp and inkscape – two very powerful and free programs.  A “veteran”  (ours was the 2nd year the course was offered, the veterans were the students who took it in the first year and volunteered to help us) provided detailed excellent tutorials on how to produce designs digitally.  I worked hard on my design and submitted it early July and was pleased to receive the certificate yesterday.

I won’t delve deeply into what permaculture is about.  However, if you look at the certificate you read “The field lies open to the intellect” and so it is not about mysticism or idealism but observing the complexity and patterns of the natural world and then developing a design whether for growing or housing or whatever, which aligns and uses natural forces.  And then there are the 3 ethics and I would say these are more pragmatic than idealistic – 1) care for the earth; 2) care for each other; 3) share the surplus, which can have several interpretations but generally means do not exploit and reinvest the surplus in the system.

Enough said, for the time being.


tale of 2 destroyed desktops

In addition to my nu trac life north of Atlanta, we also have a house in Atlanta.  The gas company decided to install new gas lines in the subdivision where our house is located.  They called in the “locators” who with different colored sprays identified the electricity, water, telephone, sewage and gas lines.  Then with a sophisticated omni-directional drilling machine they bored small diameter tunnels underground from one excavated point to another.  When the drill bit reached its destination they attached the new flexy gas line to it and hauled the drill bit and the new gas line back to the starting point.

The excitement began mid day July 2 – it was a Wednesday and 2 days before July 4, which was on the Friday.  A loud bang was heard in the kitchen accompanied with a burning plastic smell and the house lost power.  The local power company restored power within 3 hours.  However 2 desktops, a Bose CD player, the telephone and other items no longer worked.  Thursday 8am I walked over to the subcontractors who are installing the new gas lines and asked the supervisor for their claims department contact information.  The supervisor denied responsibility because, although his crew hit the power line (he couldn’t deny that) , the power line location had allegedly not been accurately marked.  We are not responsible the supervisor said, the blame lies either with the power company  for not mapping the power line or the locator for not accurately marking it.  He added that this would take weeks to resolve.  Nothing like a challenge to fire me up.  I called the power company and the gas company and left numerous voice mails – it being the day before July 4, many folks were not at work.

2 Dell computers destroyed by power surge

I figured that the desktops might just need a new power supply and, on my way to the farm, I stopped at Fry’s, which is a very impressive electronics store, and bought a new power supply for $12 (a bargain, actually $21 less $9 rebate).  The desktops which had shown no life at all after the power surge now sorta switched on with the new power supply and there was a cursor on the screen but nothing else.  So I decided to buy a new low end desktop and began reinstalling software from CD’s I had kept.  I won’t go into the details except for one challenge I encountered.  The information on the 2 destroyed desktops had not been backed up recently so I wanted to transfer from the old desktop hard drives to the new desktop.  When I bought the new desktop I had asked if it had a bay for a 2nd hard drive and was advised that it did and, when I opened up the new desktop it did have a bay for a 2nd hard drive.  But – there were no connectors to attach to the 2nd hard drive.  In other words I could not simply attach my hard drive to the new computer and transfer the files.  A hard drive needs two connectors – one to provide power for it to spin and the other to save or retrieve information.  I was thinking of powering the hard drive with the new power supply I had purchased and temporarily using the connector to the CD/DVD drive for the hard drive.  But I was concerned this could do damage.  And then I was given the solution – it’s great to have family or friends who know something about technology.

The Sabrent connected to the hard drive.  In the left is the power cord and on the right the USB connection.  All for $15!
The Sabrent connected to the hard drive. On the left is the power cord and on the right the USB connection. All for $15!

There is a very nifty device manufactured by Sabrent which costs just $15 and it both provides the power for the hard drive and also, via a USB hookup transfers information back and forth between the hard drive and the computer.  The device arrived within a few days and, with a lot of googling help, I was able to identify and transfer all the files on the 2 hard drives and the browser book marks and the desktop icons.  And life was back to normal.

And what happened with the claim?  The following Monday, when folks were back at work, I had lengthy calls with the claims departments of the power and gas companies.  They were just 2 of the 4 parties involved since there was also the locating service and the sub-contractors who were installing the new gas lines for the gas company.  But I wanted to keep things simple and so I said to the two utility companies that since their head offices were in our county, if the matter was not quickly resolved, rather than pursuing claims against them individually and the locating company and the sub-contractors, I was simply going to name the 2 big companies as joint defendants and proceed against them in small claims court, and by the time we were finished, their legal costs would probably exceed my damages, which I estimated at $1,600.  Two days later (Wednesday) the power company called and said if my damages were still around $1,600 they would settle up.  On the Thursday, I emailed a very detailed claims analysis with photos and Amazon cut outs and lengthy notes.  On the Friday they said they would pay, and on the following Monday, less than 2 weeks after the incident I received my check for approximately $1,600.

Moral – by DIY I was able to keep the downtime and my costs to a minimum, and keeping my costs low made settlement attractive (a computer technician would have increased the costs significantly).  Also by suggesting small claims court (another DIY resource, I suppose) I was able to motivate the parties to move quickly.


season update – what grew, is growing, and still to come

This morning the sun ducked behind clouds and instead of retreating before the heat I took some pics of growing activity.

At the top of the hill stands a solitary thistle. Thistle, a symbol of Scotland, brings back memories of vacations in the Highlands. And the pipes of the Black Watch swirling through our living room when my Dad, who fought in a Scottish regiment in WW2, would play our favorite record.  Not that it is universally admired – here is a quote from Botanical.com: In agriculture the Thistle is the recognized sign of untidiness and neglect, being found not so much in barren ground, as in good ground not properly cared for.

OLYMPUS DIGITAL CAMERAand here are 2 closeups

OLYMPUS DIGITAL CAMERAOLYMPUS DIGITAL CAMERAThe savage January lows doomed all my fig trees and some blueberries and a hardy citrus.  But the figs, ever optimistic are growing again (and will likely be again felled in January).

OLYMPUS DIGITAL CAMERANow is blueberry and blackberry picking time and each morning I fill a couple yogurt 1 qt containers with fresh pickings in between scoffing down healthy helpings.

blackberry
blackberry

I walk slowly through the high grass to give snakes time to move out of the way, but I was unprepared for the silent yellow wasp attack.  No buzz warning or preliminary fly around, just a quick landing and nasty bite/sting.  And when I returned having lost the contents of 1 container in the hasty exit, they were still there and gave me a 2nd lesson.  I shall have to better time my visits to this blackberry patch.

I ordered and just received 15 chestnut and 15 hazelnut trees and, since it is hot now and some hazelnut were suffering, I am nursing them in my tree nursery next to the deck which provides afternoon sun shade.

a small chestnut - whether it will survive our weather and the inevitable blight attack will be seen
a small chestnut – whether it will survive our weather and the inevitable blight attack will be seen

I have introduced several new features to my tomato growing and will not enumerate on them until I see whether they produce a measurable difference.  There are lots of green tomatoes and, at this time, they are looking good.

OLYMPUS DIGITAL CAMERAThis season has been good, so far – lots of lettuce (tho next year I will do more Cherokee than Black Seeded Simpson which have been insipid), radish, kale etc.  A pleasant surprise has been the size and quality of my   onions – I planted several varieties from bulbs and they all tasted mild and great.  Next on will be cucumbers, okra,  beans, squash, potatoes.  My cucumber plants are growing well.

OLYMPUS DIGITAL CAMERAAnd this week I bought 9 Beuregard sweet potato vines which I planted out in the areas cleared of onions and lettuce.

OLYMPUS DIGITAL CAMERA

In my orchard, which is acquiring more permaculture trappings, I earlier planted a strip of 4 rows of different corn plus beans and squash.  The corn is looking good.

OLYMPUS DIGITAL CAMERAAnd if you look carefully you will see the small squash and bean plants which have some catching up to do.

the three sisters
the three sisters

The late April 15 freeze harmed a number of my apple trees and the peach tree.  However, most importantly, my best apple tree with the sweetest apples was not affected and is bearing heavily.  Here is just one down laden branch (which I really should thin).

OLYMPUS DIGITAL CAMERAThere are so many contenders for imaging – the hop plant reaching greater heights, the muscadine vines ever multiplying.  I shall have to be selective and show one of my onion plant heads which I am allowing to go to seed and provide for next year.

OLYMPUS DIGITAL CAMERA

2 gravity feed tanks with 9 valves

All my irrigation is from harvested rainwater collected from impermeable surfaces, stored in large tanks at the bottom of the hill and then pumped to 2 tanks at the top of the hill for gravity feeding to the orchard and crops.  Today I added my 9th valve to the pipe system for the 2 gravity feed tanks.  Are 9 valves used and are they necessary?  I have concluded – yes.

Here is a ‘photo of the 2 tanks:

2 gravity feed tanks with numerous valves and pipes

And here is a schematic of the pipe system:

tank valves

You can see the 9 numbered valves.  Here are some combinations:
Pumping to tank A – 3C, 4O, 9C (i.e. valve 2 closed, valve 4 open and valve 9 closed)
Pumping to tank B – 3C, 4O, 9O
Harvesting deck roof water – 7O, 6C, 8C (when A is full, water moves via 2 routes)
Water to tree nursery – 7O, 6O, 5O, 3C, 1C, 2C
Gravity feed to downhill from B – 😯
Gravity feed to downhill from A – 7O, 6O, 5C, 3C, 1C, 2O
Gravity feed to tophill – 7O, 6O, 5C, 3C, 2C, 1O
Pump feed to tophill – 4C, 3O, 5C, 6C, 2C, 1O

One of my best innovations is the last combination.  I previously gravity fed my blueberries at tophill with an in situ bubbler system but, because pressure was slight, the distribution was uneven and unreliable.  Now, with the last combination I can switch on the storage tank pump timer at the bottomhill and directly pump and distribute water via a hand held hose to the tophill plantings, which means thorough quick daily watering with daily inspection.

So now, in addition to my daily soduku exercises, I also challenge my mind with correctly setting the various valve combinations for the changing tasks.