I inspected the bee hive last Sunday and on Tuesday I happened by and quickly glanced at the #1 hive. I kept on walking and stopped as my mind deciphered the image – the hive had been attacked. This is the first time it has happened. The hive cover was on one side, the top super was on the ground, the second super half way off, a frame on the ground and the deep slightly askew on the bottom board.
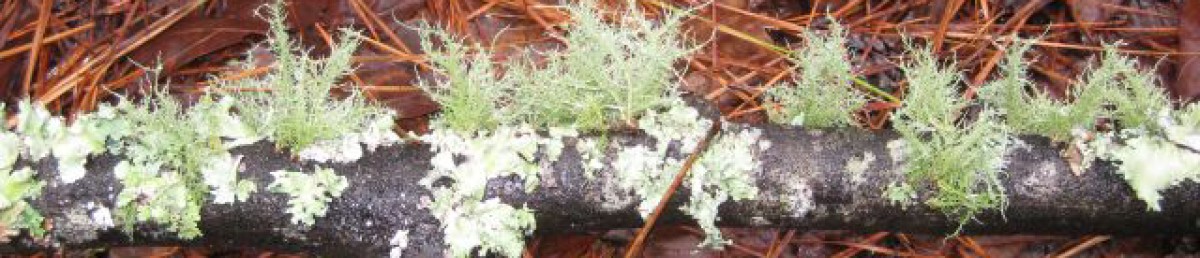
the bee hive after the attack. the wooden frame around it is stapled with plastic in the winter to provide additional protection from the wind and elements
I studied the frames – no honey had been removed. The bee hive boxes were undamaged and there were no claw marks. Was it human or animal? If human, since no honey was taken this must have been a prank. But unlikely to be human since the super on the ground was upside down and a human presumably would have picked it up and placed it down right side up. More likely an animal. But why? It it was after the honey why didn’t it take any – unless the bees drove it off? So a mystery. I reassembled the bee hive and hope the queen is ok.
I mentioned in my previous post that goldenrod and prairie fleabane (member of the aster family) are blooming and a bee favorite.
fleabane – the head of the flower is comprised of lots of little daisy like flowershere is a visitor who in one day removed half of the flowers above it
And the goldenrod is a hot favorite for wasps.
a wasp visiting the goldenrod
And of course for the bee.
a bee takes last opportunity to gather food before winter
In Cherokee county bees attract a lot of interest. I attended the beekeepers’ monthly meeting last Thursday. We are fortunate to have a commercial beekeeper as our coach and guru. I had missed the previous month’s meeting where they discussed inspecting for mites and chemical treatments. The meeting last Thursday was about Fall inspections and feeding.
First as to mites – most of the attendees were doing sugar dustings and mite counts -you sprinkle sugar on the bees and they vigorously groom themselves and each other and the mites fall onto a sticky board at the bottom of the hive and you count them and decide whether chemical treatment is necessary. Seems like most were applying chemical treatments in any case. Now I am still a beginner beekeeper – I think I have graduated from “novice” since I have kept the same bees (or rather their descendants) going since early 2010. And from philosophy or laziness I don’t count mites or do any chemical treatments. The philosophy springs from the belief that intervention usually causes more harm than good. I had some mishaps with some chicken where I tried to help and believe I exacerbated the situation. Even humans (if newspaper accounts are accepted) occasionally/often experience setbacks in hospitals from mishaps. As for bees, I think the lesser experienced of us can harm the queen and upset the equilibrium each time we intrude in the hive, even though with the best of intentions. I think the vigor of the bees and their ability to resist mites etc. is weakened by the poisons we spray in the environment, the poisons we treat them to make them stronger and the stress we create when we open the hive and disturb them (though I have often opened the hive for cursory inspections and not disturbed them at all). I grow organically, my immediate neighbors don’t spray and my bees have been doing fine, though our guru told me it is just a matter of time until the varroa mites and other dreads afflict me.
As for the feeding. Most of the attendees were feeding their bees with sugar mixed with water. Our coach asked who wasn’t feeding their bees and no one raised their hand and I didn’t, since I don’t want to appear controversial. If the bees have no food then now is the time to feed them since if you wait until temperatures fall below 47 degrees it will be too cold for the bees to feed on their sugary liquid food. So you feed them now and they store it in their cells and they partake of it during the wintry months. I don’t feed my bees – if I want them strong and healthy for the tough winter months they will survive much better on their honey than on sugared concoctions – after all that is why they harvest the honey in the first place. However, after all the dire warnings issued at the meeting and given that bee mortality over winter is high (around 30% I think), I concluded that I should take a look at my bees.
The last time I visited the bees was on July 29 of this year. I am certain of the date since I harvested about 4 gallons of honey from my # 1 hive (34 bottles all lid marked “072912”, nominally 12 0zs but filled to the top, say 15 ozs each = 510/128 = 4 gallons). It was my third harvesting in this year from the #1 hive. My #1 hive consists of a deep and two half deeps and I left 4 half frames for the bees expecting they would have sufficient time by summer end to replenish their supplies. During the July harvesting I also inspected my second new hive, which I started earlier this year with conscriptees from the #1 hive plus a new queen bee. It did not have much honey and, since it was its first year, I decided to leave it be.
This morning I inspected both hives. Lots of worker bees (phew! not drones which would indicate no queen) and lots of activity. The #1 hive, disappointingly did not have a lot of honey supplies. The top super had say 30 lbs, very little in the middle super, and the bottom deep had pollen and brood and some honey. I decided to intervene and since it will soon be getting cold, I reversed the supers by putting the top super with the honey above the deep containing the brood.
The #2 hive which consists of two deeps is in good shape. There are 10 full frames in a deep and the top deep, apart from the two outer frames on each side had 6 frames filled with honey. The bottom deep, again with the exception of the outer frames, had honey, pollen and well placed brood.
Conclusions. Now we have the goldenrod and aster in bloom and the bees are hard at work. When the blooms are finished and there is no more food to gather, I shall inspect the hives again and, if the #1 hive is looking thin on the honey side I shall give it a couple of deep frames of honey from the #2 hive. And hopefully that will be enough to get them through the winter.
I mentioned a couple posts ago the battle I am having with Bermudagrass. A few days ago we had really good rains which softened the soil and made it much easier to slowly withdraw the long Bermudagrass shoots. When the ground is dry the shoots clinging to the lumps of sod are easily broken and they remain in the ground to incubate a new invasion. I have a rototiller which I hardly ever use now I subscribe to the view that the spinning tines, which move at a set depth in the ground, create a hardpan in the soil just beyond their reach. However, tiring of forking out the shoots I recruited the tiller with mixed results. The tines were quickly woven with the long shoots which required frequent stopping to disentangle them.
So I gave up and pondered and came up with two new strategies. First defense – I purchased a 40 ft black landscape edging roll ($19) and cut it into four 10 ft lengths, each of which was used to make a circumference around individual blueberry bushes.
10 ft black edging in place around plant with Bermudagrass removed and another 10ft length awaiting deployment
The diameter is about 3.2 ft (pi is 3.1 which is the ratio of a circumference to the diameter) which is sufficient for the time being. Have established the perimeter and dug out the Bermudagrass I will now have to defend against invaders sneaking under or over.
In chess often the best form of defense is attack. One Bermudagrass invested corridor runs between my 20 tomato cages and some young blueberry plantings. From this corridor the Bermudagrass invaded the tomato cages and the blueberries repeatedly this past season. Since we are now in September and temperatures are lower I decided that solarization using clear plastic may be ineffective. Instead I purchased commercial grade 6mm black plastic and, after removing the declining tomatoes and their cages, I covered the entire Bermudagrass area.
commercial grade 6mm black plastic used to deny light to Bermudagrass
Hopefully, now the Bermudagrass is entirely deprived of light, it will weaken and maybe depart. To be monitored.
To secure the plastic in place I cut up some thick branches from a couple of my neighbor’s pine trees which collapsed over the fence into my field.
some of my neighbor’s pine trees which collapsed into my field, lengths of which will be used to pin the black plastic over the Bermudagrass
The wood is thoroughly rotted and when I am done with the black plastic, I will toss the wood into the contour ditches where it will continue to disintegrate and feed the fungi.
the problematic Bermudagrass area now fully covered with black plastic which is secured with pine trees limbs
Neighborly gifts
Another of my neighbors has 12 acres of fields and woods. This spring he offered me some pecans which had grown from his large pecan trees and which had evaded his mower. We decided to wait until it was cooler. Today I gave him some green tomatoes from the recently leveled tomato planting and he suggested we tackle the pecans. He also has a huge black walnut which had several offspring in the vicinity. Although the ground was soft from the recent rains, the pecans and walnuts, individually less than 4ft, had sunk deep tap roots. I did my best to free them but in the end had to sever the tap roots. I took two pecans and one walnut and, for the time being, until their planting area is ready (a week or so), I have planted them alongside one of my figs. The ground is rich, catches the sun nicely and is close to my walk path so I can keep an eye on them and water them frequently. I removed about 60% of their branches and leaves and, to retain moisture and maybe add some nutrients, I covered the base with comfrey leaves.
not that easy to see – in the middle is a fig tree from a cutting earlier this year, close to it on the right is a black walnut and on the left are two pecan saplings and their bases are covered with comfrey leaves
One of the pecans he had identified for me to remove was actually a coppicing – he had cut the 3 inch trunk close to the ground some time ago and new growth made it look like a young tree. I took a cutting of this new growth which I shall try start with other hardwood cuttings I shall be taking in the next few weeks.
Finally, the black walnut tree, which produced the sapling had large walnuts, and I took a few and will bury them and maybe get some seedlings.
two large walnuts from my neighbor which may grow into black walnut trees
When I began planting my vines and blueberry bushes in the field, Bermudagrass (also known as “devil grass” because it can be an highly aggressive difficult to eradicate weed) was not a problem. Yes it lurked among the broad bladed tall grasses but it was one of many. Now it is a major problem and it can thank me!
Bermudagrass is a wiry perennial (easy to cut your fingers if you are pulling hard on it), and is low-growing (hence easily checked by taller grasses) and it spreads by above ground shoots called stolons and below ground shoots called rhizomes. Every so often at a node on the shoot, a root is sent deep into the soil with at least two objectives: secure water in drought conditions, and act as an anchor to resist my eradication efforts.
I made two big mistakes. For each new planting I diligently dug out a 2 ft diameter hole, added a copious helping of my high grade compost and inserted and watered the new plant. This was mistake #1. Think of a house in a run down neighborhood which has been ignored until new occupants arrive with expensive possessions. The house attracts interest and invaders move in to seize the possessions. Previously it wasn’t worth the trouble, now there is booty and the risk of being caught (in the case of a weed, being plucked and ejected) is more than offset by the rich rewards. And who was the opportunistic invader – quick footed Bermudagrass stolons and rhizomes.
Its called the competitive exclusion principle where two species compete for the same niche – my high grade compost. The species with the greatest advantage will drive the other to exclusion. Blueberry bushes have short roots and they didn’t stand a chance and were overwhelmed by the Bermudagrass. As were too, my raspberries.
an insipid blueberry bush with adjacent pulled back mass of Bermudagrass
My logic had been that if I nourish and water the plants, they will quickly grow and outshade the competition. And this would probably have worked with the other grasses, but not against the overwhelming rapacity of Bermudagrass.
But I made a second mistake, which was just as devastating. I gave the Bermuda grass a decisive advantage over the other grasses competing for the 2ft circle. I mulched extensively with newspaper and woodchips. I first laid the newspaper, at least 8 pages thick, and then the 4″ layer of woodchips above so the chips would not compete with the shrub roots for nitrogen. The thick mulch effectively excluded all the other grasses and competition, but not the Bermuda grass. It quickly despatched scout rhizomes deep into the mulch and when they reported back on the superior quality of the compost an advance guard and then an entire regiment quickly invaded. So the deep mulching helped the Bermuda by favoring its competitive advantage of being able to delve in the dark into mulches on long exploratory missions and then to tunnel to the surface to capture sunlight.
Bermudagrass shoots at least 2 ft in length on the underside of thick wad of newspaper mulch
I suspect, but cannot prove, that the Bermudagrass shoots may host agents which demoralize the roots of my shrubs (allelopathic?).
And now I am hard at work with deep digging to locate and remove the rhizomes. And this time I am using plastic edging to guard the frontiers, which I hope will stop most of the Bermudagrass, but I shall have to be continuously vigilant.
Contour ditches
In a previous post I mentioned that large grasses and plants had moved into my contour ditches, which were established to catch, retain and infiltrate rainwater sliding down the hill. Cleverly some of the plants established themselves on the walls of the ditch – thus they were close to the entrapped rainwater at the bottom of the ditch but did not have to endure having their feet in the water for extended periods of time. My solution, as previously mentioned was to stoke the ditches with tree trunks and branches (stoke as in stoking a fireplace). A year ago some large pine trees were brought down with base trunk diameters exceeding 36″. My bobcat cuts a 24″ wide trench. So today I chainsawed the trunks of the pine trees, which did not exceed a 24″ diameter, into 10 ft lengths and relocated them to one of my contour ditches. Rather than have the nutrients and organisms of the pine tree logs slowly dissipate into the air or the field, they will now be embraced by the soil in the ditch and nurture the roots of my plantings. Also they will prevent new weedy growth in the ditches and will absorb rainwater and retain it. Hopefully, this time round, a win win solution.
+20″ diameter pine tree trunks now berthed in a contour ditch
My interest is moving from annual vegetable crops to tree crops and perennials. Perhaps the bonanza of pears from my Kieffer, Warren and Giant Korean, plus lots of figs from an old established tree have spurred me on.
With the summer heat deterring outdoor activity for much of the day, I have been reading extensively. Now that “Farmers of Forty Centuries” by F.H King (published 1911) is behind me, I moved on to “Tree Crops a Permanent Agriculture” by JR Smith published 1929 (freely downloadable) and enjoyed part one (titled “The Philosophy”) and read extracts on selected trees, all of which was very informative and relevant since the examples were taken from the southeast.
My knowledge and interest in trees was further expanded by a visit last week to Oregon including drives through large state forests and a 3 hour visit to the World Forestry Center. Located in Washington Park in Portland, the center’s mission is to “educate and inform people about the world’s forests and trees, and their importance to all life, in order to promote a balanced and sustainablefuture.” There is a wealth of information and I enjoyed the exhibits on different forests of the world and logging practices. Much emphasis was made of sustainable practices and yet it appeared to me that the practices they were promoting were not as sustainable as they could have been. It seems they monocrop i.e. after harvesting timber the new plantings are all of the same species. I wonder if this is truly sustainable? You don’t get diversity of plantings or of associated wildlife or other life forms, and, with no diversity it is much easier for a disease or insect attack to spread across the whole forest. A more diversified planting will produce a more varied canopy, encourage more diversity, with species perhaps supplementing each other and making better use of resources, and should be more resilient. Granted, when it comes to harvesting it is much easier to process similarly sized and similar tree species but in the long term is this the best practice?
I am now reading a very well written, insightful magnus opus – Edible Forest Gardens by Jacke and Toensmeier. Although I am familiar with a number of the concepts and there is some repetition, it is really a good read. I am also working on converting my fruit orchard to an edible forest garden by introducing lower canopy trees, shrubs, herbs and edible roots, and the book is a good reference. I just joined the Atlanta Fruits Yahoo group and there is a wealth of information in posts made over the past 10 years of what works and doesn’t work in the Atlanta area, which is proximate to my growing area.
Oh, I forgot to mention – I signed up for and am participating in a Coursera online course with 26,000 other students. The topic is “Introduction to Sustainability”. A 600 page textbook (current – published May 2012) is provided and each week for the 8 week duration there is required reading, lecture videos to watch and articles to read, plus quizzes to complete. And we are encouraged to participate in the forums where students from across the world (young and old) exchange information and views. And it is interesting, challenging and free!
In the woods I came across losts of fungal growth as a result of the recent rains. In particular groups of strange flower looking mushrooms –
Geastrum fimbriatum (Fringed Earthstar)
Geastrum means earthstar. The manual shows them white in color with a note that at maturity the spore case is dark brown. My visitors are black and I assume I missed their earlier appearance (or my identification may be wrong).
The name datura comes from the Hindu dhatura meaning thorn apple.
you can spot the young thorn apple
Here is a close up view of the thorn apple
Datura – as yet small spiny fruit
Many of these have taken up residency. What attracts me to them is their flower for which they are sometimes called Moonflower or Angel’s Trumpet. My bees love them but the entrance is constricted.
entrance to the Moonflower – the bees struggle to get in, you can see one working her way down
So this may be the reason why my enterprising bees cut a hole in the side for easier access
an access and egress hole
And here is a worker on her way out
a worker bee exiting the Moonflower
Datura is an hallucinogen and, in excess, a poison. My neighbor complained that the bees were less focused on his vegetables now this unusual plant was in bloom. Serious and dedicated as my bees are, perhaps they were also getting a little high from their visits.
I have an abundance of Pokeweed or Pokeberry with the hanging berries providing additional fruit for the songbirds.
Summer crops have been going well and now I am into the season of the pear. Though a few setbacks – my assorted cucumber plants delivered the cucumbers – large succulent cucumbers – but the cucumber pickelworm, a small green caterpillar is now resident in almost all of them. I will probably uproot the plants and start my fall crops in their place and next year keep a vigilant lookout for the larvae which appear at the budding stage.
It is nice to be surprised. I planted four pear trees. The blossoms on the Eldorado pear (purchased Mar ’09) were frost killed. I have been waiting patiently for the pears on the other three trees to ripen. All the pears feel firm so I decided to wait until the trees began dropping their pears and then I would start snacking. The past week I (and the chickens) have enjoyed the pears of the Warren pear tree (purchased Feb ’07) and the Kieffer pear tree (purchased May ’10). Although their exteriors were dimpled and uneven there were no worm infestations. Their flesh is firm, juicy and the Kieffer is slightly sweet, the Warren slightly sour.
Kieffer pear, branches borne down by pears, branches and trunk pliable so note the stake and collar to secure the trunk
The branches of both these trees seem very pliable and the weight of the pears has lowered some of the branches to almost ground level. Understandable that in Asia they can scaffold the branches horizontally.
the branches of the Warren pear are also weighted down by the pears
However the fourth pear tree has not dropped any of its pears, also it branches are rigid and grow almost vertically. A mystery tree.
this is the smallest of the pear trees, its branches grow vertically yet they carry large heavy pears
It has just 8 pears but they are very large, round, russet colored and unblemished. Since it has so few pears I would rather eat them now than risk them falling on the ground for other feasters.
the Giant Korean pear is perfectly round and unblemished, as are the leaves
So I picked my first pear and it was delicious. No imperfections on the exterior or interior. The flesh is firm, succulent and slightly sweet. Unlike the store bought pears which are very sweet but have soft, easily bruised flesh. A different type of pear eating experience.
an example, in situ, of a Giant Korean pear
My records tell me this is a Giant Korean pear which I purchased in March ’09. It is still small but I shall nurture it and take a few cuttings as well. I am especially impressed that it appears to be completely disease and insect resistant – well adapted for my environment.
Finally, a pic of some sunflowers.
some happy sunflowers
The late season cosmos are beginning to flower and soon I should have a stupendous display.
I notice the butterflies love the zinnia plantings in the vegetable patch.
this large butterfly flies away when I approach but then returns
I have not lost any more chicken to predators, for which I thank my handsome rooster. His aggressiveness to some of the chickens seems to have abated. Here he is with Lady Macbeth, who is still missing feathers from the back of her head, but they now seem on cordial terms.
Buffy the rooster and his sister and fellow Buff Orpington, the Lady Macbeth
And the rains we have fortunately received have promoted sprinklings of mushrooms throughout the woods and perhaps encouraged the turtles to explore their surroundings.
yet another turtle on the footpath
Finally, I gave some of the wax collected from the last honey harvesting session to my neighbor and she worked some magic and produced a wax cake (or so it looks). She said she will melt and strain it one more time, perhaps with cheesecloth.
I have excavated at least half a dozen contour ditches and, in the months following construction, they performed as advertised. After heavy rains they dutifully filled with water and, because they are on contour i.e. horizontal, they held the rainwater and allowed it to infiltrate into the soil benefiting the plantings on each side of the ditch (actually the plantings on the side of the contour ditches which adjoined the lower slope did better, probably because there was more topsoil on that side which allowed the water to move more easily to their roots).
So why a “rethinking” of contour ditches? The bottom of the ditch has proven an ideal breeding ground for high growing grasses and wildflowers (I avoid the perjorative “weed” – these invaders I am sure serve some purpose). The reason is because the water sliding down the hill brings with it soil and nutrients and the easy access to ample water at the bottom of the ditch is fuel enough for growth. So the water which should be infiltrating the ground is now sponsoring these tall growers. The extensive growth hinders access to the plantings and because the contour ditches are now semi-concealed it is easy for the unwary visitor to be injured.
contour ditch between two rows of berry plants – the berry plants are small and the tall growth locates the ditch
I recently completed reading “Farmers of Forty Centuries” by F.H. King. An excellent book filled with insights. It unlocks the techniques used by the Chinese, Japanese and Koreans who farmed the same land for 4,000 years without our modern fertilizers and ‘cides and with dense populations too. If anything meets the definition of “sustainable farming” it must be their practices. After manures (animal and human) their main source of nutrients was the soil and organic matter lodged in their canals. So their canals like my contour ditches also filled up and they turned their problem into a solution. This got me thinking – why not remove the growth in the contour ditches and stack it for use at a later date.
an example of the growth and soil which had filled one of the contour ditches
now you can see where one of the contour ditches was lurking, cleared with the help of my bobcat and stump remover, teeth of which visible at bottom of ‘photo
Another of their techniques was to either bury their compost or cover it with mud. The logic, I assume is this accelerates breakdown by keeping the contents moist, and also reduces loss of nutrients to the air. So I have decided to fill the enlarged contour ditches first with material leveled by my scythe such as long grasses and other growth, and then with tree branches and trunks. I am hopeful that these materials will absorb and hold the rainwater and, as they degrade, will provide nutrients to the soil. Two other advantages – the wood will be stacked to just above ground level so less risk of injury and the wood will prevent the growth of grasses and unwanted plants.
one of the contour ditches is alongside tomatoes. I am filling it with grasses leveled by my scythe
The berry contour ditch does not extend all the way south to the pine trees since this area does not receive much sunlight. But when it rains a lot of rainwater goes down the hill south of and beyond the contour ditches. So while I had my bobcat out I decided to angle a feeder ditch which could catch this water as it traveled over the ground and direct it to the contour ditch.
feeder ditch extending from the woods to one of the contour ditches designed to redirect rainwater which swamped the foot of the hill
Yesterday, Sunday, I had my best honey harvest in the two years I have been collecting honey from my bees. I filled just over 32 pint jars, which equals 4 gallons. Earlier this year (4/29 and 6/3) I collected 1.2 and 1.4 gallons of honey, so total yield is 6.6 gallons. If I assume an average weight of 12 lbs per gallon, this is about 80 lbs of honey, which is good going for me. But my activities were tinged with regrets. I made some mistakes and regret them.
I have two hives. The one I started this year with members from the main hive is doing ok but not great and, after a quick inspection, I decided it did not have honey to contribute. So I focused on my main hive which I have had for 2 plus years. It has 3 hive bodies or boxes on top of each other. The bottom is a deep (9.625″ high) and the two above it are medium supers (6.625″ high). I had placed the super I harvested in June and April in the middle and so the super on top had not been harvested this year. I inspected the first frame in the top super (there are 10 frames in a box) and saw it was filled with honey. So I concluded all the other frames in the top super were also filled with honey (my first mistake – I should have examined the individual frames).
bee hive (1 deep, 2 supers and sun umbrella and structure for winter rigging) after honey harvest – note containers of wax scrappings left for recycling
I don’t use chemicals on my bees with one exception – I use butyric acid, which is vile smelling, to make the bees leave the hive body. I am now reconsidering this practice. Anyhow, I applied the butyric acid to the fume board, which is a lid you place above the hive body you wish to harvest, and the bees all departed the hive body or so I thought. Then I transported the hive body to the kitchen where the harvesting and extraction equipment awaited.
Before moving the hives into the kitchen I inspected them outside and found a lot of bees still on the middle frames. I looked to see if they included the queen, did not see her and with a bee brush I gently brushed them off the frames. To my surprise they held on tenaciously and it took several attempts to get them all off. Then I moved the frames into the kitchen.
I thought all 10 frames would contain honey and the first 3 did. But, to my upset, the next 4 contained larva. In other words, the queen and her retinue had moved up from the deep and she had laid eggs in the top super. I harvested honey from the 3 frames at the other end and then returned the 10 frames (6 empty and 4 with brood) to the hive. It had not occurred to me that the queen could have moved to the top super. The bee club I belong to encourages the use of a queen excluder (a metal grill which prevents the queen moving up) but I chose not to use it.
When I returned the top super I carefully went through the frames in the deep and middle super and selected 6 frames laden with honey which I harvested, without mishaps.
I was upset for several reasons. The bees which clung to the frames were nurse bees not foragers. Nurse bees are young bees which have not yet been outside the hive. Therefore they have not performed their orientation flights, which means that the bees I had buzzing outside the kitchen did not know where they were or how to return to the hive. I could tell they were nurse bees because when they landed close I could see from their size, fuzziness and gentle color they were young bees. I tried to make amends by placing pieces of wax cuttings containing honey on plates outside the kitchen and when the offerings were covered with bees I covered the plates and moved the assembly to the hive entrance and hopefully some found their way back. But at the end of the day there were still a lot of bees buzzing around, some of which were the forever lost nurse bees. I think when I placed the wax scraps outside, word was quickly transmitted to the hives and a lot of the bees which were flying around were seasoned foragers bent on opportunistic honey treasure.
My second concern and a bigger concern was that somewhere amongst my missteps I may have lost or done in the queen. I hope not. My third concern is the larva (my future bees) could have been damaged from the exposure to the butyric acid. I now read that in Europe there are concerns about the use of butyric acid and next year I shall probably not use it. I could develop more concerns such as whether, with nurse bees absent, the functions of the hive will continue normally, but I will stop.
So a very good honey harvest, with a number of honey frames left unharvested for the bees use, but some regrets.


")


