I have taken several MOOCs (internet courses) given by University of Illinois on 3D printing and the most recent was on 3D printing software. The software, which was free to students, was provided by Autodesk and included Sketchbook (for sketching), Tinkercad (an easy to use CAD design tool) and Fusion 360 (sophisticated computer design, modeling, etc. software).
Tinkercad and Fusion 360 convert ideas into 3D models. Scanning creates a 3D model from a physical object such as if you wished to make a replacement part or copy an artifact in a museum or a miniature bust of friends. Once you have the 3D model you create a physical replica by printing it with a 3D printer. The scan can be made with sophisticated structured light scanners or by photogrammetry using photographs taken with a regular camera. I will outline how I proceeded with my iPhone, but to do it yourself you should take the course, which is free, or $79 if you wish to participate in the assignments and earn a certificate, which is what I did.
The picture at the top of the post shows the rooster model which I scanned to produce a 3D print. If you follow this link –
you will see the 3D model I produced. You can rotate and look at from all directions.
I took 44 pictures of the rooster with my iphone from all angles except from underneath. Important not to move the rooster or change the lighting or lens zoom, so that the software which stitches all the pics together can use the constant background to figure from where the pics were taken. Since I could not take pics from below, the bottom of the model appears unfinished.
I uploaded the pics to Agisoft Photoscan Pro, which is available free for 30 day trial. There are several steps – align the photos, build a sparse point cloud, delete extraneous background, build a dense point cloud, delete extraneous material, build a mesh and build texture. I then exported to NetFabb for more procedures and then exported to Sketchfab where I published it, which means it can be seen by anyone with the internet link.
The MOOC was fun (relatively easy assignments) and interesting and I will use the techniques for my own 3D printer.
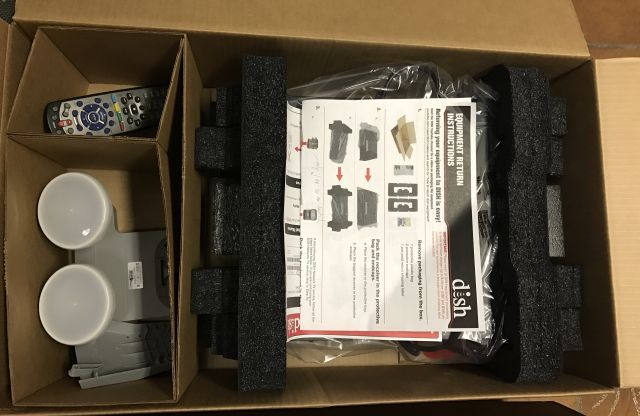
It all began when the tv satellite bill for the Atlanta house jumped unexpectedly. The company explained I was beyond the 6 month special discount period and offered to split the difference between old rate and new rate. I decided to become a “cord-cutter” and canceled the contract. They sent me a shipping box and I disconnected the LNB from the satellite dish and placed it and the receiver and remote in the box and bade farewell at the UPS office.
“Now what?” M. demanded to know. She did not watch shows or movies but was hooked on Classic Arts Showcase (“CAS”).
I decided to switch to a mix of antenna tv and internet tv. For the antenna I followed lessons learned while installing an antenna in the log cabin (see my Sept 6, 2016 post) and with a 16dB amplifier at the mast was able to access > 30 stations, none of which appealed to M.
For internet tv, after briefly considering the Google and Apple options, I plumbed for Roku. Roku does not have a recorder as did my satellite service but I can access previous output so a recorder is not critical. I discovered Pluto which consolidates a number of stations and it has “The Opera Network” but M. was not appeased. Met. Opera on demand was interesting to her but not the same. Then I discovered Qello channel for concert films and music documentaries, and peace appeared to return for a monthly cost of $7.95. But then I was told Qello was not as nice as CAS. CAS is broadcast but my antenna could not access the broadcast channels. I found I could access CAS via laptop and watch on tv via hdmi cord. M. thought this was cumbersome. I then discovered CAS is available on Nowhere TV which is available as a Roku private channel with input of a special code. Peace is restored.
Roku made obvious that our Earthlink dsl 6mbps speed was inadequate for simultaneous video watching and computer use. After lengthy calls with ATT and Earthlink I again decided to support the little guy (as I did with the Roku decision) and signed up for the Earthlink hyperlink connection which now provides download speeds of 18 mbps to 24 mbps – great. The ATT installer (although the contract is with Earthlink the service is provided by ATT) explained that if our house was closer to the fiber optic connection point the speed would be much faster (at least double) but we are towards the end of a long copper run. By eliminating some unnecessary POTS services, the additional cost for hyperlink is minimal.
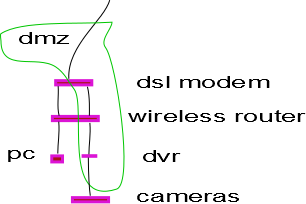
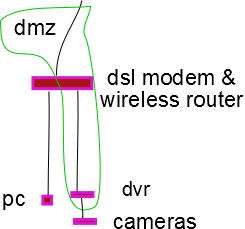
Instead of a separate dsl modem and wireless router, the 2 are combined and this simplifies accessing my cameras remotely. The modem and router both act as firewalls and both had to be programmed to permit external access to the dvr (digital video recorder) which controls my cameras.
with a dmz (demilitarized zone) the modem and router no longer bar external access to the dvr
Now with dsl and router combined only one device has to be programmed.
of course there is a risk that with firewall removed my cameras may be hijacked & so I have to use strong passwords
And finally, after saving some by fixing a water well problem and by eliminating monthly satellite bill, I splurged and upgraded my iPhone 4 to an iPhone 7. The iPhone 4 works fine for calls, texting and email. However, several important apps such as the app for remotely viewing my house cameras now require IOS 8 or higher and iPhone 4 does not support IOS 8. Reluctantly I decided, it was time for a change and I am enjoying all the upgraded apps not previously accessible and a very good camera.
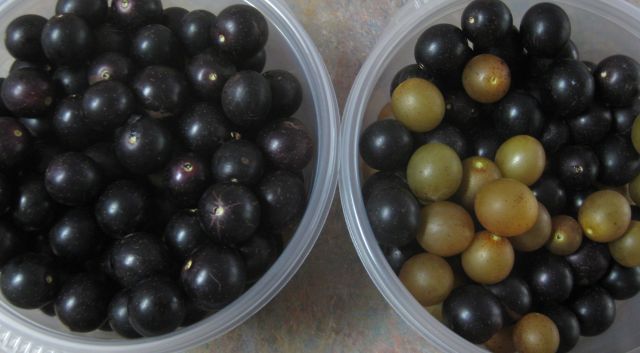
Unlike July which was hot and dry, August has been tempered with rain showers and cloudy days. My property 50 miles north of Atlanta has received a lot of rain while Atlanta very little – could this be the heat island effect? The rain has filled out my muscadine, including the golden scuppernong, shown above and throughout the day they are visited by yellow jackets, wasps and hornets, and me in the earlier morning.
With the exception of the Parks Whopper, most of my tomatoes are done. The Whopper has been an exceptional producer – the first to produce large size tomatoes and the only one still producing, though taste not comparable with the heirlooms.
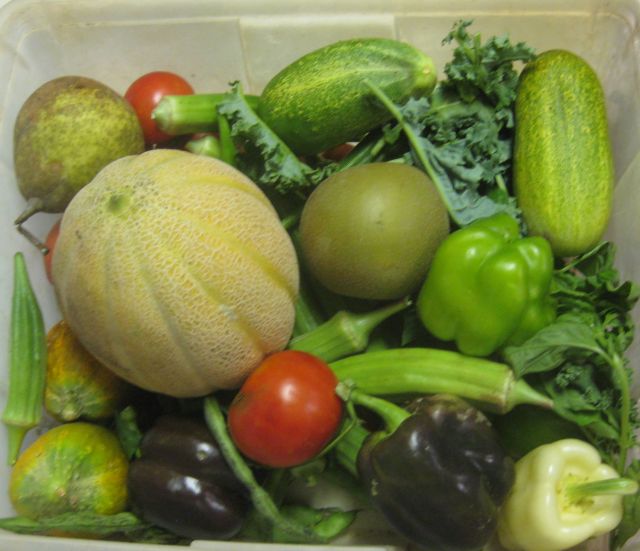
a day’s collection
My colored sweet peppers and okra are flourishing. Now the cantaloupe and watermelon are ripening, and tasting good. Cucumbers and beans are winding down. After removing the tomato plants I have been seeding the tomato cages with peas – will see how this works out. And planting greens in the raised beds – turnips, mustard, kale and collard, and soon the radishes.
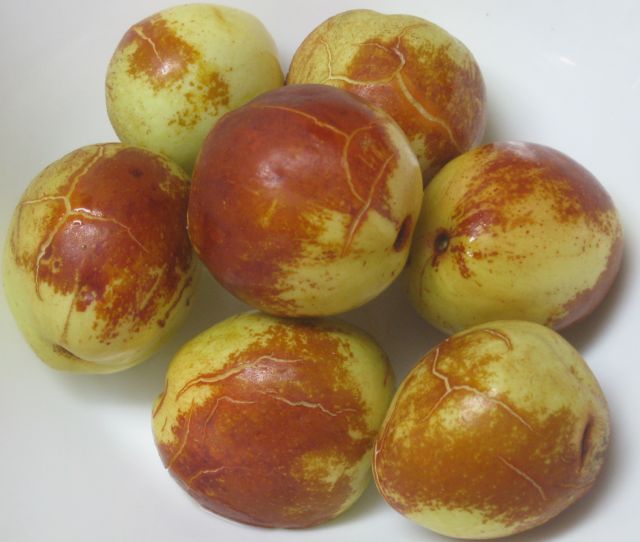
As mentioned in my previous post, lot of pears and muscadine grapes. Some apple varieties still to produce and jujube should be edible in a few weeks although we have begun snacking.
Lang Jujube ripens to a mahogany red color. I planted opposite it a Li Jujube which is not yet fruit bearing.the Kieffer pear (top right) is v. large and sweet. Top left a Giant Korean pear, bottom left a Paduckah apple and bottom right the Anna Apple from Israel with low chill hours requirement
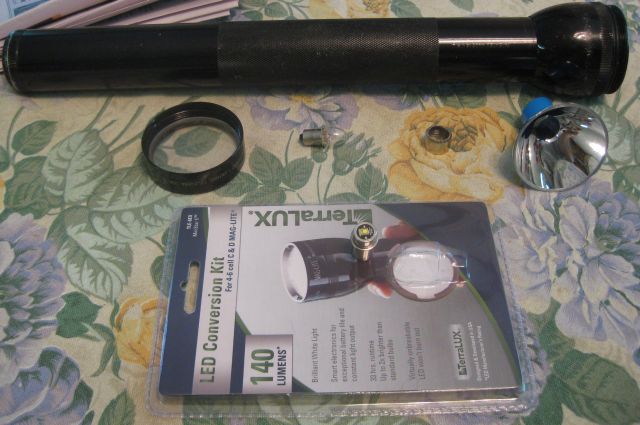
maglite led conversion
With the boxy yellow Eveready LED floating lantern available for <$5, it is difficult to rationalize holding onto the mag-lite flashlights. Except they are so well made and I really did not want to toss my large 4 D cell mag-lite. So I ordered the TerraLux LED conversion kit (140 lumens, $17.48) and it is easy enough to replace the bulb.
a quick replacement of conventional bulb with new LED
Battery life and brightness are greatly increased and I have a handy club, if needed.
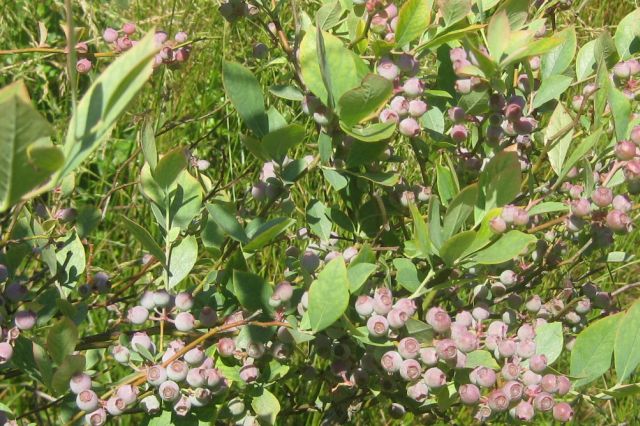
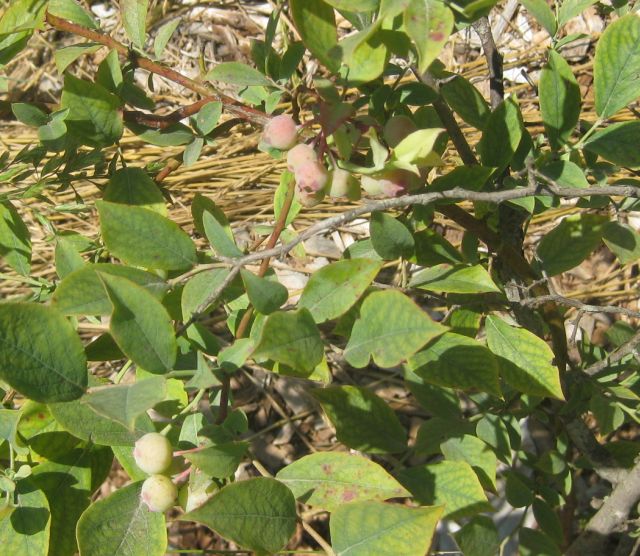
I showed M. the berry laden blueberry plants and ventured they would be ready for picking within a few weeks. But why are the leaves yellow? she asked and drew my attention, as she usually does, to what I had missed. Yellow leaves with green veins can indicate the plant is not receiving enough iron (iron chlorosis) since iron produces cholorphyll which makes the leaves green which enables photosynthesis, sugar production and growth. Blueberries thrive on acid soil (between 4 and 5) and if the soil is not sufficiently acid they cannot uptake iron.
Following my pH experiments last week I decided to sample the pH of my blueberry plants. I selected a sample from each of 3 plants, mixed each sample in a separate container with distilled water, and followed my testing protocol: 1) rinse meter in distilled water; 2) put meter in 4.0 buffer solution – it read 4.1 great; 3) rinse meter in distilled water; 4) put meter in 6.9 buffer solution – it read 6.9 great; 5) rinse meter; 6) put meter in soil sample 1 – it read 6.6; 7) rinse meter; 8) put meter in soil sample 2 – it read 7.4; 9) rinse meter; 10) put meter in sample 3 it read 6.3. Each immersion was for 1 minute and water temp around 65 deg F.
this plant has never really grown over the years, has few berries and has 7.4 pH, no surprise
I was expecting lower pH readings since earlier in the year I had purchased and added sulfur powder to the soil of the blueberry plants. I mentioned to M. that when taking the samples I had noticed sulfur powder in the soil (it is very yellow and easily seen) and she said that was because it had not been absorbed. The sulfur powder I am using does not dissolve in water.
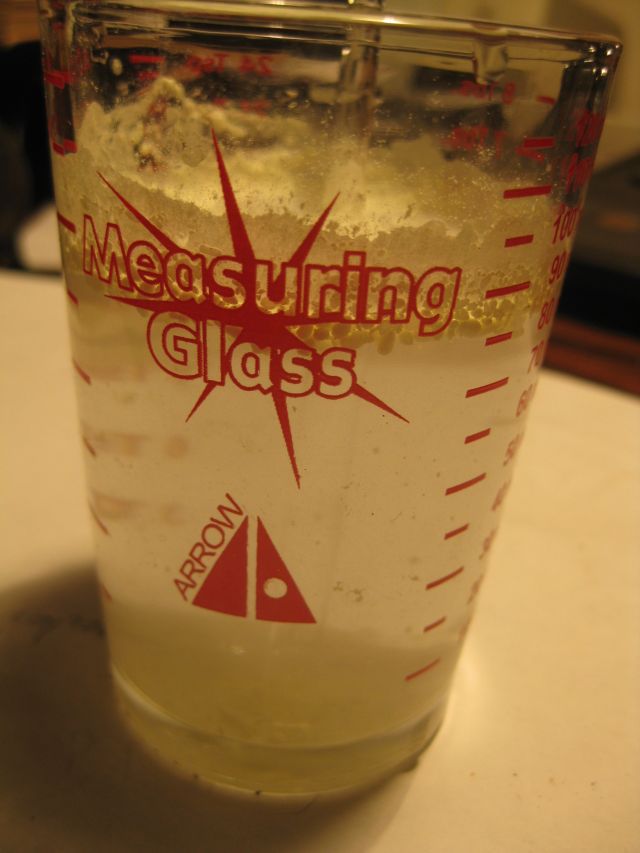
sulfur powder floats on top of the water or in clumps below the surface even after vigorous stirring
I mixed some sulfur powder with distilled water and the pH was 6.6 about what it would have been without the powder, so the sulfur powder was not interacting with the water. M. explained that sulfur loving bacteria, which are equipped with the necessary enzymes, are needed to transform the sulfur powder into soluble form. So the sulfur I added in spring had not yet been transformed and apparently this is a slow process which takes time. It would be quicker if we found some sulfur loving bacteria and added them to the soil, but this is an unlikely route.
So what to do in the meantime? There are synthetic iron chelates (a chelate is a soluble form of the mineral which makes it accessible to the plant) which will work quickly but this is at odds with my organic philosophy. The yellowing blueberry leaves do not presage a good blueberry harvest. Short term remedy – we researched and ordered an organic iron foliar spray which will work directly on the leaves and with some luck (if I don’t over apply or under apply) may get them normal looking and back to their photosynthesis work.
Also, if you look carefully at the leaves you may notice some red blotches which could indicate magnesium deficiency so I will provide an epsom salts drink to the plants as well.
The pH (acidity/alkilinity) is an important must know for growing vegetables, fruits and berries. Blueberries notoriously love acid conditions. Tomatoes like a pH range between 5.5 to 7.5. Since pH can range from 1 (very acid) to 14 (very alkaline) it follows that 7 is neutral. I have tried over the years to independently determine my soil’s pH, with little success. I have sent samples to the extension service for general soil analysis but have always wanted to determine pH myself.
The pH strips I purchased were little help to me since I had difficulty confidently matching the color on the strip after it had been dipped into the liquid I was testing, with the pH graded color chart. An inexpensive pH meter was also little help to me.
I decided to go upmarket and purchased a laboratory grade meter and 7.0 buffer, electrolyte cleaning and storage solutions and I again got unusual results. This may be because I purchased the meter for a discounted price from an alternative supplier and the electrode bulb may have dried before it reached me (I subsequently learned that a dried out bulb doesn’t work) or after it reached me due to my inexperience.
I probably needed a new replacement electrode but this cost >$60 and I was not motivated to go this route. Then it occurred to me that a) I do not need laboratory grade equipment; and b) a whole lot of decent electronic instruments have been flooding the market at much lower prices than the well known brands and should work decently.
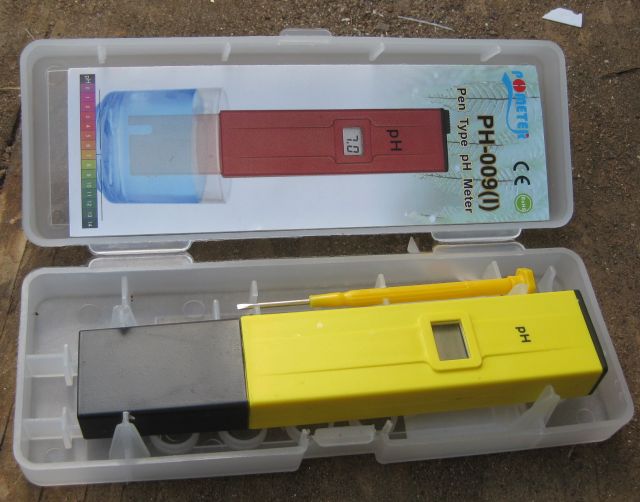
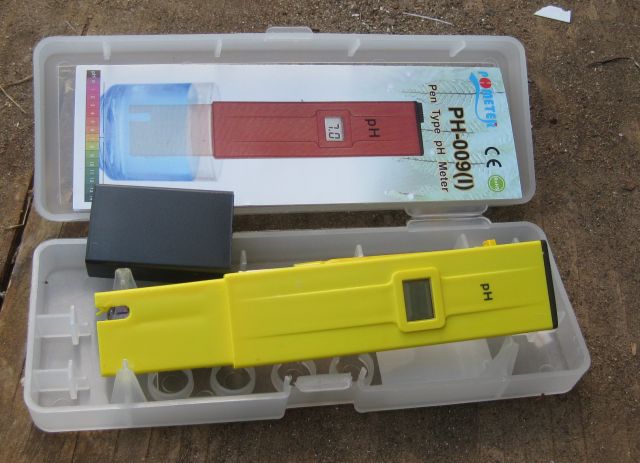
So I studied the options and purchasers’ comments on Amazon and purchased the pH tester below for $11.10 total which included 2 packets of buffer powder.
my new ph meter
I purchased a gallon of distilled water and made up the 2 buffer solutions by dissolving each packet into a separate container holding 250ml of distilled water. The instructions said to use deionized water for preparing the buffer solutions and to use distilled water for rinsing the electrode. I figured nothing could beat distilled water and I had no deionized water available so I made up the solutions with distilled water (more about this later).
my 2 buffer solutions – pH 4.01 and pH 6.86
Now the moment of truth – as instructed I rinsed the electrode with distilled water and then immersed it into the 6.86 pH solution. The meter read 6.7 and with the small screwdriver provided, I adjusted the reading to 6.9. I rinsed the electrode again and put it into the 4.0 pH solution and it read 4.0. I was seriously impressed – this $11 instrument really worked. I rinsed it again and measured the pH of distilled water expecting 7.0 (neutral) and it read 5.5 what the !!!!. Surely distilled water is neutral! Back into the 6.86 solution and it read 6.9, rinsed and back into the 4.0 solution and it read 4.0 and back into the distilled water and again it read 5.5. The meter appeared consistent.
So I pressed ahead. My rainwater measured 4.9 (acid rain?) and my well water 6.0. Time to do the tomatoes – I took 3 soil samples from 3 different tomato beds – 2 samples from beds prepared this year and 1 from a bed I have used for several years. Each sample I mixed with distilled water and then filtered the solution to remove large abrasive particles.
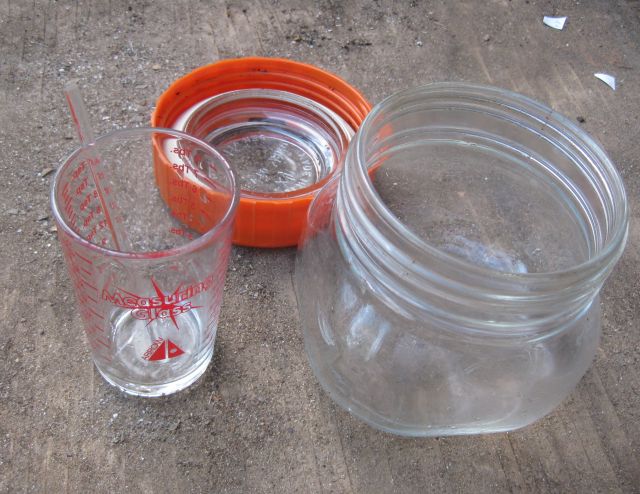
some of my utensils – a glass stirring rod, a measuring beaker and a jar to hold the solution being tested
Samples 1 & 2 both read 6.7 and sample 3 read 7.8. Wow! – a big difference. Then I remembered that I had copiously applied lime and wood ash to the existing bed in previous years so the high alkaline reading made sense. My conclusion was that none of the beds required liming.
The next day I began over again. The 6.86 buffer solution read 6.8, and the 4.0 solution now read 4.3 so I adjusted it to 4.0. and then rinsed and retested the meter on both buffer solutions and they both read true. I mixed coffee grounds with distilled water and the pH was 6.0. My comfrey and coffee compost tea was 5.5 – made using rainwater which had read 4.9 so this made sense. And I took 2 more samples from the bed which read 7.8 the previous day and they read 7.0 and 7.3 so the bed was too alkaline.
It all seemed to make sense except for one big and growing concern – why was the pH of the distilled water 5.5 and was this low pH affecting all the readings of the samples which had been mixed with distilled water. For example if with a soil sample and distilled water solution I get a pH of 7.3 and the distilled water by itself has a pH of 5.5 does this mean the soil sample if mixed with water with a neutral pH (7.0) will have a much higher pH reading?
And why does distilled water have such a low pH? Apparently distilled water when produced has a 7 pH but it reacts with CO2 (carbon dioxide) to produce a mild carbonic acid which lowers the pH of the water. It appears that the pH of distilled water is easily influenced by what it mixes with. My analogy is a shopping cart – if empty and you push with a finger it will move some distance. If heavily loaded then a 1 finger push will barely budge it. If the distilled water is the empty cart and the CO2 moves it one direction then the pH of a soil sample (I would like to think as a one handed push) will overcome the 1 finger push and get it to where it should be. Very simplistic and unproven.
I bought another gallon of distilled water from another large chain and its pH was 5.0. Now I could resolve matters by buying deionized water but it cost >$25 a gallon vs. $1.72 a gallon for distilled water. There is another solution – how about using bottled drinking water. I tested one sample and its pH was 7.4 – much closer to the neutral 7.0. If I mix the soil sample with drinking water with a 7 pH will it give a more accurate result than if mixed with 5.5 pH distilled water?
So a simple test. I filled a container with 200ml of distilled water and another with 200ml of bottled drinking water. And added a small quantity of lime to both and stirred and measured their pH’s. Lime is alkaline so you would think the lime mixed with the 7.4 pH drinking water will have a higher pH than the lime mixed with the 5.5 pH distilled water. And the result?
The drinking water had a pH of 8.4 and the distilled water a pH of 9.7! (Repeat tests with 2 drinking water solutions and 2 distilled water solutions gave pH’s of 8.6 for the former and 9.4 for the latter – a similar trend). So distilled water with a lower starting pH gave a higher pH result when mixed, compared with the drinking water which has a higher starting pH. Using my analogy, the distilled water is a very light cart with well greased wheels and the drinking water is heavily laden and moves sluggishly. I am not scientifically trained so don’t rely on my findings – if this is important to you do your own tests.
For my purposes I will continue using distilled water for my soil pH testing and will not fork out for deionized water.
FYI – a friend who is qualified in this area, says this is a long boring post; not using deionized water for the buffer solutions invalidates my readings; the shopping cart analogy is stupid; and he/she is sceptical of the results but acknowledges that for my purposes distilled water is probably ok for mixing with soil samples.
Additional note: I noticed that distilled water when first poured has a lower pH than when subsequently poured and I hypothesize that the carbonic reaction at the surface of the water, which produces the acid, does not diffuse through the whole solution (unless stirred) but I did not test this by withdrawing a sample from the bottom of the container.
I just completed the 4th and final semester of BJC MOOC via edX hosted by Berkeley, San Francisco. What a great course! And I learned so much about basic programming, computer science and technology trends. All for free if you wish, though I contributed some. For teaching purposes it uses blocks which you re-arrange called Snap! which is based on Scratch developed by MIT. A fun exercise was the Tower of Hanoi puzzle.
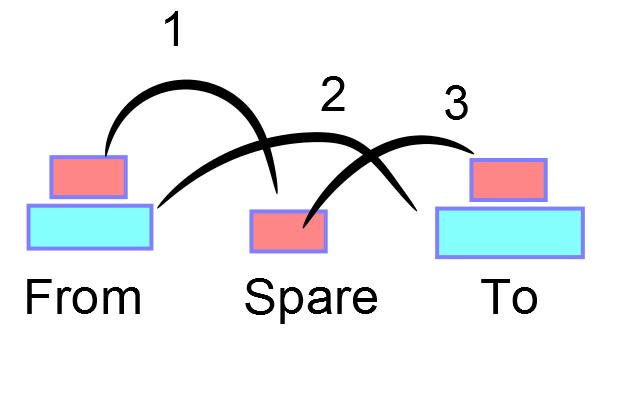
The rules are simple. There are 3 pegs labelled left to right “From”, “Spare” and “To”. The puzzle begins with various sized disks, smallest on top, stacked on the leftmost “From” peg. The object is to move the disks over to the rightmost “To” peg subject to 3 rules: 1) only move 1 disk at a time; 2) take the top disk from one peg and place it on top of another peg; 3) you can never place a bigger disk on a smaller disk.
So if there are just 2 disks on the “From” peg, the solution is simple – just move top disk to “Spare” peg, next disk to “To” peg and then disk on “Spare” peg to “To” peg.
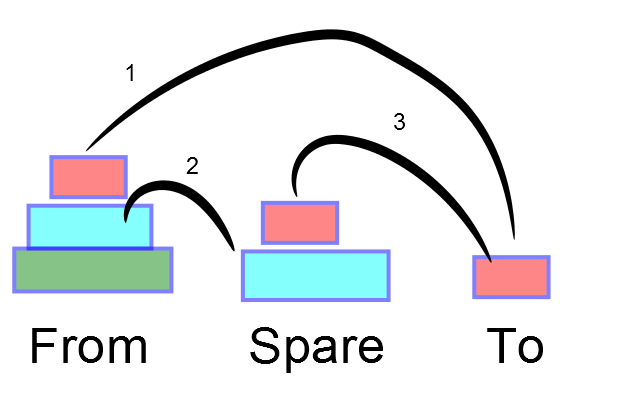
With 3 disks it is a bit more complicated. First:
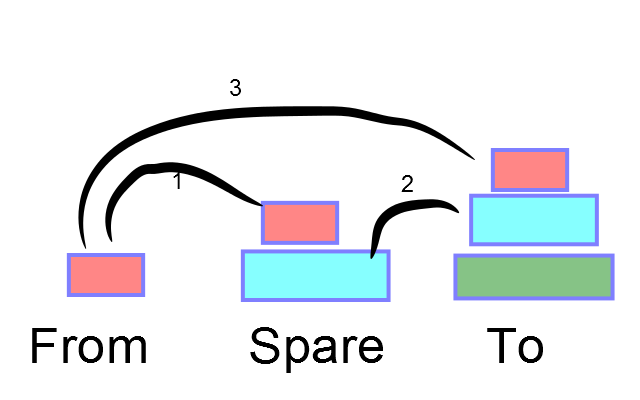
Then with red and blue at “Spare”, green is moved to “To”. The final step is:
I cut wood rectangles of descending sizes and practiced the puzzle beginning with a few pieces and progressing to 5 pieces. When I found the recurring sequences I used a technique called recursion to implement the sequences. Berkeley provided the backdrop and software to move the disks, all I had to do was figure which disks to move when and where. My program is not fully automated (a remaining challenge) but it works and here is a video showing the solution to a 5 block puzzle.
So what has this to do with growing and sustainable living? During the very cold and very hot months when outside work is unpleasant or unfruitful and you have time to spare, a MOOC on basic electronics or programming should be a good investment. Once you understand a bit about electronics and software you will feel confident to install and program your own security system; install strategically placed cameras connected to a DVR to which you set up remote access via a smart phone; and with the expanding world of IoT (internet of things) you can also install perimeter sensors to provide early intruder warning, or an automated chicken coop door opener. And you can diagnose and repair things which you might otherwise have tossed. And becoming self reliant makes you feel good.
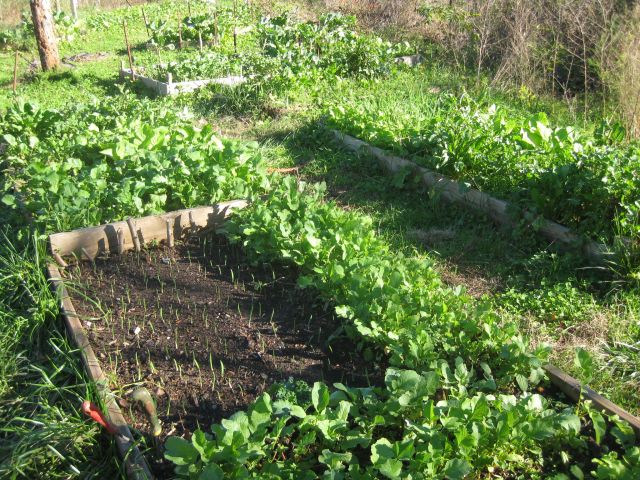
Today is Nov 20 and, after lots of rain earlier in the week the past few days have been in the 60’s and 70’s and no freezing temps yet. So my fall greens (collard, kale, turnip greens and radishes) have been doing really well with minimal pest evidence.
raised growing beds filled with green or garlic
Each year I get a little better. I pull the weeds early and cover the growing areas with growth. Garlic is different since it does not provide shading leaves and does poorly with weeds so I weed carefully before planting garlic and then keep the area clear of weeds. I am trying to upgrade my garlic and as mentioned earlier this year, I kept the larger garlic cloves for replanting, rather than consuming them first.
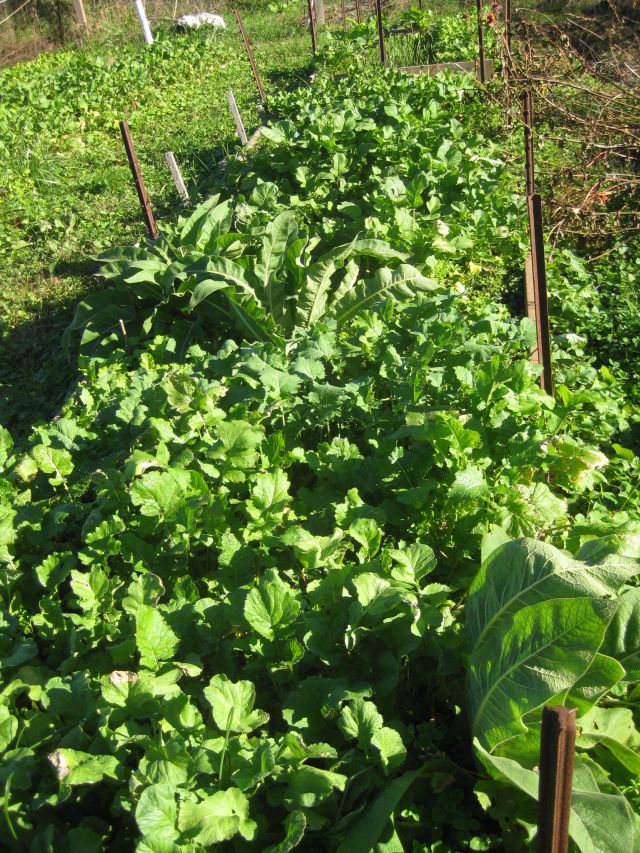
comfrey, radish and others
Radish is so easy to grow I grow plenty of it, tho I know with the first hard freeze the radish will become soft and inedible. I had my neighbors over to help with picking and eating the greens. My neighbor’s wife is industrious and grows many vegetables during the summer (conventionally) and cans them (in bottles) for year round consumption. I think she may decide to do fall crops as well. They were intrigued with the comfrey and I promised them some root cuttings. It grows very well in our area.
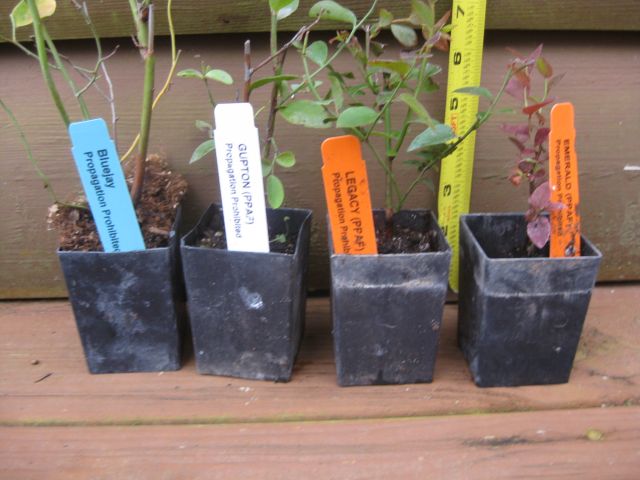
Blueberries
I have a reasonable annual yield of blueberries but nothing like the orchards (if that’s the right word) of blueberries I saw in south Georgia and Oregon. Most of mine are Rabbiteye which is a southern variety. They seem fastidious with a predeliction for acid conditions and because of their small roots they need food and moisture close to hand. I decided to branch out and bought 2 Southern Highbush and 2 Northern Highbush.
rather small Highbush varieties
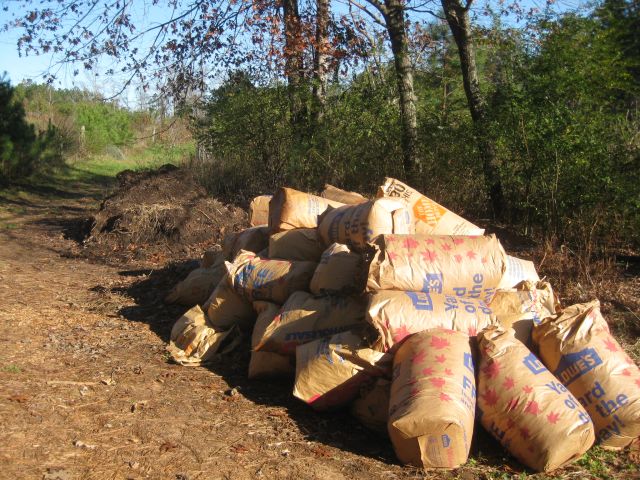
Compost
My compost growing is now well established with organisms which thrive on my local mix of leaves and greens. This year I excluded horse manure from the mix out of concern for the lurking ‘cides which may have been given to the fields and horses. Now is leaf bag season and my Tacoma pickup makes the Atlanta subdivision rounds gathering good bags which I stockpile at the Atlanta house and transfer to the farm, 12 bags each trip. The pickup has >216k miles and is >10 years old and performs very well. However, rather than wear it out I purchased an alternative more fuel efficient vehicle which I will use when there are no loads to be transported.
leaf bags for the new compost heap and behind is the old heap
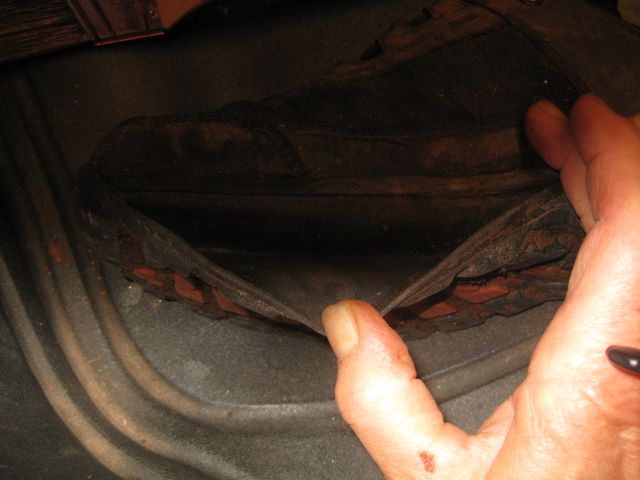
shoe repair
I was disappointed when the sole of my very comfortable, relatively new outdoor shoe detached from the upper. My bad really since I was sideswiping the gravel (see post on gravel drive) into place and they were not designed for this.
right shoe with detached sole
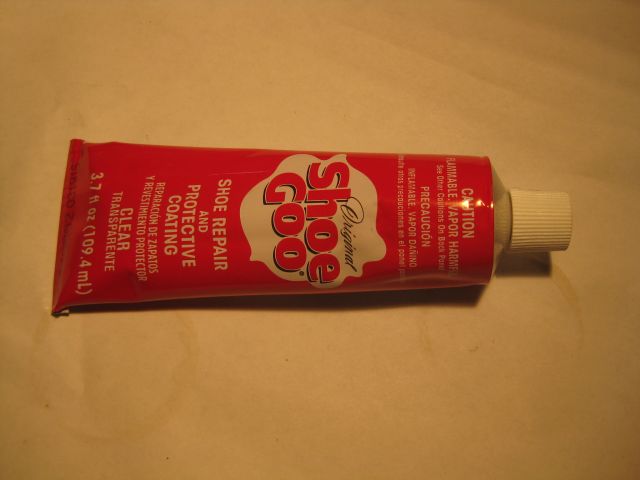
This was the second pair with a detached sole and I decided to try repair them. I ordered shoe goo and used it for both pairs and it seems to have done a good job.
my tube of shoe goo which is working for me
update – the shoe repair has not held up as well as I had hoped. I will not malign the glue I used since the cause could be the surfaces being glued were not in pristine condition or my technique was faulty.
ups
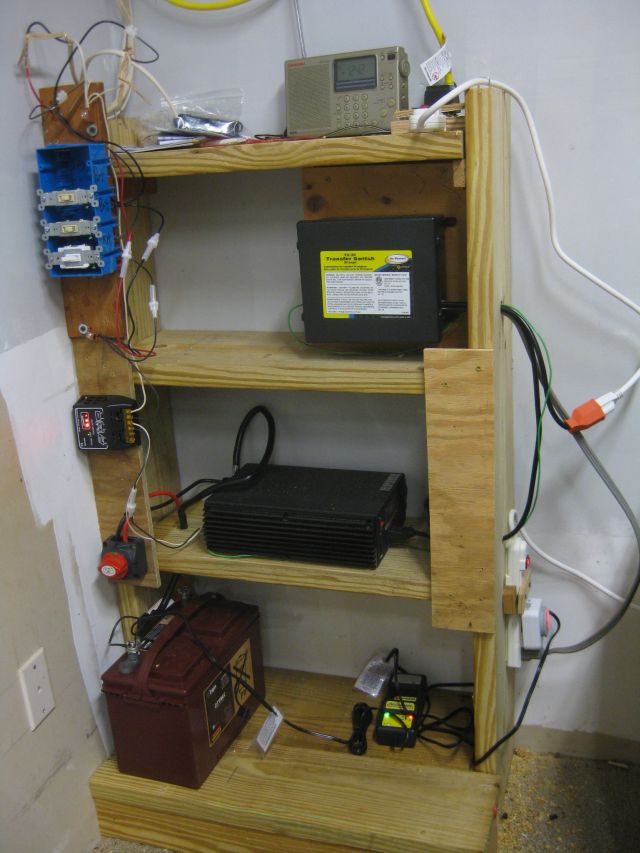
No, not the shipping company but uninterruptible power supply. For both security and convenience. Security because if there is a local power outage or if bad guys simply switch off the power supply (after breaking through the locked steel cover) and wait 30 mins for the backup security battery to run out, then the house is defenceless – no security system, no internet connection, no security cameras. And if I am in the house and the power goes out then no internet access since the modem and wireless router will be off. Below is a pic of my system which I will amend and expand and eventually connect to solar panels.
my ups system
I will provide more info on the system at a later date under the “self reliance” tab on the website. It has several components:
a deep cycle battery and smart charger on the bottom shelf with a marine on/off dc switch;
the second shelf has an inverter which converts dc power to 120ac household current and a solar power controller. The controller is to prevent the 3 dc led lights from excessively draining the battery;
the 3rd shelf has an automatic transfer switch. While utility power is on it powers the load (security system, security cameras, modem, wireless router). When utility power is off, the battery powers the load. You can also see switches for each of the 3 dc led lights and numerous fuse links – it took some time to figure the best fuse size.
the yellow cable on the top shelf goes to the load – it is 12/3 size and I did cable sizing calculations to determine a size which has acceptable resistance loss.
I will provide more info and calculations in the self reliance tab over the next few weeks.
I travel almost daily to north Georgia and the roundtrip is about 2 hours and tho NPR often has topics of interest, what I really enjoy is listening to the podcasts I have downloaded. In the early days I burned the podcasts onto cd’s which I played in the truck’s cd player, then I acquired a Sansa Clip mp3 player and played the podcasts back over a portable battery powered speaker positioned close to my ear.
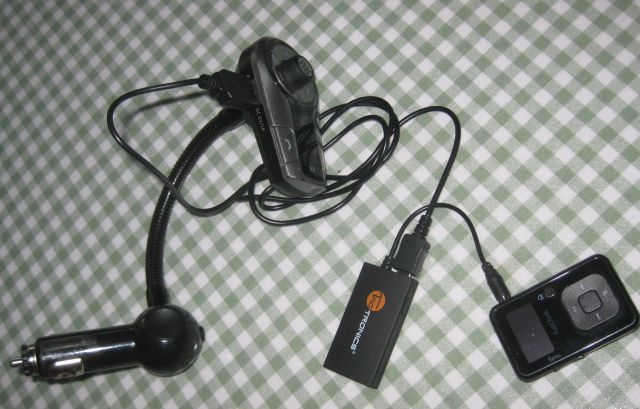
One of my tech savvy sons gave me a Go Groove x2 – a bluetooth device which plugs into the cigarette lighter of my 10 year old truck and responds to bluetooth communications and wirelessly sends them to the radio on a preselected radio band, and the sound plays through the truck’s audio system.
I have a model 4 iPhone and Apple has a great podcast app which enables me to subscribe to various shows and automatically downloads details of recent podcasts so I can choose and download the full version. I can then classify the podcasts as “On-The-Go” which means they will play in the order selected. When I start up the truck the iPhone syncs with Groove which syncs with the radio and I can play, pause and advance my way through the recorded podcasts. What could be better?
And life was fine until my 8GB iPhone ran out of storage space. I did all the usual tricks – cleared out the emails, cleared out the photos, deleted unnecessary apps, deleted the error data by syncing to the desktop. And for a while I staggered on. But whenever new Apple updates were released and downloaded on the iPhone more of my available storage was sucked up and net result, I have v.little storage for new podcasts ( postscript – for my solution, which freed up 4gb of space, see update at end of blog).
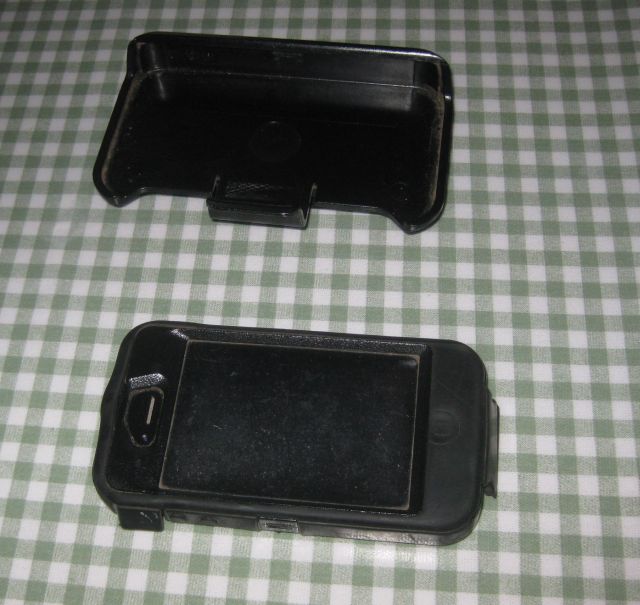
So why not buy one of the more recent models which have way more storage. Well I like the Apple brand and its current model 6 is considerably bigger. Even with the weatherproof, shock absorbing, Oyster tough shell, my model 4 fits comfortably in my pocket, which will not be the case with the iPhone 6.
my current iPhone in weatherproof shell plus holster, both of which fit in my pocket
I scrounged around and found the Sansa Clip I previously used. It has 3.6GB and can store many podcasts. I connected it directly to the Groove device and played a podcast. Barely audible. Hmm I thought, maybe it would work better with bluetooth transmission to the Groove device (silly me). I purchased a portable bluetooth transmitter for $16, connected it to the Sansa and synced with the Groove. And played a podcast and the volume was equally poor. Must be something stupid I am doing. I reviewed the Sansa settings to no avail. And then I looked on the side of the Sansa and there was volume control. Turned up the volume and sound was great – on both the bluetooth transmitter and the direct connection.
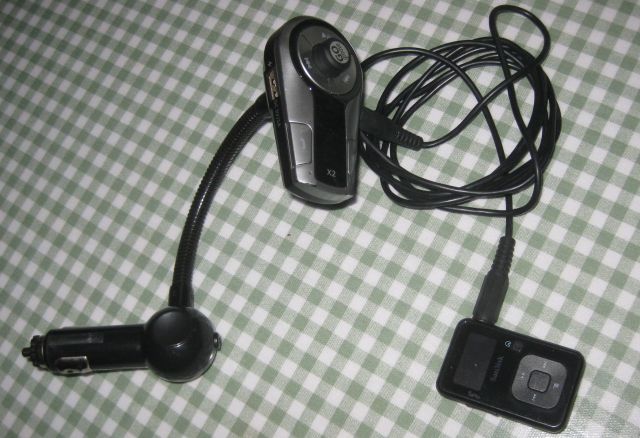
the Groove, bluetooth transmitter connected to Sansa and also powered by Groovemy current setup – Sansa with long lead to Groove. Sansa clipped to pocket lip when in use
But it is not the same as using an iPhone. With an iPhone the bluetooth works both ways – the phone sends data to the Groove and the Groove can send instructions to the phone. So when you press stop or advance to next track on the Groove the phone obeys these commands. However the Sansa is unidirectional since the sound is sent through an output port. So pressing the buttons on the Groove which are large and easy to find has no effect on the Sansa. It keeps playing. And if you want to pause or advance to another track then you have to locate the small Sansa and press the correct buttons, which is ok once you have the feel of it, though you cannot rewind but have to go to the beginning of the track if you missed something important. An advantage of using Sansa rather than iPhone is the battery life of the iPhone is preserved since it is not in bluetooth mode and not transmitting.
Now how to get the latest podcasts. For a while I used gPodder freeware to locate the podcasts, then I transferred them to Windows Media Player and synced WMP with the Sansa. Some of the podcasts appear in the music section and play sequentially. However, if the podcasts are identified as “Podcast” they are thus classified by Sansa and placed in a separate folder which is difficult to access while driving. So the trick I have learned is to review the WMP classification of the podcast and if it says “Podcast” then edit to remove this description so it appears as “Unknown Genre” and when synced it will go to the general music folder and play sequentially.
For almost 2 months gPodder worked well for me. And then I experienced problems. An uninvited screen appeared to inform me that a new podcast was available for downloading, and the screen kept appearing and ignored all my changes to preferences to make it go away. And next the downloading function ceased operating. So I spent some time familiarizing myself with iTunes and now it works great for me and automatically populates the folder used by WMP.
So, with Sansa connected directly to Groove with a long cable and clipped to the inside of my top pocket I can reach for it with one hand and pause and play and advance the tracks without taking my eyes off the road. Happy days have returned.
Update (October 2015)
And finally I figured how to increase capacity/storage on my Apple 4s (md439ll/a). I had tried everything and was deleting apps just to allow the phone to function. It didn’t make sense – what was using all the capacity? The phone is described as having 8GB and I had just a few apps and had <50MB available. The solution I eventually found, was quite simple. First I backed up all my data to iTunes -my contacts were being saved in the Cloud and I changed this to iTunes. Then I did a restore where I erased all content and settings. Then I synced with iTunes and downloaded all the data from iTunes back to the phone. And I miraculously had>4GB available. I downloaded the apps I had erased and as of now there is 5.2GB available of which about 1GB has been used, so I now have 4.2GB additional capacity. I surmise that whenever I did an IOS update the phone saved a copy of the superseded IOS and when I did the recent restore all these obsolete versions were deleted. Just a guess. But the phone is now fine for my needs and yes, I will continue using Sansa for my podcasts.