My two main nutrition inputs are leaf bags from my neighbors, which I pick up in the fall, and horse manure (well rotted/decomposed) from the stables. I have read articles about manure loaded with chemicals which wreaked havoc in growers’ plots. I have not experienced this problem but, to put this concern behind me, I ran a simple test.
I took two empty 32oz yogurt containers, drilled holes in the bottoms for drainage, and filled one 50% with recently collected manure and the other with compost. I then added another 30% sphagnum peat to both, so they were both about 80% full. Into each pot I planted two lettuce seedlings, one tomato seedling and one black locust seedling, all comparably sized. The compost pot is my control pot. Watered and left for a week plus in my greenhouse.
The result to date, is that all the seedlings in both pots are doing fine. Some of the seedlings in the manure pot appear better developed.
container on left has manure and on right has compost
I shall keep an eye on both pots but I do not expect a change in the results. Which means the manure I collect is ok. Or is it? Driving in this morning I listened to a recent Paul Wheaton podcast and he mentioned that wormers used on horses to control gastrointestinal parasites, subsist in the manure and may kill earthworms. I have a well established hardworking earthworm labor force specialized in compost making. So this podcast tidbit gives me something new to think about. I could add a couple of worms to each pot and lid it (to prevent them from escaping) and see how they are doing in a couple of weeks.
When I lived in London in the late 70’s through the mid 80’s it was common to make your own beer. Boots, the large pharmacy retailer, sold a beer brewing kit for less than 10 pounds ($16 at today’s rates) which contained all you needed to make your own beer. Drinking beer at the pubs was popular and even when you visited friends for a meal, you would before or after the meal, head to the local pub. However, and I began to dread the moment, your friend would occasionally insist you drink his own brew. Some were good, most were blemished, including some of my own.
So now, many years later, I have returned to making my own beer. One reason is I am using yeasts for various other purposes such as making whole wheat bread and I am growing three different types of mushrooms (yes, yeasts are classified in the kingdom of Fungi). And I like beers, especially dark beers – each evening I have a Trader Joe’s Hofbrau bock.
I ordered equipment and a kit (described as German style dark all malt) and yesterday I began my brew. Relatively straight forward. Clean all the equipment which will be used, then heat 1.5 gallons of water and mix in the ingredients and boil for a while.
preparing the malt mixture (wort)
Next step is to move the hot contents to the fermentation vessel, allow it to cool down, add the yeast and leave it alone for a few days. Here is a ‘photo of my carboy fermentation vessel before adding the yeast.
6 gal glass carboy with airlock before adding yeast
And here is a ‘photo 16 hours after adding the yeast. The gadget at the top is an airlock which allows the bubbles to escape without admitting outside air, which could contaminate the contents. The cylinder next to the carboy is an hydrometer which I will use to determine when the beer is ready for bottling. It measures the specific gravity (“SG”) of the contents. Alcohol has a lower SG than water and as the yeast ferments and makes alcohol, the SG will fall. When the SG reaches the accepted range it will be bottling time and “Cheers!”
carboy with brew 16 hours after adding the yeast, the airlock is bubbling
I had a good time at the Georgia Organics annual conference – its 15th and my 7th. The Friday workshops and farm visit and the Saturday educational sessions were excellent and the two keynote speakers have national repute and lived up to expectations. At my breakfast table on Friday morning was an organic livestock farmer. I asked him a question which was triggered by the assistance I am providing to two ailing chickens: “What do you do when one of your animals get sick?” His answer was simple and to the point: “If they get sick it means they do not fit in my system and I eliminate them.”
Later that day during the farm visit the same topic came up when the farmer was asked how often he deworms his sheep. He deworms them all at the beginning of the season and then if one sheep needs deworming he will deworm it a second time and if it is still wormy (if that is the word) he eliminates it – “three strikes and you’re out” he said. I am interested in dairy goats so I attended a session on keeping goats. The presenter was from the west coast (interestingly several presenters had moved from the west coast to Georgia or Alabama) and her stance was different. She stressed the importance of good management practices and prevention but, if a sheep or goat gets ill and is non responsive to organic treatments, she will use conventional medicine. She felt she has a responsibility to the animal and cannot let it suffer. The final viewpoint was expressed by a DVM (doctor of veterinary medicine) who said he would cull the animal to avoid the problem spreading and because its genetics were wrong. His only exception was if the animal was a pet and then he would do whatever to save it. So four commercial practitioners came to a three to one vote.
Some decisions are not simple. If you hew to the organic road then conventional treatments should have no place. I also understand the “genetics” argument – it is no surprise in humid summers that the tomatoes with inbred resistance to the various blights do far better than the regular tomatoes. So to travel the organic path you must select robust partners. I would probably have done much better with hybrid chickens than some of the gorgeous looking birds we bought, a few of which are struggling, which also makes me wonder if perhaps there was some inbreeding down the road. One chicken has a persistent sour crop, which means the food she eats is not being processed properly by her body. I watch her closely – she is the only one who won’t eat the occasional greens or yogurt which I provide, which would have helped avoid her condition. After a couple visits to the vet I am now medicating her with nystatin (using a feeding tube down her throat to administer the medicine) and she may (believe it or not) have to wear a bra to help her crop regain its regular shape. This is going to extremes, I agree, but I am also interested in how it all works – what causes things to go wrong and how you can fix them.
If you have to make a living from organic farming then culling the inferior specimens seems the way to go. But then it gets back to why you are doing this anyhow – if it is to experience all the manifestations of life it is hard to let one depart when you could (presumably) have saved it, or at least made the attempt.
In a previous post I mentioned building my first cold frame using bargain priced windows from the local thrift, cement blocks and lumber. The seedlings in this cold frame are growing well and when it is cold (say 18 F outside temperature) the temperature in the cold frame is approximately 10 F higher. During the day the differential increases. And it keeps out the frost. So I am hoping to grow decent sized vegetables.
One cold frame was not enough because I had 10 windows remaining and there is a better site for a cold frame – on top of the hill where it catches early morning sun to late afternoon son. This location is unfenced and close to a road so there is a possibility of unwelcome attention, therefore my decision to locate the first cold frame in the better protected vegetable growing area. Nonetheless, the cost of building a cold frame is modest and the full time attention of the sun is a major plus.
Construction was very similar to the first frame except I dispensed with all but two cement blocks (instead of the 17 used in the first cold frame). The blocks are located at each end of the cold frame and are spanned by a 10ft by 8″ wide 2″ thick, plank. In between the two cement block supports I built a stone wall of sorts using the large stones I had uncovered when I dug a contour ditch. I used a hammer and stone chisel to cut faces on the stones so they would stack.
basics of construction of cold frame - windows on top and south facing, stones on north side
The purpose of the stones is to absorb the sun’s heat during the day and release it during the night. Only the top layer of the stones is visible – there are two (more skilfully arranged) layers below the soil level. To prevent the warm air exiting through the stones I draped 6 mil plastic sheeting on the outside of the frame.
north side of cold frame showing plastic sheeting draped over north stone wall
As before, I used the windows from the thrift store to enclose the frame. The savings from using 15 fewer cement blocks was partially offset by the cost of 3 additional window frames I had to purchase from the thrift store – a different floor manager did the pricing and he wanted $4 per window rather than $1 – such are the vagaries of life.
south facing aspect of cold frame, seedlings still to be planted
The gaps and openings I covered with bits of plank or plastic. I have now introduced some collard and broccoli seedlings and in the next week will add the remaining spinach and other cool season vegetables – and wait and hope that I will get a worthwhile yield.
On a recent visit to the thrift store, where there are often solid wood furniture and country painting bargains, I noticed about 50 double insulated small windows each 2 ft wide and 31″ high. Available for $1 each. I bought 22. And have spent a lot of time figuring how to use them effectively in a cold frame.
double insulated, same sized $1 windows from thrift store
My greens are growing very well under an Agripon row cover – it allows air and rain through, protects against frost, keeps the temperature higher inside than out and allows some light through. However, as with most all solutions, there are negatives. The cover allows light through, but not all the light and it keeps temperatures higher than ambient temperatures, but not that much higher. This has worked fine up to now since temperatures have been mild. Temperatures in January and February will be much lower. A cold frame using glass windows will let much more light through and will keep temperatures much higher. Negatives are more labor intensive and costly to construct, does not allow rain to penetrate therefore more supplemental watering required and, on warm days, the temperature will rise too high so I shall have to be watchful to allow ventilation. An advantage of a cold frame over my greenhouse is the plants will be growing in the ground and their roots will penetrate further than in greenhouse pots.
So having rationalized the need for a cold frame I developed a simple construction plan requiring minimal additional expenditures.
skeleton of cold frame, cement blocks on north side of raised bed, ridgeline down center
I appropriated a section of a newly built raised bed, which has stones on the north side to store heat. I assembled a two level wall of cement blocks (8″x8″x16″ – $1.25 each). 9 blocks on the ground and 8 above them (not mortared). Most of the construction time was ensuring the bottom blocks were level. I recycled two cherry branches for my uprights to which I bolted a 2″x8″x10ft untreated plank ($5.85) which acts as the ridge on which the windows will rest.
cold frame showing 2nd plank on cement blocks and windows in place
Since cement blocks have cavities, I aligned a second 2″x8″x10ft plank along the top of the second block layer to which I screwed 5 right angle brackets which grip the inside face of the cement blocks to prevent the plank sliding off the blocks. Additionally I screwed a 2″x4″ plank along the left side of the plank as a step to prevent the windows sliding off the plank.
a view of the south side of the cold frame
On the south side of the cold frame I have the 5 windows with bottom edges resting on the ground and top edge resting on the ridge line. A total of 12 windows were used, 5 facing up and north, 5 facing south and 1 on each end. By having the south windows and the end windows resting on the ground this will maximize exposure to the low southern sun (also, unfortunately, accelerate moisture penetration and wood rot). The areas not enclosed by the windows were filled with sized surplus lumber. For access and ventilation I remove the south facing windows. I placed an electronic min/max thermometer in the cold frame and tomorrow, hopefully, I will find there was reasonable heat retention. The ground should also have warmed up and I will plant out more of my kale, collard, mache, broccoli raab, and turnip greens seedlings.
In a previous post I mentioned the repercussions experienced from locating my muscadine grape plantings too close to my vegetable beds. Just as the vines of the muscadine grow interminably so do their roots and the raised beds, tomato planting sites and other vegetable sites were mined by muscadine roots. I relocated half (6) of the muscadines earlier in November and have now prepared a site for relocating the remainder.
new terrace with contour ditch after recent rain
The site is on the slope of a small hill which has blueberries at the top and a fruit tree orchard lower down. I decided to carve out a terrace between the two, approximately 8 ft wide and 100 ft long, with my bobcat. Terracing the first 50 ft was uneventful and then I hit the rocks. It seemed the slope was made from rocks. With the teeth of the loader I jiggled the rocks loose and then manually lifted the rocks and stacked them above the terrace. Seemed interminable. Eventually a terrace appeared. But it sloped from the north end to the south end, which meant the intended contour ditch would be more drain than a container of rainwater.
I hammered in 6 – 4ft metal rods equidistant along the terrace and then with my transit level and surveyors tape tied to the rods, I identified the grade (you can see some of them in the above ‘photo). With my bobcat I then pretty much leveled the terrace, though there is still some dip from the north end to the south end.
Next step was to dig a trench/ditch down the middle. I replaced the loader on the bobcat with a trencher/stump remover attachment and after pulling out more rocks had a rough ditch. A lot more work with a shovel was required to make it presentable.
some of the rocks embedded in the slope which had to be removed
Now I had bare clay earth and the prospect of oncoming wintry rains and erosion. I discussed with the owner of the local farm supply store whether I could still seed with clover. He suggested winter rye grain was a better bet for a cover crop. So I sowed the rye and hope it will germinate.
With the terrace now done, next tasks will be chain sawing some anchor posts for the cables for the muscadine grapes. There is a toppled maple tree which I may use – though toppled, it is off the ground and its wood hasn’t rotted. Also a poplar which needs to come out since it blocks my tractor when I go chipping in the woods. Oak would be a better bet for longevity but I cannot justify (yet) cutting down a good oak for fence posts.
Yesterday morning I did not need a weather forecast to know cold was incoming and that it was time to protect some of the plantings. Of the 12 fruit trees installed earlier this year, the Gold Nugget loquat was the most vulnerable. The loquat is suited for sub-tropical to mild temperate zones and freezing temperatures will kill the buds if not the tree. My loquat did not do very well this summer, probably too hot for it, but I will do what I can to help it and first steps was to winterwrap it. Since it is only a few feet tall, it fitted easily into one of my tomato cages, which I had made from welded steel wire re-mesh. I then wrapped the cage and the space above the tree with agripon AG-30 row cover, as shown below.
loquat in tomato cage wrapped with row cover
Next to the vegetables. I have two raised beds where I am growing several varieties of lettuce as well as spinach, kale etc. Rather than using a hoop system my thought is to drape row covers over the beds just above the vegetables. This should be less vulnerable to strong winds and may offer better protection. For my first bed I bridged the long sides of the bed with two cedar posts and then strapped a 4″ pvc drain pipe to the posts and draped the row crop over this. Below is the finished product as it appeared this morning (you can see the frost on the adjacent strawberries):
raised vegetable bed covered with row cover
If the description was difficult to follow, here is a shot with the row cover removed:
raised vegetable bed with fixtures for row cover
Only half of this bed is being used for vegetables. I have extensively planted the other half and also the spaces between the vegetables with garlic. For my second bed I simply placed the row cover over the vegetables and secured with 3 2×4 untreated planks, as shown below:
vegetable bed covered against frost
The temperature fell to 22 degrees and the vegetables did fine, though it was not a heavy frost. Since temperatures are predicted to stay above freezing for the next five days, I removed the covers this morning, a simple task which took just a few minutes.
long raised vegetable bed with lettuce interplanted with garlic
My new chicken coop is working out great. Air can flow freely out the rafters at the top and I leave two of the windows slightly ajar. I was curious to learn how cold it really gets. I transplanted my two min max thermometers from my greenhouse to the coop and sited one outside at the door and the other on the partition which divides the coop into the old flock and new flock areas. This morning the outside temperature was 22 degrees and the inside temperature was 36 degrees, higher mostly I would think because of the heat of the birds. My greenhouse, which is fully enclosed, only provides a differential of about 10 degrees between outside cold and inside temperatures.
thermometer reading 22 degreesmin max thermometer on coop door
Since power outages may be expected, I checked my flashlights and found that my large 4 cell mag-lite was not functioning. Two of the 4 batteries had leaked and corroded the inside. Removing the batteries proved near impossible. I decided to drill a hole into the bottom of the battery and screw a large lag eye bolt into the battery and, with the assistance of a helper, pull them apart. After much tugging the bolt separated from the battery and the battery remained, unmoved, in the flashlight body. I then located a larger diameter hanger bolt and screwed this into the battery.
hanger bolt on left shown inserted in a battery, and lag eye bolt on right
I no longer had my helper but additional help was unnecessary since, with a assortment of 2×4’s I established a platform for the nut on the hanger bolt to leverage against. It was then a simple matter to tighten the hanger bolt nut with a wrench and slowly extricate the two damaged batteries. After rinsing out and scrubbing the flashlight interior with a liquid mix of baking soda (sodium bicarbonate) and installing new, and a better brand of, batteries, the flashlight is good to go.
tighten the nut and the bad battery comes out (slowly)
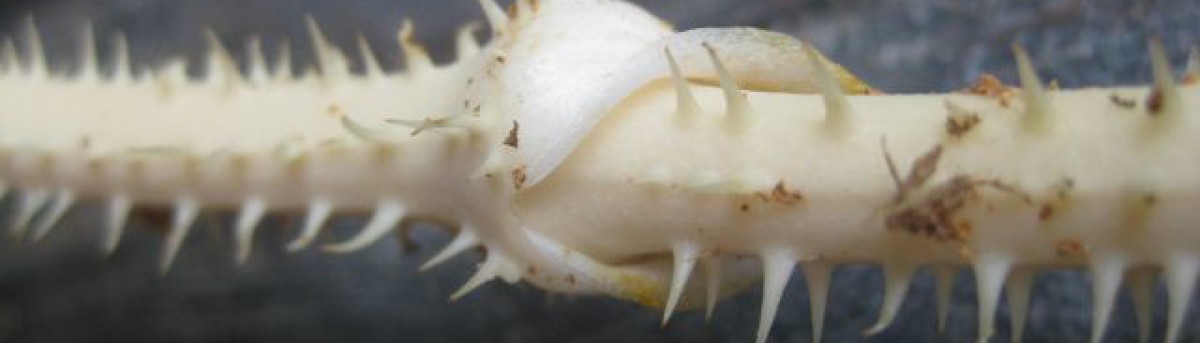
Muscadine grapes (vitis rotundifolia) grow in the wild throughout the Southeastern United States. There are well known varieties and my favorite is the Scuppernong. When I established my vegetable garden 3 years ago I had a small growing area and, in my wisdom, ignored the instructions to “set the plants 20 feet apart in 10 foot rows”. Instead, I set up 3 horizontal wires, 5 ft high, 1 ft apart, and ran this down the middle of my vegetable garden. I figured the horizontal wires would give the plants adequate sun exposure, the 1 ft spacing would allow air circulation and my heavily composted soil would support a larger number of closely planted muscadines. Sounds good in theory. What I did not know is that muscadine roots can travel long distances (I heard one grower say up to 70 ft). I suppose the roots are a bit like the vines, which also grow interminably. Result was the muscadine roots began invading my raised beds, my tomato plantings, in fact all my plantings.
So I waited until first frost (a few days ago) and am now replanting 6 of the vines. Not a simple task. It is easy enough to trim the vines to 10 ft lengths, but extricating 10 ft lengths of root without damaging them is more difficult. Where the root forks you have to be careful not to tear off and strip of the root.
I previously had run a 5 ft high cable between my fruit trees to support tomato cages for my tomato plants. Also not a good idea. While the vegetable garden is circled by a 5 ft fence which keeps out squirrels, deer etc. my fruit orchard is not protected and a lot of wildlife visitors enjoyed my tomatoes this year. So I removed the tomato cages, dug a ditch below the cable and aligned the roots of the muscadine down the trench, covered with compost and soil, and watered. And I hope the muscadines will survive and grow. This took care of 3 of the 6 muscadines, but I had to develop a location for the other 3 muscadines.
I decided to extend the cable further down the orchard which meant inserting another post to carry the cable. I attached the augur to my tractor and used a large drill to dig a 3 ft hole. Then with a chain attached to my tractor bucket I hoisted my post (an 8 ft cherry tree trunk) into the air and lowered the trunk into the hole. Remaining steps are to extend the cable and transplant the remaining muscadines. A lot of work to correct a mistake made 3 years ago.
muscadine awaiting transplantingmuscadine with trimmed vines and roots prior to going into trenchmuscadine in situ with roots along trenchtractor driven augur drilling hole for posttractor transporting cherry trunk to holecherry trunk in vertical position prior to being moved to and lowered into holenew post installed to carry cables for muscadinenew muscadine plantingssimple contraption made out of 4x4's to support augur when not in use
I completed the chicken coop project over the past weekend. I did all the work myself except for the assistance of a friend who helped me hoist 5 of the 6 windows into place and fit the entrance door. In previous posts I mentioned my progress on its construction. It is built on sloping ground so I started by using my bobcat to build a level pad, half of which was cut into the slope and the other half was infill from soil removed from the slope. Then with my trencher/stump remover attached to the bobcat I dug drainage trenches on the two sides of the pad which cut into the slope. The building is 18 ft by 10 ft and secured by posts concreted into the ground. Digging the post holes took a lot more time than anticipated since there were a number of largish stones (boulders) which had to be removed and this resulted in some cases in very wide holes. With the posts finally in place, construction went quickly. A time consuming task was digging the trenches between the posts for the cement blocks which I lined up 8″ deep to form my barrier against predator tunnels. I am concerned that predators can dig deeper than 8″ tunnels and will keep a lookout for perimeter activity.
The first photo is the entrance. The only 6ft wide gate available at the time of purchase is for larger animals rather than chicken, so I used some of my fence wire to cover the gaps between the horizontal bars.
coop seen from entrance gate
I screened all openings which remained after construction with hardware cloth. I also added the hardware cloth to two of the windows (lower half which opens) so that I can leave the windows ajar during the nights. To attach the cloth to the timber I used a pneumatic stapler (and safety glasses) and this sped up the work considerably.
coop south facing side with four 4 ft windows
There are a total of 6 windows, four in the front and one on each side. This photo shows the entrance, with my $8 front door purchased from the thrift store and my rainwater storage tank. I will use the rainwater to irrigate the tree and shrub plantings I am installing in the chicken range areas.
coop front entrance at rainwater storage tank
The coop is divided into two halves – one for the 8 younger chicken and the other for the 6 older hens. I intended to keep them all in the one half and use the other for growing and other activities. However, it appeared too cramped and there is still some friction between the two flocks. Each half has its own water container, food container, perches and nesting box. This photo shows the half closest to the entrance in which the 6 older girls now live, and the large nesting box inherited from my neighbor as well as the steps (4.5″ spacing) on the inclined plank to facilitate accessing the perch (horizontal, non pressure treated 2×4 at top left).
coop area for older hens
The two areas are separated by fencing material and a gate I salvaged.
coop partition
The other half is outfitted much as the first. Incidentally, in one of the nest boxes is a Golden Comet and, I discovered later, she is in the process of laying her first egg. Maybe living in close quarters with the older egg laying hens accelerated the process. The step spacing in this coop is 6″ which I think is a bit too far apart – you can see Lady Macbeth on her way up to the perch.
coop for younger hens
I spray painted the exterior with a block stain. This photo of the rear of the coop shows the slanting gutter leading to the storage tank and the drainage ditch on the north, slope side, of the coop.
And, finally, this photo shows the west side with the drainage ditch between the slope and the pad on which the coop is built. I have used 4 ft fencing which a number of the birds can easily fly over, but as longer as there is habitat and things to scrounge for they appear content to stay within the fenced areas.
coop west side, showing drainage ditch
Finally, I must plant up the soil which surrounds the coop before it is eroded by the rains. I may transplant sod from the hill or try seeding it. With temperatures beginning to fall, it may be too late for seeding.
The future chicken coop is progressing. I installed the windows and door with the help of a friend. Just outside of Atlanta there is a large employee owned window manufacturer and they custom manufacture windows which are occasionally returned because of wrong specs, finish, customer couldn’t pay etc. Nothing actually wrong with the windows. These returned windows are stored separately and are advertised on Craig’s list. I bought 6 of these windows (dimensions 4 ft by 4 ft) for about $50 to $60 each, and now I am putting them to use.
Incidentally, the coop building will be used for more than just the chickens. I intend this year to propagate cuttings of various fruit trees and berries and a ledge along the south facing windows will be a good spot for the cuttings, once they have rooted. I read in a permaculture book that CO2 from the chickens will also help plants stored in this area. However, no vegetables for concern of contamination – they will be grown under cover or in the greenhouse.
I found the exterior door for the coop at the local thrift store for $8. It really didn’t make sense buying an exterior door for >$100 from one of the big box DIY stores.
A simple fix
I have a Sears industrial circular saw purchased in the 80’s which has provided excellent service. Recently it would fail to start and I overcame this by turning the saw blade a few inches. Eventually it wouldn’t start at all and I figured it was time to replace the brushes. This usually is the problem when a motor won’t start initially but then starts after you slightly turn the part driven by the motor (or at least in my experience this has been the case). I downloaded the parts diagram, found the part #, found the cheapest supplier (you have to combine part price with shipping cost since the latter can vary greatly) and ordered the part. Except, a few days later the supplier fessed up they didn’t have the part and credited me (they shouldn’t have charged me until they had shipped, but I got the credit). So I paid more, got the part, opened up the saw and replaced the brushes – the whole procedure took less than 10 minutes. There are two brushes and when I removed the first it looked fine and I had real misgivings about my diagnosis. However, as you can see from the photo the second brush was completely worn. And – the saw now works fine and just in time, since I needed it to cut the 4 ft by 8 ft sheathing.
my trusty circular sawshows brush in holder pressing on commutatorthere are 2 brushes, the first looks okhowever, the 2nd brush is completely worn down
Mushrooms
I am seeing more and more mushrooms in the woods following the recent rains. The young mushrooms are rounded at the top and then, when they release their spores they open up and become flat at the top.
a young mushrooman older mushroom which has released its spores
Permaculture
I am becoming increasing interested in permaculture. A few years ago I read the book by Bill Mollison but, though I understood the concepts, they did not resonate with me. Last year I read The One Straw Revolution by Fukuoka and I just finished the permaculture book by Sepp Holzer and am working my way through Gaia’s Garden by Hemenway, which is excellently written. Since I acquired the property I have been doing more than just organic gardening – my contour ditches, my allowing natural growth to overtake the mown areas, my working in the woods – these various projects are neatly encompassed by the permaculture approach. Next step is for me to go on a PDC (permaculture design course). Below is a photo showing fall colors in the opening I cleared in the woods (the “edge” in permaculture):