my wood stove

I was thinking just a few days ago, when winter abruptly descended, how efficient and useful my wood stove has been.  Over the past 3 winters it has lived up to all my expectations and provides sufficient heat for the house except in the evening before retiring when we use supplementary heat to warm the bathroom.  Coincidentally, I received an email with some questions on the wood stove (see below):

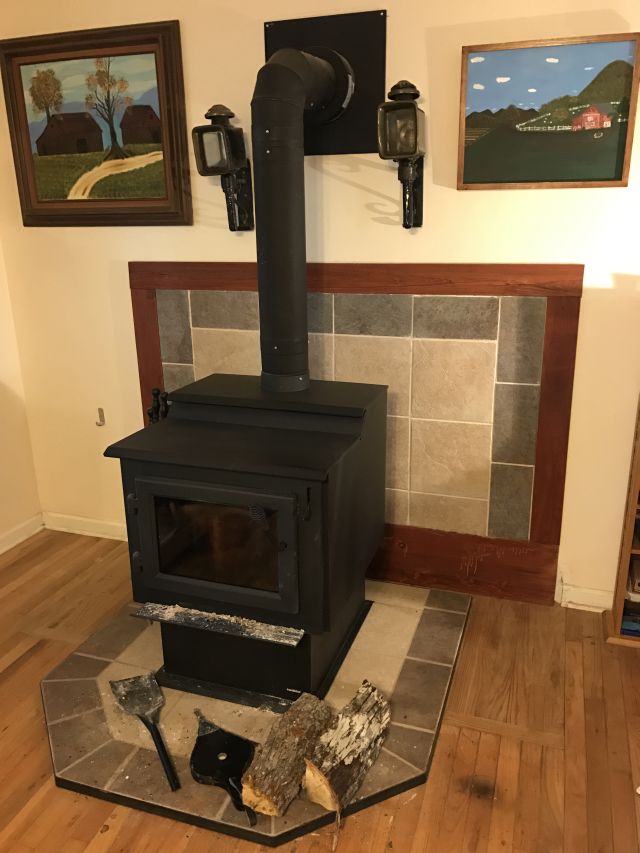
Here are some thoughts.  But first, if you are interested in the topic do read my posts, parts 1 & 2 titled “wood stove installation” dated March 2, 2014.  You can easily locate them by going to the search box and entering “wood stove”.  Part 2 ended with a functioning wood stove and gaping hole in the wall.  In my post dated July 27, 2014 (also easily located via the search box) I describe how I completed the job and include a picture of the finished product which you can also see in the picture above.

Fuel

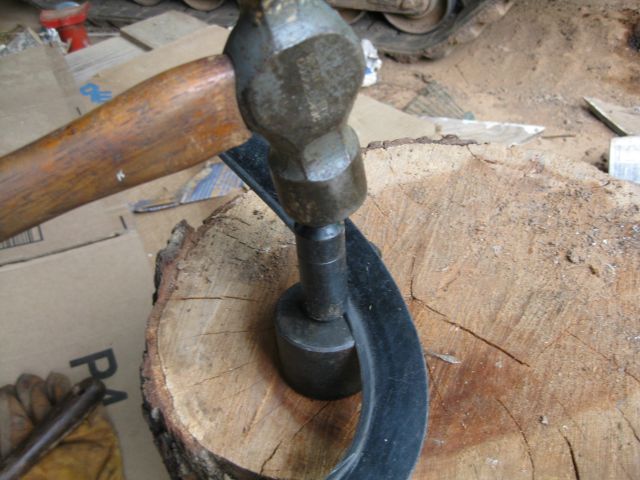
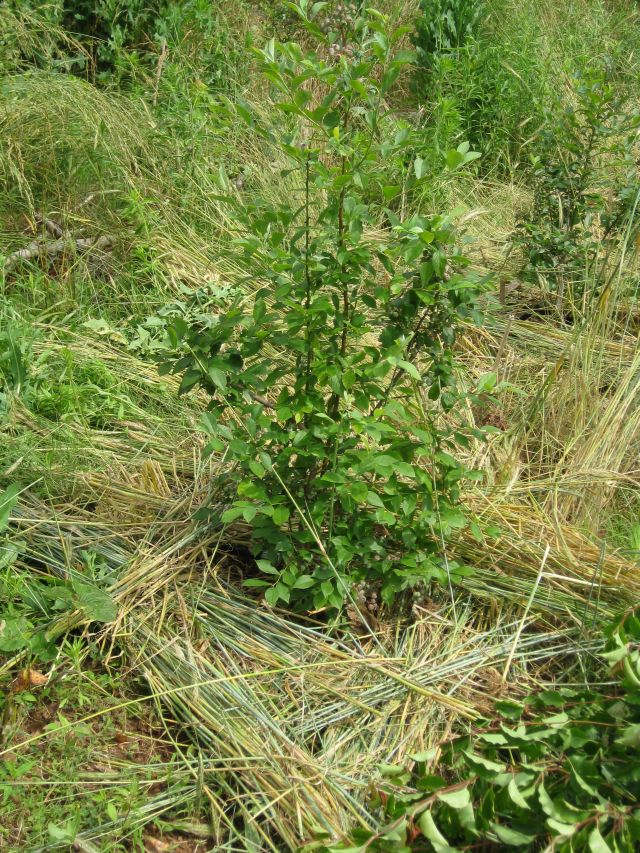
I use wood salvaged from downed trees and my first choice is oak though I will use other hardwoods if necessary.  I never use pine for fuel, instead I add it to my contour ditches to decompose and enrich the soil.  I have a decent chainsaw and electric chain sharpener (never got the hang of doing it with a file)  and I split the wood with a maul wearing eye protection.  Splitting is generally easy unless there are knots and then it becomes a challenge and a puzzle to figure the solution.  Only once have I had to chainsaw an invincible knot infested log.  I generally cut the logs to the length of the firebox.  A few inches too long can be accommodated by inserting diagonally.  The logs in the picture below were cut in the early days and are too short.

satisfying to split firewood, takes practice to deliver the blow repeatedly at the same spot, and takes experience and luck to thwart a knot

I keep all my firewood under cover.  Beats me why  neighbors leave theirs uncovered when a tarp would make such a difference.

Smoking

Smoking is when smoke enters the room, usually when I am starting the fire or when I add fuel.  Both are easily avoided.  Before building the fire I take a single double page of newspaper and twist it as if wringing a towel and I light both ends and place at the back of the firebox in a U position.  The flames heat the flue and this will entice the smoke from the fire to go up the flue.  And when adding wood you just have to remember to open the door slowly so as n0t to distract the smoke from its journey to the flue.

Lighting

Lighting the fire has not been a challenge.  I use a short piece of duraflame quickstart – the packaging says it is “made with wax and a blend of recycled and renewable biomass fibers” and it gets the fire going.  If the wood is wet it will “smoke” as it releases moisture.  In the beginning when this was a problem I used scraps of 2×4’s (untreated) to augment the firing process.  Now all my wood has had time enough to dry.  Although not sanctioned by the manual I leave the door slightly ajar (but latched) and this boosts the firing process and when the fire has achieved momentum I lock it down.

My wood stove does not have a blower , though it is available as an option.  So to circulate the heat I use the ceiling fan, and it works well enough.

And finally, never place anything on the stove to dry.  You turn your back and you have an open fire in the living room!   Oh, I forgot, the chimney installer recommended cleaning/sweeping the chimney at least annually – which is not as difficult as with a fabricated fireplace.  You just access the chimney from the rear (see my pics in earlier post) and remove the cap at the tee and with rods and a brush snare the soot in a garbage bag.  And the wood ash and the soot go into my vegetable growing beds or compost heap. 

tire puncture repair

As a kid I repaired bicycle tire flats – check the tire stem is not leaking, remove tire, remove inner tube, pump and locate hole, buff the area around the puncture, apply glue, allow to tack, apply patch, reinstall inner tube and tire, and you are good to go.

The tires on my lawn tractor are bigger and wider and removing the rim/bead is more difficult.   The treads are worn and all 4 tires should be replaced.  The right rear tire is always flat.  I have a portable compressor (see above picture) so it is simple to inflate the tire every 4 weeks or so when I need to mow.  Time for a fix I thought and since I have never inserted a plug I decided to give it a try.

From the noise of the escaping air it was easy to locate the hole in the sidewall.  Mechanics will not repair the sidewall of a car tire but since my lawn tractor has a maximum speed of 5mph and I sit just a few feet off the ground, I decided to go ahead. 

the repair kit contains a rasper tool, a plugger tool, 3 plugs and rubber cement

The instructions are straight forward.

simple instructions, however using the rasp tool and the plugger tool require directed force

After plugging the sidewall I pumped the tire and decided to check back the next day.  Tire was flat.  I was puzzled – 3 possibilities – leakage through stem, leakage through repair, another puncture somewhere else.  Escaping air was not audible so I applied soapy water and discovered 2 punctures in the tread.  In for a penny, in for a pound I thought and plugged the other 2 holes and repumped.  A day later the tire was still fine.  Problem solved.  All that remains is to cut excess plug material flush with tire and see how well my repairs hold up with use.

the two tread plugs and one sidewall plug can be seen

new camera old lens (continued)

In my previous post I mentioned the challenges of crisp focusing, the flatness produced by the flash directly above the camera (it should be to the side), camera shake and the need for a tripod.  I discovered among our possessions an old tripod (a Velbon VE-3, >30 years old) and today I returned to the field.  When using a macro lens the slightest jarring of the body blurs the image.  One answer could be to increase the speed of the shutter.  But then less light reaches the sensor.  So I could open the aperture of the lens to allow more light to reach the sensor but depth of field (clearness of image in front and behind the point of focus) is sacrificed.  Or I could increase the sensor ISO speed but this results in “noise”.  So if I want to shoot with a small aperture (say f22) and a slow film speed (say ISO 400) on a cloudy day (to avoid bright sunlight bleaching) I have to use a tripod.

flower with some depth of field

flower with some depth of field

 I also have to choose a time when there is no wind since the slightest movement of the flower produces blurring.

some varieties of onion are going to seed and I am leaving a few heads to see if they can self seed

Now I am looking at flowers more carefully, I am noticing lots of small pollinators I had not seen before.

OLYMPUS DIGITAL CAMERA
a small visitor I had not previously noticed

I continue to be attracted to patterns – here the pattern of a fig leaf.

fig leaf with the clouded sun behind it

I took several snaps of small red bugs which are teeming around a vegetable growing area.  Never saw them on the plants but they parade everywhere else.  They gather in clusters and one of my pics reveals why.

OLYMPUS DIGITAL CAMERA
they probably did not kill the centipede so they may be scavengers rather than predators?

This flower stood out from the others so I had to take a snap.

a luminescent attractive offering

I notice that my tripod, which is sturdy, is still unsteady – this is because the tripod feet rest on mulch and soft soil.  So the slightest touch can move the platform – I may need a shutter release cable in due course.  Also the pics on my website are compressed, typically as in those above, below 100 kilobytes.  The original pics are >3 megabytes so the compression is more than 30 times and yet the pics look decent, but there is an inevitable loss of definition.

new camera and old lens

I have taken photographs since I was a kid.  Initially with a box camera, then my Dad’s Zeiss Ikon f2.8 bellows camera, then a single lens reflex and then most recently for this website a Canon PowerShot SD1100.  The PowerShot has been fine but it has limitations for good close up pictures.  I recently found a boxed assortment of Pentax lenses, one of which is an Asahi SMC Macro Takumar f4 100mm, which is about 40 years old.  This lens should be great for close ups I thought, so why not pair it with a modern digital camera.  After considerable research I decided to buy the Olympus EPL-5, which arrived this week and I snapped a few pictures.  Using an older lens has some disadvantages – there is no automatic focusing, you have to do it yourself.  Also the aperture does not automatically open for focusing and the stop down for exposure, you have to manually step it down.  So it takes time to develop these lost skills.  But I don’t take action photos and I will try master these techniques.

comfrey leaf early morning rain backlit by sun

I should mention that for this website I compress photos considerably, so if they are not razor sharp attribute this to compression or user error, but not the equipment.

The photographs were taken using a monopod but this is not stable for long exposures.  I will use a more rigid platform and then I will be able to stop using a flash which tends to flatten the subject.  The centipede appeared suddenly as I was focusing on the log oyster mushrooms.

millipede amongst oyster mushrooms
centipede amongst oyster mushrooms

With all the recent rains (my property is fortunate it receives rain from the Gulf  i.e. the southwest and also the northwest) the kale was sparkly with raindrops.kale leaf with raindrops

kale leaf with raindrops

The only chicken to co-operate with my slow manual focusing requirements was the New Jersey Giant who was attracted to the distinctive click of the Olympus.

New Jersey Giant attracted to the sound of the camera


my new hand sickle

The winter rye is tall and surrounds and shades my berry plants.

rampant winter rye
rampant winter rye

Now it is summer the winter rye is drying out and will soon drop its seed.  I like the wilderness of this luscious growth and see no point in cutting it down, except where it dwarfs my plantings.  It is shallow rooted and after a rain comes easily out of the ground, but that leaves an open spot quickly invaded by weeds and Bermuda grass.  For clearing the rye away from my plantings my large scythe is ill suited since it requires large two handed sweeps which can easily slice off the unintended.  I remembered the one hand sickle from my childhood days, googled it and found several variations for sale.  I wanted something solid and not with a serrated blade.  The Truper 33576 grass hook (as it is called) with a riveted handle best suited my requirements and cost $18.11 on the internet.  It arrived with a slight bevel on the blade but completely blunt, as is customary.  I have a peening jig mounted on a broad oak log.

you can see the sickle, my sharpening stone and the peening jig with two caps

The peening procedure is fairly simple – you place the blade between the anvil and the cap and then you tap the #1 cap along the length of the blade and then the #2 cap.  Peening flattens and expands the blade making it thinner for better sharpening.

peening the blade - my right hand usually holds the blade flat on the anvil, but it was holding the camera instead
. peening the blade – my right hand usually holds the blade flat on the anvil, but it was holding the camera instead

I then hand sharpened the blade with the stone.  Which was not a good idea since it took an inordinate time.  So, instead I fitted a small grinding wheel on my dremel  and this sped things up.

I am very happy with the hand sickle.  Cutting grass is simple but needs care.  With one hand you grasp the tall grass and pull it taut.  You place the sickle blade at the base of the grass and with a slicing motion you sever the grass.  Since some force is exerted pulling the sickle toward you and it can come quickly swinging clear, you should keep limbs well out of the way of its path.  Also take care not to slice the hand holding the grass.  You can fold the grass in half (if it is several feet long) and use it to border the planting.  This acts as a mulch, keeps the ground moist and dissuades weeds.  A weed whacker would work but it flings the grass about and could damage the plantings.  The sickle is very precise since you encircle the grass to be cut with the hook before cutting it.  And since you now have the cut grass in your hand it is easy to place it where you wish.

a blueberry bush with its tall neighbors removed and at its feet

And here is a row of raspberry and blackberry plantings liberated from the rye which concealed them.

blackberry and raspberry plants now accessible


a black powder event

Now for something different!

The Remington Model 1858 was a 6 shot revolver patented in 1858.  My buddy Mike has an Italian made replica with an 8″ barrel in .44 caliber and he, and I, were keen to try it out on my range in the valley of the woods.

the case contains the revolver, a powder flask, a mould for making your own bullets, the bullets (top right) and the caps (in the tin next the bullets)

The firearm is called a revolver because it has a cylinder, which is removable, and contains 6 chambers. The procedure is you fill the 6 chambers with powder from the powder flask.  The flask has a manual valve which you open, place you finger on the end of the flask tube, invert the flask and, when the flask is full, close the valve.  The tube of the flask now has the required amount of powder and you invert the tube into a chamber in the cylinder.

 filling the cylinder
a chamber is filled with powder from the flask

After all 6 chambers are filled with powder you then insert a bullet into each chamber.  The caliber of the revolver is .44 which means the diameter of each bullet is .44 of an inch.  The diameter of the bullet, which is made of lead, is slightly larger than the diameter of the chamber so the bullet has to be compressed into the chamber, which is done with the loading lever of the revolver.

022013 compressing the bullet
pulling down on the loading lever compresses the bullet into the chamber

After loading the powder and the bullets into the 6 chambers we removed the cylinder for the last two steps.

022013 cylinder
the cylinder removed from the frame showing the 6 loaded bullets

A safety concern is cross fire which could occur when you fire one chamber and the ignition triggers the other chambers.  To avoid this we purchased a tin of Cresco.

a tin of Crisco some of which was placed in each cylinder on top of the bullet

And here is the Criscoed cylinder.

cylinder with each of the 6 chambers covered with Crisco

The final step was to place a percussion cap on each of the 6 nipples which are at the rear of the cylinder.

you can see the nipples and a cap which was fired, hence the indentation in the cap
you can see three nipples and a cap which was fired, hence the indentation in the cap

Then, with the cylinder in the frame, it was time to fire.

IMG_0135

Oh, by the way, a confession.  The gun store did not have black powder so we purchased a substitute which was also a black powder and worked just as well as the real thing.

the black powder substitute which we used

update – Mike was unhappy with the inaccuracy of the revolver.  I thought the 2ft grouping at 50ft was ok for first time firing of this weapon.  He says with its 8″ barrel and grooving this is a very accurate weapon and should have produced a tighter 6″ cluster.  He studied the photos on this site and identified several reasons.  First, the bullets should be close to the cylinder face – the reason they are so deeply seated is because we didn’t use wads, which we will use next time.  His reasoning is that it is important the bullet be close to the grooving in the barrel so it starts rotating immediately.  Seated deep in the cylinder means it will travel a short distance without rotation and this will adversely affect its subsequent rotation.  He also noted that some bullets were more depressed in the cylinder than others which means the powder charge was inconsistent and this will affect accuracy.  Finally, not all the trigger pulls fired first time and the reason we surmised was because the caps were not properly seated on the nipples and with the first trigger pull the hammer seated the cap on the nipple and then it fired on the second hammer pull.  Mike notes from the picture that some of the nipples are deformed from dry firing and he will investigate acquiring a nipple remover tool and new nipples to correct this problem.  Finally, Mike says black powder is more accurate than the powder we used.  It is like diagnosing intermittent firing on an older vehicle – so many things to consider and skills to acquire, now redundant from modern technology.

home beer brew

When I lived in London in the late 70’s through the mid 80’s it was common to make your own beer.  Boots, the large pharmacy retailer, sold a beer brewing kit for less than 10 pounds  ($16 at today’s rates) which contained all you needed to make your own beer.  Drinking beer at the pubs was popular and even when you visited friends for a meal, you would before or after the meal, head to the local pub.  However, and I began to dread the moment, your friend would occasionally insist you drink his own brew.  Some were good, most were blemished, including some of my own.

So now, many years later, I have returned to making my own beer.  One reason is I am using yeasts for various other purposes such as making whole wheat bread and I am growing three different types of mushrooms (yes, yeasts are classified in the kingdom of Fungi).  And I like beers, especially dark beers – each evening I have a Trader Joe’s Hofbrau bock.

I ordered equipment and a kit (described as German style dark all malt) and yesterday I began my brew.  Relatively straight forward.  Clean all the equipment which will be used, then heat 1.5 gallons of water and mix in the ingredients and boil for a while.

beer
preparing the malt mixture (wort)

Next step is to move the hot contents to the fermentation vessel, allow it to cool down, add the yeast and leave it alone for a few days.  Here is a ‘photo of my carboy fermentation vessel before adding the yeast.

beer
6 gal glass carboy with airlock before adding yeast


And here is a ‘photo 16 hours after adding the yeast.  The gadget at the top is an airlock which allows the bubbles to escape without admitting outside air, which could contaminate the contents.  The cylinder next to the carboy is an hydrometer which I will use to determine when the beer is ready for bottling.  It measures the specific gravity (“SG”) of the contents.  Alcohol has a lower SG than water and as the yeast ferments and makes alcohol, the SG will fall.  When the SG reaches the accepted range it will be bottling time and “Cheers!”

beer
carboy with brew 16 hours after adding the yeast, the airlock is bubbling


making whole wheat bread

A wise man once told me “You are what you eat”.  At the time I ate whatever I wished and being in my mid- 20’s and healthy, I saw little need to change my eating habits.  Nowadays I eat “healthy” which includes whole wheat bread and, noting the cost of 100% whole wheat bread and wishing to be as self-reliant as possible, I decided to venture down the bread making route.

Acquiring a whole wheat bread maker

wheat breadFirst stop was a bread making machine (I could have tried hand kneading but I like machines) and my preference was for a good quality used machine.  Craig’s list showed a make “zojirushi” and some research indicated this is a durable, well regarded but pricey item.  I was able to buy, for a reasonable price, the model “BBCC-S15” which is at least 10 years old and was made in Japan (more recent models I believe are made in China). The  manual included recipes for whole wheat bread so that closed the deal.

The machine worked fine except the battery, which keeps the date, had expired.  From the internet I learned that the battery is soldered to the circuit board but can, with care, be replaced.  This I was able to do.

wheat bread
circuit board showing original battery soldered to the board
wheat bread
new battery inserted in a battery holder


Grinding whole wheat kernel/berry

The seller mentioned to me she also had a grain mill (brand name “Whisper Mill”) which I also purchased, and that she acquired her whole wheat and other ingredients and advice from Bread Beckers company, which fortuitously is located en route to  my property.

The family members who operate the business are most knowledgeable and helpful, and I acquired hard red wheat, lecithin, gluten, flax seed and yeast.  The Whisper Mill ground the red whole wheat well and I used a coffee grinder for the flax seed.  I experimented with their Ezekiel bread mix, but the result was too dense for me.  However, the whole wheat loaves are delicious.  I include in the mix a free range egg,  my harvested honey and 1/4 cup of unground sunflower seed.

There is one area for improvement – the top rises and then falls a little.  I have experimented with increasing the gluten above the recommended amounts to compensate for moisture and will try out differing combinations to arrive at an unblemished loaf of whole wheat bread.  In the meantime, the fallen top goes to the chicks.