tasks for Fall

I am preparing for winter.

  • cover crops – I cleared the tomatoes and weeds, added compost and sowed winter rye and crimson clover.  A few years ago I used hairy vetch, which worked well and next year I will order more since the local supplier, who originally sold me the seed, no longer carries it.
winter cover crop
a vegetable growing area seeded with winter rye and crimson clover cover crops
  • firewood – during the year I cut a new 5 foot wide route through the woods and I steered the path to avoid the larger trees.  I had to uproot and remove smaller trees and I cut their trunks into 5 foot lengths and stored under cover for fuel for winter.  I am now chain sawing the wood into 2 foot lengths to fit the grate.  Last Sunday was cold and the wood burnt well.
firewood and mini posts
firewood stored under cover drying for winter use. I have used some of the oak trunks as mini posts for structural jobs


firewood
firewood cut to size next the fireplace
  • mushrooms – I built a mushroom house, which I filled with logs impregnated with sawdust spawn, and then neglected to water.  A few weeks ago I watered the logs and some oyster mushrooms have surfaced.  Encouraged, I shall water more regularly.  Also I must affix a gutter to the roof of the shelter and direct the rainwater onto the logs – this is obvious and I should have done it at the outset.
growing mushrooms
mushroom shelter with solid sheeting or barrier cloth on north and west sides for sun protection, and chicken wiring and door protecting remaining access points
some oyster mushrooms
mushrooms have begun to grow
  • winter growing shelters – last year I was able to purchase a number of wooden windows for a $1 each and constructed rudimentary cold frames.  This year I would like to create a larger structure but to do this I need posts.  Pressure treated posts would be ideal but I do not want to pollute the soil or my vegetables. So the options are cedar wood (which rots with time), composite posts (which are expensive and may distort), metal structural posts (ideal but where will I find them) or use some oak trees from the woods (cheapest, self reliant and maybe the way to go).  In the meantime I painted the wooden windows, first with Kilz primer and then a good quality exterior latex.
painted windows drying in the sun
  • seed gathering – now the cosmos and zinnia have finished flowering and set seed, I sortie out to gather seed for next year.
cosmos
ebullient cosmos in a field


  • rainwater collection – when it comes to my rainwater harvesting systems the invariable rule is that it will fail wherever I have not checked.  The main flow from the house roof went through a “Y” and the “Y” leaked in small amounts and eroded the ground supporting the connection so one of the 4″ pipes disconnected (maybe also assisted by the rodent hunting activities of my dog).
plumbing for rainwater harvesting
this is the old, cheaper, now replaced Y connection

I replaced the old Y with a more substantial Y, I rebuilt the underpinnings and I secured the inlet pipes to the Y with duct tape and am resolved to keep a good eye on this joint and have instructed Trudy to leave the water drainage pipes well alone.

rainwater harvesting
rainwater harvesting – the more expensive replacement Y secured with duct tape
  • winter vegetables – I decided to seed more lettuce since I already have sufficient kale.  The lettuce was seeded initially into 3/4″ soil blocks and are now in 2″ soil blocks in the greenhouse.  I will probably grow some full size in the greenhouse and the remainder will be ground planted once I have figured out the construction of my new windowed winter shelter.
lettuce in soil blocks
4 varieties of lettuce seedlings in 2″ soil blocks. the reason there are several in one block is this was older seed and I thought germination would be irregular. silly me, they all came up and I will have to thin or transplant.
  • cuttings and acorns/nuts – I have taken cuttings from trees I would like to replicate like mulberries, pears (my neighbor’s pear tree was prolific this year and my Giant Korean, which bore for the first time, was excellent), cherry, plum and one of my neighbor’s apple trees which had very sweet small apples.  I know with the apple tree I may have a problem with the root stock.  Perhaps next year, when I am successful with grafting, I will graft scions to root stock.  As for nuts – my other neighbor gave me a dozen pecan nuts from his magnificent pecan tree and I also buried Ohio buckeye nuts, acorns from selected oak trees and nuts from other local trees.  The cuttings and nuts are in an area which I visit and weed and water most days, with good sun exposure and the soil is well mixed with compost.  So I am hopeful.  If the cuttings are viable I may transplant them in spring next year or, better, wait till fall and then plant them out with the nut seedlings.
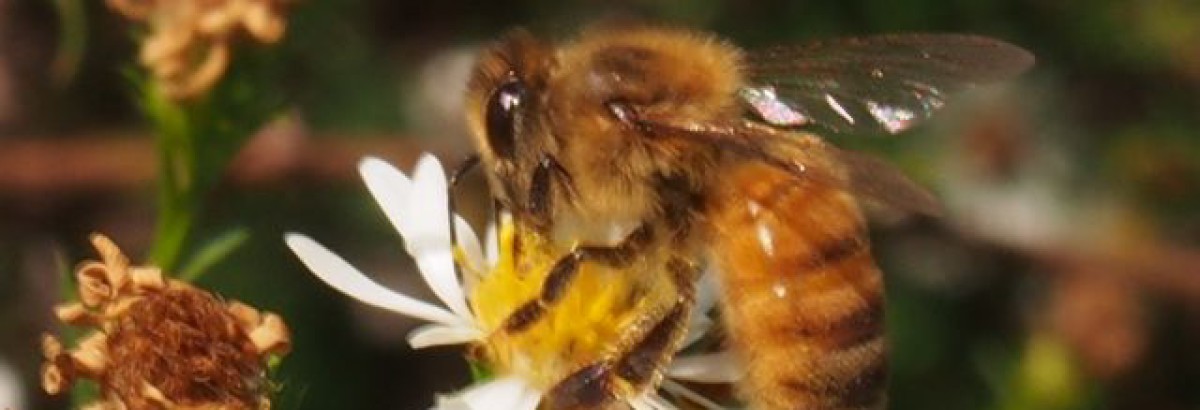
  • in earlier posts I mentioned other activities such as terracing the hill in anticipation of delivery of assorted fruit trees promised for the end of November, and winterizing the bee hives and the chicken coop.  When really cold weather threatens I will wrap my fig and other cold sensitive trees in swadling and leaves to prevent die back.


summerizing the coop

Before I get to the coop, a quick update on my “Spring activity” journal.  I mentioned that pokeweed is an unwelcome visitor, difficult to extricate because of its long thick taproot.  In permaculture “the problem is the solution” and it occurred to me that the taproot, like that of comfrey was performing a valuable function mining minerals two or more feet below the surface.  But this seemed inadequate justification for its presence until I noticed that it, and it alone, has been attacked and eaten by insects, as yet unidentified.  So it is also serving the role of a trap crop and attracting these hungry feasters from my diverse array of vegetables which, so far, are unscathed.

the pokeweed invader is the banquet for hungry feasters

a few feet away the spinach, collard, chard, garlic et al. are unscathed

I also mentioned I was leaving the crimson clover to flower to provide succour for the bees and seed for next growing season.  Well the clover is maturing quickly and today the honey bees and bumblebees and others were busy at them, so my next honey harvesting will include some clover honey.

crimson clover in flower with bees in attendance

Now to the chicken coop.

I have 3 coops, two constructed on two sides (north and east) of the barn.  The east coop is well protected from the summer sun and would be good for summer quarters.  Last year, as winter approached, I built a new larger coop (building details elsewhere on this website) which was well exposed to the winter sun and, since there are no neighboring deciduous trees (yet) even better exposed to the summer sun.  I had considered moving the chicken to the east coop for the duration of the hot weather.  And then a development – Buffy, the Buff Orpington rooster, fixated on Lady Macbeth, his sister.  She is the only hen missing feathers on the back of her head and she is vociferous and will have not truck with him, when she can avoid him.  Which is difficult when they share the same coop and so to escape him she immediately goes to the roosting ledge when they are housed for the night and consequently misses the much anticipated evening meal.

Matters came to a head when she refused to enter the coop one evening and with me trying to coax her in and Buffy charging at her as soon as she crossed the threshold, she became vociferous and agitated, and the two males increasingly frustrated.  The upshot was she spent the night in the north coop with the two comets for companions.  This got me thinking about the wisdom of transferring them all to the east coop.  Their new coop has a partition, all that is missing is a door.  So rather than spring $80 for a gate from HD or Lowes, I constructed a simple door with left over lumber and chicken fencing and two $1.54 hinges from Walmart.

the aggrieved Lady Macbeth

new partition door for coop

So with the winter coop the designated summer home, next steps were to reduce the heat buildup.  It has four south facing windows and a window each on the east and west sides.  Two of the south facing windows and the east and west windows have been predator proofed (I hope)  with wire fencing material and are left open.  I found an old tarp (8ft by 10ft) with brown colored and silver sides and scrubbed the mud off the silver, soon to be sun facing side.  I cut it into 4 sections – two ‘5 by 5′ and two 5′ by 3’.  The two larger pieces were fitted over the two closed south facing windows and the two smaller pieces over the two open south facing windows.

new coop, south side, before sun covers

new coop after sun covers installed

More work remained.  I decided to install a powered attic exhaust fan.  Since in the afternoon and evening the air will be cooler on the east side, I installed the fan on the west facing wall of the coop.  I considered using a roof vent (i.e. one installed on the top of the roof)  which would have therefore been higher up and removed more of the hot air at the higher levels of the coop, but I was unsure where that air would be drawn from.  By installing the exhaust fan on the west side I can ensure that it pulls air from the east window and therefore the air will be moving across the two roosts which are located in between the east window and the installed vent fan.  To power the fan, I installed an exterior power outlet box on the barn wall closest to the coop and led a cable the 100 feet from the barn to the coop.

new power vent and insulation added to west side

power cable to the coop

Apart from the powered vent and the hinges, all the other items were recycled i.e. lying around unused.  As you can see from the ‘photo, I attached the cable to the top of the chicken paddock fencing and to surmount the gates, I bolted 2×4’s to the gate posts and raised the cable 8’ above the gate entrance.

My next venture, and a new one for me, will be to install solar panels on the barn roof and a battery bank and inverter in the barn and thus power the exhaust fan using the summer sun (as well as a powered timed coop door to let the flock out early in the mornings).  To return to an earlier theme, albeit crudely – in the problem (the summer sun) will be found the solution (solar energy powered fan).

cold frame building (2)

In a previous post I mentioned  building my first cold frame using bargain priced windows from the local thrift, cement blocks and lumber.  The seedlings in this cold frame are growing well and when it is cold (say 18 F outside temperature) the temperature in the cold frame is approximately 10 F higher.  During the day the differential increases.  And it keeps out the frost.  So I am hoping to grow decent sized vegetables.

One cold frame was not enough because I had 10 windows remaining and there is a better site for a cold frame – on top of the hill where it catches early morning sun to late afternoon son.  This location is unfenced and close to a road so there is a possibility of unwelcome attention, therefore my decision to locate the first cold frame in the better protected vegetable growing area.  Nonetheless, the cost of building a cold frame is modest and the full time attention of the sun is a major plus.

Construction was very similar to the first frame except I dispensed with all but two cement blocks (instead of the 17 used in the first cold frame).  The blocks are located at each end of the cold frame and are spanned by a 10ft by 8″ wide 2″ thick, plank.  In between the two cement block supports I built a stone wall of sorts using the large stones I had uncovered when I dug a contour ditch.  I used a hammer and stone chisel to cut faces on the stones so they would stack.

cold frame
basics of construction of cold frame - windows on top and south facing, stones on north side

The purpose of the stones is to absorb the sun’s heat during the day and release it during the night.  Only the top layer of the stones is visible – there are two (more skilfully arranged) layers below the soil level.  To prevent the warm air exiting through the stones I draped 6 mil plastic sheeting on the outside of the frame.

cold frame
north side of cold frame showing plastic sheeting draped over north stone wall

As before, I used the windows from the thrift store to enclose the frame.  The savings from using 15 fewer cement blocks was partially offset by the cost of 3 additional window frames I had to purchase from the thrift store – a different floor manager did the pricing and he wanted $4 per window rather than $1 – such are the vagaries of life.

cold frame
south facing aspect of cold frame, seedlings still to be planted

The gaps and openings I covered with bits of plank or plastic.  I have now introduced some collard and broccoli seedlings and in the next week will add the remaining spinach and other cool season vegetables – and wait and hope that I will get a worthwhile yield.


cold frame building

On a recent visit to the thrift store, where there are often solid wood furniture and country painting bargains, I noticed about 50 double insulated small windows each 2 ft wide and  31″ high.  Available for $1 each.  I bought 22.  And have spent a lot of time figuring how to use them effectively in a cold frame.

double insulated, same sized $1 windows from thrift store

My greens are growing very well under an Agripon row cover – it allows air and rain through, protects against frost, keeps the temperature higher inside than out and allows some light through.  However, as with most all solutions, there are negatives.  The cover allows light through, but not all the light and it keeps temperatures higher than ambient temperatures, but not that much higher.  This has worked fine up to now since temperatures have been mild.  Temperatures in January and February will be much lower.  A cold frame using glass windows will let much more light through and will keep temperatures much higher.  Negatives are more labor intensive and costly to construct, does not allow rain to penetrate therefore more supplemental watering required and, on warm days, the temperature will rise too high so I shall have to be watchful to allow ventilation.  An advantage of a cold frame over my greenhouse is the plants will be growing in the ground and their roots will penetrate further than in greenhouse pots.

So having rationalized the need for a cold frame I developed a simple construction plan requiring minimal additional expenditures.

skeleton of cold frame, cement blocks on north side of raised bed, ridgeline down center

I appropriated a section of a newly built raised bed, which has stones on the north side to store heat.  I assembled a two level wall of cement blocks (8″x8″x16″ –  $1.25 each).  9 blocks on the ground and 8 above them (not mortared).  Most of the construction time was ensuring the bottom blocks were level.  I recycled two cherry branches for my uprights to which I bolted a 2″x8″x10ft untreated plank ($5.85) which acts as the ridge on which the windows will rest.

cold frame showing 2nd plank on cement blocks and windows in place

Since cement blocks have cavities, I aligned a second 2″x8″x10ft plank along the top of the second block layer to which I screwed 5 right angle brackets which grip the inside face of the cement blocks to prevent the plank sliding off the blocks.  Additionally I screwed a 2″x4″ plank along the left side of the plank as a step to prevent the windows sliding off the plank.

a view of the south side of the cold frame

On the south side of the cold frame I have the 5 windows with bottom edges resting on the ground and top edge resting on the ridge line.  A total of 12 windows were used, 5 facing up and north, 5 facing south and 1 on each end.  By having the south windows and the end windows resting on the ground this will maximize exposure to the low southern sun (also, unfortunately, accelerate moisture penetration and wood rot).  The areas not enclosed by the windows were filled with sized surplus lumber.  For access and ventilation I remove the south facing windows.  I placed an electronic min/max thermometer in the cold frame and tomorrow, hopefully, I will find there was reasonable heat retention.  The ground should also have warmed up and I will plant out more of my kale, collard, mache, broccoli raab, and turnip greens seedlings.

new chicken coop – completed

I completed the chicken coop project over the past weekend. I did all the work myself except for the assistance of a friend who helped me hoist 5 of the 6 windows into place and fit the entrance door. In previous posts I mentioned my progress on its construction. It is built on sloping ground so I started by using my bobcat to build a level pad, half of which was cut into the slope and the other half was infill from soil removed from the slope. Then with my trencher/stump remover attached to the bobcat I dug drainage trenches on the two sides of the pad which cut into the slope. The building is 18 ft by 10 ft and secured by posts concreted into the ground. Digging the post holes took a lot more time than anticipated since there were a number of largish stones (boulders) which had to be removed and this resulted in some cases in very wide holes. With the posts finally in place, construction went quickly. A time consuming task was digging the trenches between the posts for the cement blocks which I lined up 8″ deep to form my barrier against predator tunnels. I am concerned that predators can dig deeper than 8″ tunnels and will keep a lookout for perimeter activity.

The first photo is the entrance. The only 6ft wide gate available at the time of purchase is for larger animals rather than chicken, so I used some of my fence wire to cover the gaps between the horizontal bars.


coop
coop seen from entrance gate

I screened all openings which remained after construction with hardware cloth. I also added the hardware cloth to two of the windows (lower half which opens) so that I can leave the windows ajar during the nights. To attach the cloth to the timber I used a pneumatic stapler (and safety glasses) and this sped up the work considerably.

coop
coop south facing side with four 4 ft windows

There are a total of 6 windows, four in the front and one on each side. This photo shows the entrance, with my $8 front door purchased from the thrift store and my rainwater storage tank. I will use the rainwater to irrigate the tree and shrub plantings I am installing in the chicken range areas.

coop
coop front entrance at rainwater storage tank

The coop is divided into two halves – one for the 8 younger chicken and the other for the 6 older hens. I intended to keep them all in the one half and use the other for growing and other activities. However, it appeared too cramped and there is still some friction between the two flocks. Each half has its own water container, food container, perches and nesting box. This photo shows the half closest to the entrance in which the 6 older girls now live, and the large nesting box inherited from my neighbor as well as the steps (4.5″ spacing) on the inclined plank to facilitate accessing the perch (horizontal, non pressure treated 2×4 at top left).

coop
coop area for older hens

The two areas are separated by fencing material and a gate I salvaged.

coop
coop partition

The other half is outfitted much as the first. Incidentally, in one of the nest boxes is a Golden Comet and, I discovered later, she is in the process of laying her first egg. Maybe living in close quarters with the older egg laying hens accelerated the process.  The step spacing in this coop is 6″ which I think is a bit too far apart – you can see Lady Macbeth on her way up to the perch.

coop
coop for younger hens

I spray painted the exterior with a block stain. This photo of the rear of the coop shows the slanting gutter leading to the storage tank and the drainage ditch on the north, slope side, of the coop.

coop

And, finally, this photo shows the west side with the drainage ditch between the slope and the pad on which the coop is built.  I have used 4 ft fencing which a number of the birds can easily fly over, but as longer as there is habitat and things to scrounge for they appear content to stay within the fenced areas.

coop
coop west side, showing drainage ditch

Finally, I must plant up the soil which surrounds the coop before it is eroded by the rains. I may transplant sod from the hill or try seeding it. With temperatures beginning to fall, it may be too late for seeding.

progress on the coop and a simple replacement fix

The future chicken coop

Chicken coop

The future chicken coop is progressing. I installed the windows and door with the help of a friend. Just outside of Atlanta there is a large employee owned window manufacturer and they custom manufacture windows which are occasionally returned because of wrong specs, finish, customer couldn’t pay etc. Nothing actually wrong with the windows. These returned windows are stored separately and are advertised on Craig’s list. I bought 6 of these windows (dimensions 4 ft by 4 ft) for about $50 to $60 each, and now I am putting them to use.

Incidentally, the coop building will be used for more than just the chickens. I intend this year to propagate cuttings of various fruit trees and berries and a ledge along the south facing windows will be a good spot for the cuttings, once they have rooted. I read in a permaculture book that CO2 from the chickens will also help plants stored in this area. However, no vegetables for concern of contamination – they will be grown under cover or in the greenhouse.

I found the exterior door for the coop at the local thrift store for $8. It really didn’t make sense buying an exterior door for >$100 from one of the big box DIY stores.

Click to see details of the finished coop.


A simple fix
I have a Sears industrial circular saw purchased in the 80’s which has provided excellent service. Recently it would fail to start and I overcame this by turning the saw blade a few inches. Eventually it wouldn’t start at all and I figured it was time to replace the brushes. This usually is the problem when a motor won’t start initially but then starts after you slightly turn the part driven by the motor (or at least in my experience this has been the case). I downloaded the parts diagram, found the part #, found the cheapest supplier (you have to combine part price with shipping cost since the latter can vary greatly) and ordered the part. Except, a few days later the supplier fessed up they didn’t have the part and credited me (they shouldn’t have charged me until they had shipped, but I got the credit). So I paid more, got the part, opened up the saw and replaced the brushes – the whole procedure took less than 10 minutes. There are two brushes and when I removed the first it looked fine and I had real misgivings about my diagnosis. However, as you can see from the photo the second brush was completely worn. And – the saw now works fine and just in time, since I needed it to cut the 4 ft by 8 ft sheathing.

my trusty circular saw
shows brush in holder pressing on commutator
there are 2 brushes, the first looks ok
however, the 2nd brush is completely worn down


Mushrooms

I am seeing more and more mushrooms in the woods following the recent rains. The young mushrooms are rounded at the top and then, when they release their spores they open up and become flat at the top.

a young mushroom
an older mushroom which has released its spores


Permaculture

I am becoming increasing interested in permaculture. A few years ago I read the book by Bill Mollison but, though I understood the concepts, they did not resonate with me. Last year I read The One Straw Revolution by Fukuoka and I just finished the permaculture book by Sepp Holzer and am working my way through Gaia’s Garden by Hemenway, which is excellently written. Since I acquired the property I have been doing more than just organic gardening – my contour ditches, my allowing natural growth to overtake the mown areas, my working in the woods – these various projects are neatly encompassed by the permaculture approach. Next step is for me to go on a PDC (permaculture design course). Below is a photo showing fall colors in the opening I cleared in the woods (the “edge” in permaculture):

sourwood fall colors and opening in woods

support the little guy!

the roof is on the future coop - underside view showing rafters and purlins
topside view of future coop

Today I finished installing the roof of the future coop.  For the rafters I used 2″x6″x12 ft kiln dried wood, not pressure treated; for the purlins I used 2″x4″ pressure treated, and for the roofing 2ft x12ft galvanized steel crimp roof panels.  I painted with exterior enamel paint those parts of the rafters which would be exposed to either rain or carpenter bees.

I deliberated long on how to transport the 12 ft lengths of wood and roof panels.  My pickup has a 6 ft bed so either I would have had 6 ft hanging out the back of the truck, or I could have slanted it over the cab, but I was concerned I would further scratch and dent the cab roof (not the first time I have transported 12 ft lengths of material) and that the roof panels could buckle from wind pressure as I was driving.  So I thought I might rent a truck from one of the two big box DIY chains.

I priced the materials at both chains and they were identical and, to my mind, expensive.  So I thought I would visit a local family owned builder supply store.  There used to be two such stores within 15 miles of my property and both were dependent on building contractors for their business.  And then one, which have been operating for over 80 years, closed down in 2009.  So I visited the remaining store.  They were very friendly and said they would ship the lumber and roof panels to my property for a $20 delivery charge.  An even bigger surprise was their prices – the lumber was about 3% less than the price at the big chains and the roof panels were 20% less.  And they were so knowledgeable and helpful!  I decided to make additional purchases at their store and all the prices were competitive. 

Which brings me back to my heading – where possible we should support the little guys, not because we want to be nice or considerate but because it is in our own self interest to do so.  We benefit from the price competition which whittles out the independents but, once they are gone through either liquidation or consolidation, and there are just a few big operators left, as is happening with the airlines, the telecom industry, the banks, the consumer retail stores etc. etc. then we become the victims as the few remaining competitors abandon price competition and gradually price up.  So, support the little guy when you can.

new chicken coop

I am making slow progress with construction of the new chicken coop.  The present coops are well located for summer weather since they are at the bottom of the hill with large trees to the east and west and well screened from the sun, except when it is overhead.  The coops are enclosed by walls on two sides and netting/fencing on two sides, so cold winter winds will easily find the residents.  I considered closing in the remaining sides, but decided an extra coop will be handy in the future and, since it will have many windows,  a portion may be hived off and pressed into service as a greenhouse.  My new location is on slightly higher ground and has much better sun exposure.  Since it is on a slope my first task was to level the ground  with my bobcat and create a level pad.  I dug a perimeter trench between the pad and the two higher sides of the slope so the rain water coming down the hill will be diverted around the pad.

I determined the width by examining roofing materials and noting that most are either 8ft or 12 ft long.  Since I would like an overhang of approximately 1 ft on each side, I decided to use 12 ft long roofing over a 10 ft wide coop.  The coop is on an east-west axis and the higher side faces south.   The most difficult part was digging some of the post holes since there were large rocks in the ground, some bigger than a foot wide, which had to be removed.   Below is a photo of the framing which I installed.  The horizontal braces between the high side and the lower side are to hold them in place until I can install the roof rafters at which time they will be removed.

Click on these links to follow progress:  roof installation and final completion.

framing for new chicken coop

rainwater harvesting from an old deck

I acquired an adjoining piece of land which had an old mobile home and, attached to it, an old deck.  The land was uphill of my property with full sun exposure and well suited for growing and rainwater harvesting.  The timbers of the deck were protected from the rain by the roof of the deck and from the sun by an overtowering maple and were therefore in good condition.  I decided to sell the mobile home and keep the deck, though for what purpose was unclear to me at the time.

The purchaser of the mobile home sent a professional crew to move it.  Since the deck was not self standing and was attached to the mobile home, it was necessary to separate the two.

The moving truck has a powered hitch and when this was attached via chain to the deck uprights, it was easy for the crew to pull the deck away from the mobile. Then, after narrowly sliding past another maple tree, the truck and the mobile were on the road and gone.

mobile home and attached deck
rear of moving truck showing adj. hitch
hitch with chain separates deck from mobile
after bypassing a tree, the mobile was on its way


My next steps were to repair the deck. The flooring sagged in the middle as did the roof. With the assistance of a bottlejack and odd lengths of 4×4 the base was levelled and supported with cinder blocks. Similarly, after the base was stabilized, the roof was jacked up and secured horizontally with 2×6’s and vertically with 4×4 posts, all bolted together. To keep the structure upright the ends were buttressed with diagonal 2×4’s.

deck before repairs
deck after repairs


Finally to the rain capture system. Although the east facing roof was horizontal as a result of the repairs, the west facing roof which was lower and to which the water drained, sagged in the middle. Since the storage tank was at the south end, the question was how to move all the rainwater to the storage tank. I decided to attach a lower fascia board (cedar fence plank) to the existing fascia boards and this enabled me to slant the gutters to a common low point from which I ran the downpipe to the storage tank.

gutter attached to extended fascia boards
downpipe with reducers to sloping pipe to storage tank


The rainwater harvesting system works well and, since it is at the top of the hill, no pumping is required for irrigation. Now I have a use for the roof of the deck I must still find one for the deck itself. Perhaps a chicken coop?

2nd chicken coop done

Arrival of the egg laying chicken

My neighbor offered me her 6 chicken and nesting boxes and metal waterer for a reasonable price and, because of the age and size difference between her mature egg laying chicken and my youngsters, I built a second chicken coop to receive them as well as a separate fenced outdoor exercise and grazing area.

chicken
6ft gate to fenced range with coop at rear

I refurbished a horse stall into a chicken coop using scrap lumber and wire fence leftovers.  I used screws rather than nails since it is easier to undo a mistake with screws and screws, altho’ costlier, hold better than nails.  My preference for the lighter joints was “star drive” screws to “phillips” screws because turning power is better, and for the heavier joints I used hex lag screws and occasional bolts and nuts.  To secure the metal sheeting to the sides I used hex metal roofing/siding screws.

Chicken coop construction

chicken
exterior view of coop

I worked from the ground up –

  • first dug trenches for implanting narrow cinder blocks to thwart tunnel attacks;
  • along the downhill sloping side laid surplus 4 ft wire fence on the exterior ground surface anchored by flat rocks and 10″ tent pins to also deter tunnelers;
  • framed the sides and roof with old but solid 2″ x 6″ and 2″ x 4″ lumber assortments;
  • secured surplus green roof sheeting to the sides to waist height;
  • used surplus fence wire (welded or woven) to close in the sides and the “courtyard” roof;
  • a battered front door was recycled to become the chicken coop entrance;
  • a partition using wood and sheet metal scraps was constructed between the roofed in area and the courtyard;
  • a tree limb secured by lag bolts to the sides became a roosting perch;
  • a plank with screwed on footholds became the stairway to the chicken roosting perch; and
  • finally the nesting box and the metal waterer were installed and thechicken introduced to their new home.
chicken
door entrance to coop

chicken

nesting box secured to partition in coop
chicken
courtyard with roosting perch, stairway and 5 occupants
chicken
view of fully enclosed "courtyard"


To acclimatize the new residents, treats were provided.

chicken
some yogurt for the new occupants
chicken
as well as a melon treat