Last year there was a drought, I was short of water and had to transport 35 gals a day from Atlanta to Pickens to maintain key plants. I then resolved to increase my 6,000 gal storage capacity and in May I installed a 2,100 gal tank in a separate location and filled it from my other tanks. More rain quickly refilled the depleted tanks.
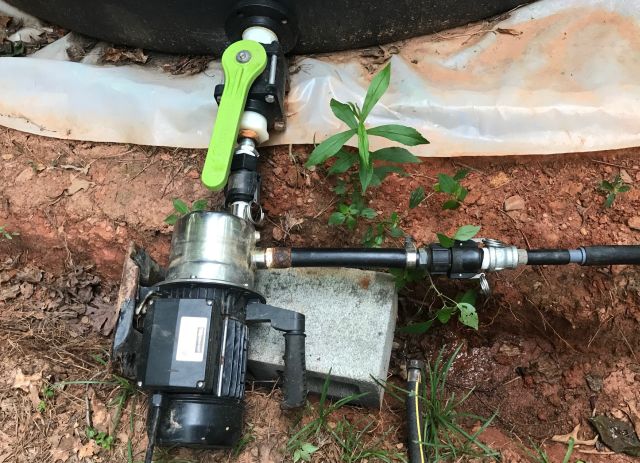
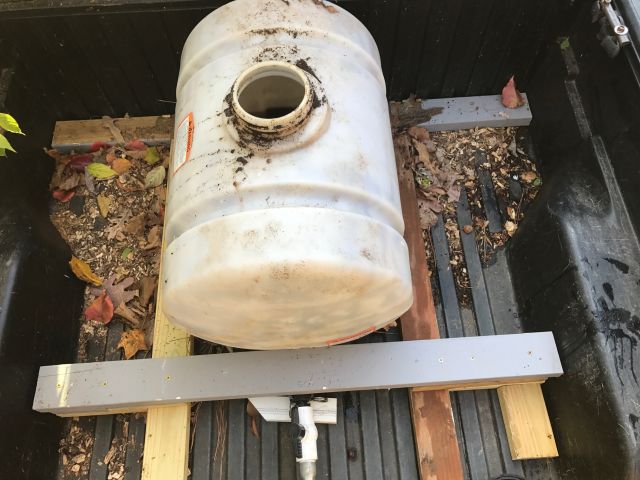
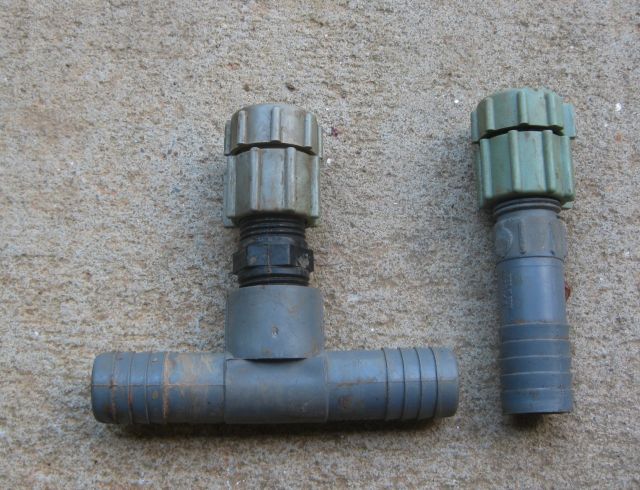
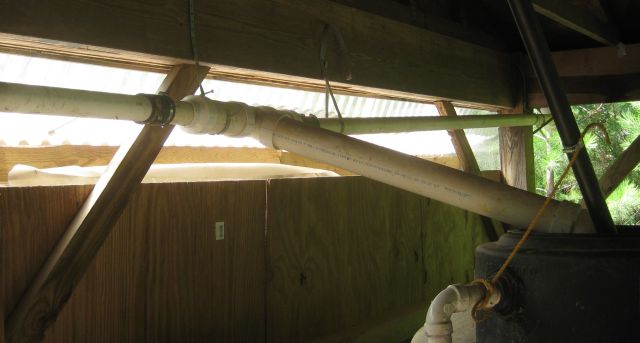
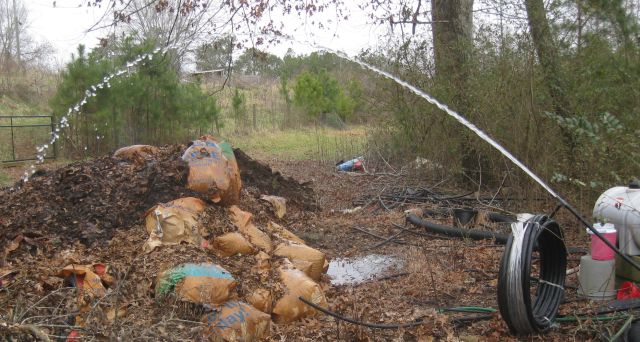
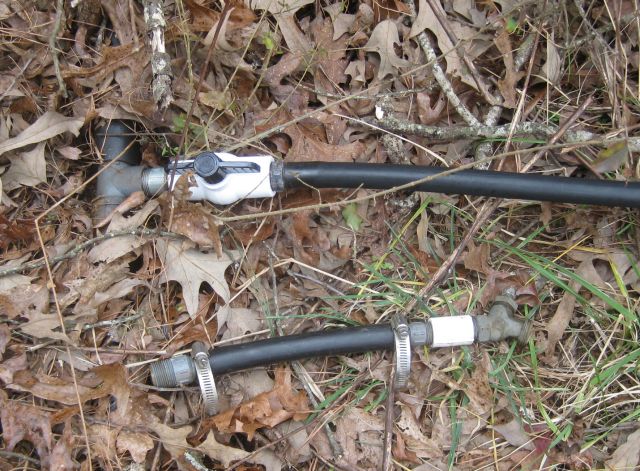
I irrigate my vegetables and fruit trees plentifully and they are producing a bumper crop of squash, cucumbers, apples, pears and also tomatoes, okra etc. However with minimal rain past 3/4 weeks my big tanks are almost dry so I must tap into the new storage tank, which is separate from the other tanks. I could pump directly to the crops or refill the main storage tanks. To refill I could run a line directly to the tanks or tap into an existing feeder line. I decided to tap into a nearby 4″ line which runs from the house gutters to two two 1,400 gal tanks. I scrounged around and found enough fittings and surplus 1″ pipe to do the job.
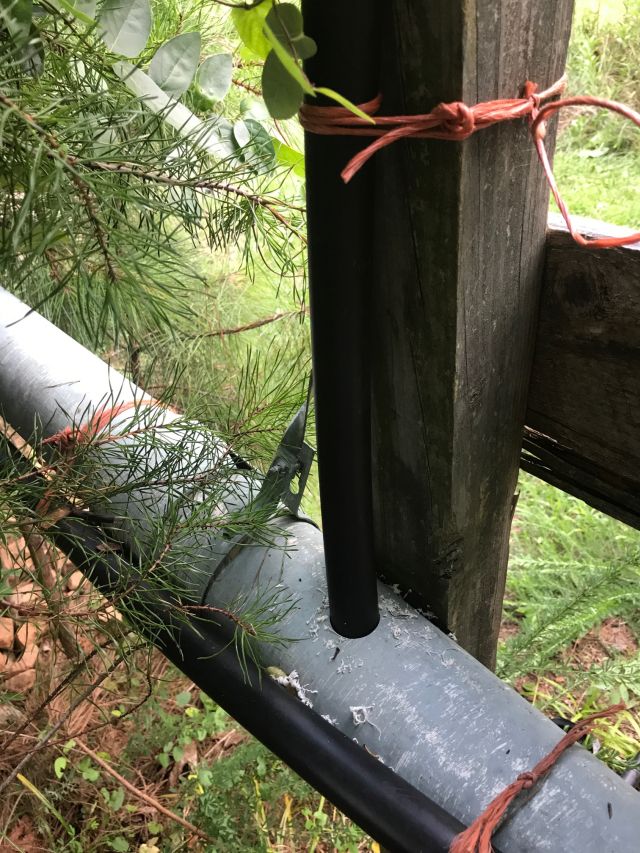
here is the portable pump (on its side) pumping from the new storage tank to a 1″ line which taps into the 4″ line. I had to cobble several fittings to go from 1″ female to the 1″ pipe and I will replace these with a single plastic fitting next visit to storehere is the 1″ pipe from the tank (shown vertically) connecting to the 4″ feeder pipe. I was lucky to find my hole saw of correct size to bore the hole into the 4″ pipe
I uneventfully pumped 1,000 gals. The rain forecast for today and tomorrow is no longer forecast, so time to irrigate.
Btw – our Giant Korean pear tree is now producing and its pears are pest free and large and juicy. They could be sweeter but this is the beginning of the season and our early picks have not fully matured.
here is a large pear. it weight 1.125 lbs and you can judge its size relative to the tennis ball
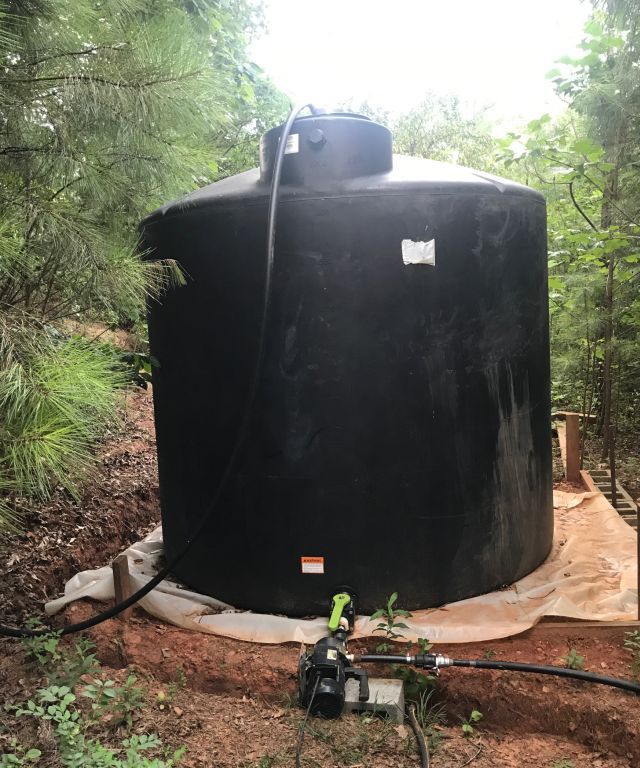
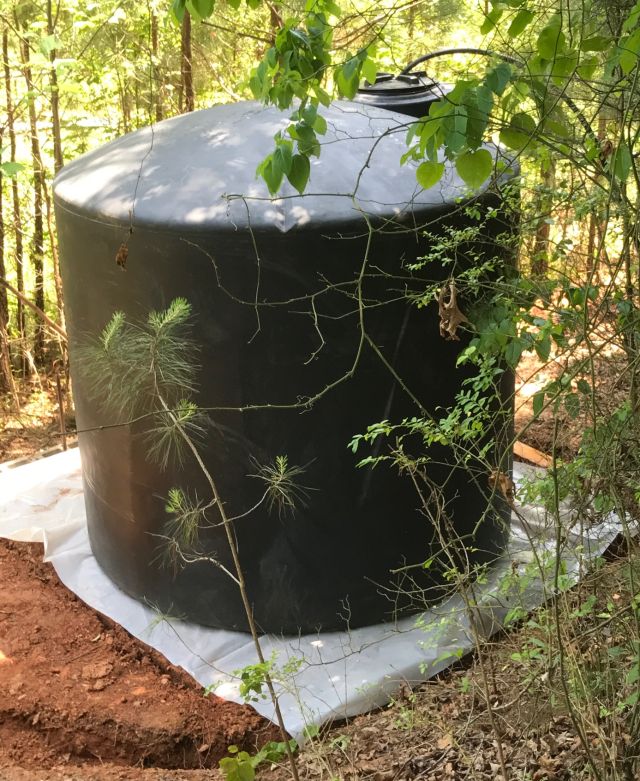
I have storage capacity for about 6,000 gals of rainwater. Last November the drought was so bad I was transporting 35 gals of water from Atlanta to my farm each visit – see “making do” post dated Nov 15, 2016. Additional water storage was needed. I have a 2,500 gal tank and would like to have ordered another (cost $860 ) but was told shipping cost would be very high. It was recommended I order the 2,100 gal tank for $920 (yes the smaller one costs more) and the freight would be $220. So I placed the order before my Pacifica trip and yesterday it arrived. See pic above.
The tank is 90″ high and 87″ wide and weighs 290 lbs. Of course there was drama with its delivery. I stressed, when I placed the order that the one lane bridge off the highway when approaching from the east, could not take a big trailer. They said the driver would call well before he reached the house and I could then instruct him on which road to use. He called me after he had reached the one lane bridge, was exasperated, and had to back his humongous trailer all the way up the hill and then approach from the west. The tank was at the end of the trailer closest to the cab and we 2 battled to hoist the tank over some other orders, but we succeeded, slid it onto the road and he and I rolled it up the driveway to its overnight resting spot which you see in the pic above.
Prior to its delivery I had much deliberated where to place it and decided it should go on a ledge below higher ground. With my bobcat I had pulled out the small pine trees and removed the topsoil and then with shovel and pick I leveled the 8ft by 8ft staging area and dug a half circle drainage trench on the high side to prevent water eroding its base. I laid plastic sheeting on the staging area also to prevent water eroding its base and this morning my neighbor helped me roll and place the tank in position.
in this pic you can see the cinder blocks holding soil in place on the downside of the site (with metal rods securing the blocks), the plastic sheeting and drainage trench. I may not connect the overflow fitting since I will be filling this tank to order from the other tanks
I stopped at Tractor Supply this morning to buy a 2″ valve which you can see at the bottom of the tank. The 1″ pipe at the top is moving water from my other tanks to this new storage area. It is expected to rain tomorrow and I want to relocate at least 1,500 gals today so my other tanks can accept the rain.
another pic from above – you can see I have removed the vent plug in the screw in lid so the 1″ pipe can enter snugly from the top
My neighbor who is a house builder has surplus lumber and metal roofing and I will contract with him to help me build a roof above this tank to which I will add a gutter and so capture any rainwater which lands on this area as well.
So I hope this all works out well and, from transporting 35 gals a day during the dry season I now hope to have an additional 2,100 gals of storage.
And so the north Georgia drought continues. Yesterday was hellish – rolling clouds of smoke streamed down from Rabun county, where some houses were being evacuated, and from areas of South and North Carolina. From my neighbors, who are weather hardened house builders, I heard hacking coughs and mine joined theirs as I pruned my trees. And rain not in sight and maybe none until next spring.
My house is on a well and I could pump water for irrigation but this depletes my well (and probably my neighbors too) and though dry, dry conditions are bad, nothing is as bad as a house without water.
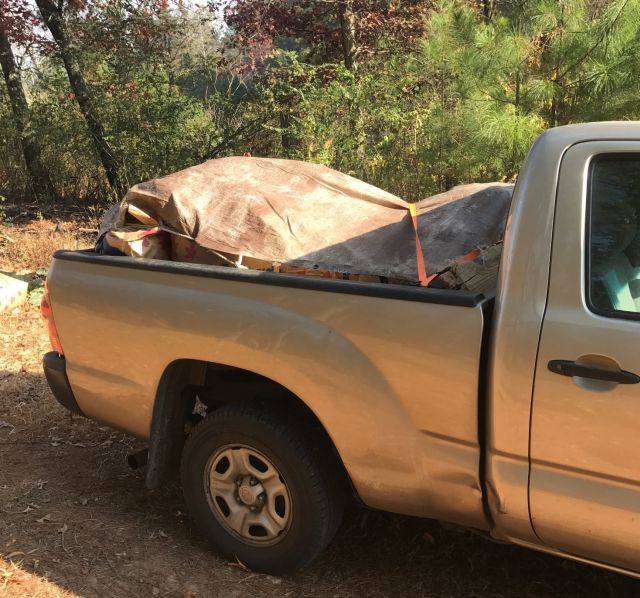
the slump in the tarp indicates this is not the usual 12 leaf bag freight but includes a change in the mix
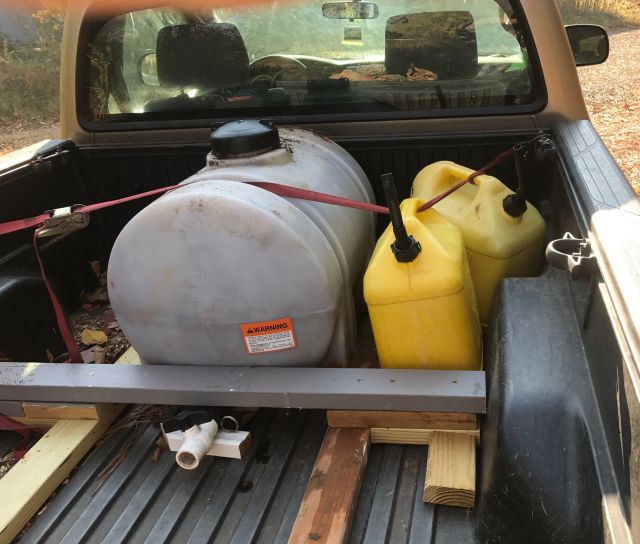
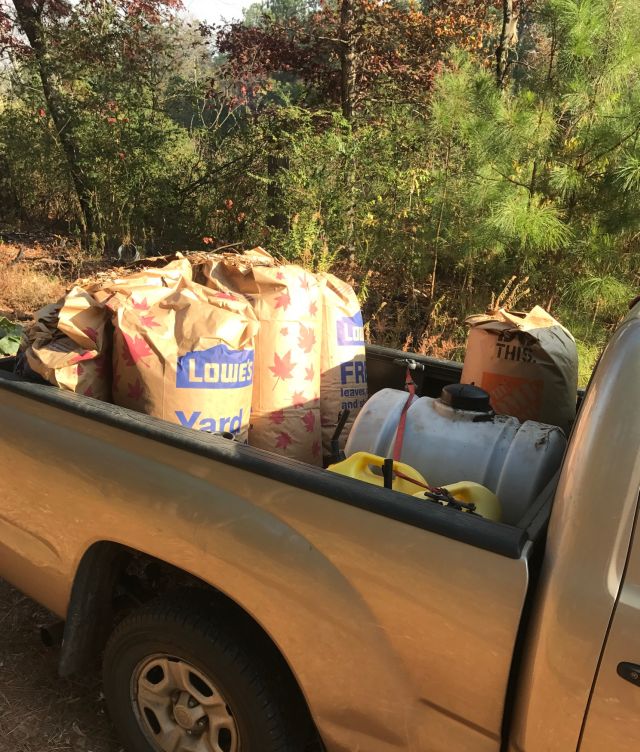
So I decided to enlist my pickup. Already it has begun making the trips to and from Atlanta to relocate my neighbors’ leaf bags to my compost heap. Why not bring some water as well? There are not yet watering restrictions in Atlanta and our Atlanta house has an irrigation meter which I installed years ago and from which we draw about 4 gallons a month for the bird bath. So time to use the irrigation meter again.
now I move 7 leaf bags and 45 gallons of water
I recommissioned my 35 gallon horizontal storage tank from compost tea maker to water carrier. A gallon of water weights 8.3 lbs so this tank full will weigh about 300 lbs. And if it slides around the truck bed it can do some damage. I fashioned from 2×4’s a brace to hold it in place in the center of the bed up against the cab. I decided to add 2×5 gallon containers on the right side of the bed so that their weight (10 gallons x 8.3lbs per gallon = 83 lbs) plus Trudy’s (my 46lb canine companion) will somewhat counterbalance my weight in the driver’s seat. And so I now transport 45 gallons of water to my logcabin, plus 7 leaf bags with each trip.
you can see the brace which secures the tank -2 long 2×4’s fitted between the cabin and tailgate (to prevent sideways movement) held in place by spacers at the cabin end and front end and a grey 2×4 secured to the 2 long planks to prevent forward sliding
The 2 -5 gallon water containers I transport in a barrow to the orchard and upend each at a fruit tree. Not much, I agree but better than nothing for trees which have not savored water for several months. The fruit trees are surviving and I attribute this to the contour ditches which straddle the hill and infiltrate the rainwater runoff and heavy mulching.
a black pipe drains the water to the 4″ pipe which moves roof water to a storage tank
The 35 gallons of water I pour into a storage tank from which I can pump to the vegetable garden or wherever it is most needed. From watering the vegetable garden > 100 gals every day I am down to 40 gals every 3 days although of course the summer heat is past and evaporation and transpiration are also greatly reduced. I have cut back on plantings and if there is any consolation for this unusual weather, at least I am getting good tasting organic tomatoes and peppers and lots of greens in the middle of November.
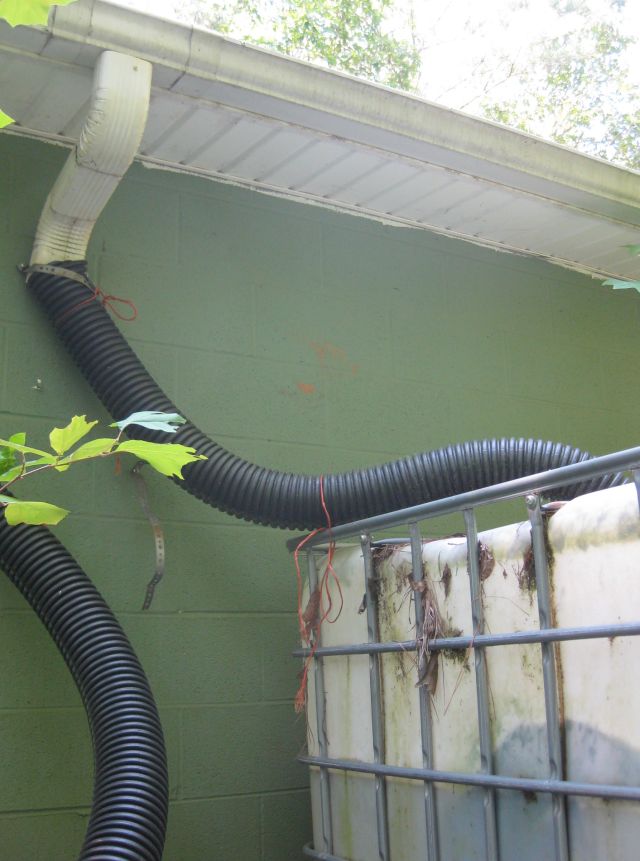
you can see the barn at the bottom of the hill which houses 2 -1,400 gallon tanks
I received some comments on my rainwater harvesting and gravity feed irrigation system. Luke from Australia is surprised at the amount I collect. There are simple formula on the internet where you multiply annual, or monthly or daily rainfall in inches or cm by the area of the roof and can easily derive in gals or liters the amount collectible. And the volume is often bigger than you would expect.
Because of our continuing drought in N. Georgia I am going to expand my storage system from about 6,000 gals to about 10,000 gals so I can retain more of the rain that falls and not lose so much from tank overflow in the rainy months. The rain that does not fall on my roofs I try infiltrate into the soil with contour ditches thus minimizing or eliminating ground runoff altogether and soil erosion, and the soil to some degree acts as my storage tank.
Benjamin from Florida mentions that Geoff Lawton says algae in the irrigation storage tank are beneficial. I seem to remember Geoff saying this in his pdc. I think life in irrigation water is good and I make and use compost teas throughout the growing season. Problem with algae is it clogs the bubblers I use for watering my orchard, but is not a problem when I use a hose. I find algae comes out mostly at the beginning of the irrigation cycle, because it has settled near the outlet, or when you use the last remnants of tank water and the outlet is pulling horizontally what has settled at the bottom. The quick flush I do at the manifold to eliminate air pockets also clears a lot of the starting algae http://www.nutrac.info/2016/05/20/additional-thoughts-on-airlocks/.
my manifold at bottom of hill
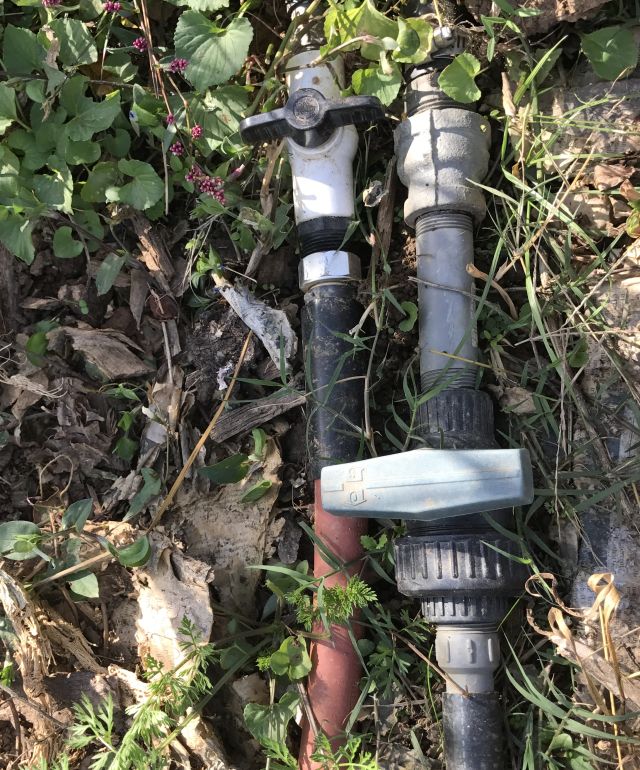
Water comes down the hill in 1.25″ pipe and if the pipe is empty I flush out the air through the white ball valve. The water jets out and the stone is to slow it down and direct it in a channel to an apple tree. Plastic ball valves are best – they are cheaper than bronze, less likely to crack from icing and shut off water better than gate valves. There are 3 valve controlled lines to the orchard and one to the vegetable growing area.
With the water flowing to the orchard I unscrew the furthest bubbler in the line because by removing it for inspection and cleaning, it allows water to flow down the line removing air bubbles and collecting and ejecting any debris along the way.
2 bubblers connected to 3/4″ pipe connectors. The one on the right I use at the end of the pipe. The bubblers come with plastic filters which are helpful. The black pipe connector on the left bubbler is for illustration only – typically it is at least 4 inches long so the bubbler stands well above ground level for easy visual inspection.
Then I visually inspect each bubbler to check that water is flowing and unscrew and clean those which are clogged.
For the vegetable area I split the incoming line into 2 each with its own valve and hose.
there are 2 hoses in the veg area to save me lugging one all over
My rainwater harvesting system (elsewhere described) includes a 2,500 gal storage tank which takes water from the carport roof. Rain has been sparse but on Saturday we had a short heavy deluge and I noticed that both gutters which feed the tank were overflowing. I was surprised since a month previously I had connected a hose to the gutters and each had drained into the storage tank.
The drawback with testing for a blockage with a hose is if a pipe is partly blocked the water will still flow and seem ok but that slower flow cannot accommodate a heavy downpour. The reason for my recurring pipe blockages is poor design and so even if the pipes are clear, the gusts which precede a storm can dump leaves on the roof which will clog a weak system.
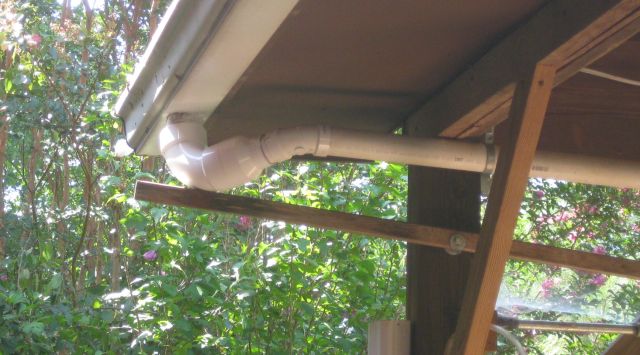
As you can see below I capture water in a 4″elbow positioned below the gutter downspout and then reduce the flow to a 2″ pipe which runs to the storage tank.
the old connection – a 4″ pvc elbow reducing to a 2″ pipe and 45 degree elbow held in position by a 8 ft length of 1×1 with the long end rotating on a bolt fulcrum to keep the short end pressing the elbow in position below the gutter outlet. The size reduction guarantees blockages.
The old design had the two 2″ pipes connecting to expansion joints connected to a 4″ T connection which fed into the top of the storage tank.
you can see the two 2″ pipes expanding into a 4″ T joint. Because the pipes would block I used sleeves with screw clamps (you can see the black sleeve on the left) to easily disconnect the pipes and clear the blockage
I cannot recall why I used such a convoluted design. Perhaps I had surplus 2″ pipe though the cost of the expansion joints should have been offputting. Perhaps the thought of using heavy thick wall 4″ pipe was a deterrent. Today I resolved to fix the problem and as I considered my options I decided to keep it as simple as possible. Why not use thin wall 4″ pipe and run it from the downspout directly to the storage tank. This would eliminate the need for 45 degree connectors and a T joint and direct the water to the shortest route with a continuous down slope to the tank instead of a horizontal run to the T connection and then the down slope to the tank. Keep it simple stupid!
So here is the new connection in place of the connection first shown.
a straight downward run. I should mention that a 90 degree 4″ thin wall elbow has a smaller internal diameter than a 4″ thick wall elbow but I found a corrugated pipe adapter which fits inside the elbow and has a wider internal diameter to accommodate the gutter downspout – the adapter is the black sleeve between the elbow and the gutter
And below is the connection of the 4″ pipes to the storage tank – a straight run with a 90 deg elbow at the end to dump the contents into the mesh filter at the top of the tank. Since the pipes can be raised vertically it should be easy to remove and clear the mesh basket, when needed.
the two 4″ pipes feed directly into the top of the tank and are secured with straps and rope
This is the design I should have used at the outset, the cost of the new design is less than the old design and I am hoping for no future blockages. And why didn’t I think of this at the outset. I wanted the weight of the water and the pipes on the wall rather than the rafters and aesthetically it looked less intrusive, plus I didn’t have the experience of recurring blockages and knowing how to keep things simple.
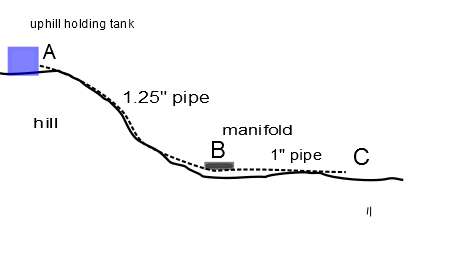
I harvest rainwater and when I need to irrigate I pump the water to a tank at the top of a hill (right hand tank in the picture) and use gravity to move the water from the tank to its final destination. See my description of the system and airlocks at airlock problems
I use a 1.25″ pipe to take the water from the top of the hill to the base of the hill and then I use a manifold to direct the water into four 1″ pipes, three of which irrigate the orchard with positioned bubblers and the fourth goes to the vegetable growing area where I hand water with a hose.
Over the years as my patience with air bubble delays diminished, my progress towards a solution increased.
a) In the beginning I opened the valve to the hose at C and waited for the trickle of water to slowly increase in volume as some but not all of the air bubbles were expelled by the water pressure.
b) Then I made a tee at C with 2 water valves, one to the hose and the other to a short length of pipe. I would open first the valve to the short length of pipe and the water would flow more quickly since it did not have to go through the hose. With the water flowing faster, the blockages cleared quicker. It sounded like a train gradually gaining speed.
c) I discovered that if I opened and then quickly closed the valve to the short pipe it increased turbulence in the downhill pipe since the water coming down backed up, and then if I quickly opened the valve again the water appeared to come through with more pressure and bring more air bubbles with it.
d) But this all took time so I developed a smarter approach. Before starting with C, I went to the manifold at B and opened a spare valve. Now the water rushed out with quick stabbing pauses as the air in the 1.25″ pipe was ejected. It took very little time to clear all the air in the pipe from A to B because this pipe was at a steeper incline and larger diameter than the pipe B to C. Then clearing the 1″ pipe from B to C was much quicker.
e) And finally, to avoid air blockages all together I made my final change. I had gate valves at the manifold and some trickled water in the fully closed position so overnight the pipe from A to B lost water. I replaced the gate valves with ball valves and eliminated all leaks so the full length from A to B and B to C was full of water with no air pockets before I began irrigating. The trick was to stop watering before the tank at the top of the hill emptied.
These procedures have minimized the inconvenience of air pockets in my gravity fed irrigation setup.
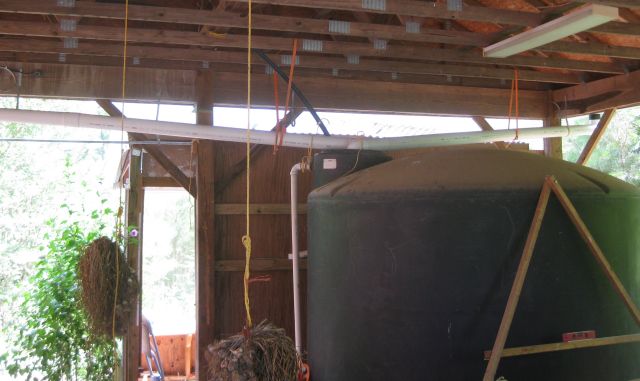
With the beginning of winter I now always ensure that I have disconnected my water pumps and drained the water. My carport pump (moves 2,400 storage gals) started fine, but my 1hp Water Ace (moves 2,800 storage gals) just made a humming sound when I tried pumping today. Another challenge!
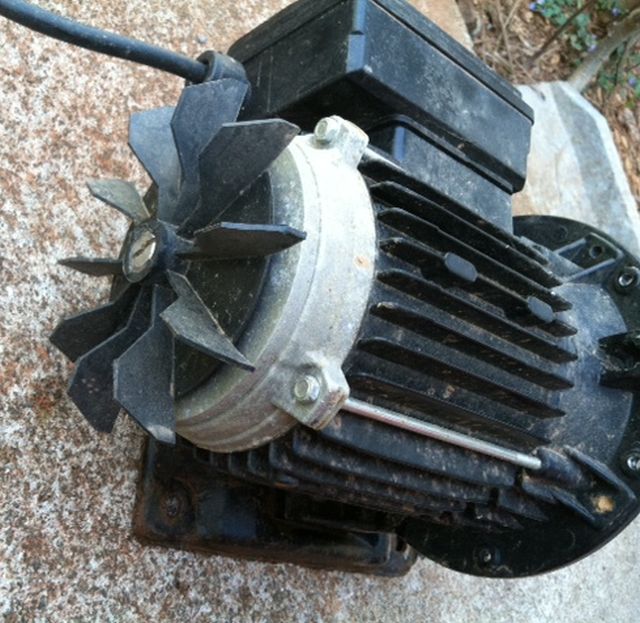
Probably bad brushes I thought but usually there is warning – a lot of spluttering and starting in fits. Not this time and why should it fail to start after the winter break? I moved it to the workshop and removed the front end where the centrifugal impeller is – it turned with difficulty.
the pumping end -the motor spins the disc which has slits in it to catch the water and force it through the center hole
Odd, I thought something must be jammed. While it was open I removed some small stones caught in the slits. So what could it be? I happened to look at the rear end and the cover was not seated properly. Beneath the cover is the fan which is also driven by the motor.
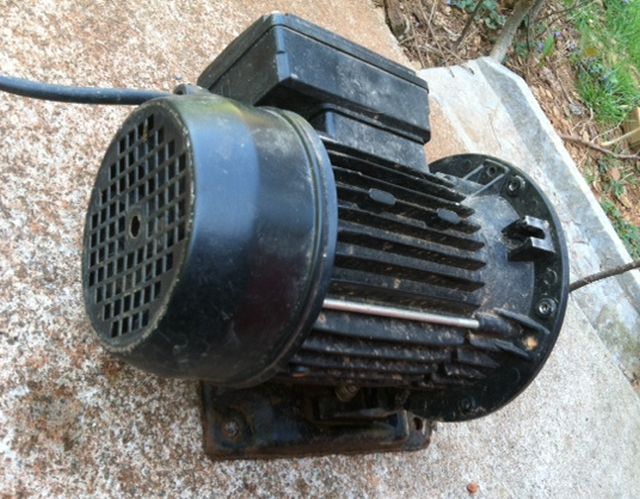
cooling fan with cover removed
Now, with the cover removed, the impeller and the fan (they are connected to the same drive shaft) turned easily. I carefully replaced the fan cover and the front end cover and the pump started fine and pumped without leaking. All done!
pump fan cover replaced
To remove the bolts I looked for my battery powered screwdriver, could not find it and so used my drill at lowest speed and torque setting. Mistake! Even at the lowest settings it is too fast and too powerful. I more determinedly looked for the powered screwdriver, found it and then removing the remaining bolts and re-assembly was fine. Moral – don’t rush.
the small powered screw driver turns more slowly and with less torque – why strip bolt heads needlessly?
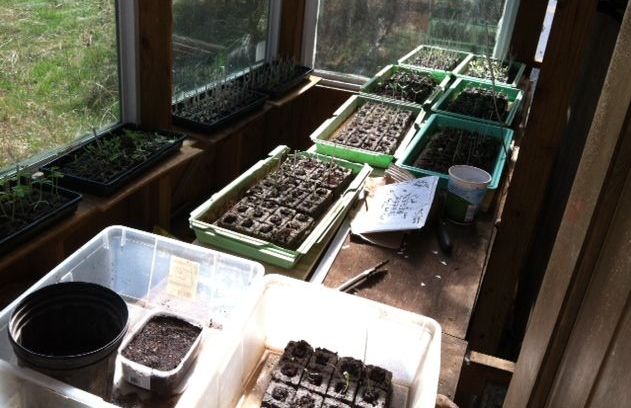
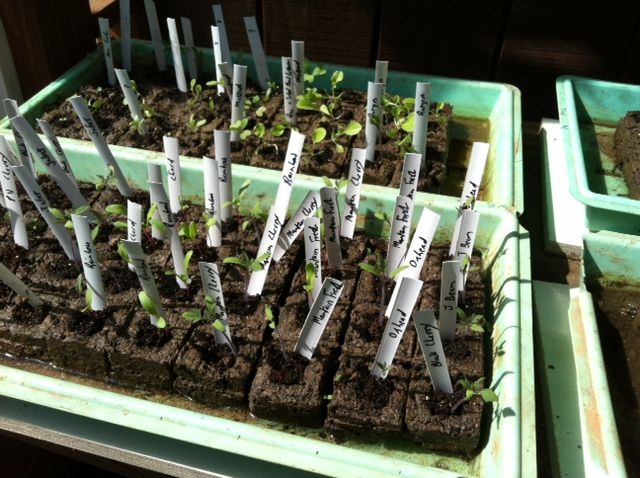
My seedlings are progressing well – below is a snap of some of my tomatoes in 2″ soil blocks in the greenhouse.
some tomatoes identified with venetian blind plastic strips
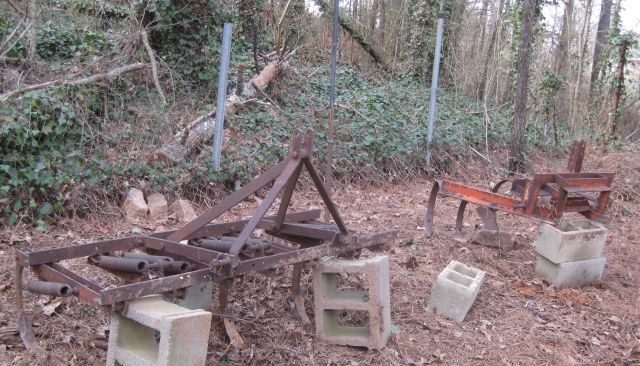
We had some cold days (for Georgia) with temps in mid teens, but that is past and I am emerging from my winter funk. Friday I cranked up the bobcat and worked it a couple hours – moved pine and other logs up the hill to the contour ditches where they will decompose with time; moved two old tractor cultivators from alongside the drive, where they could snag an unwary driver, to a show off location; and turned >150 leaf bags collected in the fall into a semblance of a compost heap.
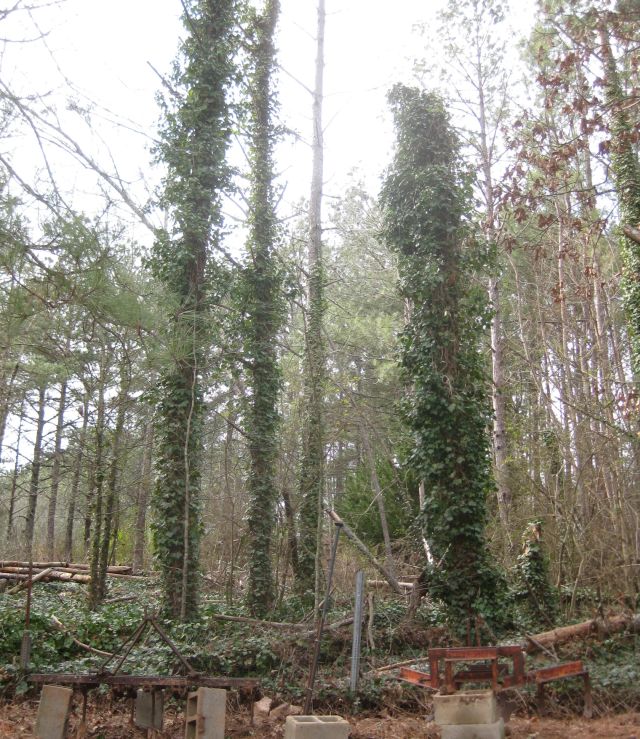
these tractor implements were given to me. the closest weighs >400lbs and would have been hard work for me to move without the bobcata snap of my neighbor’s yard where the pines are strangled by ivy and have succumbed to borers. when they fall into my yard I chainsaw the trunks and add them to my contour ditches
Saturday I weeded my first of 15 raised beds and added wood ash and finished compost.
90% weeded bed, the light patches are the wood ash, more compost to be added
The turnips survived the cold temps and are edible, not so the radishes. The greens were set back by the cold but will recover, all the more quickly without weed competition.
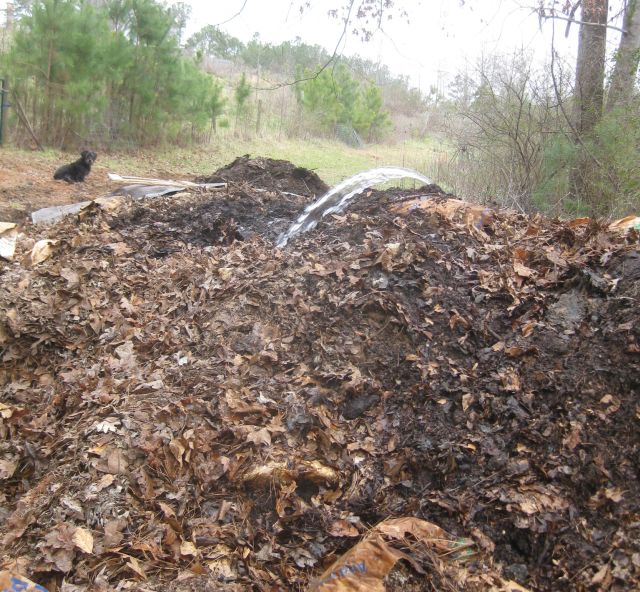
And today, I decided to water the compost heap. I have described my rainwater collection system and tanks holding about 6,000 gallons. All the tanks are full and winter rains go to waste. So why not use some of the water now, not only for irrigating the fruit trees, but also to fire up the compost. Though I added finished compost to the leaf heap nothing happens without moisture. I use 1.25″ pipes to move water and to this is connected a regular hose for watering the compost. This is inefficient – the hose is 5/8″ diameter 100 ft long and connects via a faucet – three negatives right there a) diameter too small; b) length too long; and c) faucet configuration disturbs water flow. I have two 3/4″ diameter 100 ft hoses but they are used elsewhere and are also too long. It took just 10 minutes to make some big improvements. I replaced the faucet with 3/4″ in line PVC valve, and I selected 2 – 20 foot lengths of 3/4″ plastic coil pipe which I connected.
the 2 connections compared – above is the new connection with straight water flow valve connected to 3/4″ black plastic pipe; and below is the traditional water faucet which connects to a hose
Water flow was much better than with the garden hose.
watering the heap with 3/4″diameter 40 foot length pipe connected to 1.25″ diameter pipe, Trudy observing
As I moved the pipe to water different parts of the heap, the connection between the 2 lengths separated. I was impressed with the vigor of the water jetting from the shortened pipe and it occurred to me, why not just use a 20 foot length and the increased water pressure will get the water to where it is needed. The image at the head of this post, also below, shows the increased pressure when just a 20 foot length is used (similar dynamics to the flow of electrical current through a cable, the calculations for which I have included elsewhere on this site).
considerably greater pressure when the pipe length is halved. bottom right -red container is liquid nutrient collection station and 30 gal white container is compost tea maker
So I was able to quickly water the heap, and then I covered with a tarp the northern end (winter gusts come from the northwest). When the heap is compacted I will dispense with the tarp. I know tarps conserve heat in the heap which accelerates the action, but then you need to remove it for the rains and, since I am in no rush and have an ample supply of finished compost, I will let the heap proceed at its own pace.
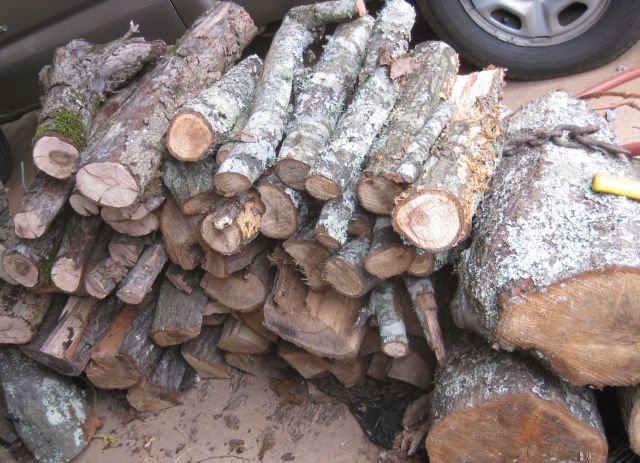
This morning was productive – I also chainsawed an oak and dogwood which had fallen down – though there limbs are small diameter, I added them to the firewood pile.
the small sized diameters were taken this morning. The dogwood is hard and heavy and should make good firewood
And I weeded another bed and picked turnips which we enjoyed in our lunch salad.
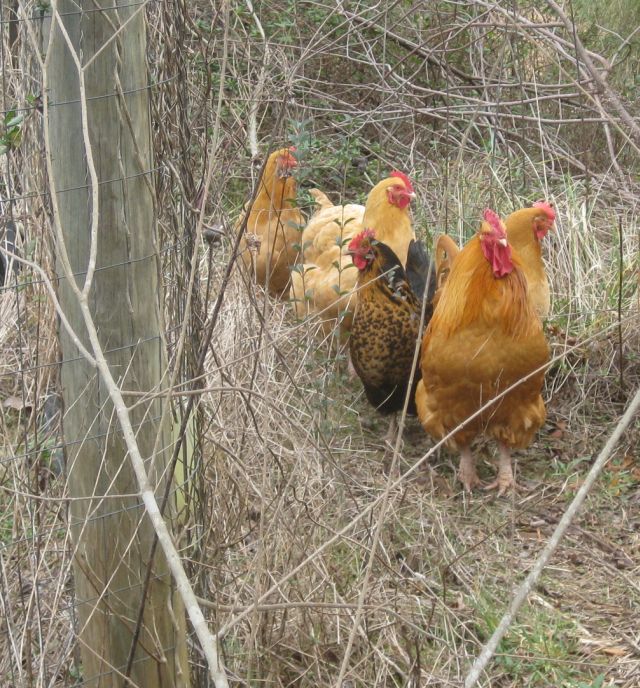
woodland foragers circling the vegetable growing area. Though I would appreciate their work turning the raised beds I cannot risk contamination. Since I trapped and removed a feral cat in December, we have not had predator problems and the chickens are confident exploring the yard.
And there were 5 eggs today and 3 yesterday – the longer days are moving the hens back to production. A productive morning.
I never used to read science fiction. But technology and sustainability hold my attention and I read good futuristic books on these topics. “Ghost Fleet” a technothriller on the next world war portends problems with technology and is well researched with extensive footnotes. Now I have completed my interactive Python programming course with Rice University via Coursera, I have begun my next read, the Water Knife about a water starved west beset with dust clouds and violence. Both are excellent reads.
Which brings me to water sustainability. I store about 6k gallons rainwater and I restrict my growing activities to get by on rain and harvested rainwater. This would not be possible in California (we make our annual visit to San Francisco in a few weeks) where Summer rainfall is minimal. But here in north Georgia it is possible, with some luck. My stored water is sufficient for about 3 weeks and then I need rain. And so far the rains have arrived timely. I hand water with a 3/4″ hose – takes time but for me is the most efficient method. My water is gravity fed and though it goes thro a gauze filter before entering the tanks it grows algae and would not work with drip feed unless I installed filters and increased the water pressure, which I am not prepared to do. When water runs low I have to choose where to best use it and so some will thrive while others have to endure. And it is enjoyable to see what is growing, how the pests are doing, and admire the butterflies.
looks good but not so the offspring
But things go wrong with the collection system and I have to watch that everything is connected and blockages removed. An endcap I had fitted to a gutter installed on a shed kept coming loose. So, effective but not attractive, I used a couple screws to hold it in place.
note the 2 screws in the endcap
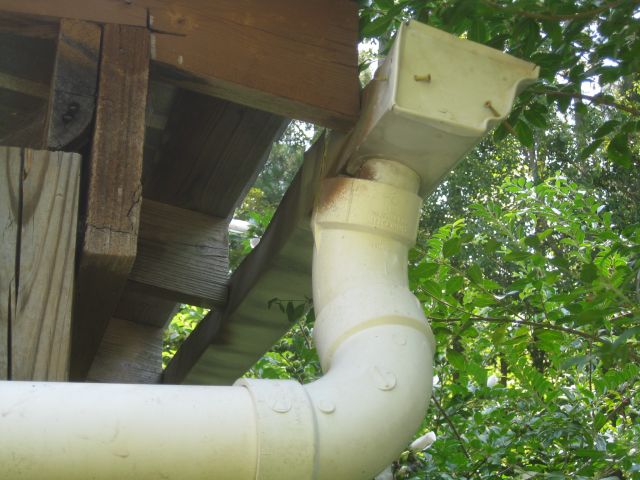
At my tractor building a 4″ corrugated pipe formed a u-bend, then filled with water, and broke loose. Now with screws and straps I have secured it again and tried to prevent another u-bend forming.
ignore the pipe at the bottom which feeds a lower tank with water captured from the other side of the building
Previously I used my heavy portable drill for inserting screws. Now I use a real handy portable screwdriver which fits in my pocket and is easy to use.
a big time saver and powerful enough
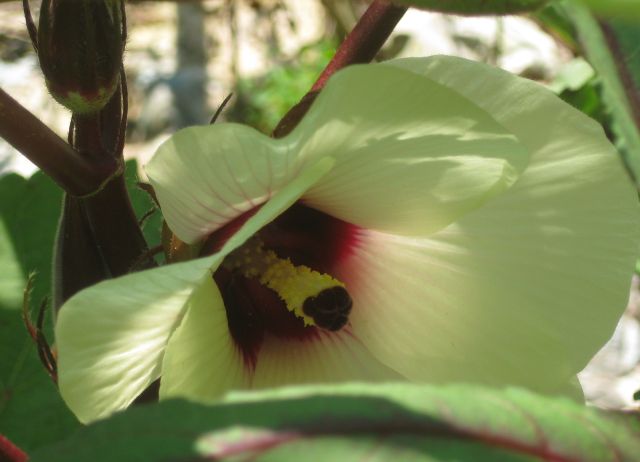
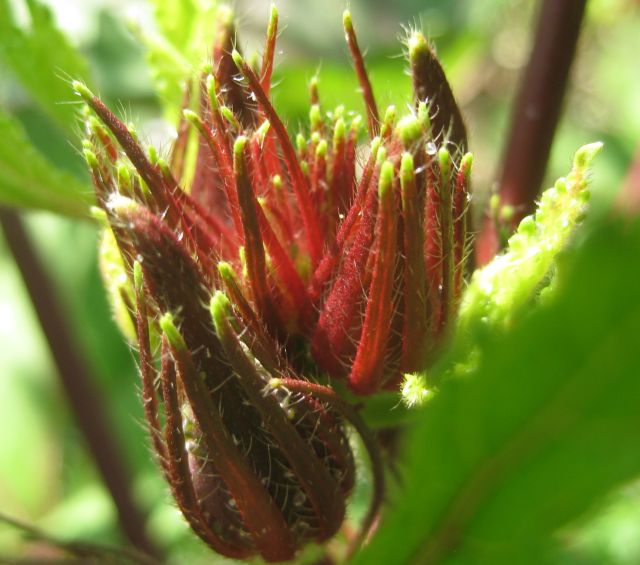
Tomatoes are a plenty and now the unusual okra plant is beginning to produce. It has a striking flower.
the shadowed flower and behind it, small okra pods
The flower transforms into future pods.
baby okras
Which then grow into regular okra which we eat off the plant, when small, or grill with squash.
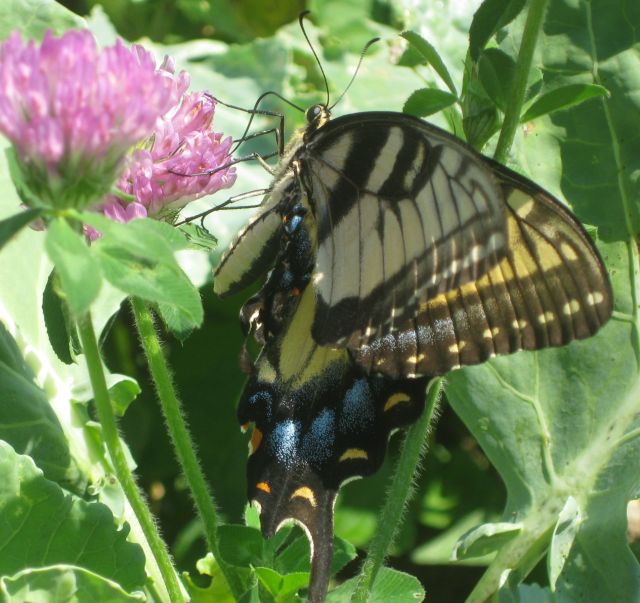
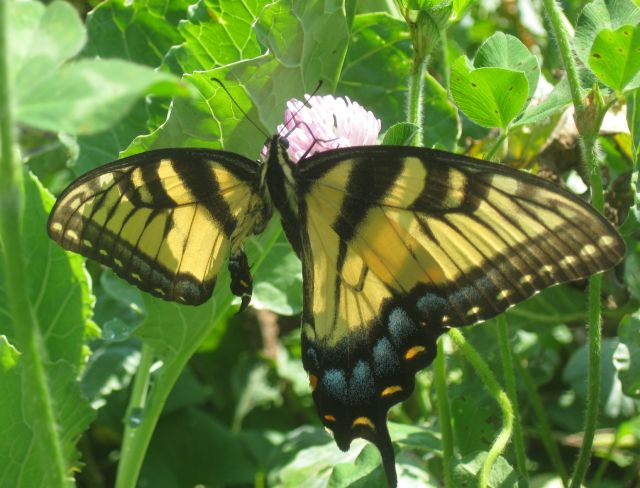
And, finally some more butterflies.
my decorative flowers in the growing area, pleasing to the eye and visitorsand my greens will soon harbor caterpillars
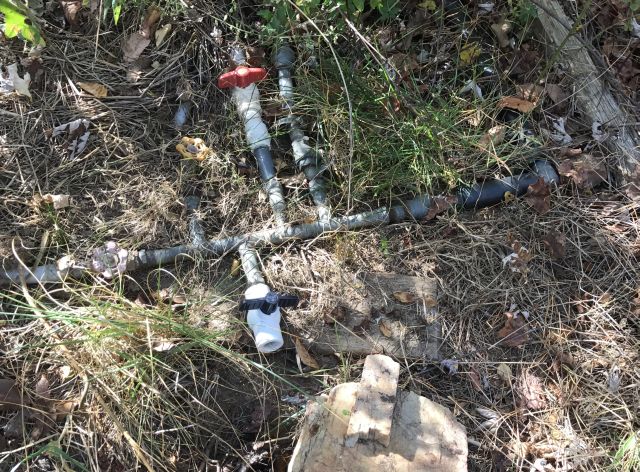
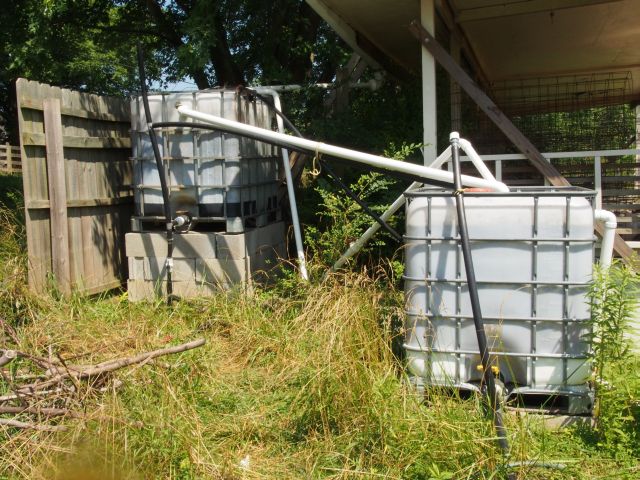
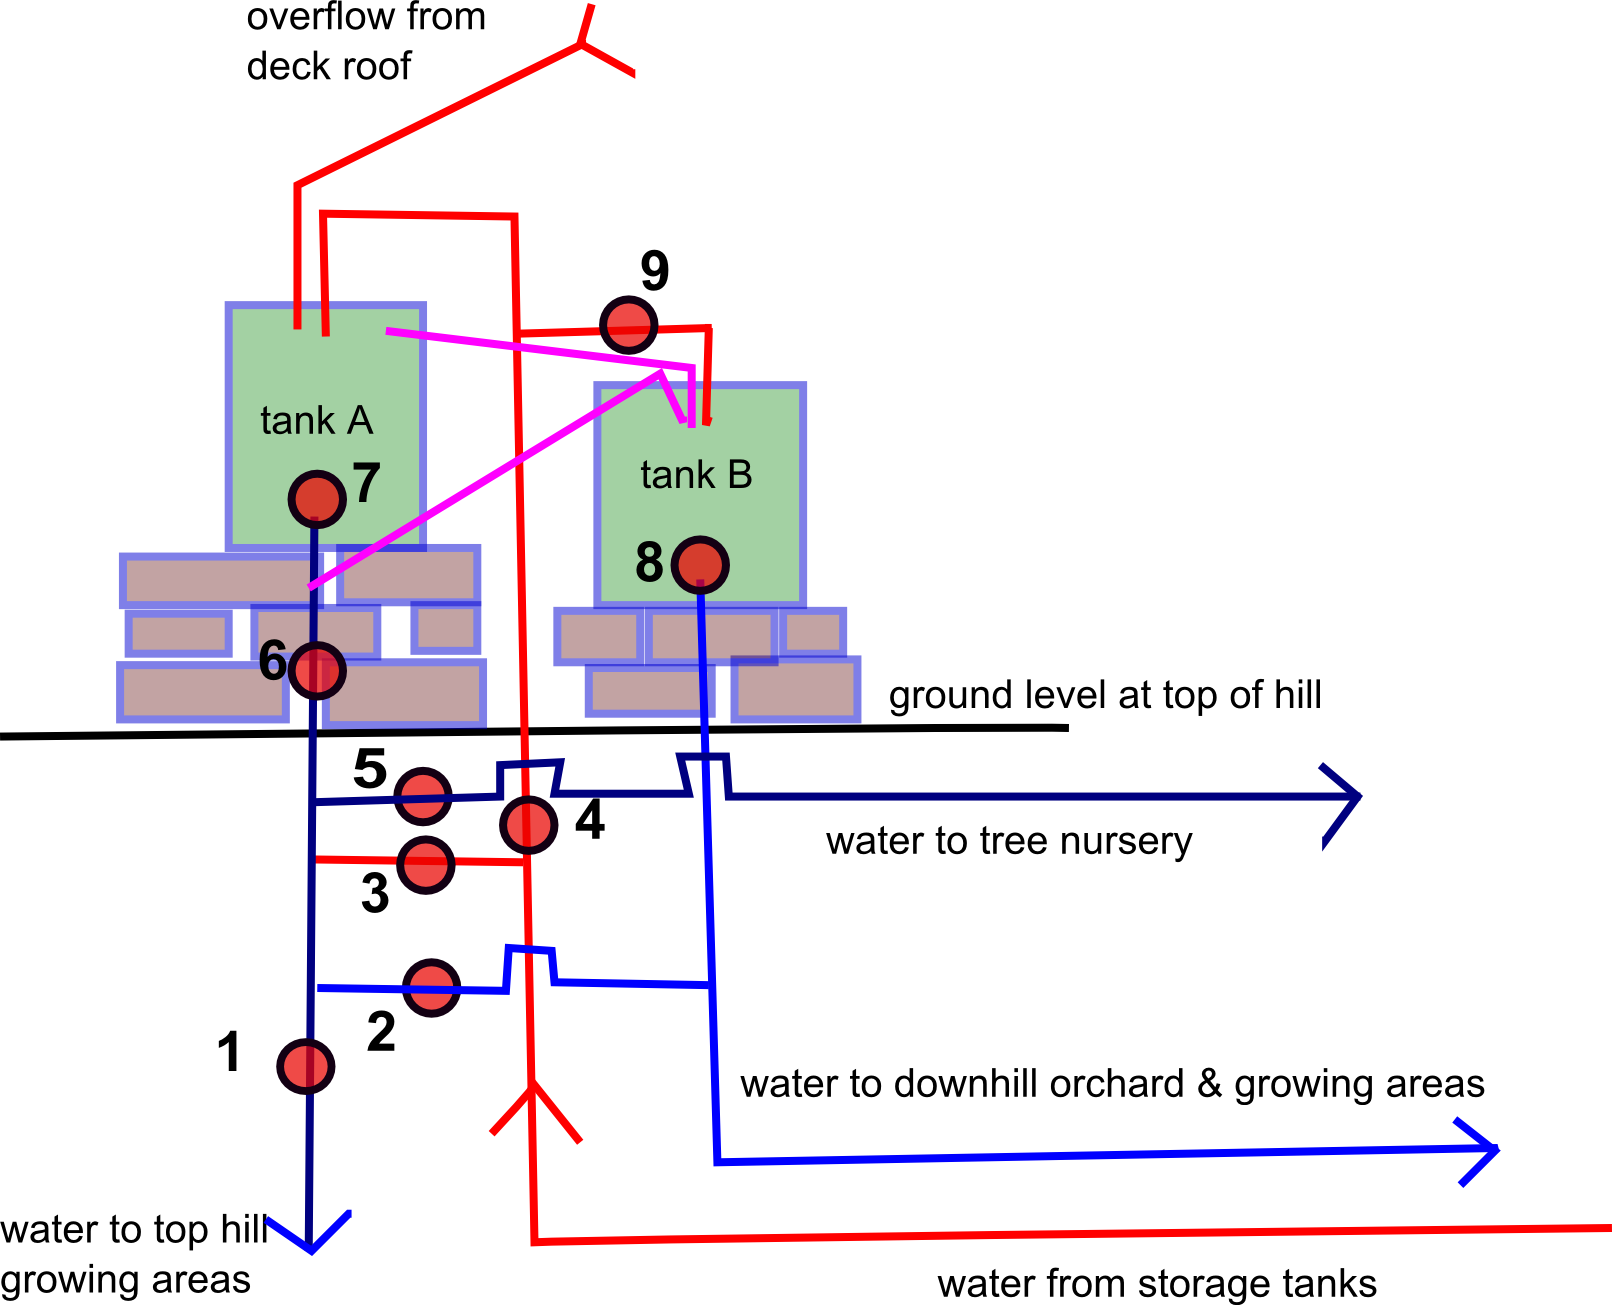
All my irrigation is from harvested rainwater collected from impermeable surfaces, stored in large tanks at the bottom of the hill and then pumped to 2 tanks at the top of the hill for gravity feeding to the orchard and crops. Today I added my 9th valve to the pipe system for the 2 gravity feed tanks. Are 9 valves used and are they necessary? I have concluded – yes.
Here is a ‘photo of the 2 tanks:
2 gravity feed tanks with numerous valves and pipes
And here is a schematic of the pipe system:
You can see the 9 numbered valves. Here are some combinations:
Pumping to tank A – 3C, 4O, 9C (i.e. valve 2 closed, valve 4 open and valve 9 closed)
Pumping to tank B – 3C, 4O, 9O
Harvesting deck roof water – 7O, 6C, 8C (when A is full, water moves via 2 routes)
Water to tree nursery – 7O, 6O, 5O, 3C, 1C, 2C
Gravity feed to downhill from B – 😯
Gravity feed to downhill from A – 7O, 6O, 5C, 3C, 1C, 2O
Gravity feed to tophill – 7O, 6O, 5C, 3C, 2C, 1O
Pump feed to tophill – 4C, 3O, 5C, 6C, 2C, 1O
One of my best innovations is the last combination. I previously gravity fed my blueberries at tophill with an in situ bubbler system but, because pressure was slight, the distribution was uneven and unreliable. Now, with the last combination I can switch on the storage tank pump timer at the bottomhill and directly pump and distribute water via a hand held hose to the tophill plantings, which means thorough quick daily watering with daily inspection.
So now, in addition to my daily soduku exercises, I also challenge my mind with correctly setting the various valve combinations for the changing tasks.