coursera – it’s great

Coursera, the MOOC (massive open online course), has kept me very busy.  Last year I took the sustainability course and earlier this year, 2 physics introductory courses.  My background is accounting, business and the humanities.  Now, with access to excellent tuition from top flight college lecturers, all for free, I am greedily imbibing the sciences.  I am currently taking 4 courses: Animal Behavior (University of Melbourne, Australia), Preparation for Introductory Biology – DNA to organisms (University of California, Irvine); Calculus One (The Ohio State University); and the most intriguing A Brief History of Mankind (Hebrew University of Jerusalem).

The biology course is unusual in that it is provided for 2 levels of students – I am taking the basics level while first year students at the college are required to take the scholars level which involves considerable additional research and peer assessments.  We all watch the same videos and take the same quizzes.  I am content to receive a basic understanding of the functioning of the cell and DNA, alleles etc.

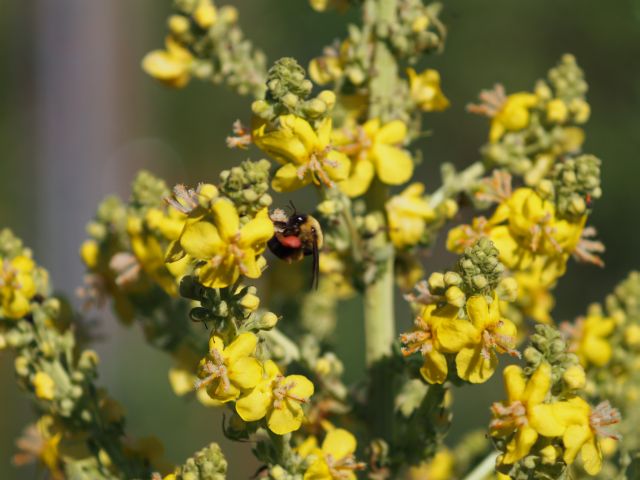
Animal Behavior answers so many of the questions you would have from watching wild animals.  Good videos and additional reading material – a fun course.

Calculus can be fun but I struggled mightily in the beginning and only pride prevented me from un-enrolling.  The problem is I never did calculus at school and my algebra and trig was at a basic level and a long time ago, so from the get go I was adrift with almost all the terms tossed about (radical #’s, rational #’s, real #’s, polynomial etc.). I borrowed a couple precalculus books and have been working hard to catchup.  Why mess with calculus?  I like #’s and often competed against the clock to solve internet sudoku problems – grappling with calculus is a more worthwhile use of leisure time and more challenging.

The most intriguing course is not about science but is listed under the humanities section of coursera and is a brief history of mankind by Dr. Harari.  He speaks directly and effectively and traces our history to to the different homo species (such as homo erectus and then Neanderthal man) and describes how between 70k to 100k years ago, unaccountably, homo sapiens developed superior communication skills and emerged victorious over the other homo species.  From being a scavenger of the bones of victims of predators, homo sapiens became triumphant over all animals.  For anyone interested in the palio diet or the advantages of hunter gatherer culture over the lives of humans in the subsequent agricultural revolution, this is a must see course.  We just covered the onset of the agricultural revolution – lesson 5 titled “History’s Biggest Fraud” and I eagerly await new installments.

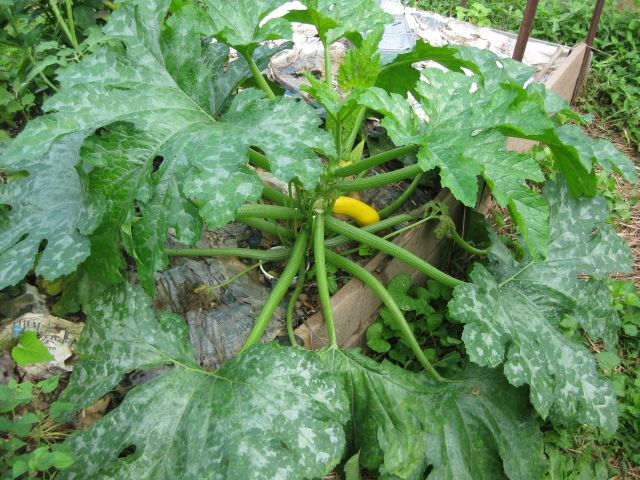
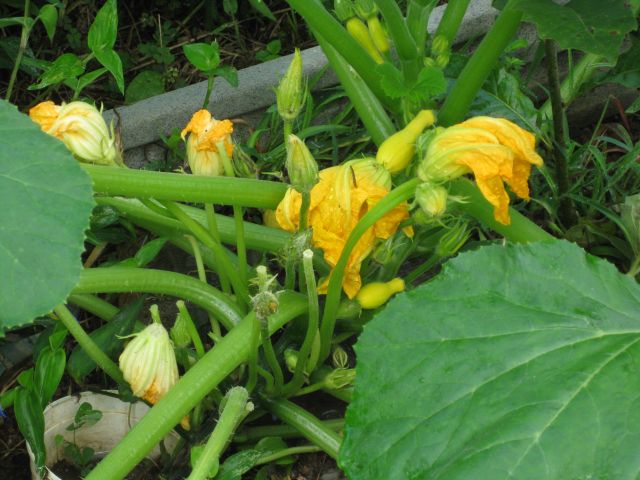
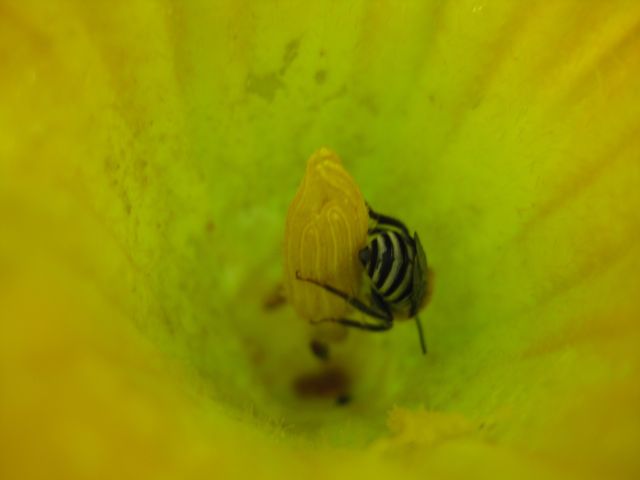
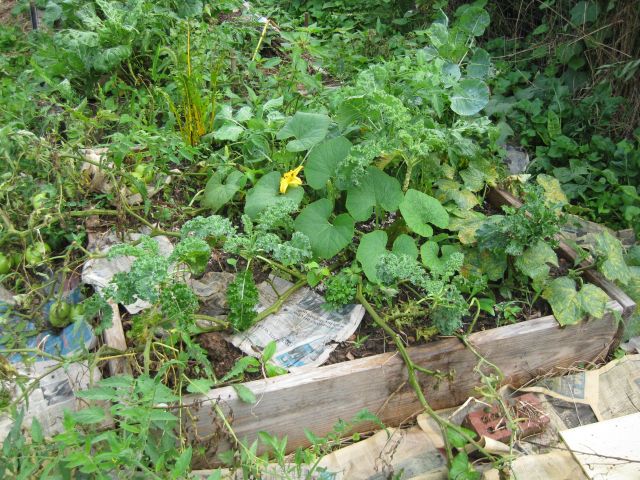
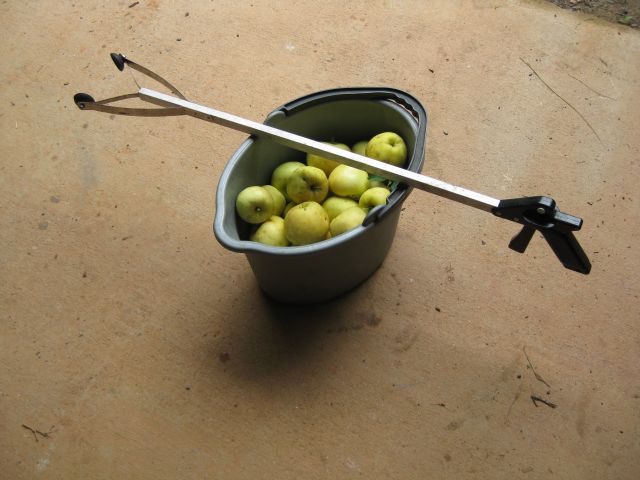
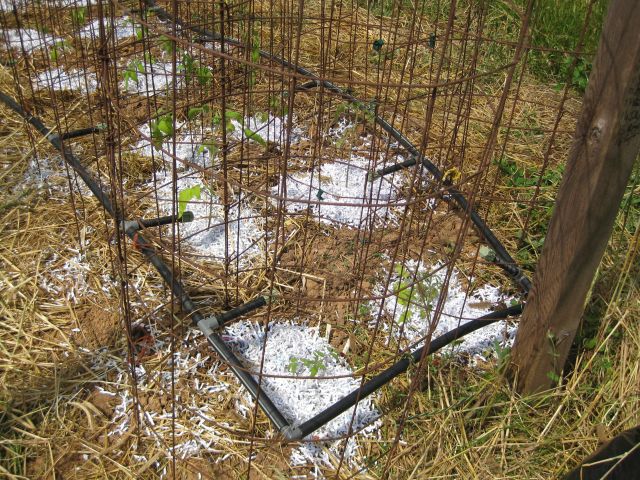
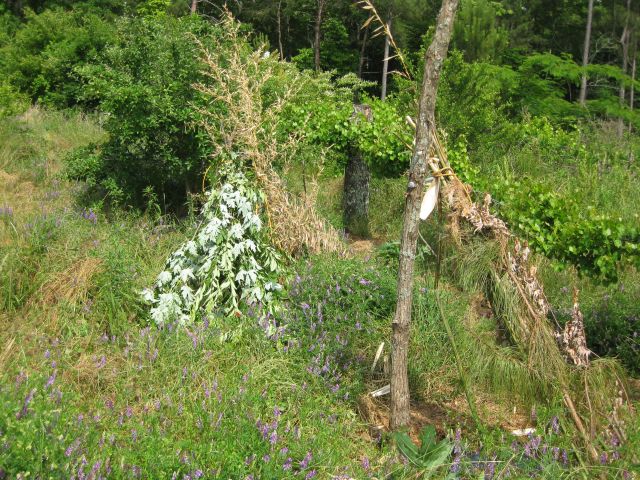
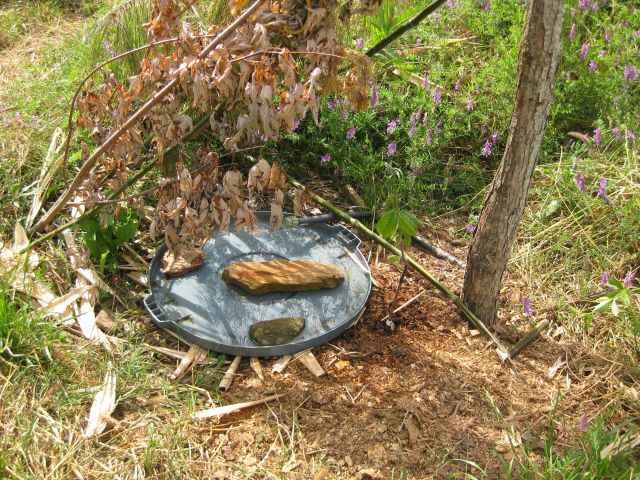
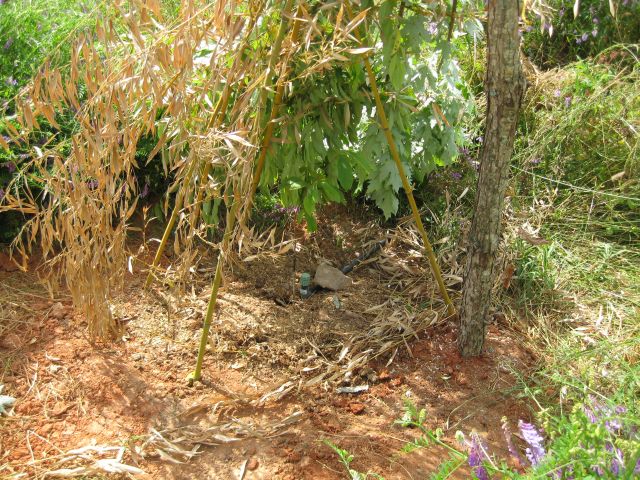
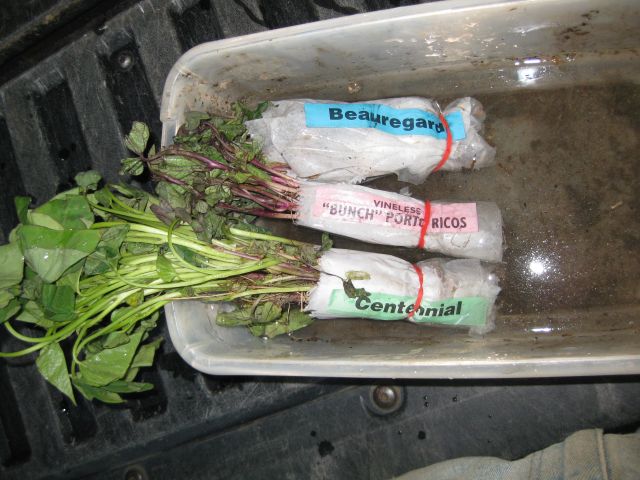
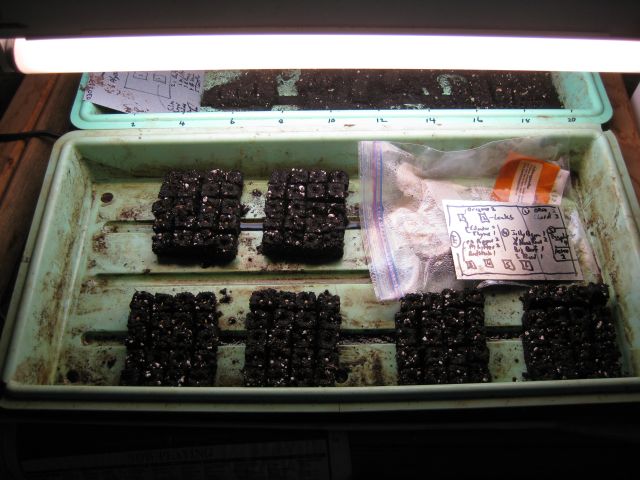
So the above have taken much time.  But the growing season has been good for me – my Giant Asian Pears are excellent – they are huge (bigger than a baseball) crunchy and sweet and plentiful.  Muscadines are ripening now but not as plentiful as they were when sited in my vegetable growing area where they could tap into my compost rich beds.  I have a prolific apple tree producing though the apples are not as sweet as some of my other apple trees.  They need selective slicing to remove visitors but are entirely toxin free.  Squash are plentiful and some have visitors in which case my chicken receive a treat, and some are fine.  Tomatoes are still coming in and, as always, there is lots of kale and collards.  I have begun seeding and planting out kale for the fall and as soon as the tomatoes and squash are past I will commence in earnest, together with garlic, which again did very well this year and is the easiest of all vegetables to grow.

growing update 0822

Good news – my squash have not (yet) been visited by the dreaded borer and are growing rampaciously.

squash growing vigorously in raised bed
squash growing vigorously in raised bed with a mullein scaffold available if needed
0822 squash a
another squash plant in production – but there is a problem, someone has been snipping off the squash buds – you can see some single squash stems
here is a closeup of another plant and you can clearly see someone has been snacking - I suspect a rabbit
here is a closeup of another plant and you can clearly see someone has been snacking – I suspect a rabbit

So I have a new pest to respond to and I have set a live trap with some enticing carrots to try catch the rabbit.  A more tedious, though inevitable response will be to better secure the growing area and the fence which surrounds it.  Here is a welcome visitor.

a welcome visitor to a squash flower, most of the pollinating is done by bumble bees, this may be a yellow jacket

My most productive bed which is just 4ft by 4ft and was an afterthought, in addition to pumping out tomatoes and cucumbers and kale and chard is now sporting a new squash plant.

this 4ft by 4ft bed does very well and you can spot a new squash flower amongst the regular residents

this 4ft by 4ft bed does very well and you can spot a new squash flower amongst the regular residents


I have a few pepper plants.

green peppers are looking good

And am pleased some holy basil (I planted two varieties) is growing well.

a variety of holy basil

I was preparing a raised bed for a seeding of radish and beets and noticed the soil looked drained of its vigor.  Forking a bit deeper I was not surprised to find invading roots.  I traced them to their entry point and from the outside I chopped the roots and then inserted a few left over pieces of cement siding.  This should stop the roots for a while.

newly seeded radish and beet bed with added compost and cement siding below ground to stop roots

Finally, the 4 chicks which hatched last week were getting frustrated in their lamp heated chamber, so I screwed 4 old windows together to make a square on the grass in the shade, and placed them and their water and food inside and covered the top with wire mesh.  At first they were terrified by the big circling chicken giants but then settle down and enjoyed themselves until the rain showers ended their first outdoor adventure.

outing for the week old chicks


growing tomatoes – a curious result

Why is one plant outperforming the other tomatoes?

This year, as in other years, I grew several varieties of tomatoes in my greenhouse and in May planted out 32 tomatoes in wire cages in a new growing area.  We had heavy rains and this set the tomatoes back but now they are producing, though with average/poor yields.

some of the tomatoes

In a nearby 4ft sq raised bed I planted a few vegetables including a tomato and a cucumber plant.  Both have been growing gangbusters.

my strong plant with tomatoes each day for the picking
my strong tomato plant.

I pick 3 to 4 large tomatoes each day from this plant.  But why the difference in yield?  The soil, compost, sun exposure and watering are similar.  This plant was an afterthought and I did not record its variety though it appears it could be a Mortgage Lifter.  Perhaps the plants in the wire cages resent their imprisonment (just read D Chamovitz’s book “What a Plant Knows”) or they don’t like being crowded together and relish the opportunity to spread without competition from other tomatoes.  Or there may be a companion plant synergy at work?  Or maybe it has to do with the raised bed – drainage is better in a raised bed and the tomatoes may prefer that, but then I remember that tomato plant roots extend deep into the ground so an 8 inch raised bed would not make that much difference.  A way out thought is this is not the plant I planted but it seeded from the compost, in which case I must certainly save its seeds.  I am developing a theory that although my 4 year old tomato seeds still germinate they may not be as vigorous as fresh seeds?   And now a solution occurs to me –  although all the tomatoes get full sun, their exposure is different – a plant in a cage surrounded by other cages only gets direct sun at the top (which is why in the first photo there is so much growth at the top), but the plant in the raised bed sprawls horizontally and so each stem and leaf enjoys its own direct sunlight. If this is the case then there is little point growing tomatoes in adjacent wire cages – if I do use wire cages they should be separated to permit full sun exposure on all sides.  But even this will not be as efficient as allowing the plant to spread horizontally.  The problem with horizontal growth has been the increased contact with the soil and potential transmission of disease from the soil, which has not happened this year.

I have notice much less pest pressure.  Last year most of my cucumbers were afflicted with a pickel worm (see post dd 081212) and this year, so far, not a sign of them.  Here is an oversized cucumber which I discovered in the raised bed – if it is like its even larger sibling which I found nearby a couple days ago, the inside will be crunchy nice.

vigorous cucumber plant

And the notorious stink bugs are absent – maybe the heavy rains had something to do with that.  My squash plants are growing well – usually at this stage they are felled by the notorious borer and this may well happen during the next few weeks.  But if it doesn’t then I will be drawing some happy conclusions about the improved biodiversity and the activities of the Brown Thrasher (our state bird) which I have seen hard at work in the vegetable area.  Still early days.

one of the squash plants

And now back to the salad of organic tomatoes and cucumbers!

organic tomato cucumber salad


first apple harvest

My Pristine apple tree is the first to ripen in my orchard and each day drops many apples.  In Atlanta and northwest Georgia we have had record making rains, so the apples are relatively large, very juicy and, for the Pristine, relatively sweet. I do not spray so, inevitably, there are occasional visitors but these are easily removed with my pocket knife as I gorge away.   Nice thing about not spraying is I don’t wash my fruit and I eat the skin.

the Pristine apple tree - it had a lot more apples last week
the Pristine apple tree – it had a lot more apples last week

Since there are too many apples for consumption I decided to dry and store them.  We had a rigorous debate about using apples which had fallen to the ground.  My view is they fell because they were ripe for eating and, provided I clear them each day, they are relatively fresh.  The more informed view was that there is a risk of contamination (salmonella) which even washing and skinning does not allay and, if I was the only one eating them – fine, otherwise no ground apples.  So I hand pick the apples from the tree – the trick is to test only the yellow ones (ripe Pristine apples are yellow) and if they need more than a nudge, leave them for tomorrow.  I also use my arm extender shown below.  (see update)

my extension arm apple picker

Then to the coring station – I use a handy contraption which peels, cores and slices at the same time, and very quickly too.  Since the slices are thin it is easy to notice any ingredient other than apple and to exclude that segment from the lineup for the dehydrator.

the handy apple peeler, corer and slicer

I do not pre-treat the apple slices since I don’t mind some discoloration and I want to keep out all additives, even fruit juice.  Then I load each of the trays which come with the dehydrator.


one of five dehydrator trays

Finally, close up the dehydrator, set the temp initially to 155 deg for 15 mins and then back off to 135 deg and take a look see 6 hours later.  When the slices are leathery dry I pack into zip lock bags and freeze.  And they taste so good.

my Nesco dehydrator
my Nesco dehydrator

Update

Picking, processing and dehydrating apples is now a regular first thing in the morning event.  To avoid wastage and missing out on the ripest apples, I cut 2 6′-10′ sections of 6mil clear plastic sheets which I located under the apple tree.  Now each morning, rather than picking from the tree I simply collect the apples which fell the previous day.  Because they have not come into contact with my animal fertilizer, compost or the ground we are not concerned about contamination.


mullein is an unusual plant

The Permies permaculture website recommended mullein.  So last year I bought seeds of 3 varieties and grew them.  In their first year they are low lying with large very soft leaves.  The leaves can be used for various purposes and apparently the plant has some medicinal uses.  But they appeared to contribute little to my vegetable garden.  Unlike comfrey (one of my favorites which sends its roots deep to mine nutrients) the mullein roots run horizontal and suck the nutrients out of the adjoining soil.  True I cut the leaves and drop them as a mulch and they will return nutrients to the soil but this seems to add little for the work involved.

But in the second year they are a spectacle. A central stem emerges all soft and downy.

mullein in its 2nd year taken 4/26

Then little yellow buds appear on the stem and it begins rapid growth. I heard it would grow to 5 feet, which I thought implausible but the tip of the specimen below is almost 6.5 feet above the ground.


a tall mullein plant

And the yellow buds develop into a complex maze of flowers.

masses of little yellow mullein flowers

The flowers are small but attractive.

a single mullein flower

And attract hosts of visitors.

a bumble bee at work

Then suddenly it is over and all the central stem is a skeleton of its former self, and the mullein is gone.  Perhaps to return next year?

my new hand sickle

The winter rye is tall and surrounds and shades my berry plants.

rampant winter rye
rampant winter rye

Now it is summer the winter rye is drying out and will soon drop its seed.  I like the wilderness of this luscious growth and see no point in cutting it down, except where it dwarfs my plantings.  It is shallow rooted and after a rain comes easily out of the ground, but that leaves an open spot quickly invaded by weeds and Bermuda grass.  For clearing the rye away from my plantings my large scythe is ill suited since it requires large two handed sweeps which can easily slice off the unintended.  I remembered the one hand sickle from my childhood days, googled it and found several variations for sale.  I wanted something solid and not with a serrated blade.  The Truper 33576 grass hook (as it is called) with a riveted handle best suited my requirements and cost $18.11 on the internet.  It arrived with a slight bevel on the blade but completely blunt, as is customary.  I have a peening jig mounted on a broad oak log.

you can see the sickle, my sharpening stone and the peening jig with two caps

The peening procedure is fairly simple – you place the blade between the anvil and the cap and then you tap the #1 cap along the length of the blade and then the #2 cap.  Peening flattens and expands the blade making it thinner for better sharpening.

peening the blade - my right hand usually holds the blade flat on the anvil, but it was holding the camera instead
. peening the blade – my right hand usually holds the blade flat on the anvil, but it was holding the camera instead

I then hand sharpened the blade with the stone.  Which was not a good idea since it took an inordinate time.  So, instead I fitted a small grinding wheel on my dremel  and this sped things up.

I am very happy with the hand sickle.  Cutting grass is simple but needs care.  With one hand you grasp the tall grass and pull it taut.  You place the sickle blade at the base of the grass and with a slicing motion you sever the grass.  Since some force is exerted pulling the sickle toward you and it can come quickly swinging clear, you should keep limbs well out of the way of its path.  Also take care not to slice the hand holding the grass.  You can fold the grass in half (if it is several feet long) and use it to border the planting.  This acts as a mulch, keeps the ground moist and dissuades weeds.  A weed whacker would work but it flings the grass about and could damage the plantings.  The sickle is very precise since you encircle the grass to be cut with the hook before cutting it.  And since you now have the cut grass in your hand it is easy to place it where you wish.

a blueberry bush with its tall neighbors removed and at its feet

And here is a row of raspberry and blackberry plantings liberated from the rye which concealed them.

blackberry and raspberry plants now accessible


planting out the tomatoes

My main ritual early each summer is the planting out of the tomatoes.  I grow these from seed, initially in the basement (0.75″ soil blocks) then in the greenhouse (2″ soil blocks).  My first year was a glorious year, since then hard going.  Not beginner’s luck but a case of slipping under the radar the first time.  Now each year the pests and problems await me.  Though I rotate the growing site, this does not thwart the soil borne diseases – there is an interesting piece in this morning’s NYT on using grafted tomatoes – maybe next year.  The biggest problem is the stink bugs, which each year multiply and love despoiling my tomatoes.

Undaunted I press ahead.  This year I planted 32  plants, less than last year.  And, for the first time in two adjoining rows of 16 plants each.  Previously I took care to wrap the stems just above and below the ground with aluminum to foil soil disease transmission – this year I just mulched with shredded paper waste.

Each plant has a name tag, but these frequently go missing, so I also noted the details on a post which carries the cable securing the wire cages.

0531 tomato a
16 plants in the right row listed sequentially

The varieties, which include heirloom and hybrid, are:  Mortgage Lifter, Rutger, Sweet Olive, Cherokee, Jelly Bean (new), Georgia Steak, Yellow Pear (new), BrandyWine, Siletz, Sugar Cherry, Black Prince, and Beef Steak.  The other 16 plants are also listed on the post and are of the same varieties.

I also adjusted my irrigation system.  I use bubblers for each plant, gravity fed from my rainwater tanks.  In the past the lines and bubblers were at ground level.  Advantage was they were somewhat protected from the sun and degradation.  Disadvantage was that if the bubbler was raised, say 45 degrees, the water from the bubbler ran to the base of the bubbler and not on to the plant and if the bubbler was horizontal it was difficult to see if water was flowing.  With my gravity fed system blockages occur and, if not identified, no water leaves the bubbler.   So this year I raised the lines and the bubblers so it is much easier to check that the water is flowing.  Will see how it works out.

0531 tomato c
irrigation loop with lines and bubblers raised above the ground

The irrigation lines form a loop enclosing the 16 wire cages so the water pressure equalizes and all the bubblers should flow about the same, though of course they don’t, even after cleaning.  So everything in place and awaiting quick growth and the stink bugs.

0531 tomato b
the 32 wire cages each containing a tomato plant and each fed water through a bubbler, with the prominent shredded paper to conserve moisture and delay weeds

Wildflowers

Some of the wildflowers are glorious, this near the chicken coop.

0531 wildflower


shading the PawPaw

Last September I purchased two PawPaw trees from HiddenSprings Nursery – a Mango and an Overleese.  Initially I planted them in an extended area of my new orchard but when a sickly apple tree had to be removed from my old orchard I decided to transplant the two small PawPaws close together where the apple tree had stood.  Incidentally this apple tree was purchased from a big box store to replace an apple tree which had previously failed.  So either there is a problem with the soil in this specific area or both trees were unsuited to my conditions.  Generally I purchase all my trees from specialist nurseries or develop them from cuttings.

The instructions which accompanied the PawPaws said shade is needed for the first year or two, so I decided to construct a simple shelter.  I am averse to buying materials when I can make do with what is around me.  After experimenting with a tripod arrangement made from bamboo, which worked ok, I decided to utilize 10ft oak branches as the post for each shelter. I first dug a 2ft hole with a clam shell digger to anchor the posts.

0531 pawpaw a
oak post with horizontal 12″ carriage bolt to which are strapped branches and bamboo to provide shade from sun in south and west

The two shelters are about 8 ft apart.  On the right is a trellis of various muscadines and in front is hairy vetch which loves my area and is self propagated from a seeding several years ago.  I let it and the winter rye and clovers go to seed each year.  This ensures winter cover and slows down the spread of bermuda grass.

In my first shelter I have a watering stop for my bees.  The irrigation is arranged that the bubbler fills the basin (upturned trashbin cover) and then dribbles over onto the site of the PawPaw.  The flat stones in the water are landing pads for the bees.

0531 pawpaw b
you can spot the PawPaw. it is the small stem with a few leaves between the watering station and the oak post

And my second shelter is similar, a post, surplus branches attached to the bolt on the post and a small pawpaw sheltering underneath.

0531 pawpaw c
this PawPaw is more difficult to spot though it is larger – its leaves are amongst the green leaves and its graft union is just discernible


sweet potatoes

I listened in on a nutrition lecture and heard a pointed saying, ascribed to Ayurveda:

“With good food, medicine is of no need.  With bad food, medicine is of no use.”

Sweet potatoes were prominent in the highly regarded traditional Okinawan diet – see my recent post.  In March I ordered “southern” styled sweet potatoes, they arrived yesterday and today with the Ayurvedic prescription in my thoughts, I planted them.

sweet potato slips
sweet potato slips

Detailed instructions accompanied the package and, as recommended, I wetted their feet and waited till the sun was setting before planting them.  I noticed that the Beauregard slips had not yet developed roots.  I hope this will not be a problem.

tomato seedlings

Now is the time I focus on my tomato growing.  As discussed in the growing organic tab, I start with tomato seeds in .75″ blocks on a heating pad and fluorescent lighting.  For the first few days the tomato seeds are covered in plastic to raise the humidity and temperature.

tomato
tray with blocks of tomato seeds covered with plastic

The tomato seeds are individually located in .75″ seed blocks and there are 20 seed blocks in each of the 6 bigger blocks – so there are 120 seeds germinating in this tray.  On the right is my summary of which seeds are in each block.

tomato seeds
6 blocks each containing 20 .75″ blocks – so 120 seeds including tomato are germinatingI

In my greenhouse I have set out some tomato seedlings.  The .75″ blocks are inserted into larger 2″ blocks and each 2″ block carries a description of the tomato variety.  You can see a few empty 2″ blocks with their square indentations awaiting a .75″ block.

tomato seedlings
some tomato seedlings transplanted to larger 2″ blocks

From the tags you can identify some of the tomato varieties I am growing – both heirloom and hybrid.

Now that my cool season plants are in the ground I am also growing out various herbs as shown in the next tray.

herbs in addition to tomato plants
some herb and other plants – yarrow, parsley, oregano and spearmint. In an adjacent tray is astrolagus, my first experience with this herb.

Finally, one of my two indoor lettuce trays.  Several times a week I clip the outer leaves for my organic lettuce salad.

several varieties of lettuce growing in the greenhouse next to tomato plants
several varieties of lettuce growing in the greenhouse.

Soon I will plant out the lettuce in an area protected from the afternoon sun.  And all this area will be occupied by 32 oz yogurt containers each with a tomato plant.