As I experiment with compost teas my better half decided to go down the biodynamic compost route. My role was to locate and assemble the ingredients. It would be a small heap shaded throughout the day and well clear of my regular compost heaps which include manure from stables – a possible contaminant. I provided 3ft stalks from flowering vegetables for the base, I scythed my plentiful high growing grasses for the “green” material and carried to the assembly area three 5 gal buckets half filled with chicken litter and poop. I also produced 4 intact leaf bags gathered from neighbors the previous fall, which would be the “brown material”, and with my bobcat transferred a mix of well rotted (3 year old) wood chips and soil, which would provide the covering material. I connected a hose to a rainwater tank. Then I stood back and watched.
the leaves were added first, then the green material and then the chicken litter was spread on the top
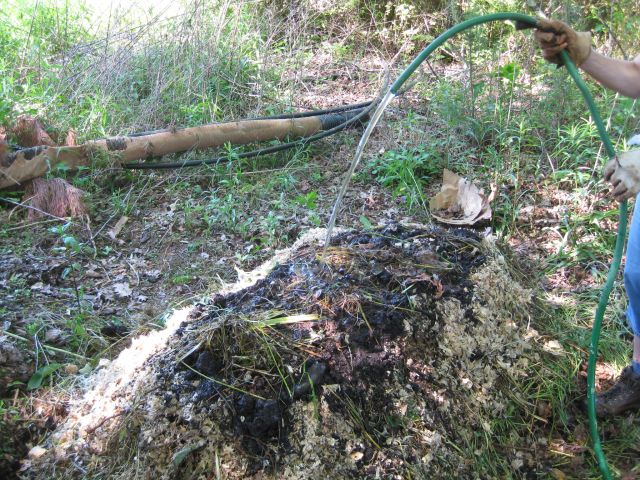
Next was adding the rainwater.
wetting the heap with rainwater
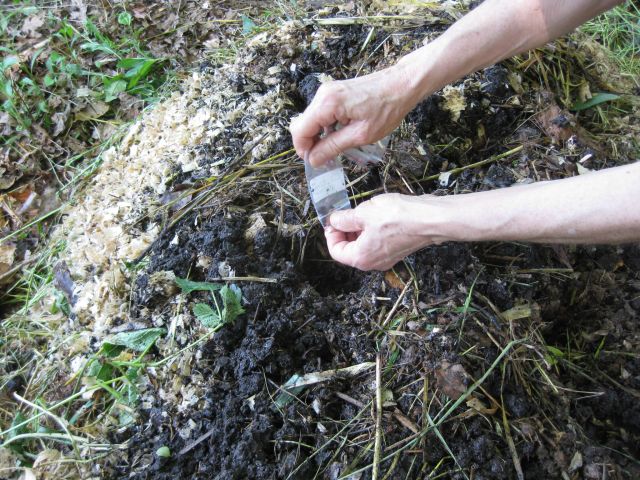
With a crowbar I made 6 spaced holes in the top to a halfway depth. Into each hole a different preparation was added: #502 yarrow; #503 chamomile; #504 stinging nettle; #505 oak bark; and #506 dandelion. The preparations were purchased from JPI (the Josephine Porter Institute). The first 5 preparations were in powder form, the sixth #507 valerian was a liquid which we added to a gallon of water, stirred vigorously and half added to the sixth hole.
adding the preparations to the compost heap
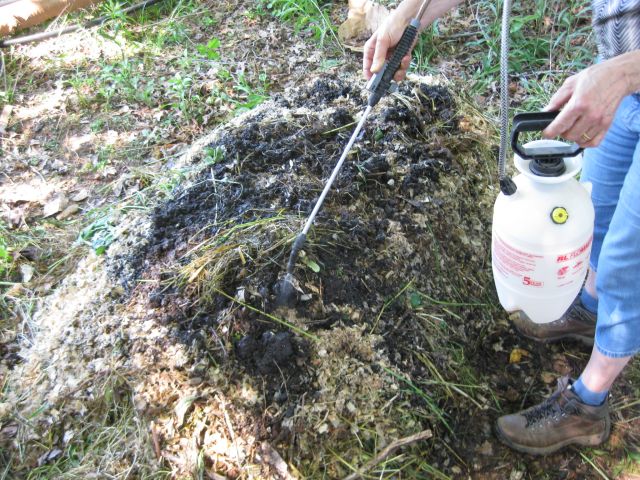
The remainder of the valerian solution was sprayed onto the heap.
spraying the valerian solution onto the heap
Finally the heap was crowned with the soil decomposed wood chip mix and then covered with some plastic bags to slow evaporation and retain warmth. And that was it for the time being.
The occasional cold temperatures in March dissuaded the plants from growing. This was evident from an experiment with peas. I moistened the peas and those which appeared to be growing the fastest I planted outdoors and the remainder I planted in a soil container in the greenhouse. Until a week ago very few of the peas planted outdoors had broken surface. Those in the greenhouse grew steadily. Today I transplanted the greenhouse peas.
the pea plant on the left was planted in March, on the right are two siblings from the greenhouse planted today
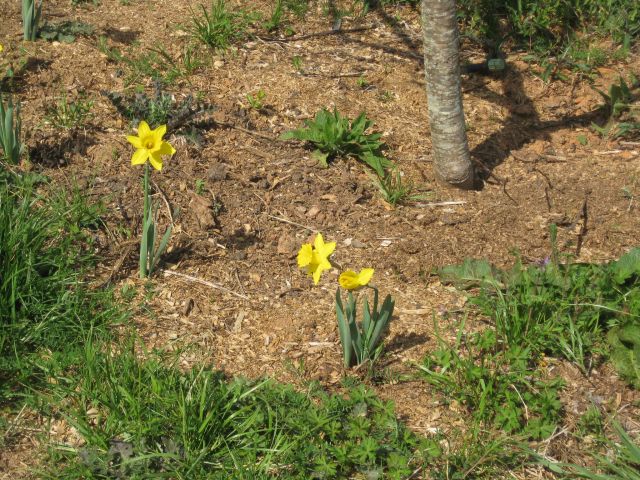
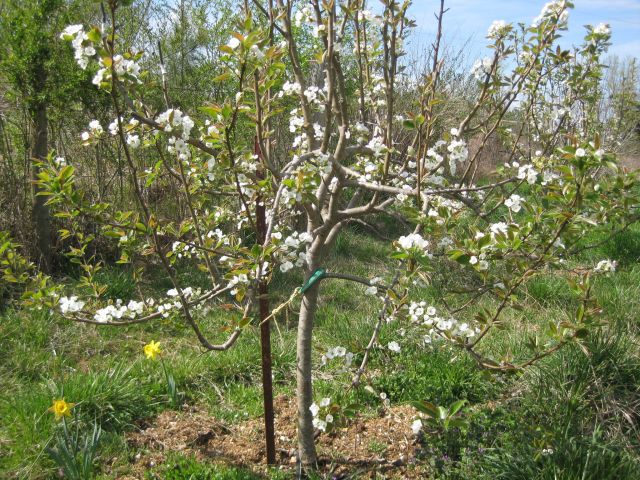
Of course the daffodils are out and my comfrey plants have surfaced from the root fragments I planted in December.
the comfrey is the small plant to the left of the apple tree trunk
The pear and peach trees are the first to blossom – here is a well bedecked pear tree.
white blossomed pear tree
A couple days ago I again sprayed the trunks of the fruit trees, but not the blossoms, with neem oil and will keep a good look out for pests. I probably mentioned that my bees survived the winter. They are now very active together with many other types of pollinators.
busy bees arriving and departing
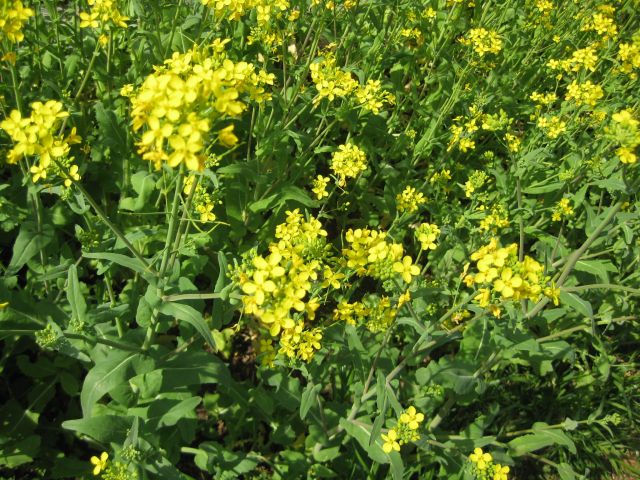
The precocious kid next door looked at them and said “buzzy bees” and then with a smile looked at me and said “get it?” Some of the greens are flowering.
a mass of yellow flowers beckoning pollinators
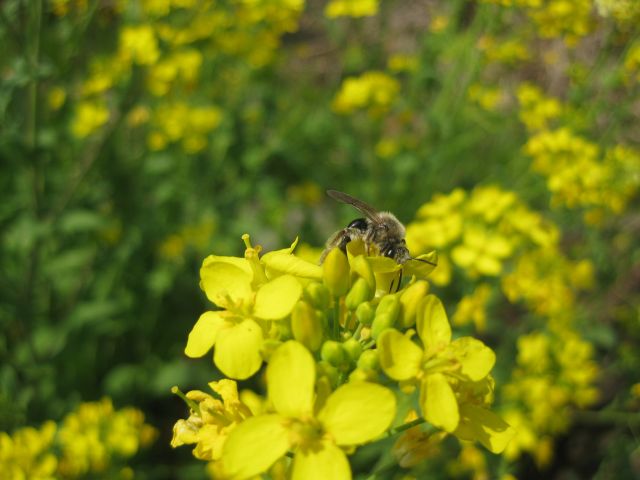
And if you step closer you see the pollinators.
a bee at work
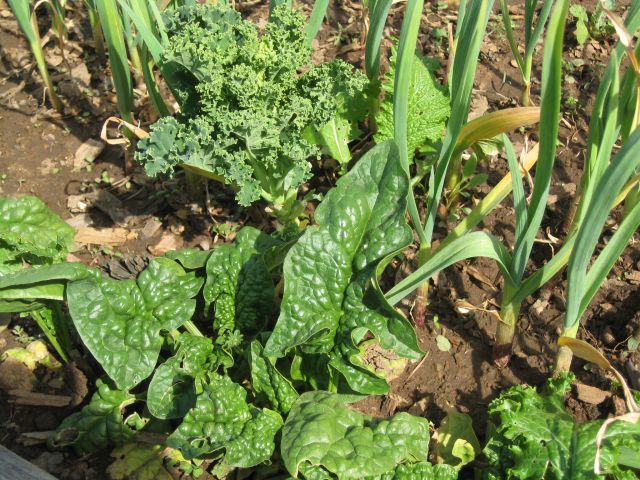
The spinach, kale, mustard and garlic are now beginning to grow.
spinach kale and garlic are stepping up, all are transplants
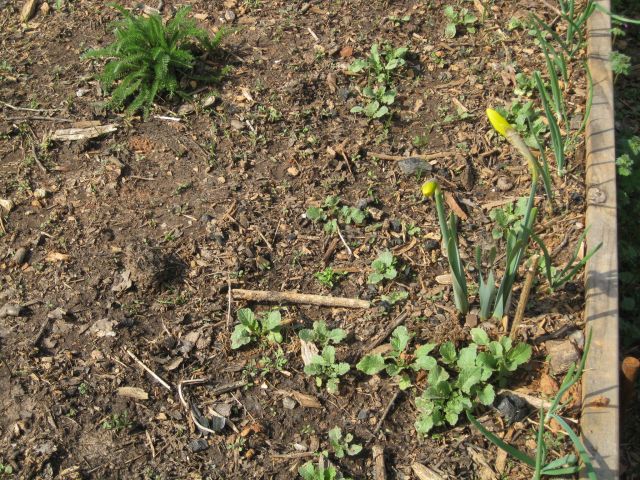
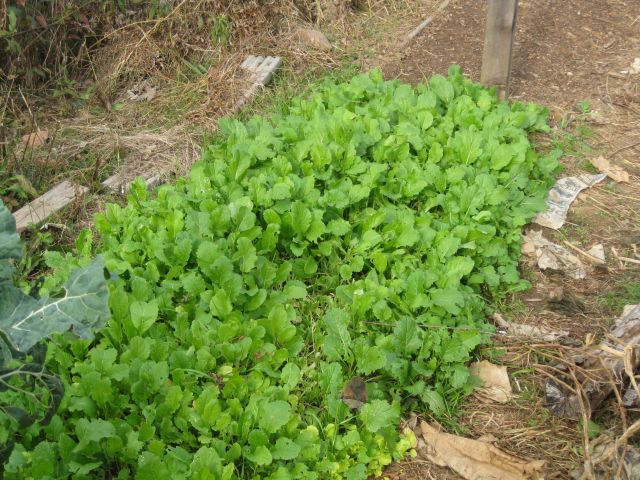
Of the vegetables seeded this year, the radishes are doing best. Here they can be seen with yarrow and some daffodils to add cheer to the scene.
a sparse array, though many other vegetables such as lettuce and collard have now germinated in the soil
Last year I grew yarrow from seed and it did so well in January I took root segments and planted them in each of the raised beds. They have all surfaced and are growing well. Plus the many onion bulbs I planted out in January. I will replant the daffodils. A big annual event for me is releasing the ladybirds. For whatever reason each year they hibernate in the one bathroom – they disappear in the crevices and then suddenly one day, there they are. I collect them by tipping/knocking them into a yogurt container and then I cap the container and walk them to the vegetable area. The photo below is horribly blurred but I kept it since it records the date the ladybirds arrived – all of them within a two day period.
some of the ladybirds in a yogurt container
I made 5 trips and with approx 20 ladybirds in each container, I guess I added 100 beneficials and I was pleased to see one of them this morning sunning on a leaf.
I built a large compost heap this year from approximately 200 leaf bags. I previously commented that I have too much brown and too little green ingredients, so I added horse manure which comes with straw to help balance it out.
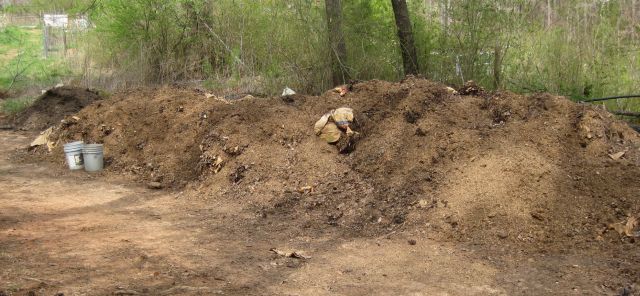
assembled compost heap – it should be ready by August and then look like the finished heap at the end
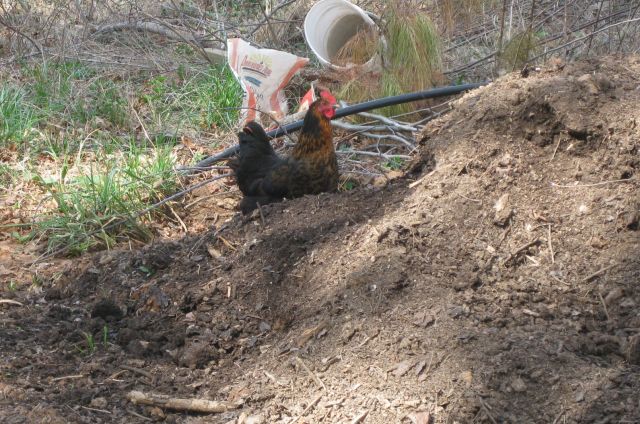
And the chicken are producing – an average of 8 eggs a day from 10 hens two of which are seniors. Two of the younger hens frequently fly over the paddock fencing to explore and feed. Today I noticed Wanda (abbreviated from wanderer) had discovered the compost heap. She is the daughter of our Buff Orpington rooster and her mum is a New Jersey giant. The only trace of dad is the gold coloring on her neck.
It takes some skill to see or observe things and then a lot more experience and skill to interpret what you see. With me it is a drawn out journey. There were signs along the way which I ignored and am only now, with hindsight, piecing together. I remember when I purchased the land some 4 years ago and my sceptical neighbor, now deceased, wagered his tomatoes would outgrow mine. And in that first year I had the most amazing huge tomatoes and he admitted, sheepishly that he had snuck in to take a few baseball sized specimens to give to a friend who lamented (until he received the gift) that the days of really good tomatoes were past. That was my first year and, altho I subsequently religiously rotated growing areas and weeded and watered, I never replicated those first heady moments when the harvest was unceasing and delicious.
Never, until last year when if you go to my 8/22/13 post you will see that I marveled at the prodigious production of a single 4ft sq. raised bed. Marveled, but never stopped to consider why!
A few weeks ago I read again about compost teas and decided to head down this road and purchased Teaming with Microbes by Lowenfels, which discusses compost teas and intelligibly leads the reader through the soil web and bacteria and fungi. And as I read I concluded that my compost, which in my untutored opinion was excellent, was really deficient because its components are mainly (90%) comprised of brown material such as leaves and woodchips and minimal green materials. So as I read further I realized my compost is best suited for shrubs and trees and not for vegetables. And then the penny clicked! In my first year I had used compost from our Atlanta house which has a 50:50 ratio of brown and green (the green is grass cuttings from our lawn – at the farm there are no grass cuttings). And then I also remembered that the 4ft sq raised bed which performed so stellarly last year had also incorporated compost from the Atlanta house. So I asked myself – could the solution be in the compost I was using? I decided on two steps – use Atlanta compost to make compost tea for the raised beds to try upgrade the compost in place, and use Atlanta compost for the future tomato growing areas. Such usage required negotiation with the Atlanta compost maker and the logic I am using is that my farm prepared fungal dominated compost is better suited for the roses and shrubs that dominate the Atlanta garden than the bacteria dominated compost which I will accept in exchange and use on the vegetables for our common benefit.
Compost tea
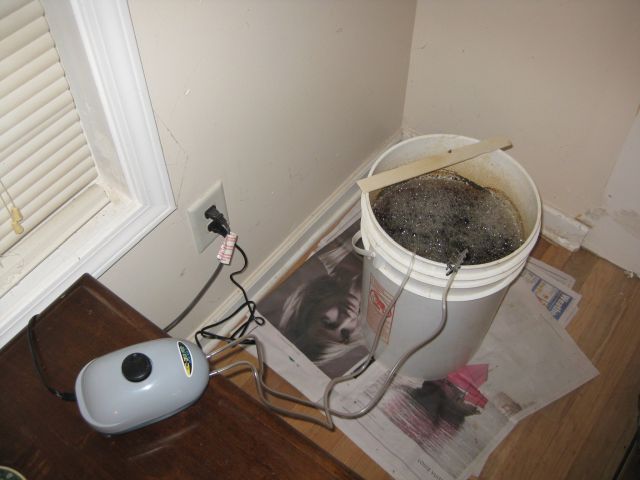
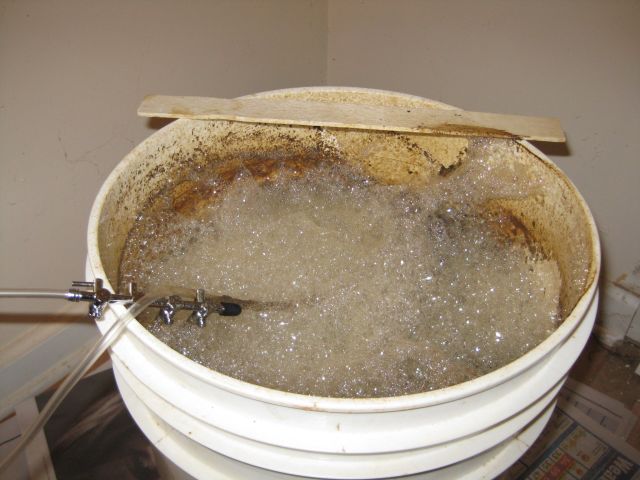
To simply add compost to water will fail. Bacteria, the good guys, need air to survive so you have to add air to the water and this is done using an aquarium pump connected with tubing to “stones” pinned by real stones to the bottom of the 5 gal container which is filled with (in my case) well water maintained at a reasonable temperature. Chlorinated utility water will kill off the bacteria. I then add 2 quarts of Atlanta compost. So the bacteria are now receiving air and will survive and hang out in the compost unless induced to leave. And the daily bribe is 2 tablespoonfuls of molasses, diluted in warm water and added to the brew.
compost making operation – aquarium air pump, tubing to the stones and 5 gal container
Such is the logic, and formation of bubbles and brown/black slime is supposed to evidence the proliferation of bacteria.
a lot of bubbling and slime on the rim – hope this proves the presence of beneficial bacteria
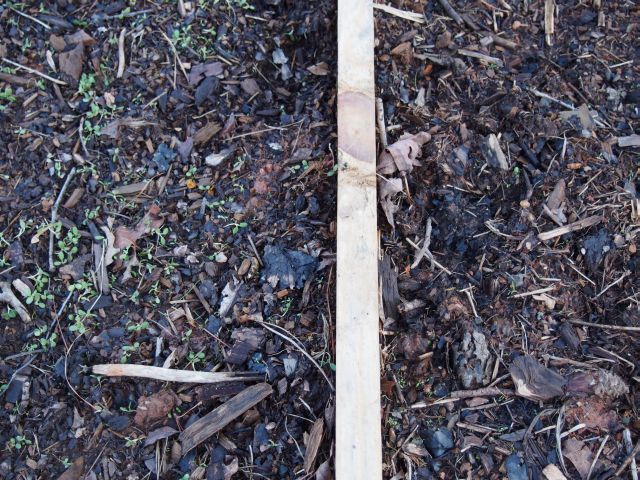
I sprayed my first batch on the raised vegetable beds, except for my control bed which is 4ft by 10 ft with 10 ft seed rows running south to north. I demarcated a 5 ft midpoint and sprayed the compost tea on the southern half of this bed. The northern half catches slightly more sun than the southern half so it has a slight advantage which I am hoping the compost tea will overcome. Since both halves have the same seed species planted at the same time it will be interesting to see if the southern half outperforms the northern half. I used my second brew for several days to water my tomato seedlings in the greenhouse. I topped the container with water and added the molasses meal each day.
So now wait and see – the author of one of my fruit tree books says the jury is still out on compost teas. I understand the logic of the process but am I really producing viable bacteria which will proliferate and alter the dynamics of my soil? The concept has a resemblance to the biodynamic approach – I attended a workshop last weekend where we added formulated cow manure to a pail of water and created a vortex (oxygenation?) before sprinkling the solution on the growing areas. What I should really do is have a thorough scientific analysis prepared of soil samples from my beds and use that as my starting point, but I like to meander along and try figure it all out myself.
My orchard is beginning to blossom. First are the peach and the pear trees and then the apple trees with some earlier than others. I noticed that my little peach tree which last year provided its first delicious peaches (unfortunately inhabited with visitors since peach is tough to grow without ‘cides) was dead! The other peach tree, a shadow of the first, was doing fine. I feared root nematodes or some other nasty affliction which would spread to my other fruit trees, so I hauled the tree out of the ground. I could have dug it out but it was easier to chain it and lift it vertically out with my bobcat and this way get most of the roots out at the same time.
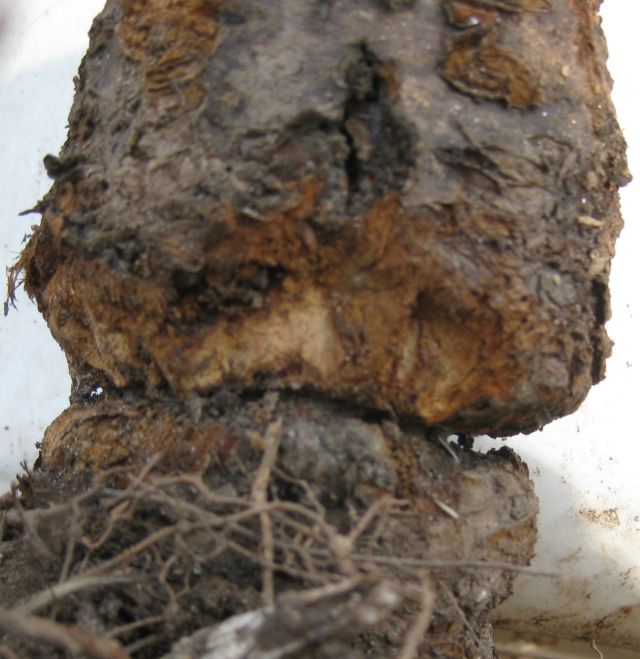
And then I noticed why it had died. When I planted my trees I engraved their salient details on thin aluminum plates which I loosed tied around the trunks. With time the string loops (actually nooses) were buried by mulch and disappeared from sight and the trunks expanded. Of course I used synthetic long lasting string which does not deteriorate and so, as the tree grew bigger it slowly strangled itself. The nutrients could not pass between the roots and the above ground tree and the tree died.
the base of the peach tree – you can see how tightly the string had constricted and cut into the trunk and completely cut off the supply of water and nutrients
I was somewhat upset! And then immediately began examining my other trees and found 5 other restricting nooses which I cut with a chisel and pulled loose with pliers. These trees had not fruited last year and I had assumed it was because of competing growth from weed thickets which I since removed. So easy to draw the wrong conclusions – it was possibly because they were deprived of nutrients. I hope they will all now do well. I had to gauge one so deeply to remove the name plate that I left a sizable hole which I decided to douse with with antibacterial spray and plug with grafting wax to keep out invaders.
Since peaches are tough to grow organically I decided to replace the peach tree with 2 apple trees. I wanted low chill varieties since, despite this recent cold weather, I believe the long term trend is to warming and a low chill variety requires fewer cold hours. My googling produced 3 varieties – Dorsett Golden, Fuji and Pink Lady aka Cripps Pink. Gilmer county is just north of my farm and is apple country in Georgia and has a decent nursery where I previously bought some of my apple trees.
The manager (he may also be the owner) was very helpful and confirmed that peach trees are self pollinating and my remaining peach should be fine, but got a little upset when I said I wanted low chill varieties and mentioned Dorsett Golden. Heated because he felt my logic was faulty and also because he said, with a smile, that he did not carry Dorsett Golden. But he approved and had in stock Cripps Pink and Fuji. I boarded his golf cart and we drove to the Fuji and had wide ranging discussions on growing topics – he is trying to adopt organic practices and uses neem and spinosad (I occasionally use neem and have never used spinosad) and he makes his own compost. But he says for his container plants he has to use a slow release fertilizer and will not call himself organic because that would be misleading.
The Fuji was in a container, the Cripps Pink was bare root and in a moist indoor location and looked very vigorous – he said it was a 2:3 which he explained meant the the scion was 2 years old and the root was 3 years old. On the way back to the office he elaborated on his global warming views that if it was happening (he stressed the “if”) then he was sure we on earth would act to limit it and anyhow, in his view it would take many years before it became an issue. I did not want to debate and upset what was a pleasant visit, so we settled up and parted harmoniously and a few hours later the new arrivals were bedded in their new home.
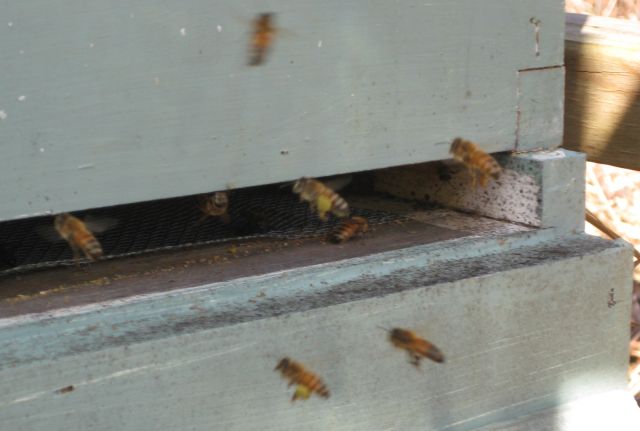
The happiest sign of spring for me is when bees emerge from the hive. Bees collect honey to nourish them through the winter. Many beekeepers will harvest most of the honey and then feed the bees with concentrated sugar water (three parts sugar to two parts water) at the end of the season to provide nourishment for the cold months. I prefer to harvest less in July and leave them honey and several remaining summer months to replenish their stores. You could ask why not check up on their honey reserves in December and January and if they are slight, then feed them sugar water? Bees huddle around their queen to maintain a high temperature and opening a hive on a cold day is stressful for them. A bigger problem is if food arrives in the middle of winter they may conclude that spring has arrived and encourage the queen to produce brood. I have an Italian queen and this species is well known for beginning brood production early. You could ask what is the harm if they start brood production too early. It requires a lot of energy for bees to keep themselves warm in cold weather and if they have to warm themselves and the queen and the brood in the cells as well, this will be additionally stressful, and bees have too much stress already and too high a winter mortality rate for me to stack the deck further against them. So I abide and hope to see them on a warm day, especially if they have successfully foraged food, and so it was yesterday.
bees approaching the landing strip, some with bags of pollen
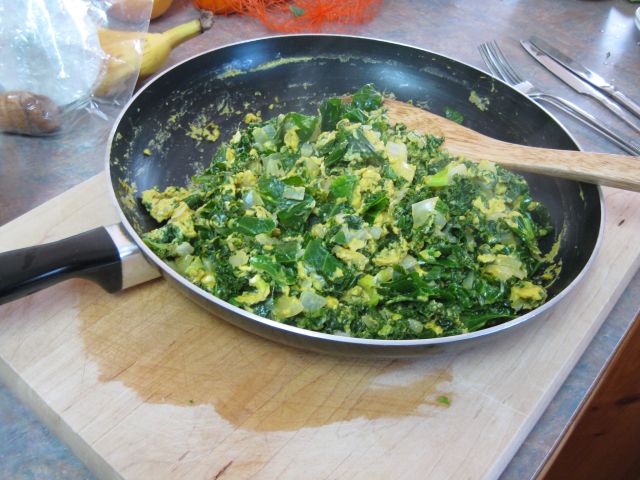
Another gratifying sign is my own greens on the food plate – here a medley of greens (primarily mustard, spinach and kale) sauteed and mixed with scrambled eggs ready for the eating.
home grown greens and free range eggs
And these greens really do taste better than the hoop produce from Georgia farms or the long shipped immaculates from drought ravaged California. My ten hens (two of whom are elders) are now producing 7 eggs a day, another sign that spring is almost here.
And now for the chores – weeding. I have concluded that my training as an accountant has helped me become a better weeder. An oddball theory it seems but here is the reasoning. My upfront standard for a competent accounting operation is that it reconciles its cashbook to bank statement to the penny. I am all for taking a big picture and have produced reports rounded to $1, $100, $1,000 or even $1 million, but even with the biggest organizations my test is still the same – did they reconcile their bank statements to the penny. Having done such reconciliations myself numerous times, and audited and investigated such reconciliations, I guess I have developed a fastidious and somewhat boring mentality. But since I now have the gift (or handicap) it certainly is useful when it comes to thoroughly weeding a vegetable patch. Unless you clear out all the weeds you leave trouble brewing for next time which means more work. Once the weeds are out it is simple maintenance to quickly scarify the soil every few days and bring to the surface the small white roots of infant weeds and thus forestall their attack. But if you leave a few behind and just concentrate on the big uns, why then it becomes an unremitting slog.
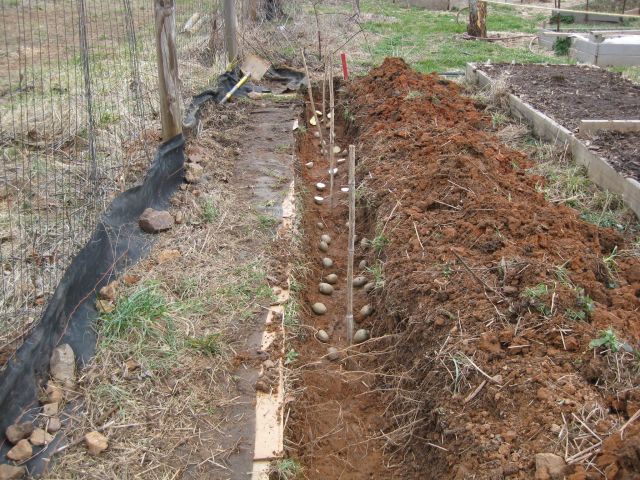
Other work is not a chore such as digging the trench for the potatoes – I planted out four varieties.
a potato trench with 4 varieties identified with bamboo sticks and soon to be lightlycovered with compost and soil
And planting out cool season vegetable seeds is a satisfying investment in future months. And to keep track of what I am doing I label each row with the variety and date of sowing.
labels for the vegetable rows
I tend to hold onto items I have replaced thinking I will find a new use. I had damaged venetian blinds sitting in the corner of the basement for a year before I could figure out a new use which was to cut the slats into small pieces and use them as labels for my vegetable rows. Since the slats are designed for sun exposure I am sure they will not deteriorate but they are flimsy and so I locate them at the edge of the beds where they are better protected.
My next project is to make compost tea which is need to dynamize (I am thinking along the lines of bio dynamics) some of the recently built raised beds. I have ordered an air pump and piping and “stones” and when I am successful will make a future post.
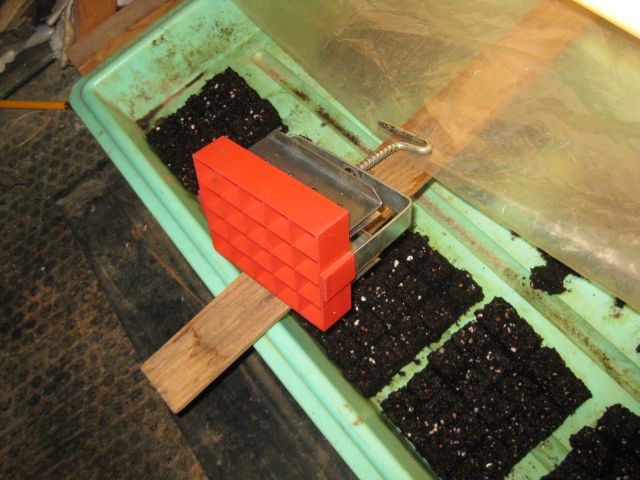
The annual ritual commences – germinating tomato seeds for the summer. I have a number of varieties stored in their original paper packets in a ziplock bag (but not zipped) in the basement. And each year I select 4 of each variety for growing. I moisten commercial seed starter mix and with my mould produce a 20 block rectangle of 0.75″ individual soil blocks.
the mould for producing the rectangle of 20 .75″ soil blocks,
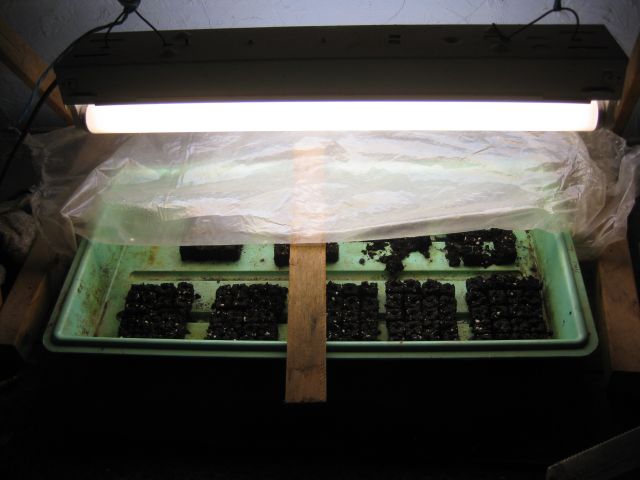
Into each block I insert a single tomato seed on the tip of a moistened pencil. The seedling tray sits on a heating pad below a timed fluorescent light in the basement.
the germinating set up – a tray with seeded soil blocks; a plastic sheet to maintain humidity, a heating pad below the seed tray, and a timed fluorescent light started about 4 days after seeding
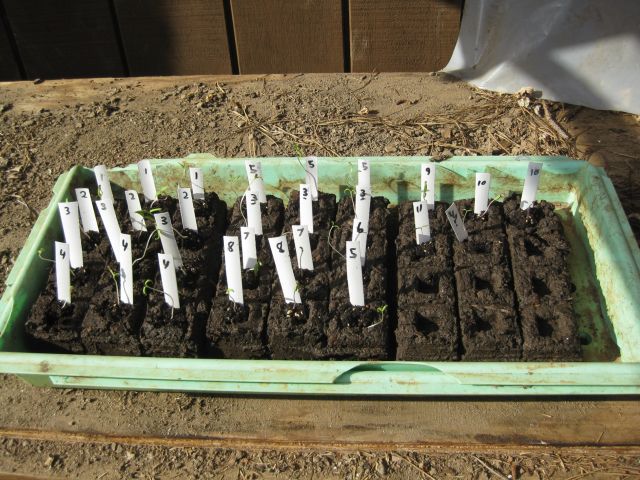
On 1/13/14 I seeded the blocks and by 1/22/14 the seedlings were ready for relocation to 2″ soil blocks made from my compost, play sand and other additives. Now the cold has departed (for the time being) I locate the 2″ blocks in the greenhouse where they benefit from real sunlight and where they will develop to be transplanted later to pots and then to the growing areas.
2 inch soil blocks in the greenhouse. rather than naming each variety I provide the # I assigned to each variety
All my varieties germinated with at least 3 out of every 4 seeds (75%) except for Big Beef and Brandy Wine, and the Sugar Cherry only has 1 germination tho more are indicated. Here are the vital stats:
Good germination: Beefsteak – American Meadows purchased Jan ’10; Mortgage Lifter – Southern Exposure Seed Exchange Feb ’12; Jelly Bean Hybrid – Ferry-Morse Mar ’13; Yellow Pear – Burpee Signature Mar ’13; Black Prince – Johnny’s Feb ’11; Cherokee Purple – Johnny’s Feb ’11; Rutgers – Ferry-Morse ’10; Georgia Streak – Southern Expos Seed Exchange Feb ’12; Siletz – Peaceful Valley Sep ’10; Sweet Olive – Johnny’s Feb ’11; Cherokee Purple – Botanical Interests Feb ’10.
I notice that the Big Beef which did not germinate is a pelleted seed and this is probably too large for starting in a 0.75″ block. It was purchased in Mar ’13 and I will try again and bury it in a small pot. The Brandywine was purchased in Dec ’08 more than 5 years ago, so the seed is probably no longer viable. The Sugar Cherry was purchased in Feb ’12. Gratifying that tomato seed purchased in 2010 is still viable.
In addition to the old tomato seed, I made 4 acquisitions. I googled tomatoes for the southeast (heat and humidity) and, of the varieties recommended 3 stocked by Johnny’s caught my interest – all are hybrids – Juliet, Big Beef and Mountain Fresh Plus.
My 4th acquisition was Ukranian Purple – I took a pinch from a packet on a table at a seed exchange day hosted by the town of Decatur on National Seed Swap Day on Jan 25. We had a representative from the Seed Exchange present who provided useful tips on saving seed, with a focus on tomatoes. Apparently tomato is largely self pollinating and so long as the varieties are 15 ft apart, the seed saved should be true to variety. The gift of Ukranian Purple,the advice proffered and the challenge, have now resolved me to save heirloom seed this year. And so, instead of a my usual mass tomato planting I will plant the heirlooms in separate groups by variety. The hybrids can be planted together since I will not bother with their seed or, maybe I will.
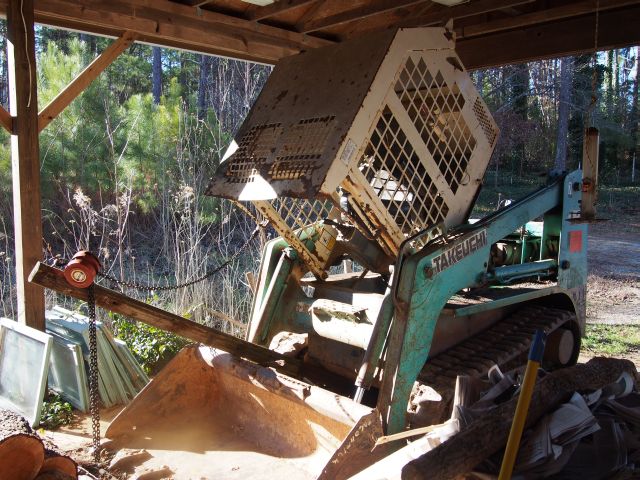
After some cold nights (12 below freezing) my Takeuchi bobcat refused to start. Cold and tired battery. The best way to charge the battery is to pull the cab forward on its hinges and then you have direct access to the battery. It is heavy and best done with an assistant. In the past I had an anchor point in front of the Take and winched the cab forward. However, there was no anchor point for the Take this time just a 2,400 gal rainwater tank. The last time I had no anchor point I attached the negative charging wire to the body and the positive to a nail which I inserted into a slot in the fusebox. I really didn’t want to do this again. So I pondered and created my own anchor point. I found an 8ft fence post, located it between the loader and the body of the Take, attached a hook and winched the cab up. Effortless and the charging was uneventful.
raising the cab of the Take
work in the orchard
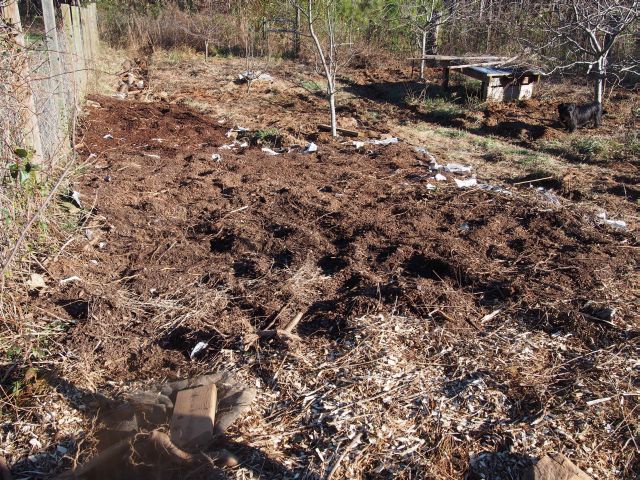
This year, for the first time, my first row of apple trees produced apples but the second row which is nearest my neighbor’s fence did not, and the trees appeared lackluster. I diagnosed this to competition from vines, shrubs and small trees, some of which have thick roots 10ft long which have been out competing my apple trees for compost nutrients. I am avidly reading The Holistic Orchard by Michael Phillips in order to thwart the pests that nourished on many of my apples. He makes the interesting point that wood chips from hardwood trees create beneficial fungus for fruit trees. So I have worked hard to clear the growth between my trees with an eyehoe (what a wonderful invention). I then spread manure from the stables, layer newspapers thickly and now, with my Take recharged I ferry loads of woodchips and dump and spread over the newspapers.
mulching the orchard
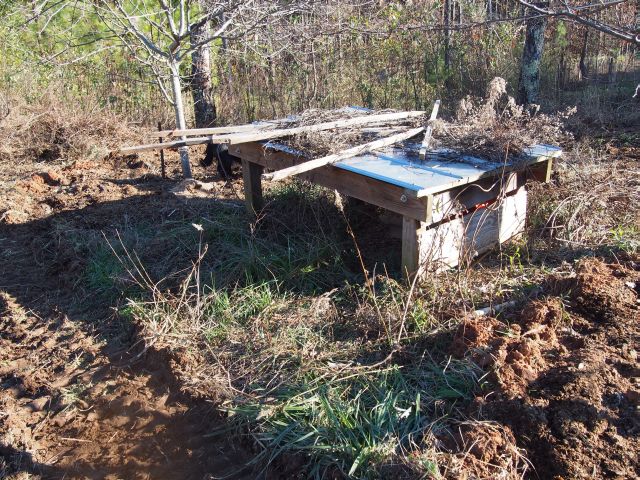
When the orchard is respectable I will bring in a flock of helpers to scratch and turn up over wintering pests. A couple years ago I improvised a simple chicken shelter which has a couple of nestboxes and I will clean it up for my chickens.
simple chicken shelter in the orchard
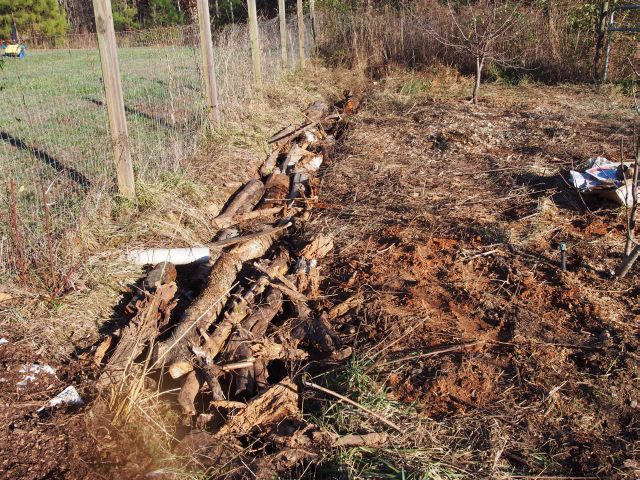
water and nutrient infiltration
I dug a trench alongside part of the orchard to capture and infiltrate rainwater run off. I am now filling it with hardwood (mainly) logs, the idea is that the wood will decompose and the nutrients and fungi will benefit my fruit trees along the lines suggested in The Holistic Orchard book (and will also physically block the growth of tall weeds in the ditch).
various logs stacked in the rainwater ditch
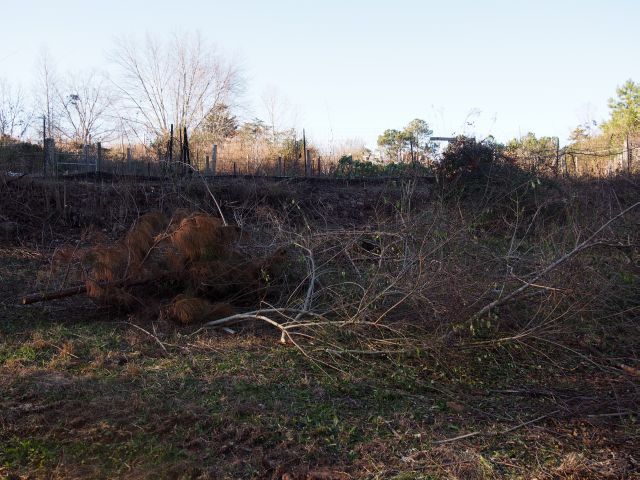
clearing the slope bordering the vegetable growing area
My main vegetable growing area is fenced in and along the southeast border a thicket of privet and briar sprung up over the past several years. I tolerated the growth since I reasoned it provided vantage points and shelter for insect loving birds which were helping me control pests in the vegetables. However there were two problems – a) the roots invaded my raised beds – there is one type of small tree which has very long wily roots which evaded all my attempts to obstruct it; b) in the winter, when sunlight is dear, the wild hedge blocked the sun from my frost ridden beds. So I worked hard to cut down and remove the growth and have been chipping away with the chipper, carried and powered by my tractor. This mulch I have also been adding to the orchard. Some chipping remains and when the clay soil has dried I will bring out the tractor again and chip away.
some of the small trees awaiting chipping in the foreground and the fenced growing area at the top of the slope
winter hive protection
My bee hive faces south. Chilling winds tend to come from the west and north. On the west side I have a window which allows the sun but not the wind access to the hive, and on the north side I have plywood protection.
the sheltered winter protected bee hive
how the clover fares
I recently installed a 20ft by 4ft raised bed and sowed half of it with crimson clover and the other half with white (ladino) clover. The crimson clover is larger but both seemed to germinate equally well. However, following the recent cold, the ladino clover almost disappeared while the crimson is holding on well. Will be interesting to see how they comparatively perform in the spring.
the crimson clover is on the left of the divider and the barely surviving ladino clover is on the right
veggies for eating
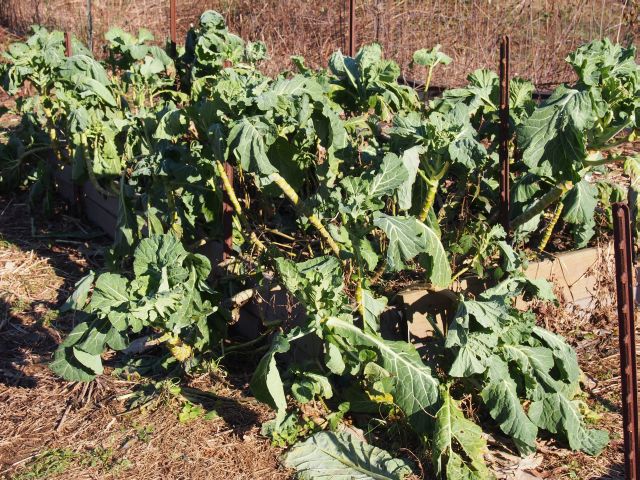
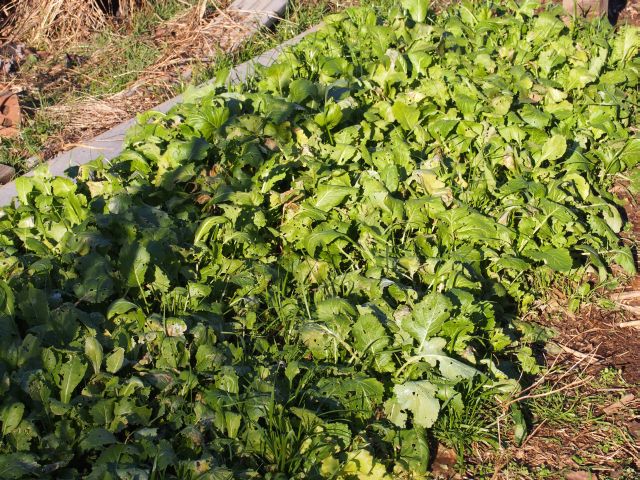
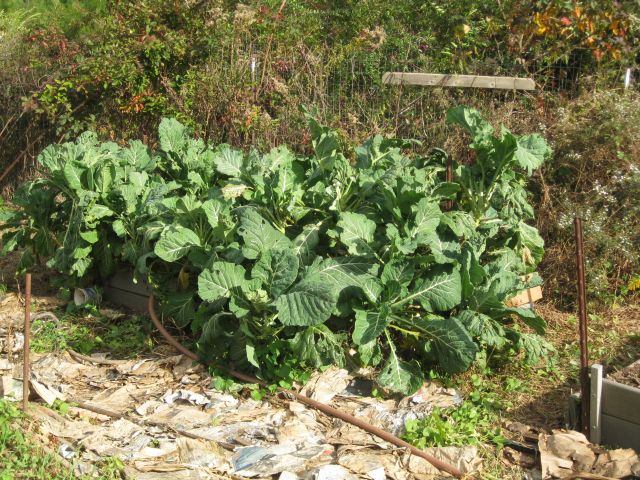
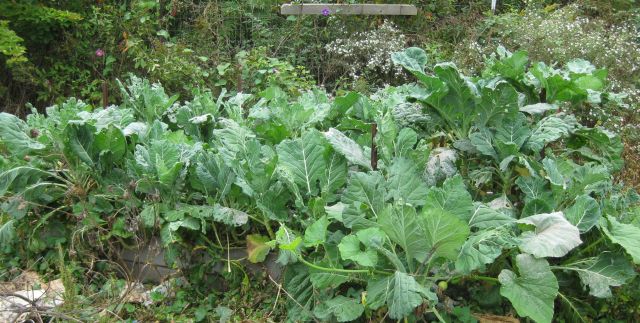
.I am not using crop covers right now and my collard and turnip and mustard greens are surviving, tho at time the collard looks a little bedraggled.
tasty collard for the picking
A tasty (and healthy) dish is newly hatched eggs (yes my younger hens are laying in the winter without artificial lighting), collard, greens and garlic stir heated, eaten with home made whole wheat bread.
lots of winter greens which keep growing in the winter
So these are some of my winter tasks. And on the inclement days, Coursera, the free online college course compendium, awaits. I just completed calculus, precalculus and a fascinating history on mankind from 250,000 years ago to the present.
I recently attended an open house event at a local organic farm trending to permaculture. I wandered the fields with the manager and we discussed many topics. It was only later when I was by myself and walking his rows that I noticed how perfect his vegetables looked. No weeds – well I could manage that too if I was doing an open house, but not a single insect chewed leaf! By that time the manager was busy with other visitors and not accessible.
I thought long on what I had seen. Their compost heap was far from humming which made me think their organic growing skills were still on the uptake. Now when I build a new compost heap it also looks pretty rough but I always keep finished compost on the side to provide a bio-organic boost. They did not have any finished compost in sight and their heap didn’t look that new either. So it seemed to me unlikely that they could have mastered pest free organic growing, which incidentally if you use a tight definition for “organic” , I regard as an impossible goal. I mean think about it – if your system is in balance with well nourished high immune level plants and beneficials on the standby to consume pests as soon as they appear, then yes, the pests will not get to first base on the first leaf. But this is an improbable assumption – the beneficials depend on pests for sustenance (that’s why pests precede beneficials in the march of Spring) and cannot survive and be on red alert if there is not a continuous supply of pests and for pests to be around they have to snack and so you gotta have chewed leaves.
So how could this relatively new farm have perfect looking vegetables? Yesterday the manager visited my outpost and I casually raised the topic and the answer – a well known pyrethrin spray. It is an effective and expensive knock down spray and is OMRI approved which means you can use it and say you are organic growing. I suppose because it is derived from natural ingredients (chrysanthemum) this means it is natural. It will take out all insects including honey bees and beneficials, so as for honey bees you spray when they are not around and as for beneficials, since your spraying killed the lot of them, then per the instructions “plan to reapply them” 1 to 2 days after the spraying. We have reached the stage where beneficials are applied just like a chemical! It seems that once you go down this route you probably going to end up doing a lot of spraying.
So is this really organic growing? Depends on how tight your definition is. Are natural ingredients empowered by human ingenuity that much different from synthetic ingredients? Are pesticide sprays from natural ingredients less toxic to humans than synthetic sprays? For me, growing organic is assisting but not enforcing – I encourage beneficials, I make compost, I want nature to run its course and I am perfectly happy with sharing some veggies with pests. And my take away is that with the exception of some veggies which seem to grow perfectly with little pest pressure (lettuce, radish and garlic come to mind) the next time I see perfect looking organic vegetables I will wonder if spraying was used.
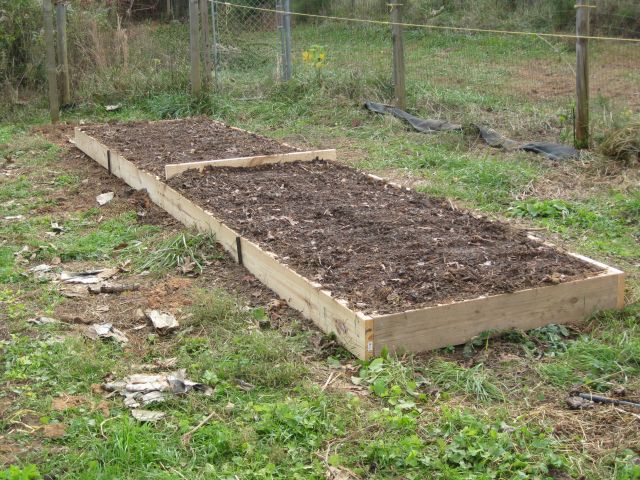
As the months and seasons roll by and I learn what works and doesn’t, I change my practices. For me, raised beds work best. I produce mainly for my family and the area under cultivation is about 1/4 acre and worked by hand (my hands). For this situation raised beds are optimum – they drain better, they resist weed invasion better, easier to work (less stooping) and warm up quicker in the winter. I have 8 beds now – mostly 8 or 10 ft by 4 ft, though I just installed a 20ft by 4ft addition.
my new raised bed
For this bed I used 10ft by 10″ untreated planks screwed together at the corners and in the middle a left over 4ft by 12″ wood with steel stakes in the middle of each of the 10ft lengths. I filled the bed 80% with soil from a contour ditch which I had mixed with wood chips a couple years ago, and the balance with my compost plus liberal scoops of lime. I sowed one half with white ladino clover and the other with crimson clover. I should have done all this a few weeks ago and not just before our first big winter storm, but I was delayed with more pressing tasks. Hope my winter cover will germinate and then late spring I will cut and plant out edibles. The yellow raised line to the right of the beds is my deer dissuader – it is supposed to make a simple hop over the fence a complicated maneuver (and to date I have not had any deer visits).
My most productive bed this season was this 4ft by 4ft which is not well sun exposed. As I cleared the tomato, cucumber and squash vines I saw and remembered how this was different from the others – when I first filled the bed I used about 50% (at least) compost and this made the difference. For an organic grower it is all about the compost.
my best raised bed – it endlessly pumped out tomatoes and cucumbers plus kale and more
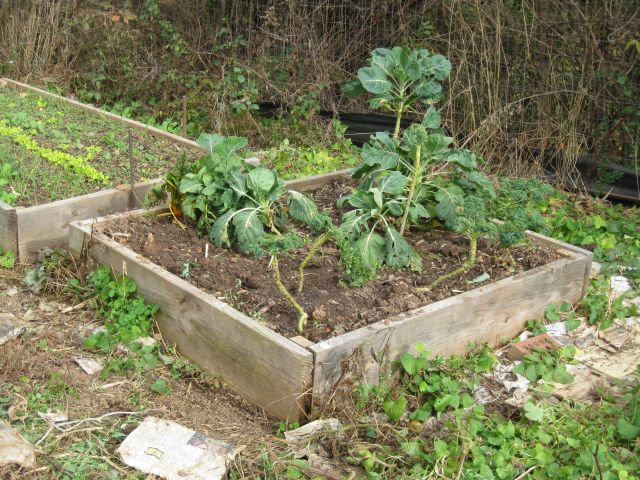
I have cleared and recomposted most of my beds and sowed cool season vegetables and will use row covers if it gets very cold. My favorite planting is garlic – from a few organic heads purchased a few years ago I now produce sufficient garlic for use throughout the year plus lots of cloves for planting in the fall. Here is a typical bed going into winter.
typical bed going into winter with lots of garlic among the veggies
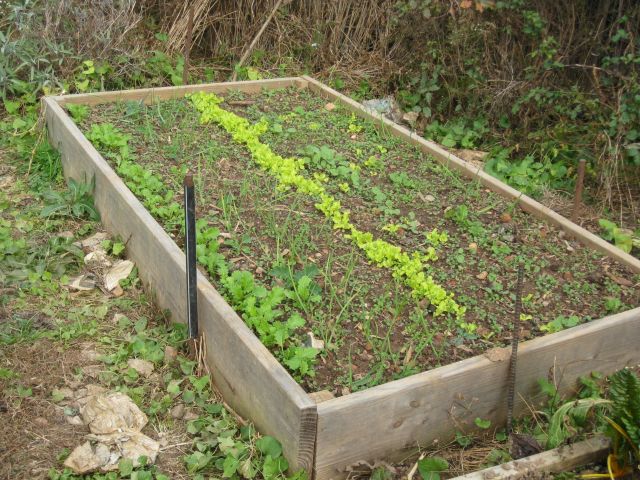
I still plant directly into the soil and here is mustard growing well – I just scattered the seed, they took off, and now I haircut the leaves as needed and they grow back quickly.
abundant regenerating mustard
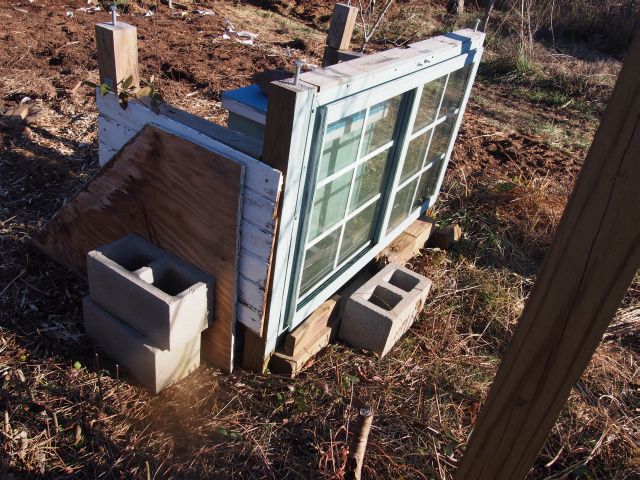
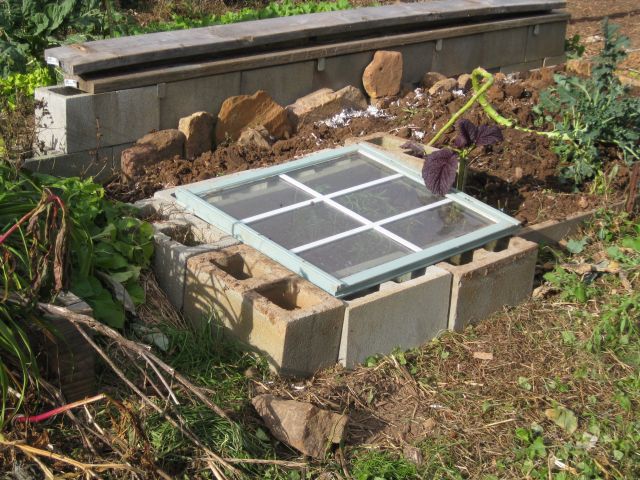
Previously I built elaborate above ground cold frames – which worked but were a bit clumsy. I will take my chances this year (I do believe the climate is warming) and make do with row covers except for some delicate herbs – rosemary, oregano and parsley for which I made a very simple, sun exposed cold frame. It is not airtight which means the plants will not overheat on warm days but how will they do on the cold days?
cold frame for the herbs
Another change I made was hand watering my vegetables with a hose – I still use bubbler irrigation for the two orchards. (All water used is rainwater collected from various locations and pumped to large storage tanks and then to smaller elevated tanks for gravity fed irrigation). Now I have my feed tanks at the top of the hill the psi is sufficient to enable quick watering. When I began growing, I did not own the hill and my gravity fed system produced only a slow flow and I used bubblers for everything. Hand watering is quick and I can see what is going on – where pests are developing, where diseases, what needs more and what needs less watering. I use a 3/4″ hose which can be spotted in this pic of my collard bed where the collard is growing well – it tolerated the Georgia heat well, now to see how it does in the winter.
raised bed containing lots of collard, with less pest pressure the collard leaves look great
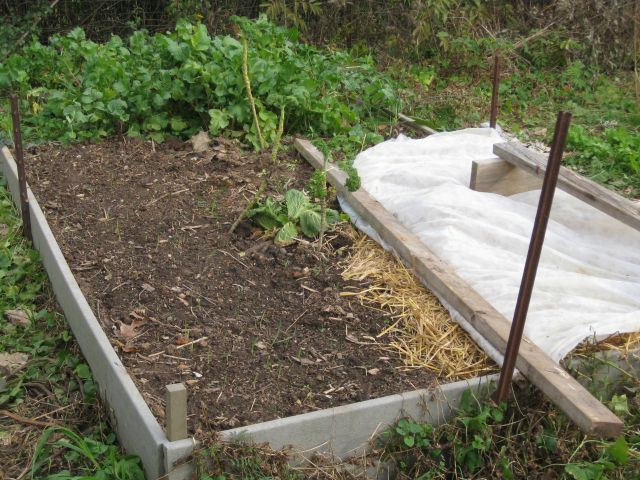
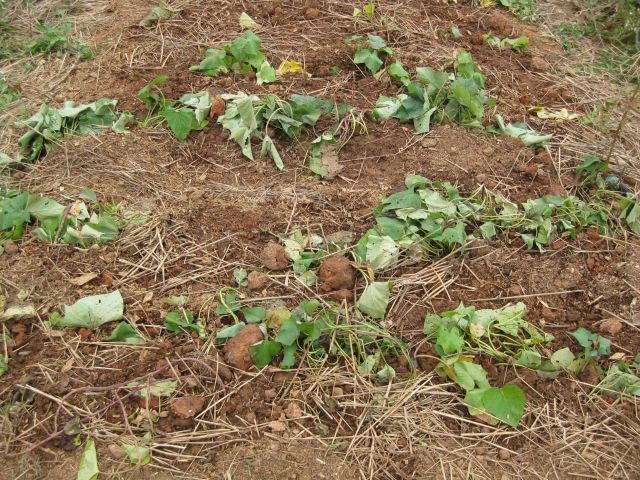
My first attempt with sweet potato was middlin – they tasted fine but not a big crop. After harvesting, I buried the vines in close proximity in a raised bed and with freezing temps just a few hours away I covered them today with hay and placed a doubled row cover on top. Hopefully they will make it through the winter and I will plant them out earlier next year and should do much better. You can also see in the rest of the bed some fine garlic heads and radish at the end.
an experiment with sweet potato stalks covered with hay and row cover
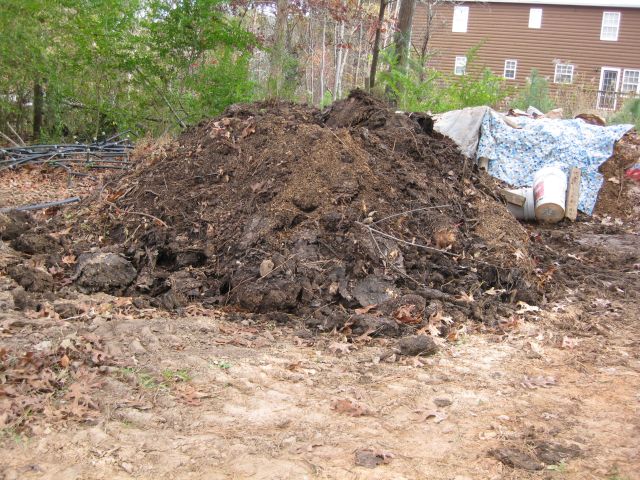
And finally my compost – I have a lot left over and will contribute it to my fruit trees. I had lots of apples this year (with lots of invaders as well) and my goal next year is to minimize the pests and good nutrition from good compost is a good starting point.
lots of compost left over after repriming all the vegetable growing areas
The closest heap was begun last fall with leaf bags. Behind the heap you can see the second heap gathering – it already has 36 leaf bags from neighbors and 2 truckloads from the stables plus cleared vegetation.
It has been some time since my last post. Coursera, the online education system, has absorbed a lot of my time. I can spend 10 to 15 hours a week just on the calculus course with The Ohio State University. Plus I am enjoying Animal Behavior with the University of Melbourne, Australia, and What a Plant Knows with Tel Aviv University. And for an unconventional outlook there is A Brief History of Humankind from the Hebrew University of Jerusalem. Plus I am busy with Fall tasks.
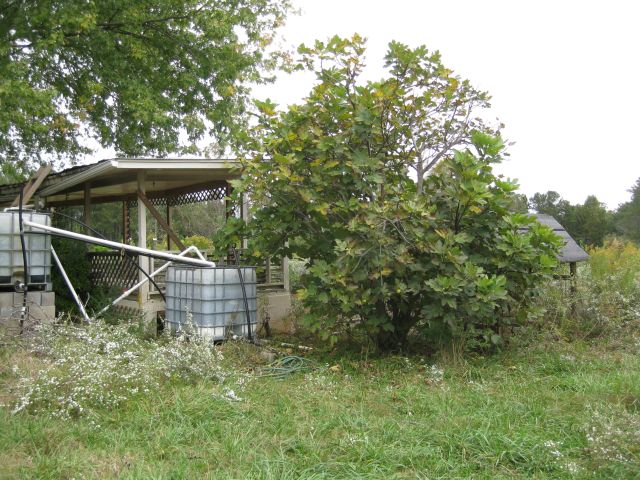
This summer has been good for me – plentiful rains, good food and limited pest issues. My apple trees were bountiful and the Giant Korean pear outperformed everyone else. As the season winds down there are still figs to be picked.
still some figs remaining tho the best are gone
This fig tree is at the top of the hill with 2 small tanks which gravity feed to the plantings. The higher tank provides water for the fig tree level – the pressure is unsatisfactory and I have devised a method using several valves to have the pumps at the base of the hill directly pressure irrigation at the top level. This additional pressure now makes hose watering feasible and I am relocating strawberry and sweet potato plantings to the top of the hill. My first year of sweet potato production was meager but the microwaved sweet potatoes were delicious. I hope to do better next year with more sun at the top of the hill. Below are some of the sweet potato leaves I trenched and will cover later with hay.
3 varieties of sweet potatoes which I hope will provide starter stock next year
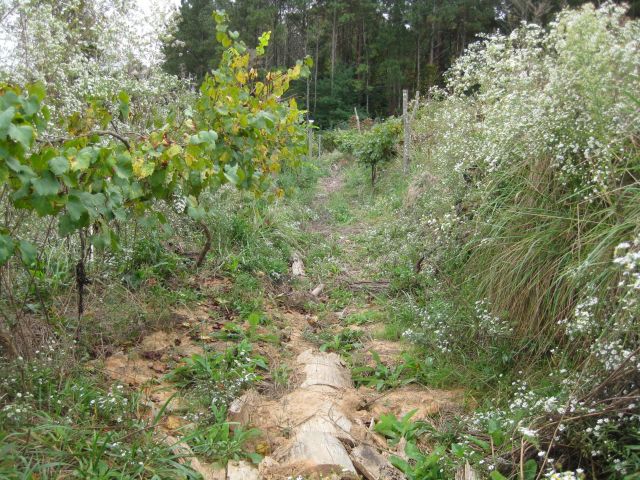
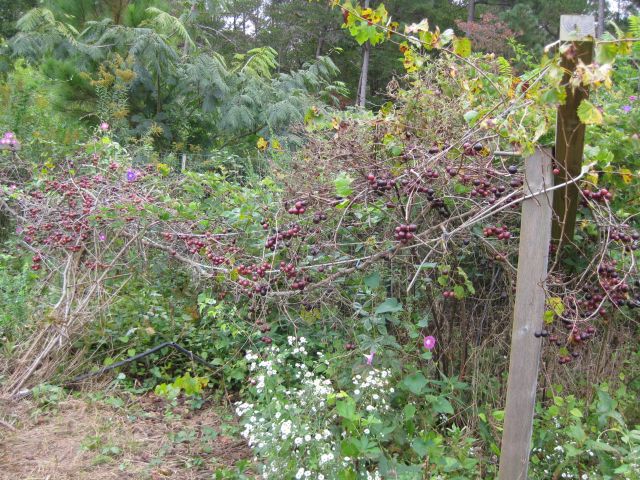
Last weekend was a muscadine pickers delight – one vine was overladen with large delicious scuppernong. I have muscadine at several locations. The best performing are those on the hillside.
these muscadine did well – notice the central contour ditch filled with logs which store water and provide nutrition
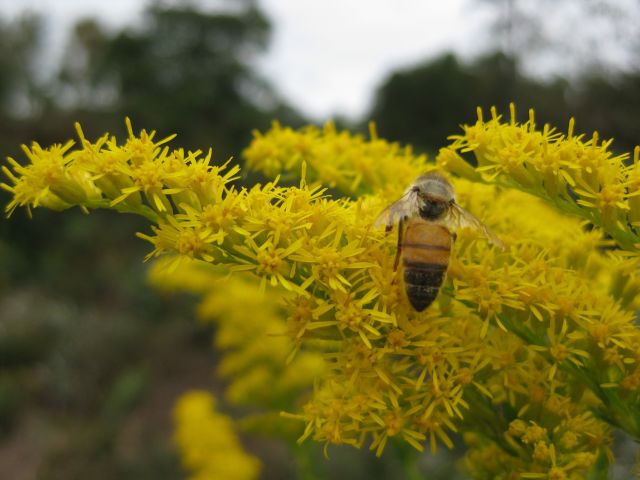
I allow wildflowers to run rampant and now the daisy and goldenrod are filled with my honeybees.
a field where I bush hogged a path. I have planted out various saplings grown from local nuts and in a few years hope for a more foresty look
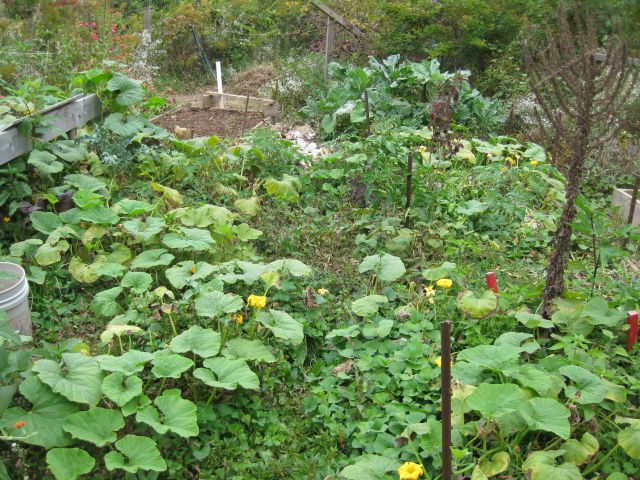
In my vegetable area I am allowing the squash plants to have a last fling – this is the first year I actually had such plants since previously they were leveled by the squash borer. Probably attributable to increased diversity of flowers whose nectar may have attracted borer predators.
squash and melons on the run – the squash is not great but the chicken like it
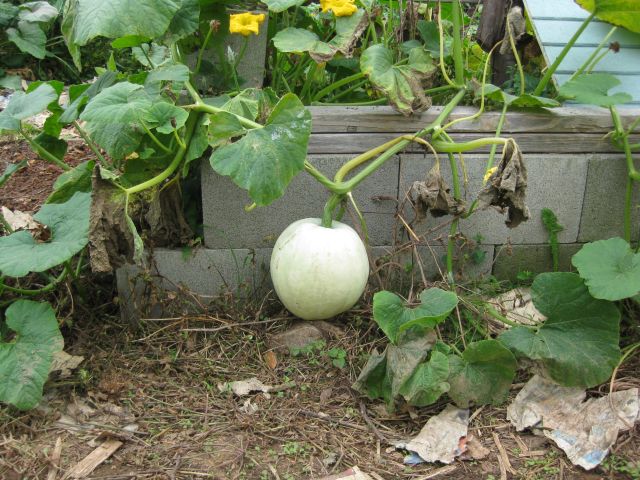
And here is a candidate soon for harvesting.
a melon soon for the table
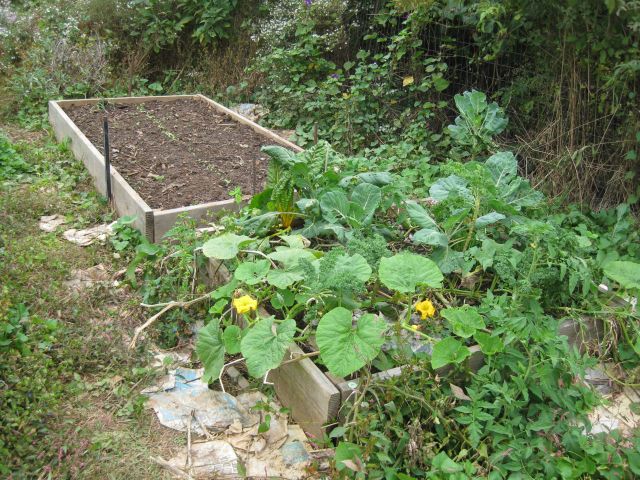
Elsewhere I am clearing raised beds, composting and planting out lots of garlic as well as kale, radish, lettuce etc.
the bed at the rear has been seeded, the closest bed has been an excellent producer throughout the year probably due to liberal doses of my compost
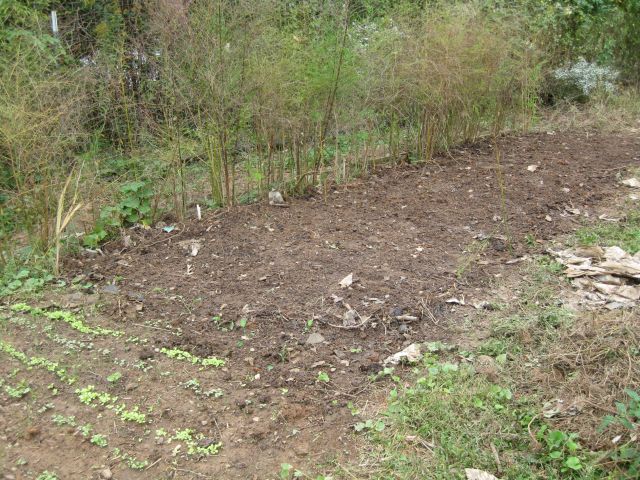
I have had most success with raised beds though here, alongside the asparagus I am seeding directly into the ground.
mainly seeded with garlic cloves tho lots of cool season vegetables have been included
My collard performed well throughout the year. They were healthy and grew strongly and even when attacked by pests there was always some for me.
some collard plants were relatively unscathed. I did do occasional dustings with diatomaceous earth
I mentioned my best muscadine was on the hillside. Altho these vines at the base of the hill have produced large grapes they are not tasty. Next year I will prune more severely and feed with lots of compost and stable manure and try again.
muscadine looks good but really isn’t
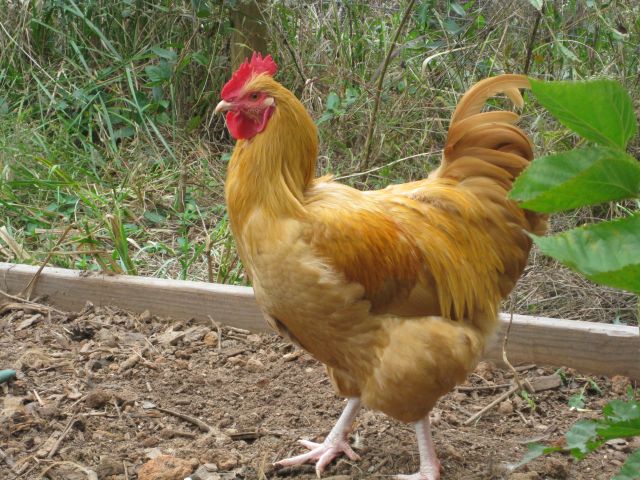
All my chicken are doing well. The four I incubated in June have grown largely, though the hens are not yet laying eggs – may have to wait for the spring. And the young rooster is bigger than his dad, tho he has no spurs (yet) and is somewhat timorous (soon to change, I am sure).
young rooster on the raised bed for plantings for the chicken which they have demolished
And finally one of my busy unpaid workers on goldenrod.