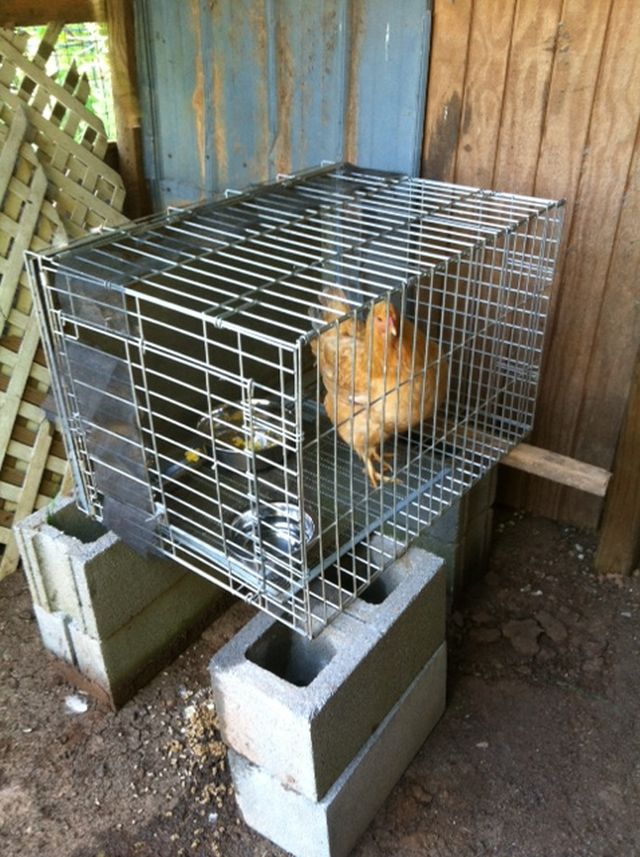
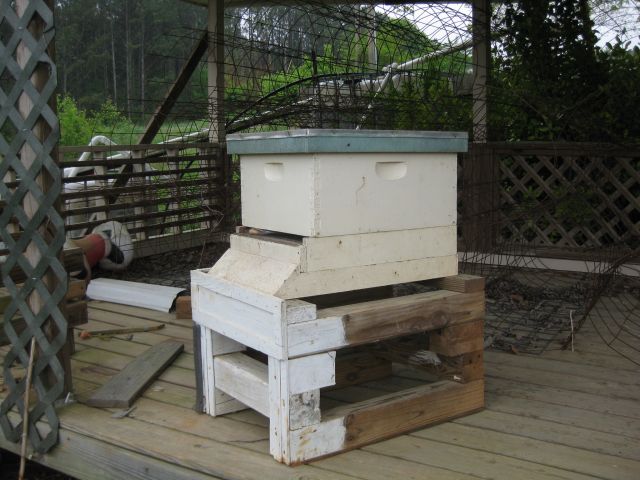
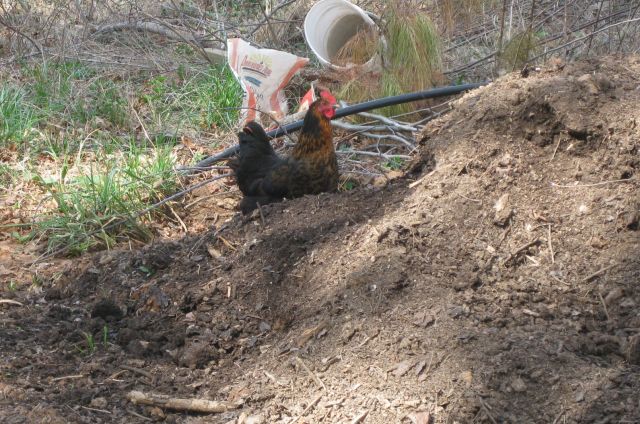
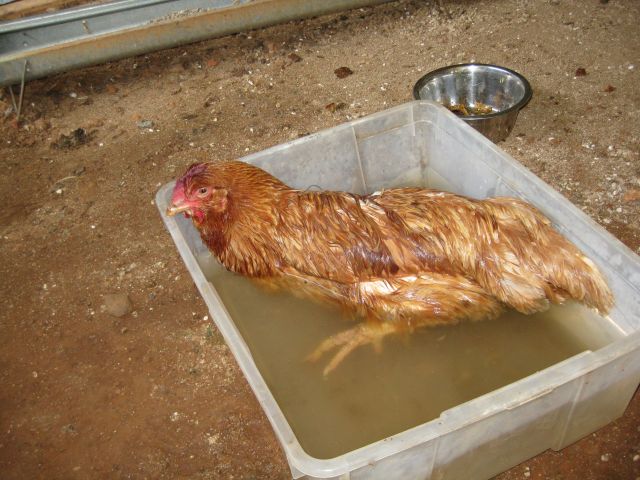
Our broody hen kept brooding. Each night I would remove her from the eggs she was safeguarding and, after a quick sup, she would go back to the nesting box. And so it continued night after night for a week. Our research indicated that if she was kept in a place where her underside was cool, she might desist. I located and positioned 6 cinder blocks on top of which I placed the wire cage we had used when they were newly born. Since the bottom of the cage was a solid removable tray, which would block air passage, I rotated the cage so the bottom was on the side. And I placed a queen bee restrictor grill on the bottom of the wire cage for her comfort.
temporary quarters for Yellow Legs
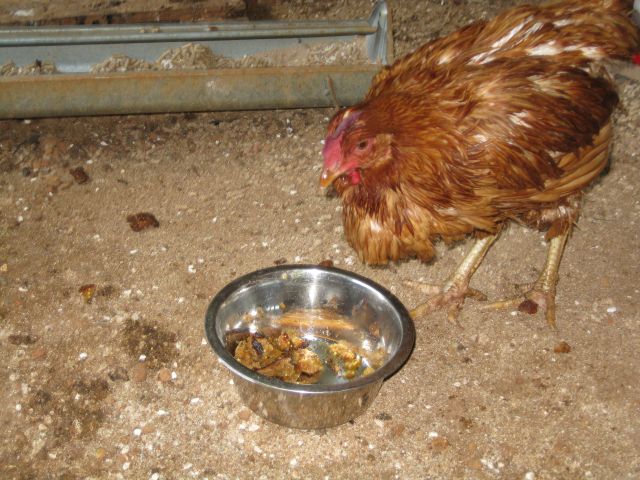
Yellow Legs was very unhappy with imprisonment – she kicked over the water and food dishes which I replaced with receptacles not easily overturned and, whenever I opened the door she made a dash for freedom, sometimes successfully. After a couple of days of mutual frustration I decided to release her to the flock and resigned myself to the evening turnover routine. But – to our delight she was cured and now roams with the flock. Success.
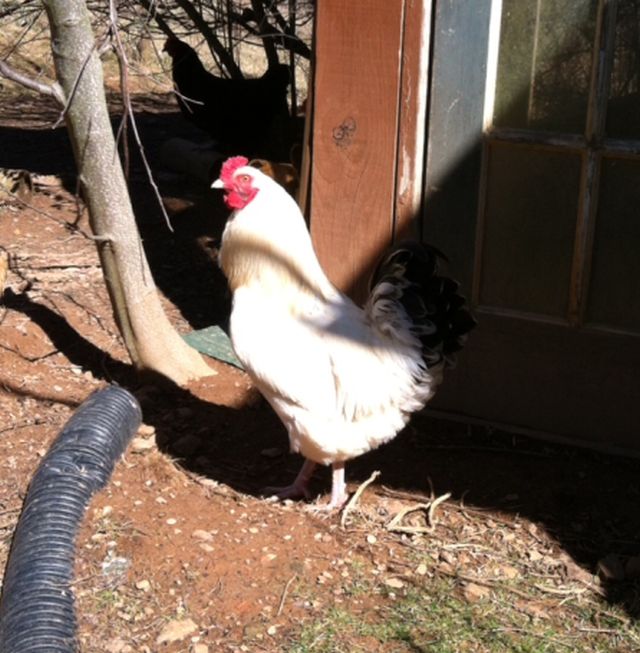
And for some other chicken news. Our rooster had a black mite infestation on his comb. I treated with a solution of neem oil mixed with olive oil (I usually use Johnson baby oil but couldn’t find it) and he was cured. One of the black speckled hens had feathers missing from her wing – feather plucking or maybe a failed predator attack? I treated with blue kote and it is healing well. And finally, the next pic shows a celebration of sorts. Last evening as I was leaving I couldn’t find Randa who is agile, flies easily over the paddock fence and likes to make the most of daylight hours and (it seems) when I am looking for her she hides in the overgrowth. I wandered around looking, called her and even the sunflower seed trick (rattle the seed in a plastic container) failed. So I departed not knowing if I would see her again. This morning there she was as usual in the yard. To celebrate I got more sunflower seed, had some myself and scattered the rest for the flock. Randa warily entered the paddock and participated.
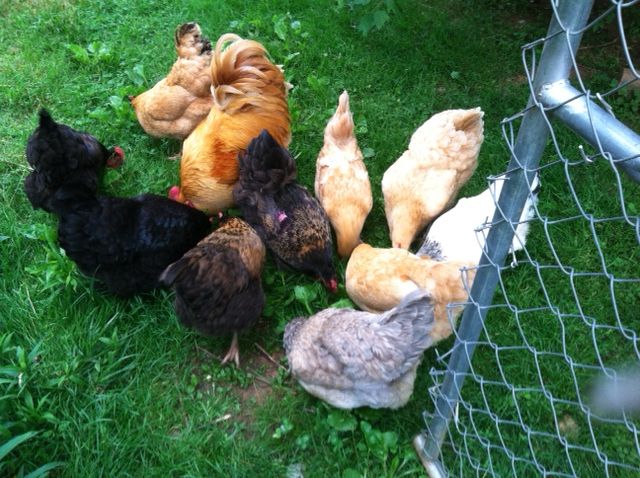
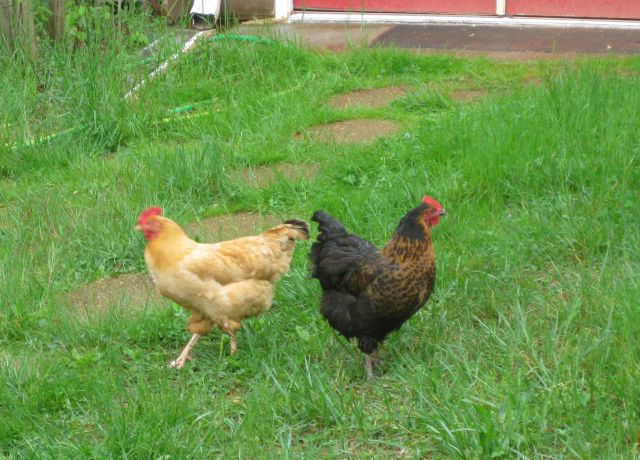
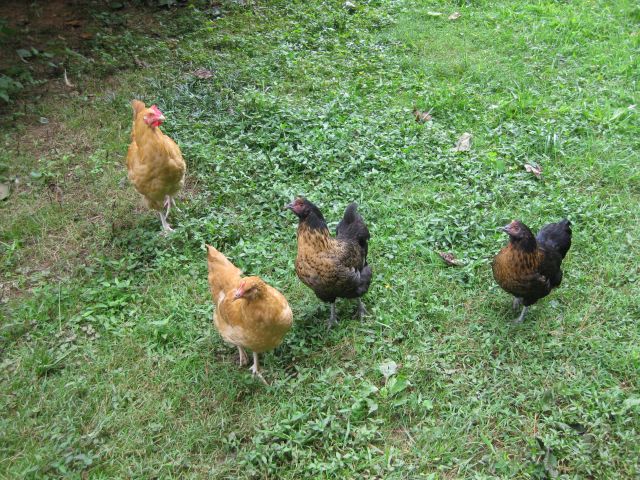
10 hens and a rooster enjoying sunflower seed. the hen with the missing feathers is in the middle
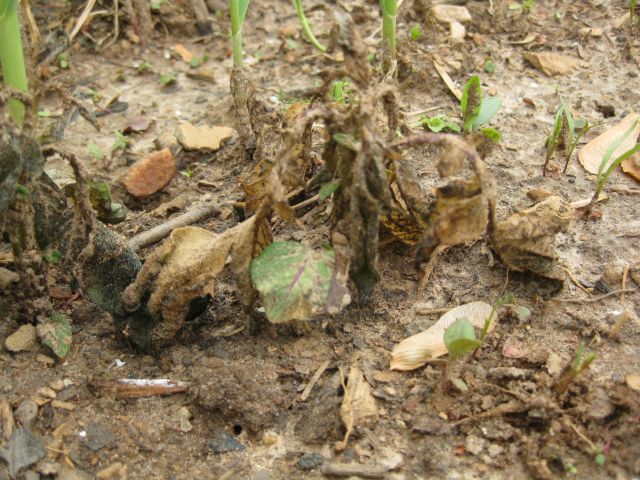
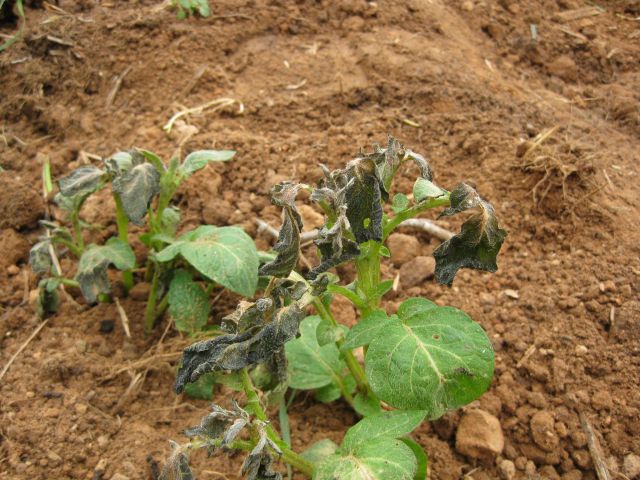
The average date for last spring freeze where I grow should be after March 30 and before April 10 based on a map provided by the National Weather Service. On April 16 the temperature in our area fell to 30 deg F and caused some damage. The potato plants suffered – the volunteers on the ground surface were almost wiped out –
freeze damaged potato plant
While the potatoes I had planted in a trench had less extensive damage –
potato plant in trench showing some freeze damage
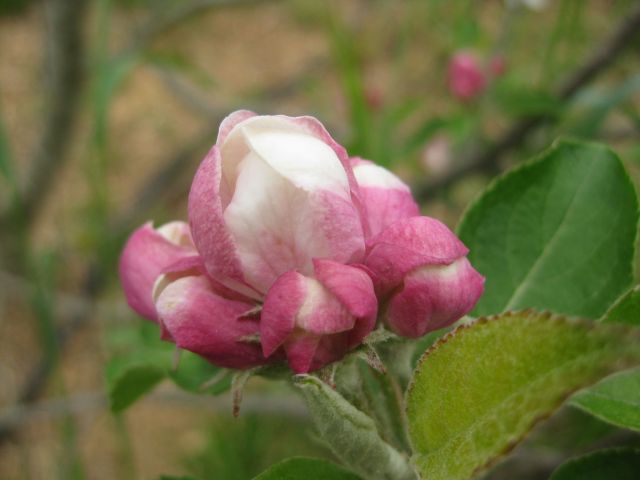
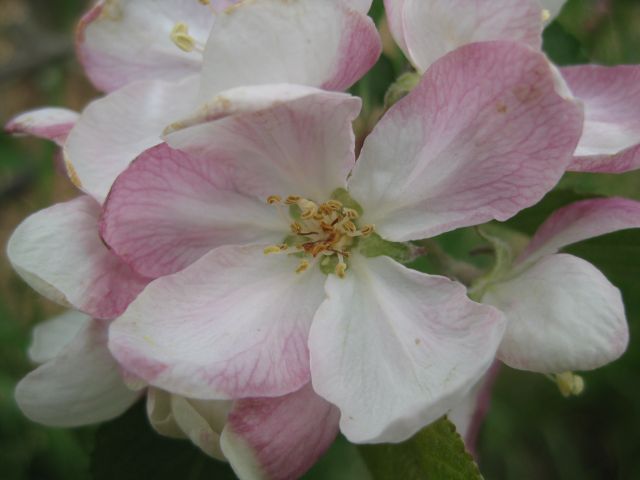
I was concerned about my apple trees some of which are in blossom but they seem fine –
this apple blossom a couple of days after the freeze was unaffectedand this apple blossom seems happy too
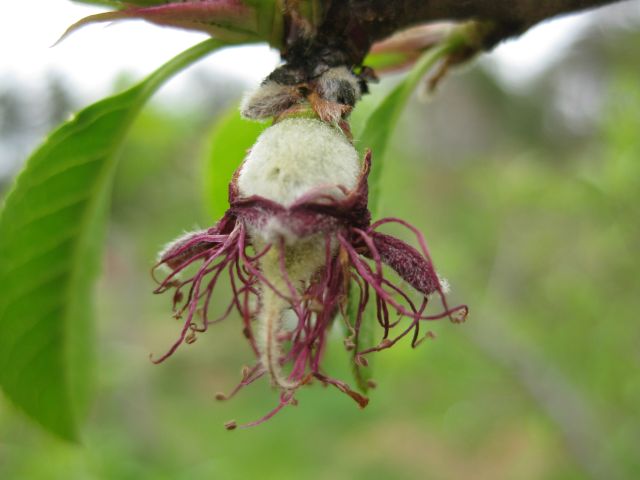
But there were many signs elsewhere of freeze damage such as kale plants showing whitened or yellowed leaves. My pears and peach had already blossomed and set so they were past danger.
usually my peaches are nailed by late frosts/freezes but this time the freeze was too late and this will be a peach in the summer
And my blueberries appear unaffected, tho some gardeners in Atlanta complained of damage. And my muscadine are now accelerating growth.
muscadine are hardy, greening well and with long growing horizontal roots seem to do well anywhere in this area
Black locust
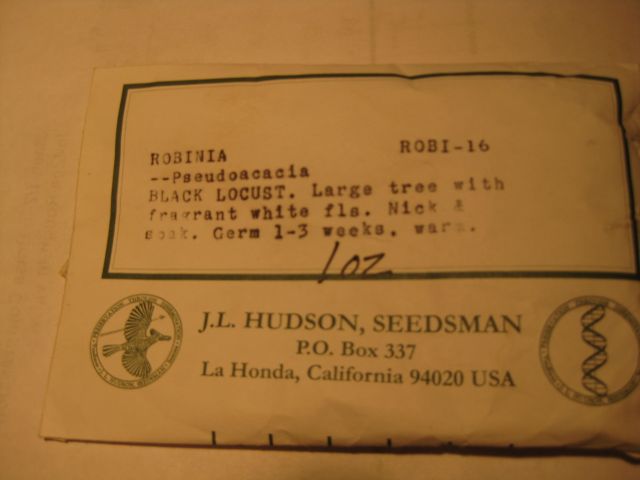
A couple years ago I bought Black Locust seed and germinated 10 seeds. I decided a few weeks ago to transplant the saplings to my orchard where I am increasing the diversity. The roots fix nitrogen and the tree is popular with bees. There must have been 100 seeds in the packet I received.
my source for unusual seeds including recently quinoa, stinging nettle, epizote and 3 varieties of Amarinthe
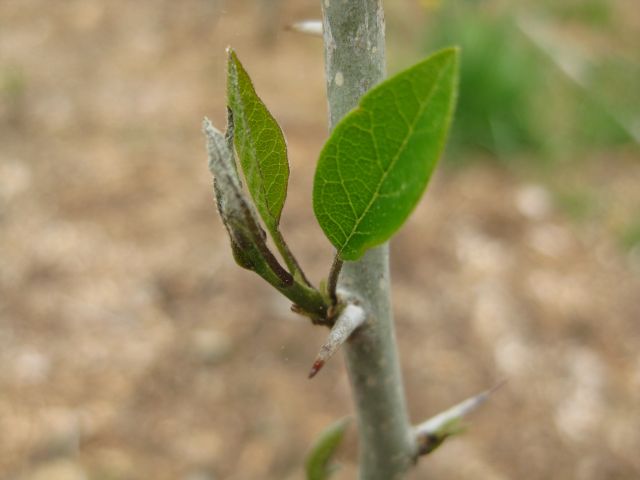
I decided to try germinating more black locust since I have spots on the hill which I seldom visit where they will thrive. The “seldom visit” caveat is important – they have nasty thorns as you can see on this young specimen.
Young black locust with thorny protection
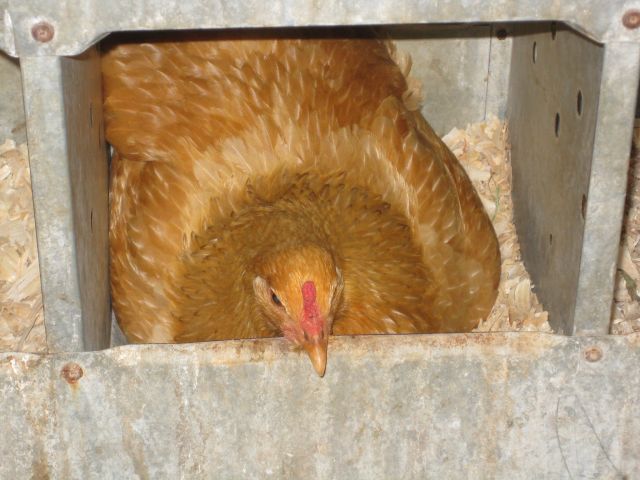
Broody hen
I have kept chicken for several years but this was my first encounter with a broody hen.
broody hen
She refused to leave the eggs she was guarding, pecked sharply, fluffed out her feathers and made an unusual warning sound. I was undecided what to do. Part of me recognized this is natural and far more natural than incubating the eggs which I have done successfully on two occasions. But there were other considerations. When I incubated the eggs four viable chicken of which one was a rooster, were produced each time. I was lucky there were only two roosters and doubly lucky that a nearby farm agreed to take them both and I now see them in the field whenever I drive past the farm. But what to do with more roosters? Our one rooster takes good care of his 10 hens and a 2nd rooster will create considerable stress as occurred previously. A second factor is the hen is the daughter of the rooster and the eggs she was sitting on were hers or her sisters so with this inbreeding there is an increased likelihood of non viable chicken. In the end I removed the broody hen from the 5 eggs she was guarding and cracked them open over the compost heap. Four of the 5 eggs would have produced chicken – my bad – I should not have waited as long as I did. I temporarily separated the broody hen but as soon as I released her she gobbled down some food and headed to the nest box to sit on more eggs. I shall have to keep an eye on her and remove her from the eggs each day until the habit is broken.
Other hen news
Two of the hens are fliers and wanderers. They have discovered the grass is greener on the other side and they regularly fly over the 5ft fence. The first to do so was the black hen who we call Wanda being a wanderer and the second is named Randa.
Wanda and Randa
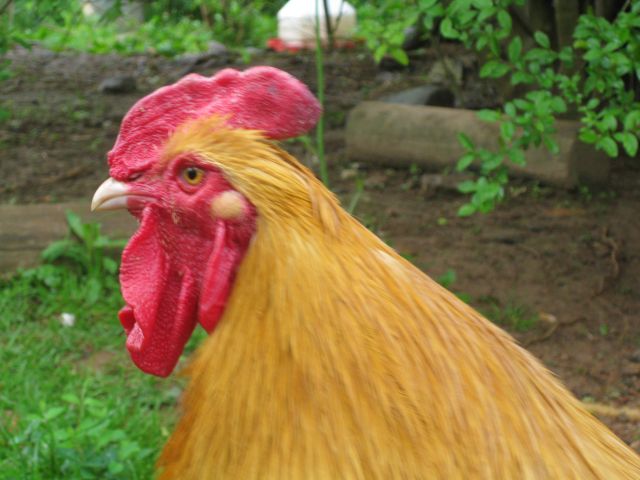
The cold weather did not affect the chicken except that the points of the rooster’s comb turned black. I massaged them with vaseline – since he has fierce spurs you have to grab him quickly when he is eating and grip him between the knees – he seemed to appreciate the ministrations and quickly forgot the indignity when released. When spring arrived the black tips either fell off or were removed by one of the hens. He now has a rounded comb.
rooster with rounded comb
Frass
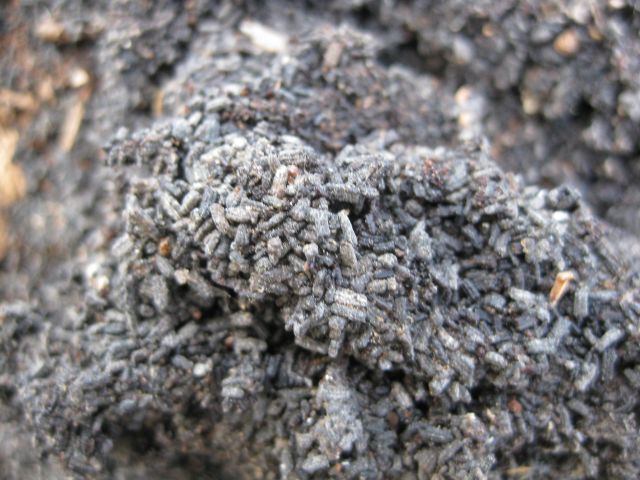
Frass is poop of insects. In this case the larva of the wax moths which colonized the honey frames I put into storage. I had placed the honey frames in contractor grade black bags securely tied. Didn’t help. What I should have done was to freeze the frames and then place in storage – next time. The black bags were ripped in many places and the wax on the frames mainly gone and replaced with black frass on the lowest surface. The frass I collected and added to the compost heap, maybe it will do some good there.
frass derived from wax and honey
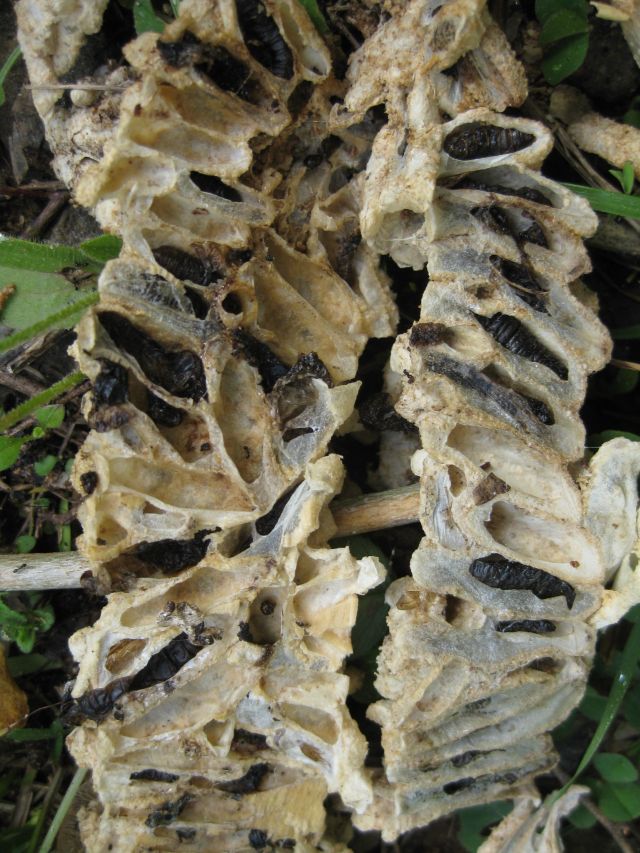
The frames were covered with cocoons and in each one there was a black slug, maybe from the larva as it grew – reminded me of a belt for machine gun bullets.
underside of larva cocoons scraped off my honey frames
I removed the plastic foundation from the frames and spent considerable time scraping and scrubbing them clean. I decided to discard some of the badly damaged wood frames.
I used a salvaged deep, 9 frames and foundation to make a swarm lure hive. I bought swarm lure last year and had a couple surplus refrigerated vials. I added the contents of one vial to a small piece of paper towel inserted in a small ziplock bag held open by a stone at one end. Hopefully this hive will attract a swarm.
The occasional cold temperatures in March dissuaded the plants from growing. This was evident from an experiment with peas. I moistened the peas and those which appeared to be growing the fastest I planted outdoors and the remainder I planted in a soil container in the greenhouse. Until a week ago very few of the peas planted outdoors had broken surface. Those in the greenhouse grew steadily. Today I transplanted the greenhouse peas.
the pea plant on the left was planted in March, on the right are two siblings from the greenhouse planted today
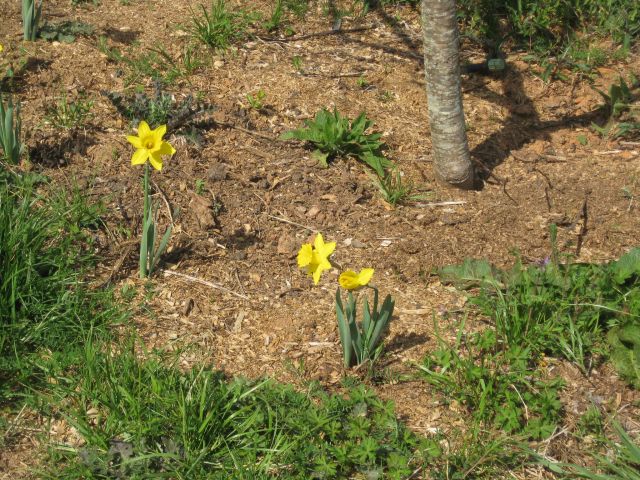
Of course the daffodils are out and my comfrey plants have surfaced from the root fragments I planted in December.
the comfrey is the small plant to the left of the apple tree trunk
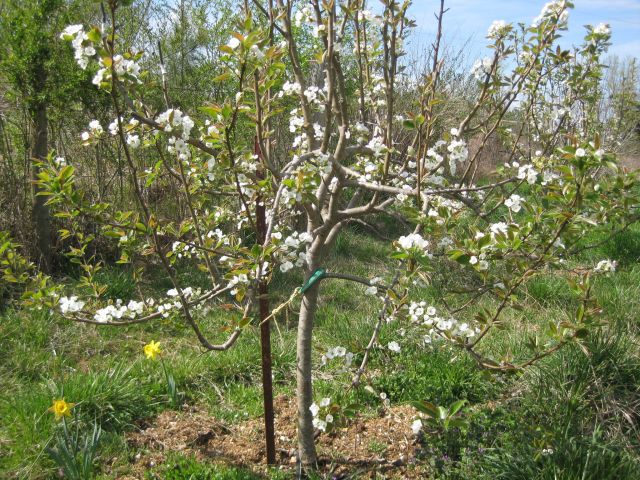
The pear and peach trees are the first to blossom – here is a well bedecked pear tree.
white blossomed pear tree
A couple days ago I again sprayed the trunks of the fruit trees, but not the blossoms, with neem oil and will keep a good look out for pests. I probably mentioned that my bees survived the winter. They are now very active together with many other types of pollinators.
busy bees arriving and departing
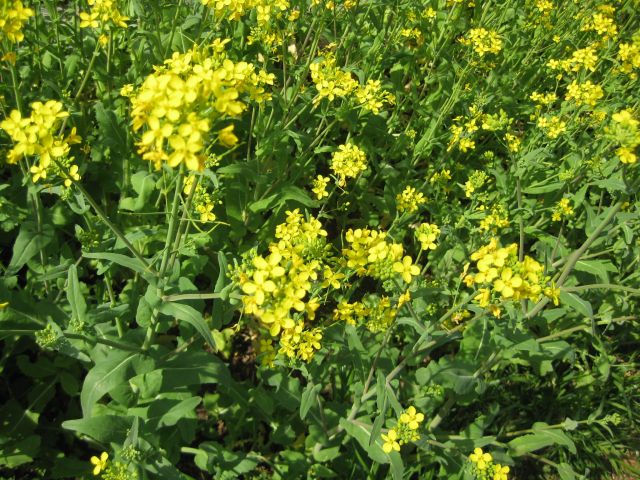
The precocious kid next door looked at them and said “buzzy bees” and then with a smile looked at me and said “get it?” Some of the greens are flowering.
a mass of yellow flowers beckoning pollinators
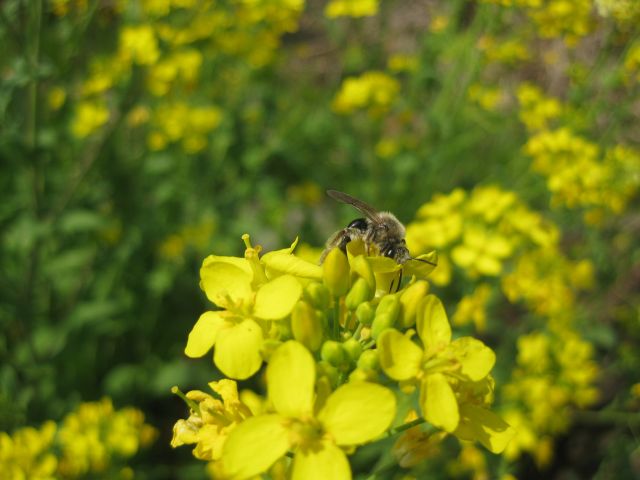
And if you step closer you see the pollinators.
a bee at work
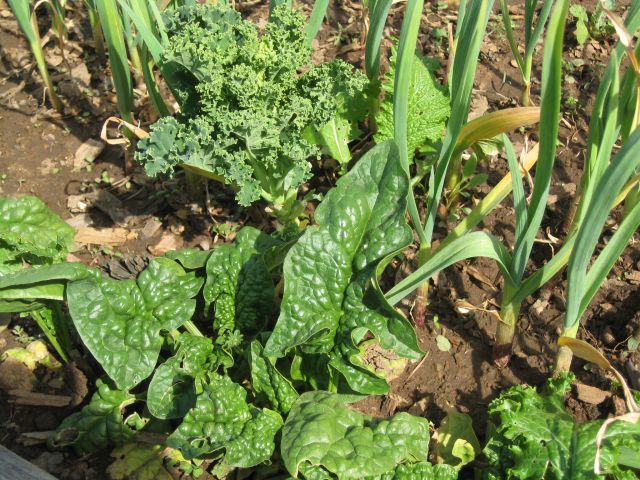
The spinach, kale, mustard and garlic are now beginning to grow.
spinach kale and garlic are stepping up, all are transplants
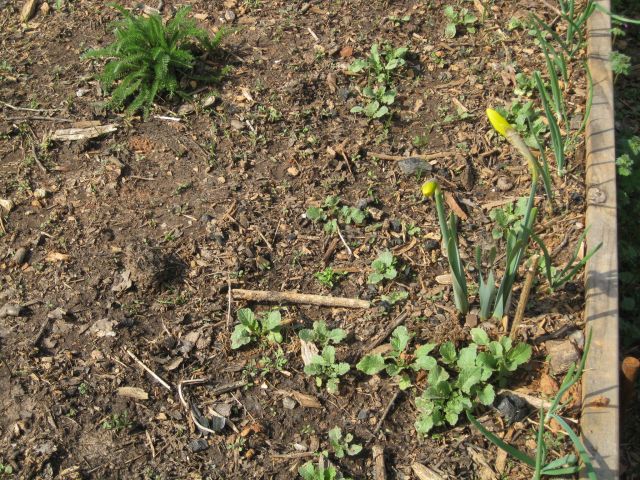
Of the vegetables seeded this year, the radishes are doing best. Here they can be seen with yarrow and some daffodils to add cheer to the scene.
a sparse array, though many other vegetables such as lettuce and collard have now germinated in the soil
Last year I grew yarrow from seed and it did so well in January I took root segments and planted them in each of the raised beds. They have all surfaced and are growing well. Plus the many onion bulbs I planted out in January. I will replant the daffodils. A big annual event for me is releasing the ladybirds. For whatever reason each year they hibernate in the one bathroom – they disappear in the crevices and then suddenly one day, there they are. I collect them by tipping/knocking them into a yogurt container and then I cap the container and walk them to the vegetable area. The photo below is horribly blurred but I kept it since it records the date the ladybirds arrived – all of them within a two day period.
some of the ladybirds in a yogurt container
I made 5 trips and with approx 20 ladybirds in each container, I guess I added 100 beneficials and I was pleased to see one of them this morning sunning on a leaf.
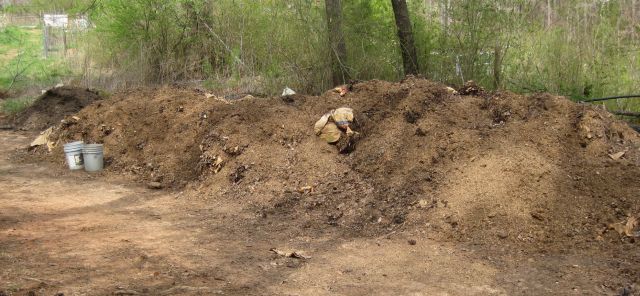
I built a large compost heap this year from approximately 200 leaf bags. I previously commented that I have too much brown and too little green ingredients, so I added horse manure which comes with straw to help balance it out.
assembled compost heap – it should be ready by August and then look like the finished heap at the end
And the chicken are producing – an average of 8 eggs a day from 10 hens two of which are seniors. Two of the younger hens frequently fly over the paddock fencing to explore and feed. Today I noticed Wanda (abbreviated from wanderer) had discovered the compost heap. She is the daughter of our Buff Orpington rooster and her mum is a New Jersey giant. The only trace of dad is the gold coloring on her neck.
I have mentioned that Buffy, our Buff Orpington rooster, takes good care of his girls and that on two occasions I incubated eggs successfully. The incubator takes 7 eggs and each time there were 4 viable chicken and each time it was 3 hens and one rooster. And each time, as the young rooster grew up, friction developed between dad and son, and son and all the hens.
We are very lucky to have a chicken enthusiast down the road from us who happily took Buff, the first young rooster and we see him most every time we drive to our farm. He is inevitably surrounded by his girls and also seems to get on well with the turkeys since he is fairly large, aggressive and undaunted.
We had wanted to keep the second young rooster who is named Gus after his mom Gimpie but concluded it wouldn’t work out. Gimpie is the senior hen (in pecking order) and has a bad hip which makes it difficult to walk, hence her name. On sunny days she gets out of the coop and in the evening the routine now is she waits for me to pick her up and carry her back to the coop. I always deposit her just before the door so Buffy does not see me carrying her. It is a practice with Buffy that if anyone has contact with one of his hens he has to immediately mount the hen and this is one more ordeal Gimpie would rather avoid. So Gimpie is a toughie and yesterday she laid her first egg of the year and Gus inherited her good genes and most of her coloring with just some gold around the neck from his dad.
our young rooster Gus before he moved to a new home down the road
I contacted the chicken enthusiast about Gus and to our delight she said she was so happy with Buff (our first young rooster) that she offered to take Gus as well, which she did last weekend. And now order is restored and the Americauna who is first generation like Gimpie and who had sat in the nest box the past month to avoid the attentions of Gus, is going out of the coop every day and is also back in egg production. Goodbye Gus and hope to see you when we drive by your new home.
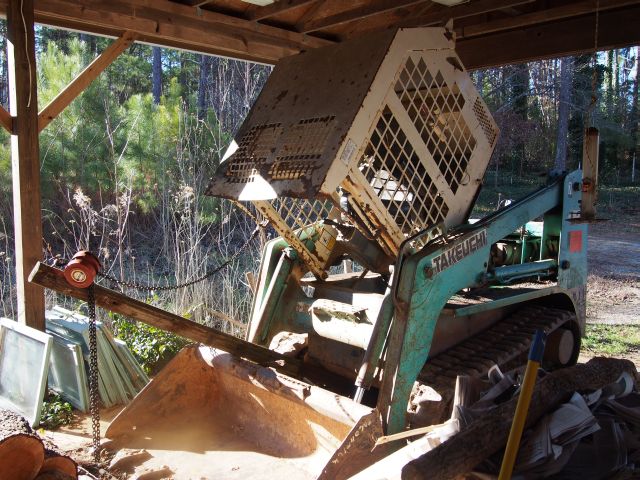
After some cold nights (12 below freezing) my Takeuchi bobcat refused to start. Cold and tired battery. The best way to charge the battery is to pull the cab forward on its hinges and then you have direct access to the battery. It is heavy and best done with an assistant. In the past I had an anchor point in front of the Take and winched the cab forward. However, there was no anchor point for the Take this time just a 2,400 gal rainwater tank. The last time I had no anchor point I attached the negative charging wire to the body and the positive to a nail which I inserted into a slot in the fusebox. I really didn’t want to do this again. So I pondered and created my own anchor point. I found an 8ft fence post, located it between the loader and the body of the Take, attached a hook and winched the cab up. Effortless and the charging was uneventful.
raising the cab of the Take
work in the orchard
This year, for the first time, my first row of apple trees produced apples but the second row which is nearest my neighbor’s fence did not, and the trees appeared lackluster. I diagnosed this to competition from vines, shrubs and small trees, some of which have thick roots 10ft long which have been out competing my apple trees for compost nutrients. I am avidly reading The Holistic Orchard by Michael Phillips in order to thwart the pests that nourished on many of my apples. He makes the interesting point that wood chips from hardwood trees create beneficial fungus for fruit trees. So I have worked hard to clear the growth between my trees with an eyehoe (what a wonderful invention). I then spread manure from the stables, layer newspapers thickly and now, with my Take recharged I ferry loads of woodchips and dump and spread over the newspapers.
mulching the orchard
When the orchard is respectable I will bring in a flock of helpers to scratch and turn up over wintering pests. A couple years ago I improvised a simple chicken shelter which has a couple of nestboxes and I will clean it up for my chickens.
simple chicken shelter in the orchard
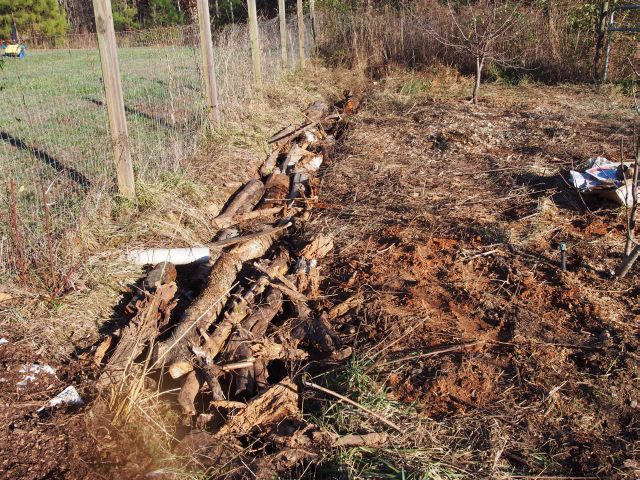
water and nutrient infiltration
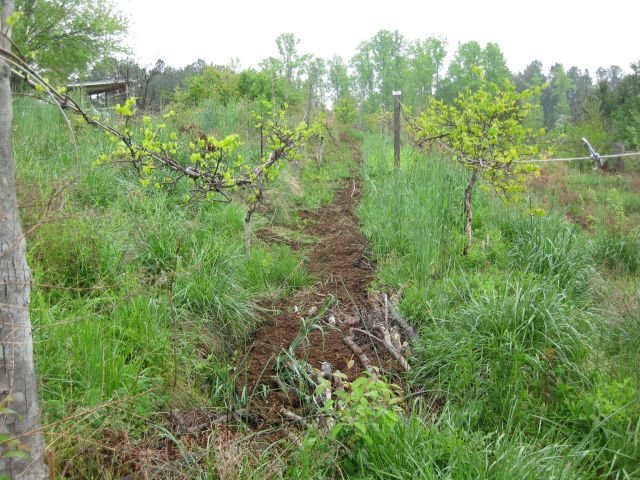
I dug a trench alongside part of the orchard to capture and infiltrate rainwater run off. I am now filling it with hardwood (mainly) logs, the idea is that the wood will decompose and the nutrients and fungi will benefit my fruit trees along the lines suggested in The Holistic Orchard book (and will also physically block the growth of tall weeds in the ditch).
various logs stacked in the rainwater ditch
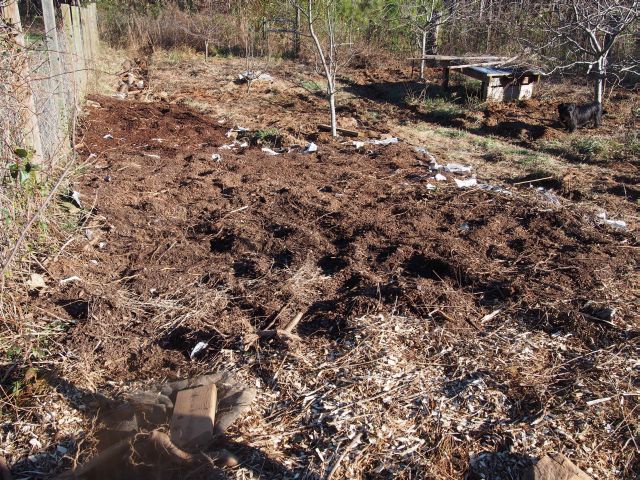
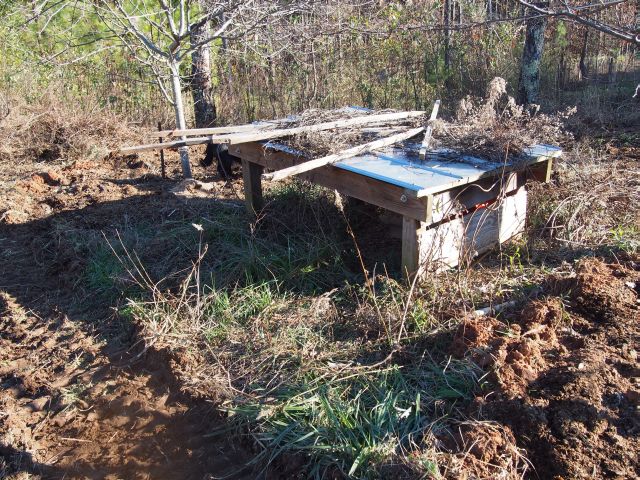
clearing the slope bordering the vegetable growing area
My main vegetable growing area is fenced in and along the southeast border a thicket of privet and briar sprung up over the past several years. I tolerated the growth since I reasoned it provided vantage points and shelter for insect loving birds which were helping me control pests in the vegetables. However there were two problems – a) the roots invaded my raised beds – there is one type of small tree which has very long wily roots which evaded all my attempts to obstruct it; b) in the winter, when sunlight is dear, the wild hedge blocked the sun from my frost ridden beds. So I worked hard to cut down and remove the growth and have been chipping away with the chipper, carried and powered by my tractor. This mulch I have also been adding to the orchard. Some chipping remains and when the clay soil has dried I will bring out the tractor again and chip away.
some of the small trees awaiting chipping in the foreground and the fenced growing area at the top of the slope
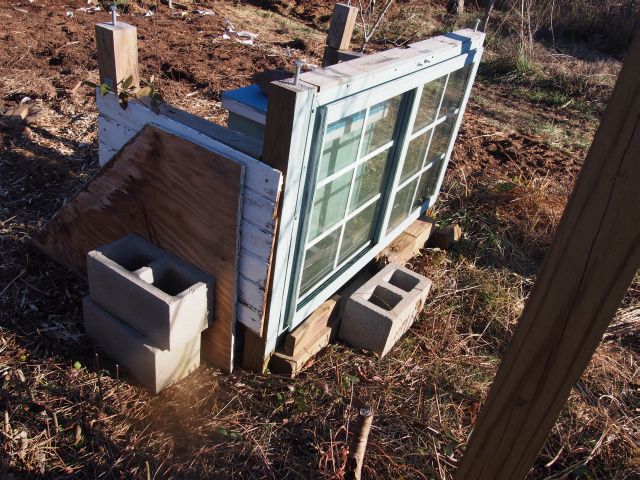
winter hive protection
My bee hive faces south. Chilling winds tend to come from the west and north. On the west side I have a window which allows the sun but not the wind access to the hive, and on the north side I have plywood protection.
the sheltered winter protected bee hive
how the clover fares
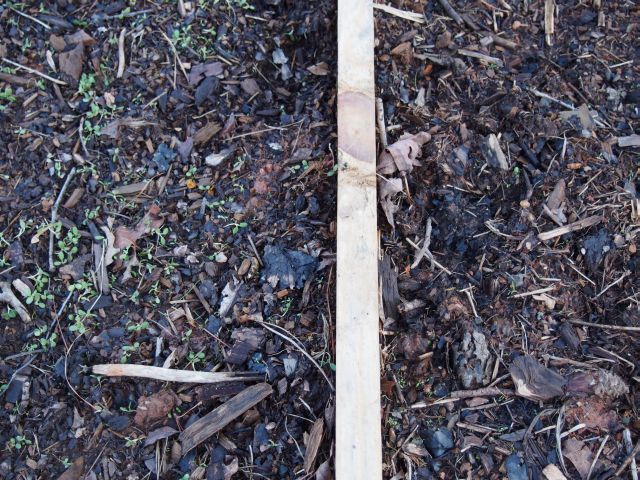
I recently installed a 20ft by 4ft raised bed and sowed half of it with crimson clover and the other half with white (ladino) clover. The crimson clover is larger but both seemed to germinate equally well. However, following the recent cold, the ladino clover almost disappeared while the crimson is holding on well. Will be interesting to see how they comparatively perform in the spring.
the crimson clover is on the left of the divider and the barely surviving ladino clover is on the right
veggies for eating
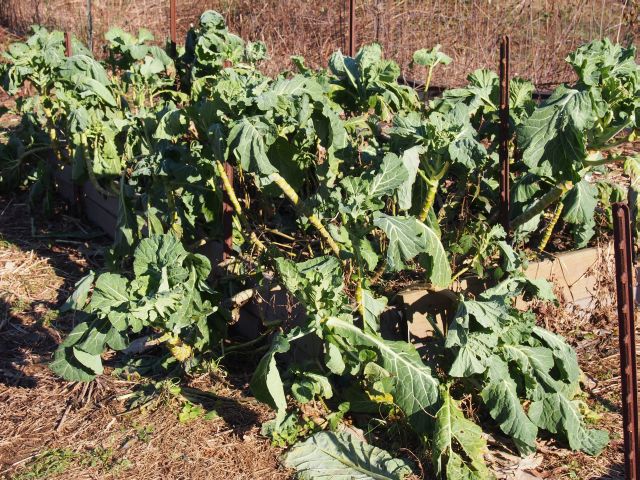
.I am not using crop covers right now and my collard and turnip and mustard greens are surviving, tho at time the collard looks a little bedraggled.
tasty collard for the picking
A tasty (and healthy) dish is newly hatched eggs (yes my younger hens are laying in the winter without artificial lighting), collard, greens and garlic stir heated, eaten with home made whole wheat bread.
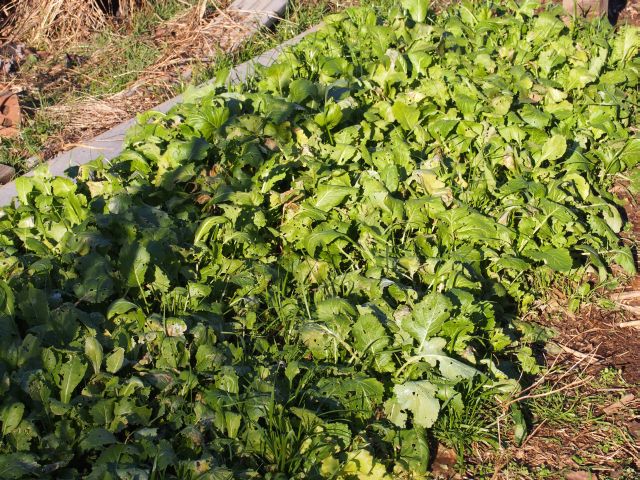
lots of winter greens which keep growing in the winter
So these are some of my winter tasks. And on the inclement days, Coursera, the free online college course compendium, awaits. I just completed calculus, precalculus and a fascinating history on mankind from 250,000 years ago to the present.
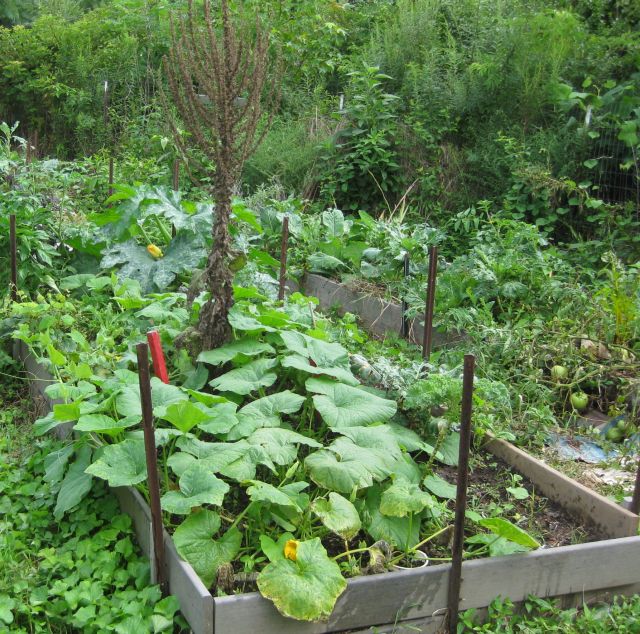
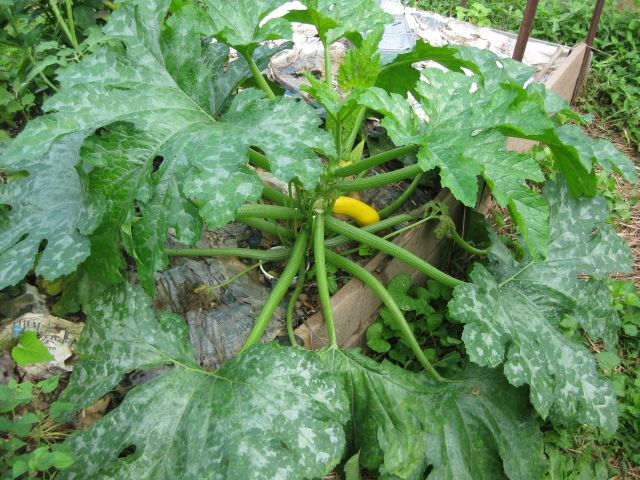
Good news – my squash have not (yet) been visited by the dreaded borer and are growing rampaciously.
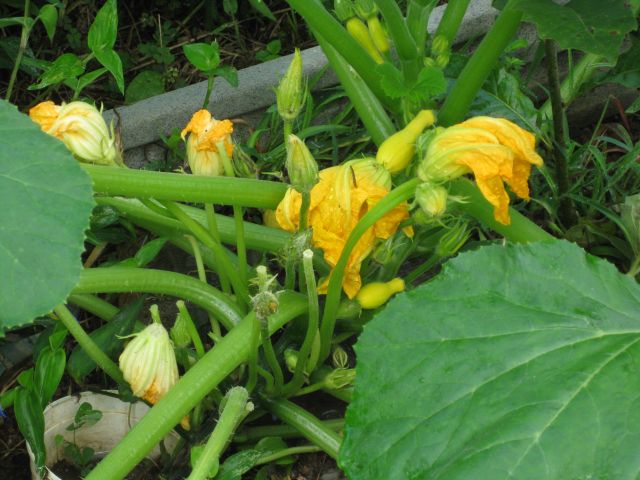
squash growing vigorously in raised bed with a mullein scaffold available if neededanother squash plant in production – but there is a problem, someone has been snipping off the squash buds – you can see some single squash stemshere is a closeup of another plant and you can clearly see someone has been snacking – I suspect a rabbit
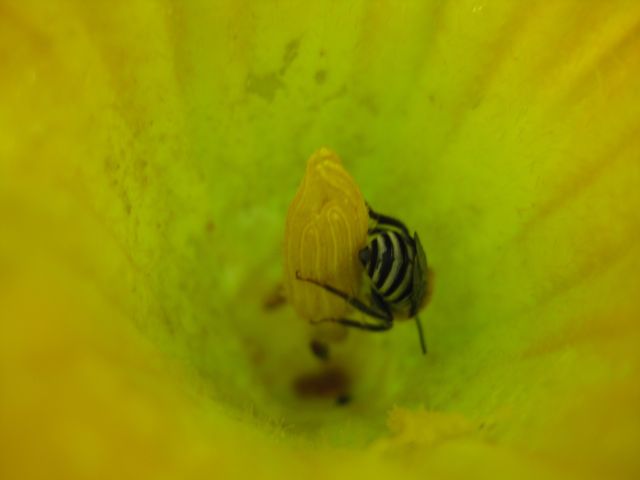
So I have a new pest to respond to and I have set a live trap with some enticing carrots to try catch the rabbit. A more tedious, though inevitable response will be to better secure the growing area and the fence which surrounds it. Here is a welcome visitor.
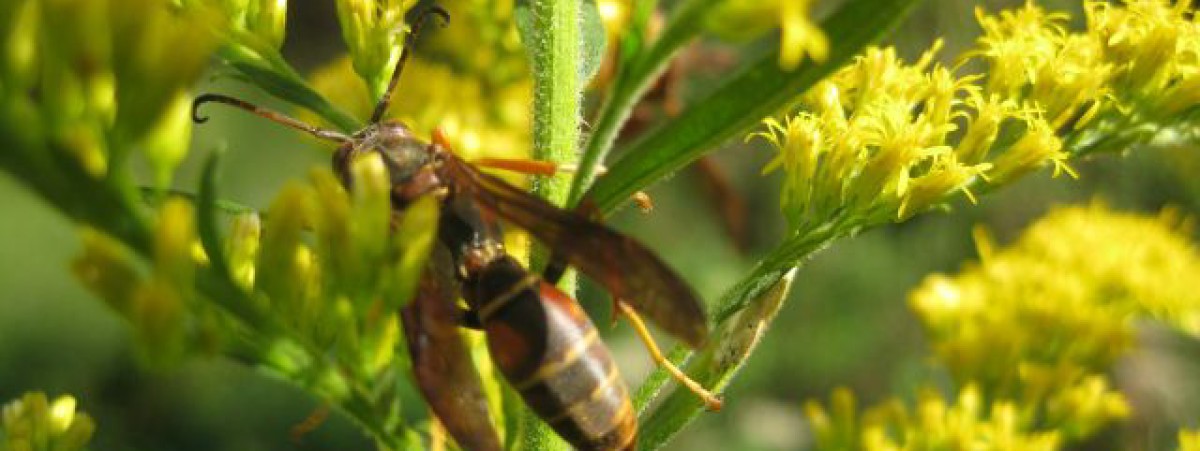
a welcome visitor to a squash flower, most of the pollinating is done by bumble bees, this may be a yellow jacket
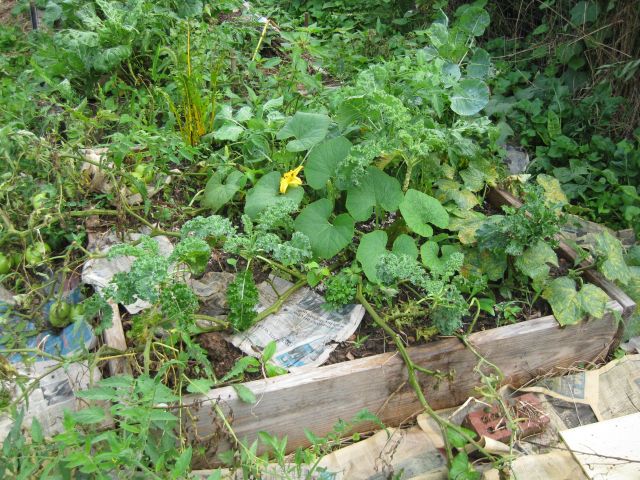
My most productive bed which is just 4ft by 4ft and was an afterthought, in addition to pumping out tomatoes and cucumbers and kale and chard is now sporting a new squash plant.
this 4ft by 4ft bed does very well and you can spot a new squash flower amongst the regular residents
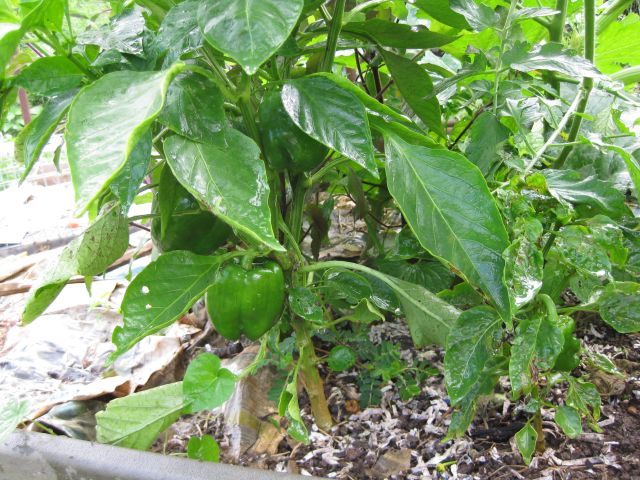
I have a few pepper plants.
green peppers are looking good
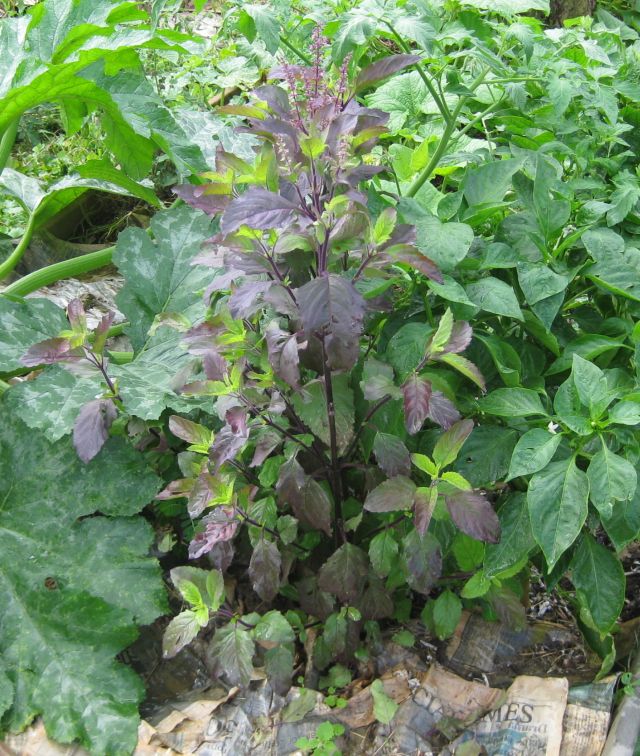
And am pleased some holy basil (I planted two varieties) is growing well.
a variety of holy basil
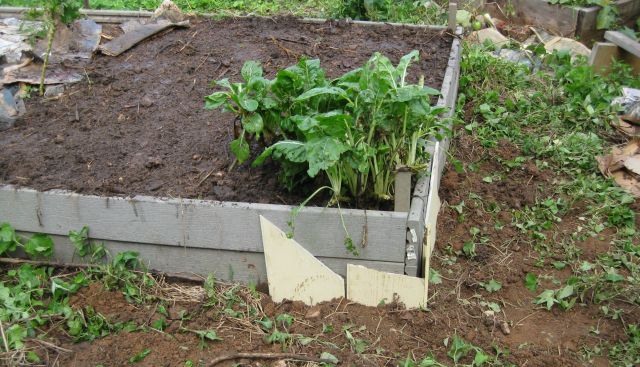
I was preparing a raised bed for a seeding of radish and beets and noticed the soil looked drained of its vigor. Forking a bit deeper I was not surprised to find invading roots. I traced them to their entry point and from the outside I chopped the roots and then inserted a few left over pieces of cement siding. This should stop the roots for a while.
newly seeded radish and beet bed with added compost and cement siding below ground to stop roots
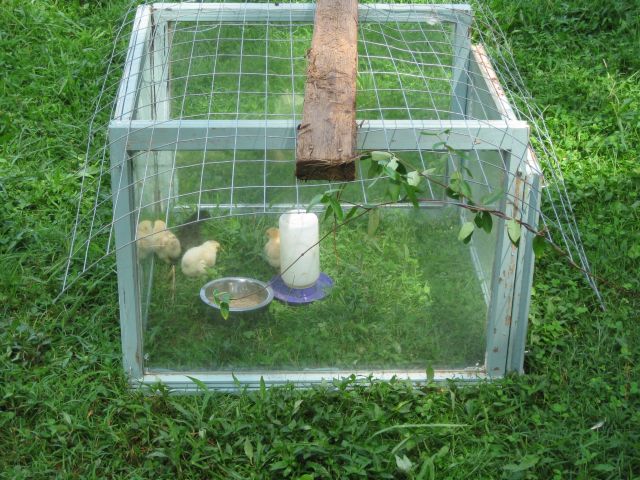
Finally, the 4 chicks which hatched last week were getting frustrated in their lamp heated chamber, so I screwed 4 old windows together to make a square on the grass in the shade, and placed them and their water and food inside and covered the top with wire mesh. At first they were terrified by the big circling chicken giants but then settle down and enjoyed themselves until the rain showers ended their first outdoor adventure.
In my May post I described my process for hatching chicks. I hatched 5 chicks from 7 eggs using a Brinsea incubator. I did not mention that one of the chicks had part of its intestine protruding, presumably could not digest food, and died 2 days later. The 4 remaining chicks grew at a steady pace and are now almost the size of their mothers. It appears they are all hens.
in May they were new born chicks, now they are big teenagers
I began chicken keeping with 8 purchased (1 rooster and 7 hens) and 6 gifted hens. Of the original 14, I am down to 5 including the rooster who is as vigorous as ever. Since the surviving hens are tough, well adapted birds and almost all their eggs are fertilized, I decided to do a 2nd round of hatching chicks while I still enjoyed their company.
Same procedures for hatching chicks as in May, with 7 eggs in the incubator. On the 19th day the first egg hatched and 4 more on the 20th day. Of the remaining 2 eggs one was not fertilized and the other grew but could not emerge from its shell. Of the 5 that hatched, one was very weak, chirped continuously and did not survive to the next day. So I have 4 healthy chicks from the 7 eggs I incubated, the same result as my first go at hatching chicks.
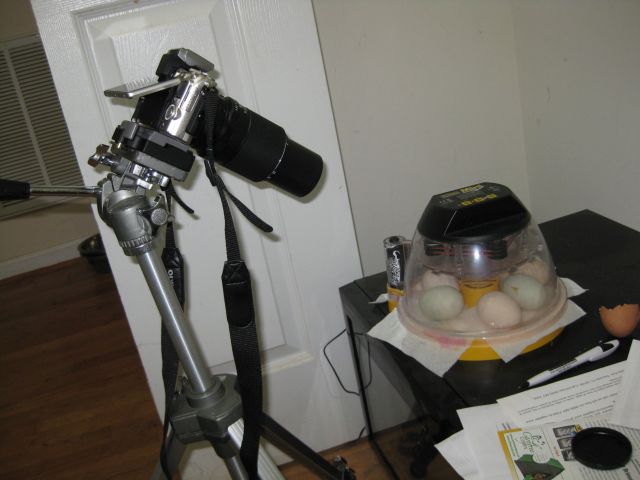
I spent much time watching the hatching chicks and took pics along the way. I placed the camera on a tripod – here is the setup.
photo setup – old tripod and old manual focus lens with new digital camera
The chick inside the egg chips away at the shell to form an elongating crack.
hard at work preparing to emerge
It can take hours for the hatching chicks. When the crack is well developed the chick applies considerable effort to split the shell.
the shell is broken and the chick is about to emerge
And then, with a final heave the shell remnants are scattered and the chick emerges.
a new arrival
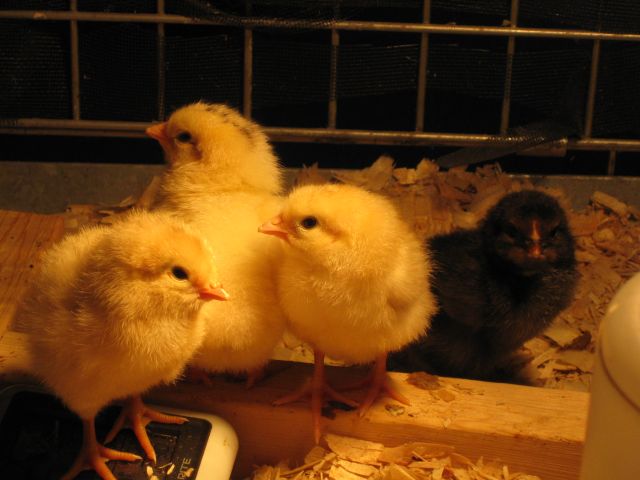
And here are the 4 of the hatching chicks the next day.
4 new chicks – one from the New Jersey Giant, one from the Buff Orpington (blondie) and two from the Americauna
So I now have 13 chicken (almost back to the original numbers) – 5 of the original crew, 4 hatched in May and 4 hatching chicks in August.
I inherited Red from departing neighbors. She had been rescued from a commercial hatchery and came with a snipped beak. She was the smartest of them all. In the early days I borrowed her and some of her companions to help prepare the vegetable growing area and she would hover close to my digging implements to examine and gulp down whatever edibles I unearthed – whilst the other chicken stayed as far away from me as possible. And when she and the others were given to me, it was Red who first identified the presence of a young rooster (Buffy) in my second flock, as I wrote in September 2011:
“she paces the fenceline and he saunters closer though pretext is food, a purposeful loiter, he faces and tip toes, his chest full of swagger she responds just as quickly with unrestrained vigor and then he departs and she wistfully eyes the untutored young rooster and if she could, sighs, but tomorrow will come and who knows by then Buffy be back and gladden the hen”
She had been ailing for some time and seemed to recover after I administered some antibiotics and gave her a spa bath with epsom salts. But the past week was tough and she got weaker and weaker and today she was gone.
What to do with the body? I remember when I was caring for my neighbors’ chicken while they were away and one died and I buried it. When I told them they were incredulous so, not understanding their response, I asked if they would have liked me to freeze the body for their later digestion, which provoked a similar response. So I asked what they did with their chicken and they said they tossed them into the garbage bag, which to me is wasteful of recyclable nutrients and somewhat discourteous of a loyal retainer. In fairness I should mention that my neighbors used to slaughter, process and eat healthy chicken, they drew the line with a chicken dying of unknown causes.
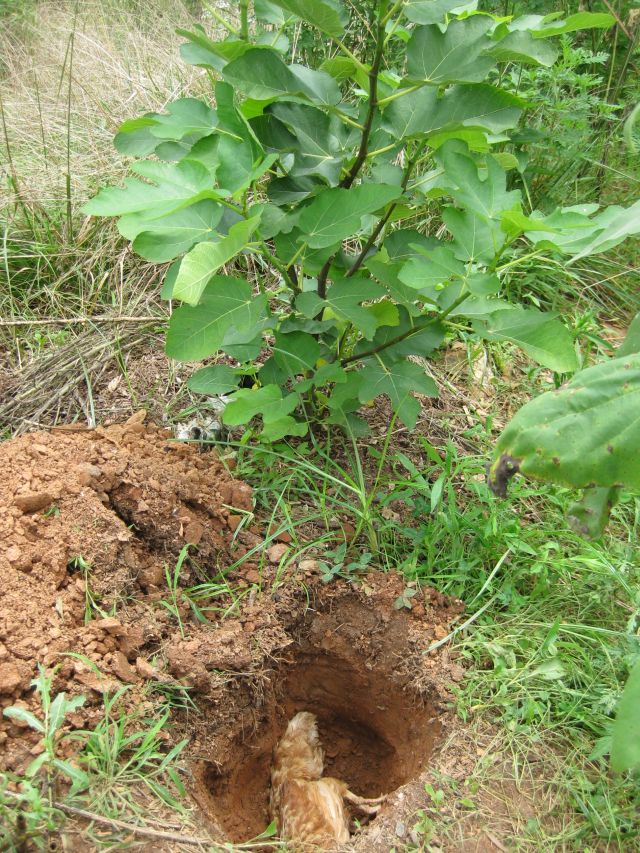
A number of chicken have died over the past 2 years and I have an area where I buried them side by side under biggish stones to deter scavengers. But I decided today that Red would be better honored if she were buried amongst my fruit trees – perhaps I am thinking of a tradition where a dead fish was buried at the bottom of a hole dug for new fruit trees.
Red about to be buried in a hole alongside a young fig tree
So she has moved on but her remains will contribute to the soil and its inhabitants, the small fig tree and to the fruit it will bear one day.
Of the 6 chickens inherited from my neighbor, Red has always been my favorite. On one occasion I borrowed them to assist in the new vegetable area. 5 huddled in the furthest corner, Red came up to where I was forking up the soil and she focused on each upturning and snatched any worms or grubs that were unearthed. I was told she was rescued from a commercial operation and that was why her beak was snipped – to minimize damage amongst stressed confined birds. The bigger birds respected her and let her alone.
And all was well until last week when her behavior changed – not amongst the birds at the paddock corner scrounging for handfuls of seed, comb faded, more time in the coop than out. And last night I was sure she was at her end – standing in the corner with head drooped to the ground. I separated her from the others and this morning I set out to take her body for burial – I dig a deep hole for the departed and, when covered, mark it with a boulder. But there she was on her feet!
So I rolled out the “spa treatment” recommended at www.hencam.com. A long soak in an epsom salt bath. Which she enjoyed as you can see below.
epsom salt bath – warm water and quarter cup epsom salts
Followed by pieces of whole wheat home made bread doused liberally with olive oil.
Red enjoying whole wheat bread and olive oil
The least I could do for a real character. So we wait and see.
We have a Buff Orpington rooster and 8 hens, one of which is his sister. Because most nights I am away from the property I have an automatic coop door opener (design specs elsewhere on this website). Most nights I lock them in but, when I can’t neighborhood kids earn pocket money doing so. And when they can’t a neighbor obliges and I will offer, though she doesn’t always accept, a dozen eggs. She used to keep guinea fowl and she mentioned to me that all the eggs I had given her were fertilized. My respect for Buffy (the rooster) leaped, not only for his efficacy but also for the way he distributed his favors unerringly.
So as I am a DIY’er I fashioned an incubator <$10 from website instructions and – after 21 days nothing happened. So with a mother fox and 4 young encamped in the area and being uncertain of my rooster’s life expectancy when a mother fox has to provide, I bit the bullet and purchased a Brinsea 7 egg incubator. (I am confident Buffy will sacrifice himself for his gals and with his elongated spurs give a good accounting but hope he will not be put to the test).
For incubation success you have to replicate as closely as possible the behavior of a mother hen – how she keeps her eggs warm all the time (except for brief snack and bathroom excursions), how she settles down and rolls them ever so slightly. Temperature and humidity are critical factors. The Brinsea has programable options and the default setting seemed designed for chicken (but could easily be adjusted for pheasant, quail, ducks and parrots). My default settings were 99.5 deg F; 21 day incubation; egg turning every 45 minutes; turning angle 5 seconds duration; and no automatic cooling. Some explanations – the significance of the 21 day count down is that on the 19th day the incubator will stop turning the eggs. Automatic cooling is to mimic the cooling which occurs when the mom temporarily leaves the nest. Since I opened the incubator every few days I thought this was sufficient. For the last few days of incubation humidity must be high to soften the shell to enable chick emergence, so I checked both water reservoirs were full during this period.
I tried “candling” where you examine the eggs carefully under a bright light and did not learn much. I did weigh the eggs at the outset and during incubation and noted all the eggs lost weight somewhat in line with recommendations, so I assumed the humidity was ok.
And, on the 20th and 21st days there was action and 5 chicks emerged from their shells. In anticipation, I had rigged a heat lamp over a simple brooder box. I made a quick trip to Sackett’s, the local resource, and purchased an inexpensive plastic gravity fed waterer and feeder and chick feed. They seem content – not only do they all seem to awake and jump into motion at the same time but, just like the closing of a switch, they all collapse and go to sleep at the same time, piled up on each other. They all know how to eat but only one so far has figured out how to drink. More training required there. As for the remaining two eggs, they may not be viable – I will wait a few days more.
the incubator with the first two chicks emerged
Prior to emerging chicks will make a small hole for breathing and to take a peek at the outside world.
breathing hole and a window to the big world
And what fun it is to snuggle up with siblings, a common dad but different moms.