some winter tasks

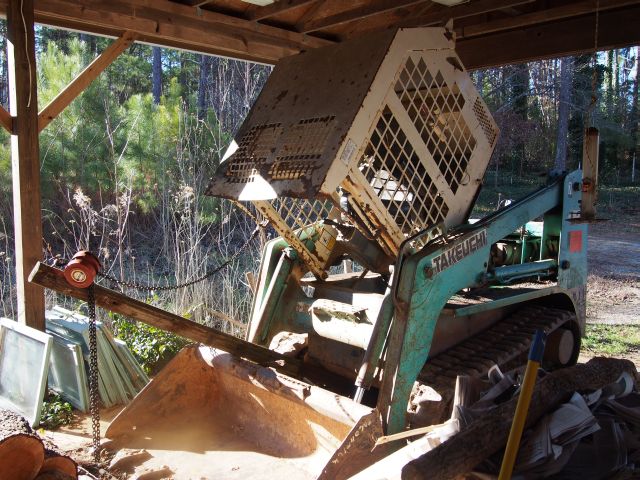
charging the Takeuchi

After some cold nights (12 below freezing) my Takeuchi bobcat refused to start.  Cold and tired battery.  The best way to charge the battery is to pull the cab forward on its hinges and then you have direct access to the battery.  It is heavy and best done with an assistant.  In the past I had an anchor point in front of the Take and winched the cab forward.  However, there was no anchor point for the Take this time just a 2,400 gal rainwater tank.  The last time I had no anchor point I attached the negative charging wire to the body and the positive to a nail which I inserted into a slot in the fusebox.  I really didn’t want to do this again.  So I pondered and created my own anchor point.  I found an 8ft fence post, located it between the loader and the body of the Take, attached a hook and winched the cab up.  Effortless and the charging was uneventful.

raising the cab of the Take

work in the orchard

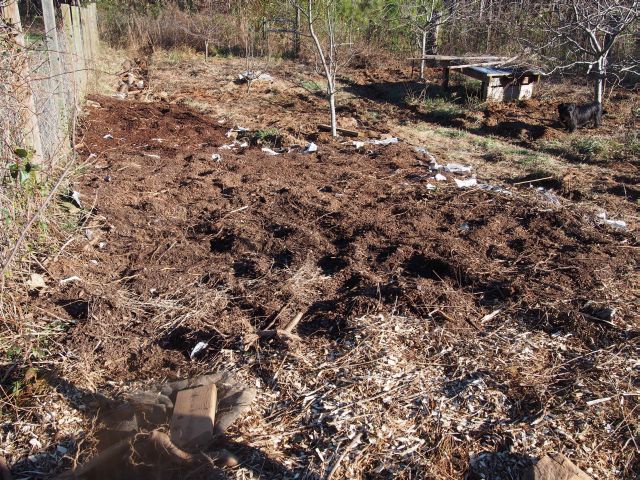
This year, for the first time, my first row of apple trees produced apples but the second row which is nearest my neighbor’s fence did not, and the trees appeared lackluster.  I diagnosed this to competition from vines, shrubs and small trees, some of which have thick roots 10ft long which have been out competing my apple trees for compost nutrients.  I am avidly reading The Holistic Orchard by Michael Phillips in order to thwart the pests that nourished on many of my apples.  He makes the interesting point that wood chips from hardwood trees create beneficial fungus for fruit trees.  So I have worked hard to clear the growth between my trees with an eyehoe (what a wonderful invention).  I then spread manure from the stables, layer newspapers thickly and now, with my Take recharged I ferry loads of woodchips and dump and spread over the newspapers.

mulching the orchard

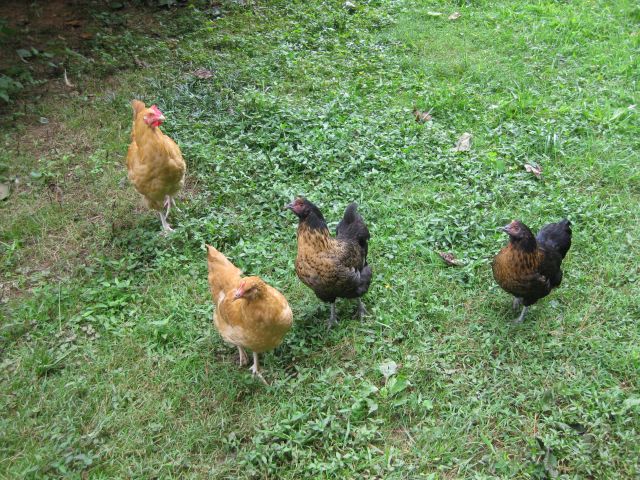
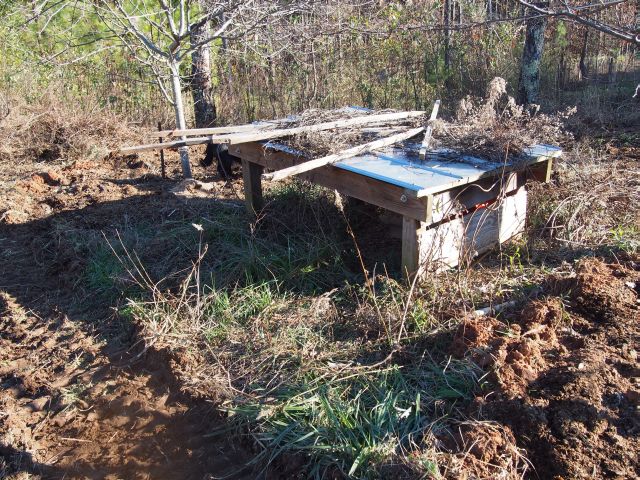
When the orchard is respectable I will bring in a flock of helpers to scratch and turn up over wintering pests.  A couple years ago I improvised a simple chicken shelter which has a couple of nestboxes and I will clean it up for my chickens.

simple chicken shelter in the orchard

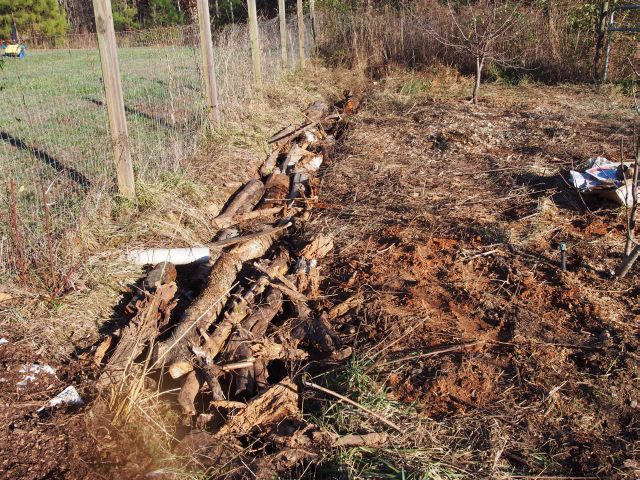
water and nutrient infiltration

I dug a trench alongside part of the orchard to capture and infiltrate rainwater run off.  I am now filling it with hardwood (mainly) logs, the idea is that the wood will decompose and the nutrients and fungi will benefit my fruit trees along the lines suggested in The Holistic Orchard book (and will also physically block the growth of tall weeds in the ditch).

various logs stacked in the rainwater ditch

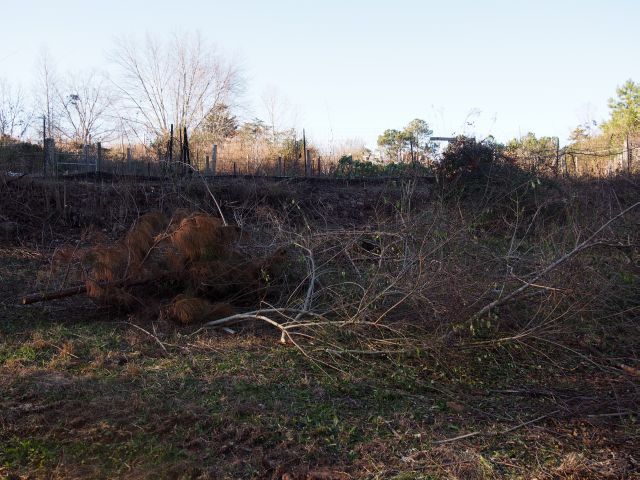
clearing the slope bordering the vegetable growing area

My main vegetable growing area is fenced in and along the southeast border a thicket of privet and briar sprung up over the past several years.  I tolerated the growth since I reasoned it provided vantage points and shelter for insect loving birds which were helping me control pests in the vegetables.  However there were two problems – a) the roots invaded my raised beds – there is one type of small tree which has very long wily roots which evaded all my attempts to obstruct it; b) in the winter, when sunlight is dear, the wild hedge blocked the sun from my frost ridden beds.  So I worked hard to cut down and remove the growth and have been chipping away with the chipper, carried and powered by my tractor.  This mulch I have also been adding to the orchard.  Some chipping remains and when the clay soil has dried I will bring out the tractor again and chip away.

some of the small trees awaiting chipping in the foreground and the fenced growing area at the top of the slope

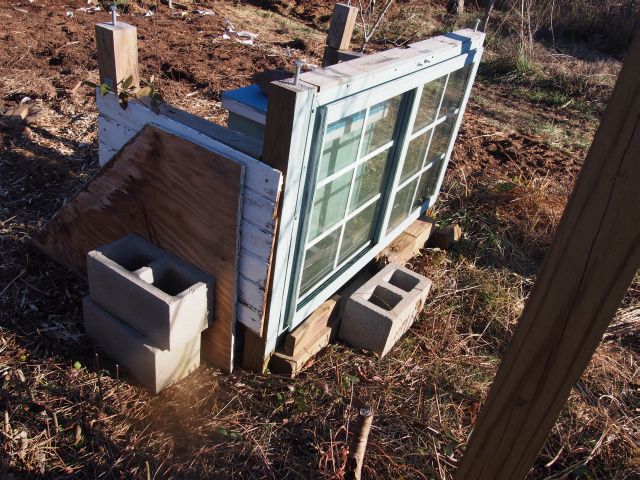
winter hive protection

My bee hive faces south.  Chilling winds tend to come from the west and north.  On the west side I have a window which allows the sun but not the wind access to the hive, and on the north side I have plywood protection.

the sheltered winter protected bee hive

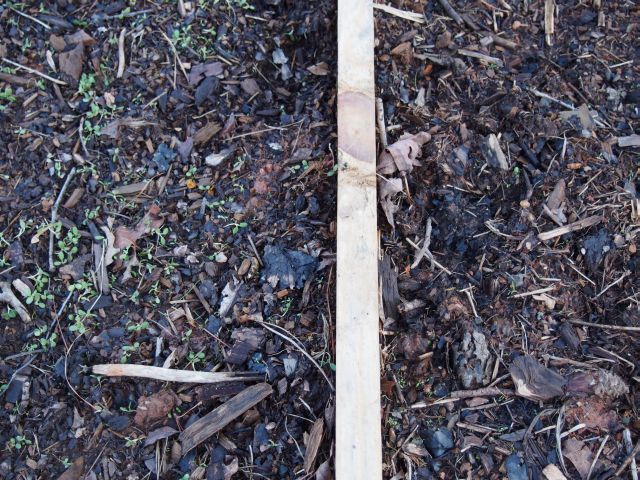
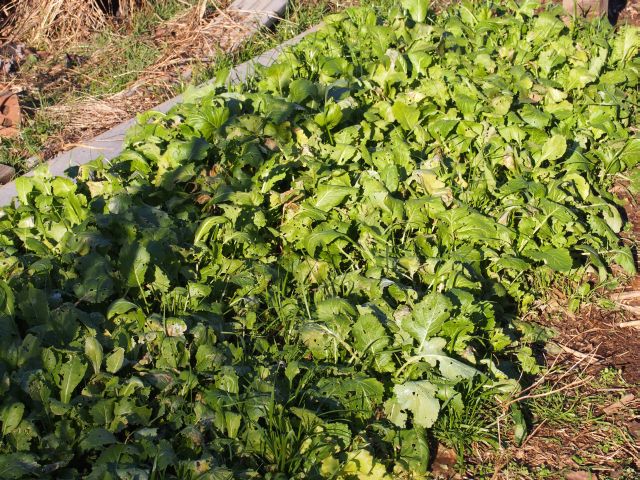
how the clover fares

I recently installed a 20ft by 4ft raised bed and sowed half of it with crimson clover and the other half with white (ladino) clover.  The crimson clover is larger but both seemed to germinate equally well.  However, following the recent cold, the ladino clover almost disappeared while the crimson is holding on well.  Will be interesting to see how they comparatively perform in the spring.
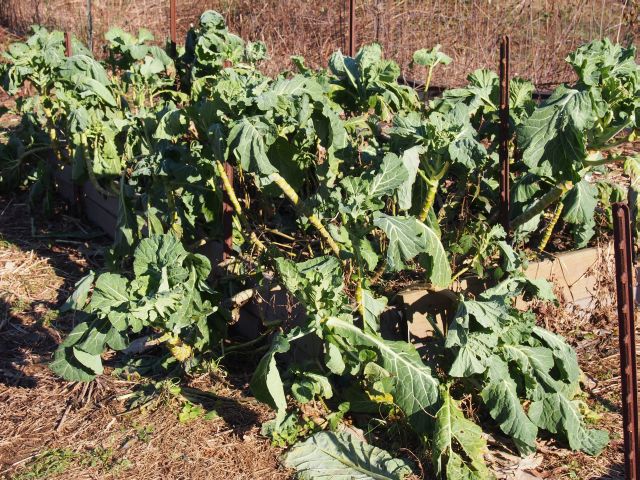
the crimson clover is on the left of the divider and the barely surviving ladino clover is on the right

veggies for eating

.I am not using crop covers right now and my collard and turnip and mustard greens are surviving, tho at time the collard looks a little bedraggled.

tasty collard for the picking

A tasty (and healthy) dish is newly hatched eggs (yes my younger hens are laying in the winter without artificial lighting), collard, greens and garlic stir heated, eaten with home made whole wheat bread.


lots of winter greens which keep growing in the winter

So these are some of my winter tasks.  And on the inclement days, Coursera, the free online college course compendium, awaits.  I just completed calculus, precalculus and a fascinating history on mankind from 250,000 years ago to the present.

hatching chicks

My second round of hatching chicks

In my May post I described my process for hatching chicks.  I hatched 5 chicks from 7 eggs using a Brinsea incubator.  I did not mention that one of the chicks had part of its intestine protruding, presumably could not digest food, and died 2 days later.  The 4 remaining chicks grew at a steady pace and are now almost the size of their mothers.  It appears they are all hens.

hatching chicken
in May they were new born chicks, now they are big teenagers

I began chicken keeping with 8 purchased (1 rooster and 7 hens) and 6 gifted hens.  Of the original 14, I am down to 5 including the rooster who is as vigorous as ever.  Since the surviving hens are tough, well adapted birds and almost all their eggs are fertilized, I decided to do a 2nd round of hatching chicks while I still enjoyed their company.
Same procedures for hatching chicks as in May, with 7 eggs in the incubator.  On the 19th day the first egg hatched and 4 more on the 20th day.  Of the remaining 2 eggs one was not fertilized and the other grew but could not emerge from its shell.  Of the 5 that hatched, one was very weak, chirped continuously and did not survive to the next day.  So I have 4 healthy chicks from the 7 eggs I incubated, the same result as my first go at hatching chicks.
I spent much time watching the hatching chicks and took pics along the way.  I placed the camera on a tripod – here is the setup.

hatching chicks
photo setup – old tripod and old manual focus lens with new digital camera

The chick inside the egg chips away at the shell to form an elongating crack.

hatching chicks
hard at work preparing to emerge

It can take hours for the hatching chicks.  When the crack is well developed the chick applies considerable effort to split the shell.

hatching chicks
the shell is broken and the chick is about to emerge

And then, with a final heave the shell remnants are scattered and the chick emerges.

hatching chicks
a new arrival

And here are the 4 of the hatching chicks the next day.

hatching chicken
4 new chicks – one from the New Jersey Giant, one from the Buff Orpington (blondie) and two from the Americauna

So I now have 13 chicken (almost back to the original numbers) – 5 of the original crew, 4 hatched in May and 4 hatching chicks in August.


hatched chicks

We have a Buff Orpington rooster and 8 hens, one of which is his sister.  Because most nights I am away from the property I have an automatic coop door opener (design specs elsewhere on this website).  Most nights I lock them in but, when I can’t neighborhood kids earn pocket money doing so.  And when they can’t a neighbor obliges and I will offer, though she doesn’t always accept, a dozen eggs.  She used to keep guinea fowl and she mentioned to me that all the eggs I had given her were fertilized.  My respect for Buffy (the rooster) leaped, not only for his efficacy but also for the way he distributed his favors unerringly.

So as I am a DIY’er I fashioned an incubator <$10 from website instructions and – after 21 days nothing happened.  So with a mother fox and 4 young encamped in the area and being uncertain of my rooster’s life expectancy when a mother fox has to provide, I bit the bullet and purchased a Brinsea 7 egg incubator.  (I am confident Buffy will sacrifice himself for his gals and with his elongated spurs give a good accounting but hope he will not be put to the test).

For incubation success you have to replicate as closely as possible the behavior of a mother hen – how she keeps her eggs warm all the time (except for brief snack and bathroom excursions), how she settles down and rolls them ever so slightly.  Temperature and humidity are critical factors.  The Brinsea has programable options and the default setting seemed designed for chicken (but could easily be adjusted for pheasant, quail, ducks and parrots).  My default settings were 99.5 deg F; 21 day incubation; egg turning every 45 minutes; turning angle 5 seconds duration; and no automatic cooling.  Some explanations – the significance of the 21 day count down is that on the 19th day the incubator will stop turning the eggs.  Automatic cooling is to mimic the cooling which occurs when the mom temporarily leaves the nest.  Since I opened the incubator every few days I thought this was sufficient.  For the last few days of incubation humidity must be high to soften the shell to enable chick emergence, so I checked both water reservoirs were full during this period.

I tried “candling” where you examine the eggs carefully under a bright light and did not learn much.  I did weigh the eggs at the outset and during incubation and noted all the eggs lost weight somewhat in line with recommendations, so I assumed the humidity was ok.

And,  on the 20th and 21st days there was action and 5 chicks emerged from their shells.  In anticipation, I had rigged a heat lamp over a simple brooder box.  I made a quick trip to Sackett’s, the local resource, and purchased an inexpensive plastic gravity fed waterer and feeder and chick feed.  They seem content – not only do they all seem to awake and jump into motion at the same time but, just like the closing of a switch, they all collapse and go to sleep at the same time, piled up on each other.  They all know how to eat but only one so far has figured out how to drink.  More training required there.  As for the remaining two eggs, they may not be viable – I will wait a few days more.

the incubator with the first two chicks emerged

Prior to emerging chicks will make a small hole for breathing and to take a peek at the outside world.

breathing hole and a window to the big world

And what fun it is to snuggle up with siblings, a common dad but different moms.

5 new chicks
5 new chicks

And a final shot of the five (sex still unknown).

5 new chicks
5 new chicks


short-night veggies

I was aware of but didn’t not pay much attention to the long-day and short-day preferences of certain vegetables.  I knew that with onions, since I live in the south, I needed to grow the short-day variety.  But that was it – until recently.  In spring last year I had a lot of success with radishes and beets and so this past fall I seeded the ground again with  radishes, beets and, for good measure, turnips.  Only the turnips grew, excepting a couple of sorry looking beets.  Got me wondering.  The seed was purchased this year, so it was good, so why were the radishes and beets so reluctant?

I am studying a couple of biology textbooks and reached the chapter on plant sensory systems and “photoperiodism”, which is the response of an organism to the relative lengths of day and night (the “photoperiod”).  Radishes, beets, spinach and lettuce are called long-day plants but this is confusing, they are really short-night plants.  The distinction is important – the plant is concerned with the length of the night not the length of the day.  It would seem this is a distinction of little importance but it does have significance.  A short-night plant monitors the length of the night so if sun down is 5pm and sunrise is 8pm producing a night of 15 hours (9 daylight hours), a short-night plant which requires a short night of 10 hours, will not be motivated to germinate, grow or flower.  However, if the night is interrupted by a short period of bright light, the plant concludes that this is a short-night, even if darkness returns when the light is snuffed.  So, theoretically, half an hour of light interrupting 15 hours of darkness can convince a short-day plant that the time has arrived to grow.  If, instead, the plant monitored the length of the day and required say 14 hours of daylight (the converse of 10 hours of night) and there are only 9 daylight hours, I would have to provide an additional 5 hours of light instead of the 0.5 hour of light calculated above.

I have given up on the radishes and beets – hopefully they will get going in spring.  But I seeded lettuce indoors (initially 0.75″ seedblocks transferred to 2″ seedblocks) and I germinated spinach seed in the refrigerator, and I would like to get some lettuce and spinach this winter.  I have a simple unheated, good sun exposed, greenhouse and I prepared a growing medium of soil and compost and planted out the lettuce soilblocks and germinated spinach seed.  To make the long nights short, I decided to use the flourescent lights which I had installed for a neighbor to encourage her chicken to lay eggs in winter.  (My chicken keeping days began when my neighbor headed north and gave me her chicken).  Chicken need 14 to 16 hours of daylight to be stimulated to lay eggs.  I have discontinued this practice for my chicken.  To my mind it requires a big effort for a chicken to produce eggs every day or so and I have given my chicken the winter off to recuperate.  They have filled out and look good during their wintry vacation.

So, I had available flourescent lighting and an external use 3 prong timer and all that was required was to position the lights and set them to switch on from 12am to 12.30am.  Initially I thought I would lay the light holder a few inches above the grow trays thus giving the plants maximum exposure.  After pondering this simple solution I realized that if I did this the light holder would block the sunlight and make watering difficult.

short-night vegetables
initially the fluorescent lighting, for interrupting the night for short-night vegetables, was located just above the grow bed

So I screwed together a simple beam structure using oak sapling trunks, which was cheaper and more green than buying 2 by 4’s, and it was done.  Now I will monitor the growth of the lettuce below the fluorescent tubes compared with lettuce in the cold frame outside and see if there is a difference.  A concern I have is that plants respond best to certain light wave-lengths (red light at 660nm) and the flourescent lighting is not the ideal wave-length (500nm – 600nm).   Although, importantly it is not the far red spectrum (735 nm) which actually switches off the growth response.  So, wait and see if interrupting the night will dupe the short-night vegetables.

short-night vegetables
the lights are now high enough above the growing bed of short-night vegetables to not interfere with daylight or watering

egg production

I have mentioned my travails with the Speckled Sussex – one was ill and died and the other went into a serious slump and, despite my efforts also died.  So from 13 hens and 1 rooster I am down to 11 hens and a rooster.  Two of the hens had problems of sorts.

Gimpy, one of the hybrids inherited from my neighbor, developed a bad leg or hip.  Don’t know why – could this has been from the rough attentions of the rooster?  She hobbles with difficulty and I recently noticed she was now losing feathers on her back.   Thinking this was caused by insects (lice, mites, fleas) I began dusting her with diatomaceous earth.    I then ratcheted up the treatment and began dusting her with Sevin dust powder (deviating from organic principles here).  Then she wouldn’t come out of the coop during the day and I thought this was because the weather was cold and she did not have all her feathers to keep her warm.  But I noticed she wasn’t wandering around the coop but huddling in a corner under the nest boxes, so it occurred to me that some of the feather loss was because of feather-pecking by the other birds and she was sheltering defensively.  One warmer morning, I dusted her with Sevin and, despite her protests, took her outside and placed her amongst the others.  I noticed that two of the birds approached her as she balanced on a log on one foot (she tries not to use her damaged foot unless she has to)  and pecked at her back.  And got a bite of Sevin powder and backed off in disgust.  Maybe this helped.  I am pleased that she is now, of her own accord, coming out of the coop during the day.

My other patient is one of the Golden Comets whom I have named “Goldie” – a spur of the moment naming decision required when I took her to the vet.  Her problem was her large crop, which was always large, and her unusual neck movements as she tried to get the food down and to stay in her crop.  The vet realized I like to be hands on and was very helpful showing me how to insert a tube to try drain the crop contents.  He also prescribed  Nystatin for crop fungal infection and gave me a couple of tubes for administering the medicine and draining the crop, if I wished.  Well, Goldie seems to be getting better, as well.  After scouring the internet for advice and noticing what appeared to be conflicting suggestions, I decided to administer every few days, via a feeding tube, a capsule of psyllium fiber (Metamucil) mixed with 25ml of water and then massage the crop.  And it seems to be helping.

I should mention that, unlike the now departed pair of Speckled Sussex which appeared devoted to each other and always stayed together,  the other Golden Comet (Goldie’s sister as it were) appears little interested in Goldie and when I remove Goldie from circulation and then reintroduce her, the other Golden Comet pays scant attention.  This other Golden Comet is also amongst the most intelligent of the birds, the first to run up to me on the off chance I am bearing food and, when I am digging trenches or turning the dirt, she is constantly at my side pecking at the worms in the upturned soil as soon as they appear.  I am not suggesting intelligence trumps emotion, just that she appears to have reordered her priorities.

So it is spring now and everything is looking up, and the chicken appear happy and content and I am getting between 7 and 9 eggs a day – different sizes and colors.

a day's harvest - the green egg (top right) is from the Ameraucana


November tasks

No pics for this post since my camera informed me the battery pack had to be replaced and refused further negotiation.

A pleasurable task, this time of year, is collecting the flower seeds. I did my first Cosmos seeding early 2010 and, from the seeds gathered last November and spread this past spring, I enjoyed a whole new expanse of Cosmos. By November 8, as was the case last year, most of the seeds have dried and spread and are easy to grasp in one’s hand and release into a shopping bag. Lots of Cosmos and every few days I gather more. Also collecting Marigold and Zinnia seeds for new plantings next year.

I am heavily studying permaculture and a recommended plant is the Gumi/Goumi (Elaeagnus multiflora), native to China, Korea and Japan, which provides edible fruit, fixes nitrogen and apparently has medicinal uses. Rather than buy a plant, I bought 12 seeds which arrived after a 2 week trip from NS, Canada accompanied with a note “Has a long germination requirement, often taking 2 full winters before germination.” This will surely test my propagating abilities. For starters, I moistened some seed starting mix and placed, with 6 seeds, in a zip loc bag in the refrigerator. To mimic two years I may remove from the refrigerator in a month’s time and allow to warm for a while and then back into the refrigerator to trick the seeds into thinking this is their second winter. I suspect I will find these seeds are not easily tricked – that’s why I kept 6 seeds in storage for a second go round.

I am also trying, for the first time, to propagate cuttings. I have had success with layering where you pin a low branch of a shrub on the ground, maybe roughen the underside, cover with compost and soil and leave for a few months and, when you return the pinned branch has developed roots and can now be cut from the mother plant and transplanted. Works very well with azaleas and forsythias. But cuttings is something new and, when I have definitive progress, I shall include some pics. I am aware that the best time to be doing this is in spring when the plant is in growth mode, not at the end of fall when systems are shutting down. And spring next year I shall also be trying grafting on my fruit trees.

Next week I should receive some root cuttings of Comfrey, Goldenseal and Jerusalem Artichoke, and also two varieties of mulberry, black bamboo and everbearing strawberries. Just in time to plant before the real cold settles the ground. I have been growing early season strawberries for several years and they were very sweet and spread prolifically. However, their fruiting season is too short, and so I hope to be similarly lucky with the everbearing variety.

With the cooling temperatures I have been progressively winterizing the bee hive. A couple months ago I removed the big sun umbrella which protected them from overhead sun, then I removed the board fence on the west side which protected them from afternoon sun, now I have stapled the plastic sheeting to the frame which encompasses the hive, and I slid in the bottom board, so only the entrance side and the top are open to the elements. I also have left them with a lot of their honey (my last harvesting was August 5) so I hope they will have enough to get through the winter without my having to give them sugared water. Since I do not use any chemicals, I want them as healthy and strong as possible to survive the challenges of winter and their own honey will be infinitely better than a sugared substitute.

And the chicken? The 6 older hens are delivering 3 eggs a day which is ok for now, given the shortening daylight hours. The flock of eight (7 hens and 1 rooster) are now about 6 months old and only one of them (one of the Golden Comets) is egg producing. They love their new coop and seem to be having a great time so I have had a few chats with them about the importance of delivering more eggs – “eggs or the pot” I say to them. In December, if egg production is down, I may use artificial lighting on a timer to get them 14 hours of light and more into an egg laying frame of mind.