jujube, 3 Canadian aids, a feral bee colony

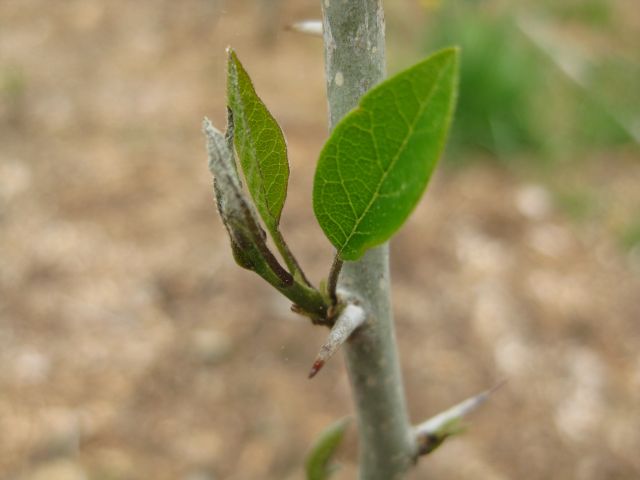
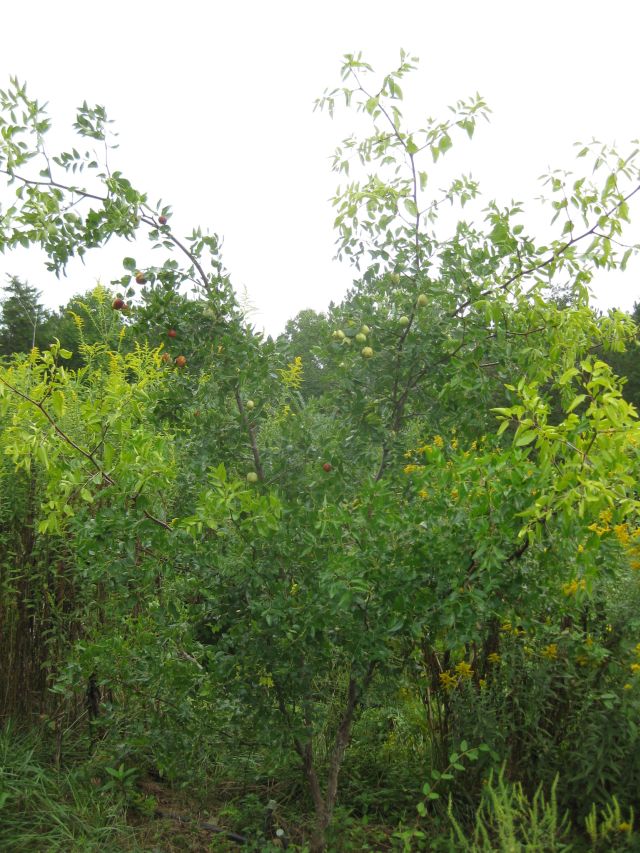
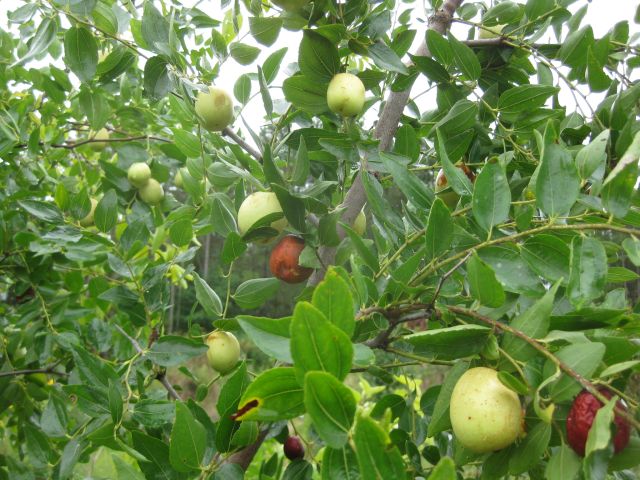
With unexpectedly cooler weather here in N Georgia in September, I am spending more time in the vegetable garden and orchards.  I had planted jujube saplings a few years ago in the terraced orchard and neither irrigated nor tended them until recently I noticed small round fruit.  At the time they were green and tasteless.  Now they are brown or red with wrinkled skins and a delicate flavor, a bit like an apple.  There are two small jujube trees – the Li Jujube provided just one fruit, the Lang Jujube is plentiful.  Both were planted in February 2011 opposite each other.

the Lang Jujube, barely discernible from its surroundings

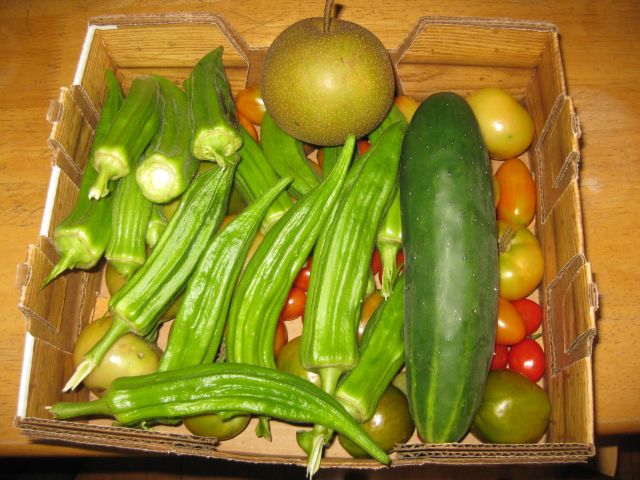
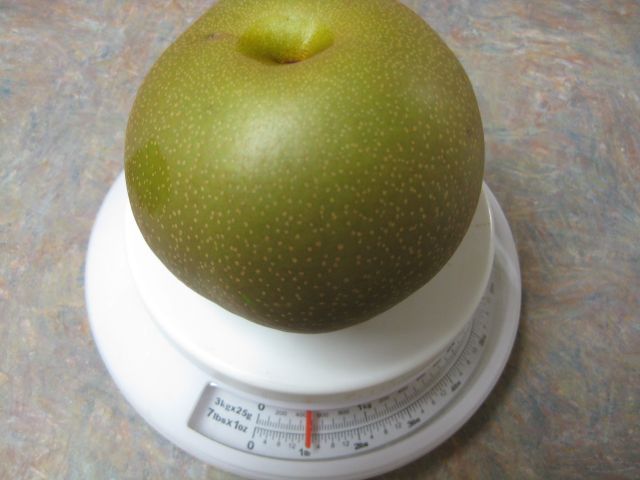
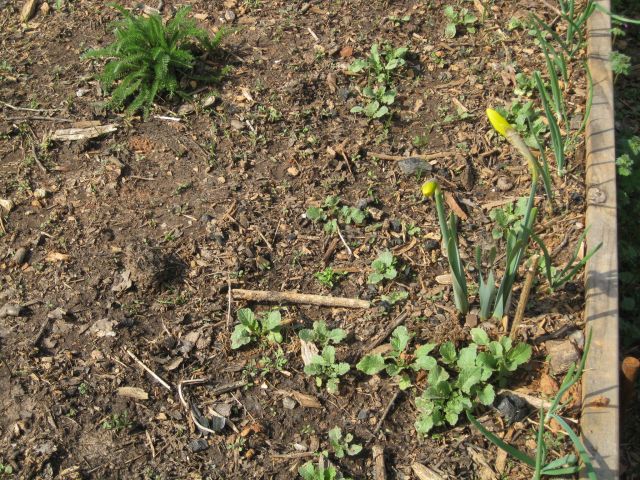
The fruit is smaller than it looks, in the photo below.

jujube fruit.  if you wait too long the fruit rots and tastes acidic
jujube fruit. if you wait too long the fruit rots and tastes acidic

I mentioned in the caption, 3 great Canadian aids:  1) my EyesOn addition to my surveillance systems (designed in Canada, made in Taiwan) which I previously posted, is invaluable.  It texts and messages me whenever there is a change in the security system.  This can mean being woken in the middle of the night when the text message beep goes off, but I have security of mind knowing the premises are continuously monitored, not by neighbors who may not hear a siren, but by the flow of electrons (I am taking a circuit & electronics course with edX and electrons are on my mind).

2)  is the excellent organic growing book – “the market gardener” by J M Fortier from Canada.  He uses covers to exclude pests, a move I will have to make.  Recently in Marin county near San Francisco at the weekly organic growers market, I asked a farmer if she sprayed (meaning organic sprays) and she said no.  So I asked the obvious follow up question – how come no pest damage?  She mentioned the usual – beneficials, healthy plants etc. but then said the produce was from a green house.  Which to me was the solution – unless you have a controlled environment I believe after a while (in the first year they may not yet have discovered you) there will be some pest damage.

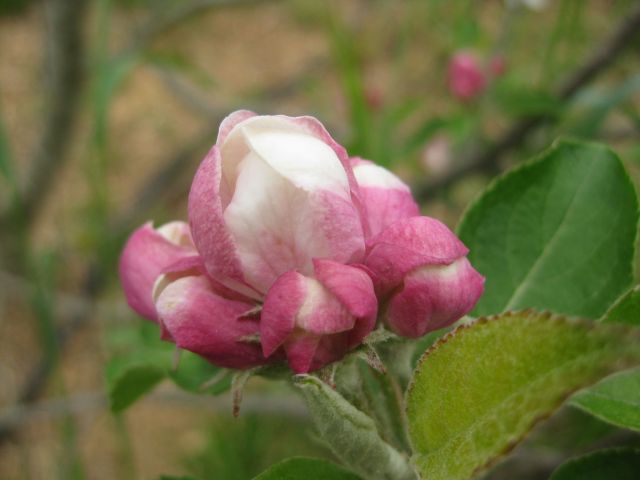
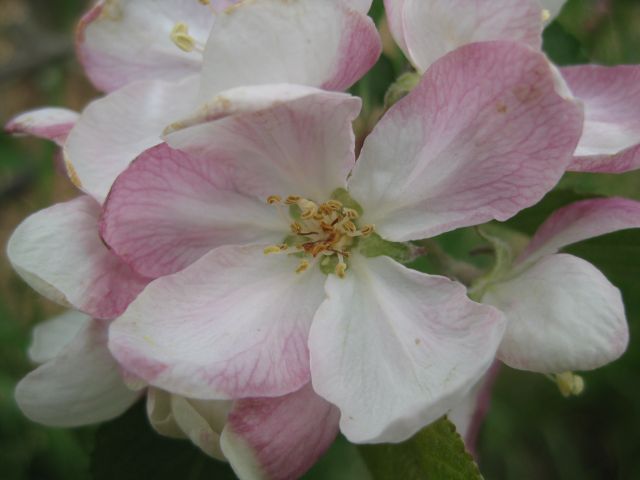
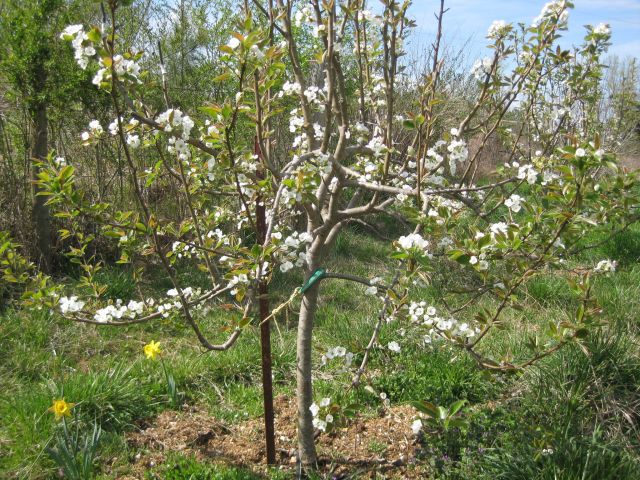
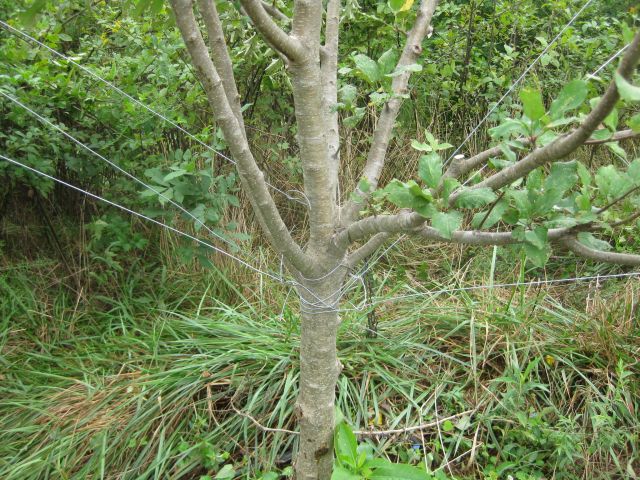
3) my third great aid is the DVD “the permaculture orchard:  beyond organic” by Stefan Sobkowiak, Canada.  Lots of insights.  I am adopting many of them and right now I am following the pruning and training suggestions.  One of them is that upright branches want to keep growing wood and leaves, but if you can train them to stay horizontal they will focus on bearing fruit.  So below is my Ein Shemer apple tree, planted at the same time as the jujube and also bearing fruit this year and you can see I have attached wires to the branches to bring them down.

the Ein Shemer apple trees with branches trained toward horizontal

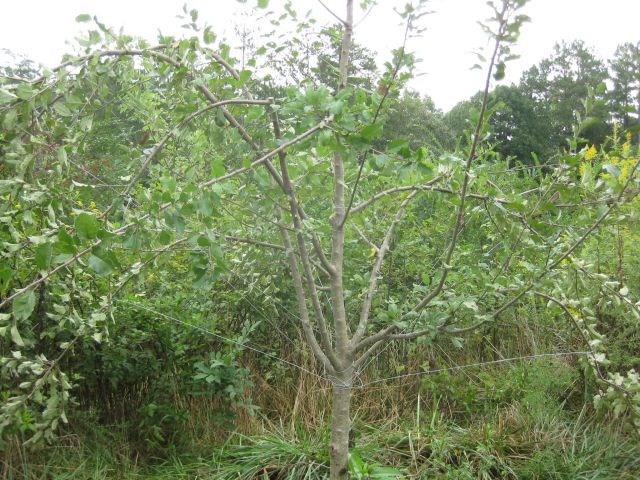
The training is with wires which I hope to remove soon – I have seen too much damage done when bindingse were left to strangle a trunk.

wires around the trunk of the apple tree pulling the branches down

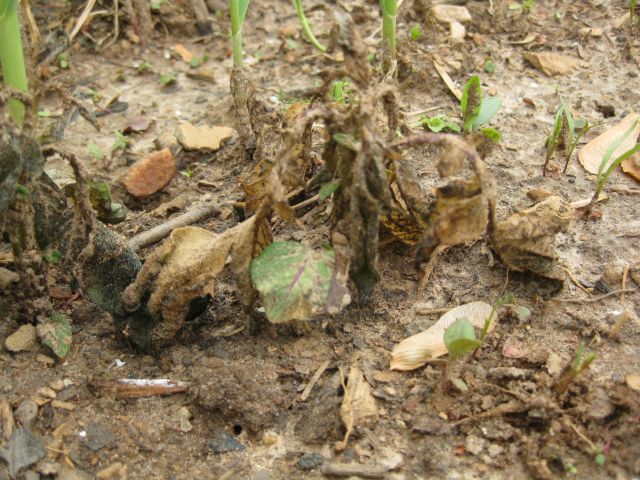
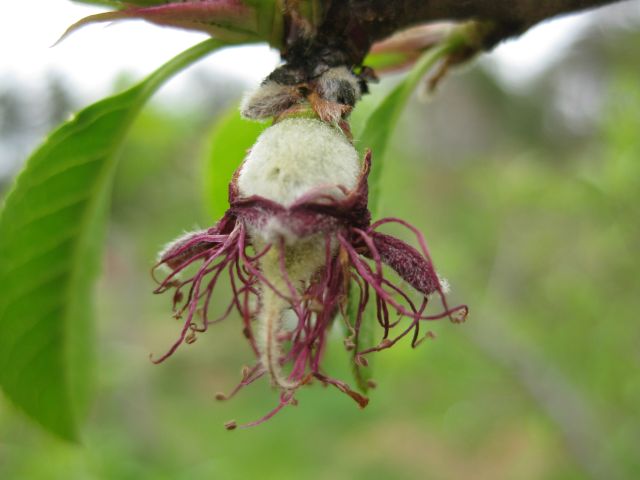
My Stellar cherry tree (planted at the same time as the jujube and Ein Shemer) has lost all its leaves.

leafless cherry tree

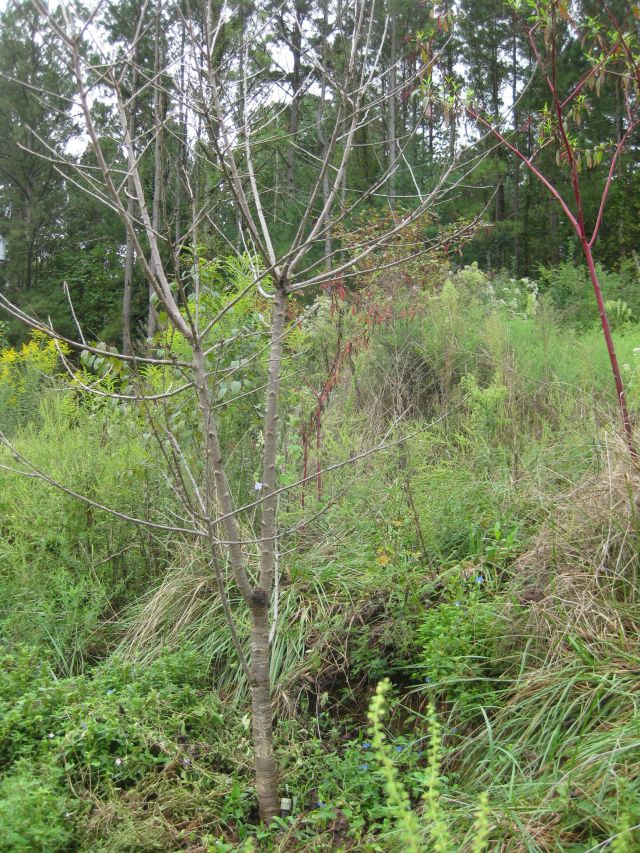
Incidentally, a forester told me how to identify cherry trees – they have horizontal lenticils.  Casual observation shows a dark brown gum substance at the crotch of the two limbs.

you can see the problem - likely a borer infestation to which the tree responded by producing sticky pitch to discourage the invaders
you can see the problem – likely a borer infestation to which the tree responded by producing sticky pitch to discourage the invaders

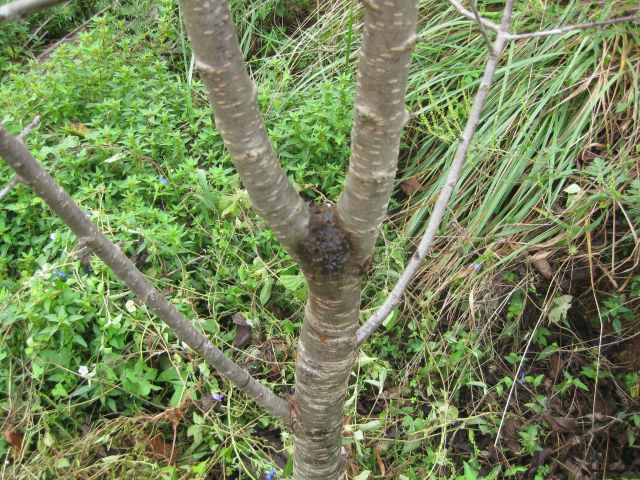
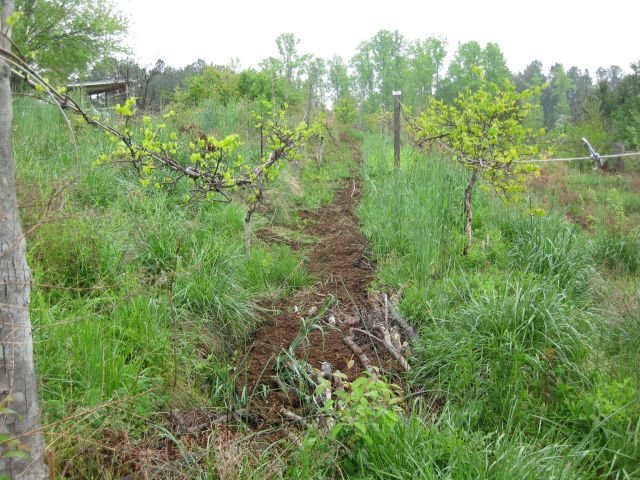
The DVD recommends eliminating any branch off the main trunk which has a diameter 50% or more of the trunk.  Had I done this I might not have the current problem.

I have cut off the other limb

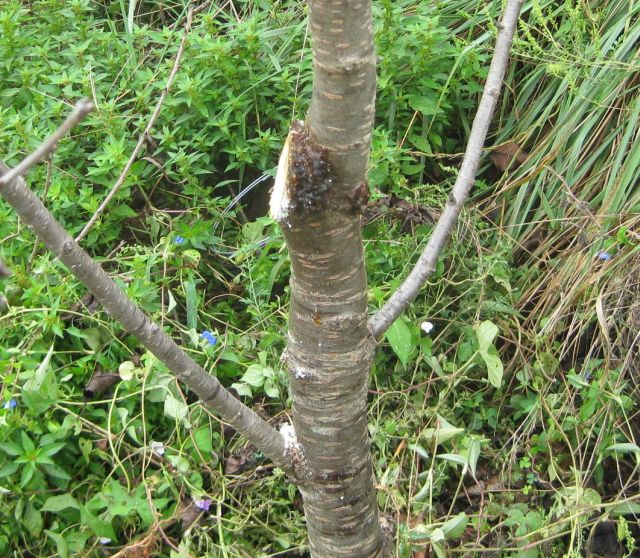
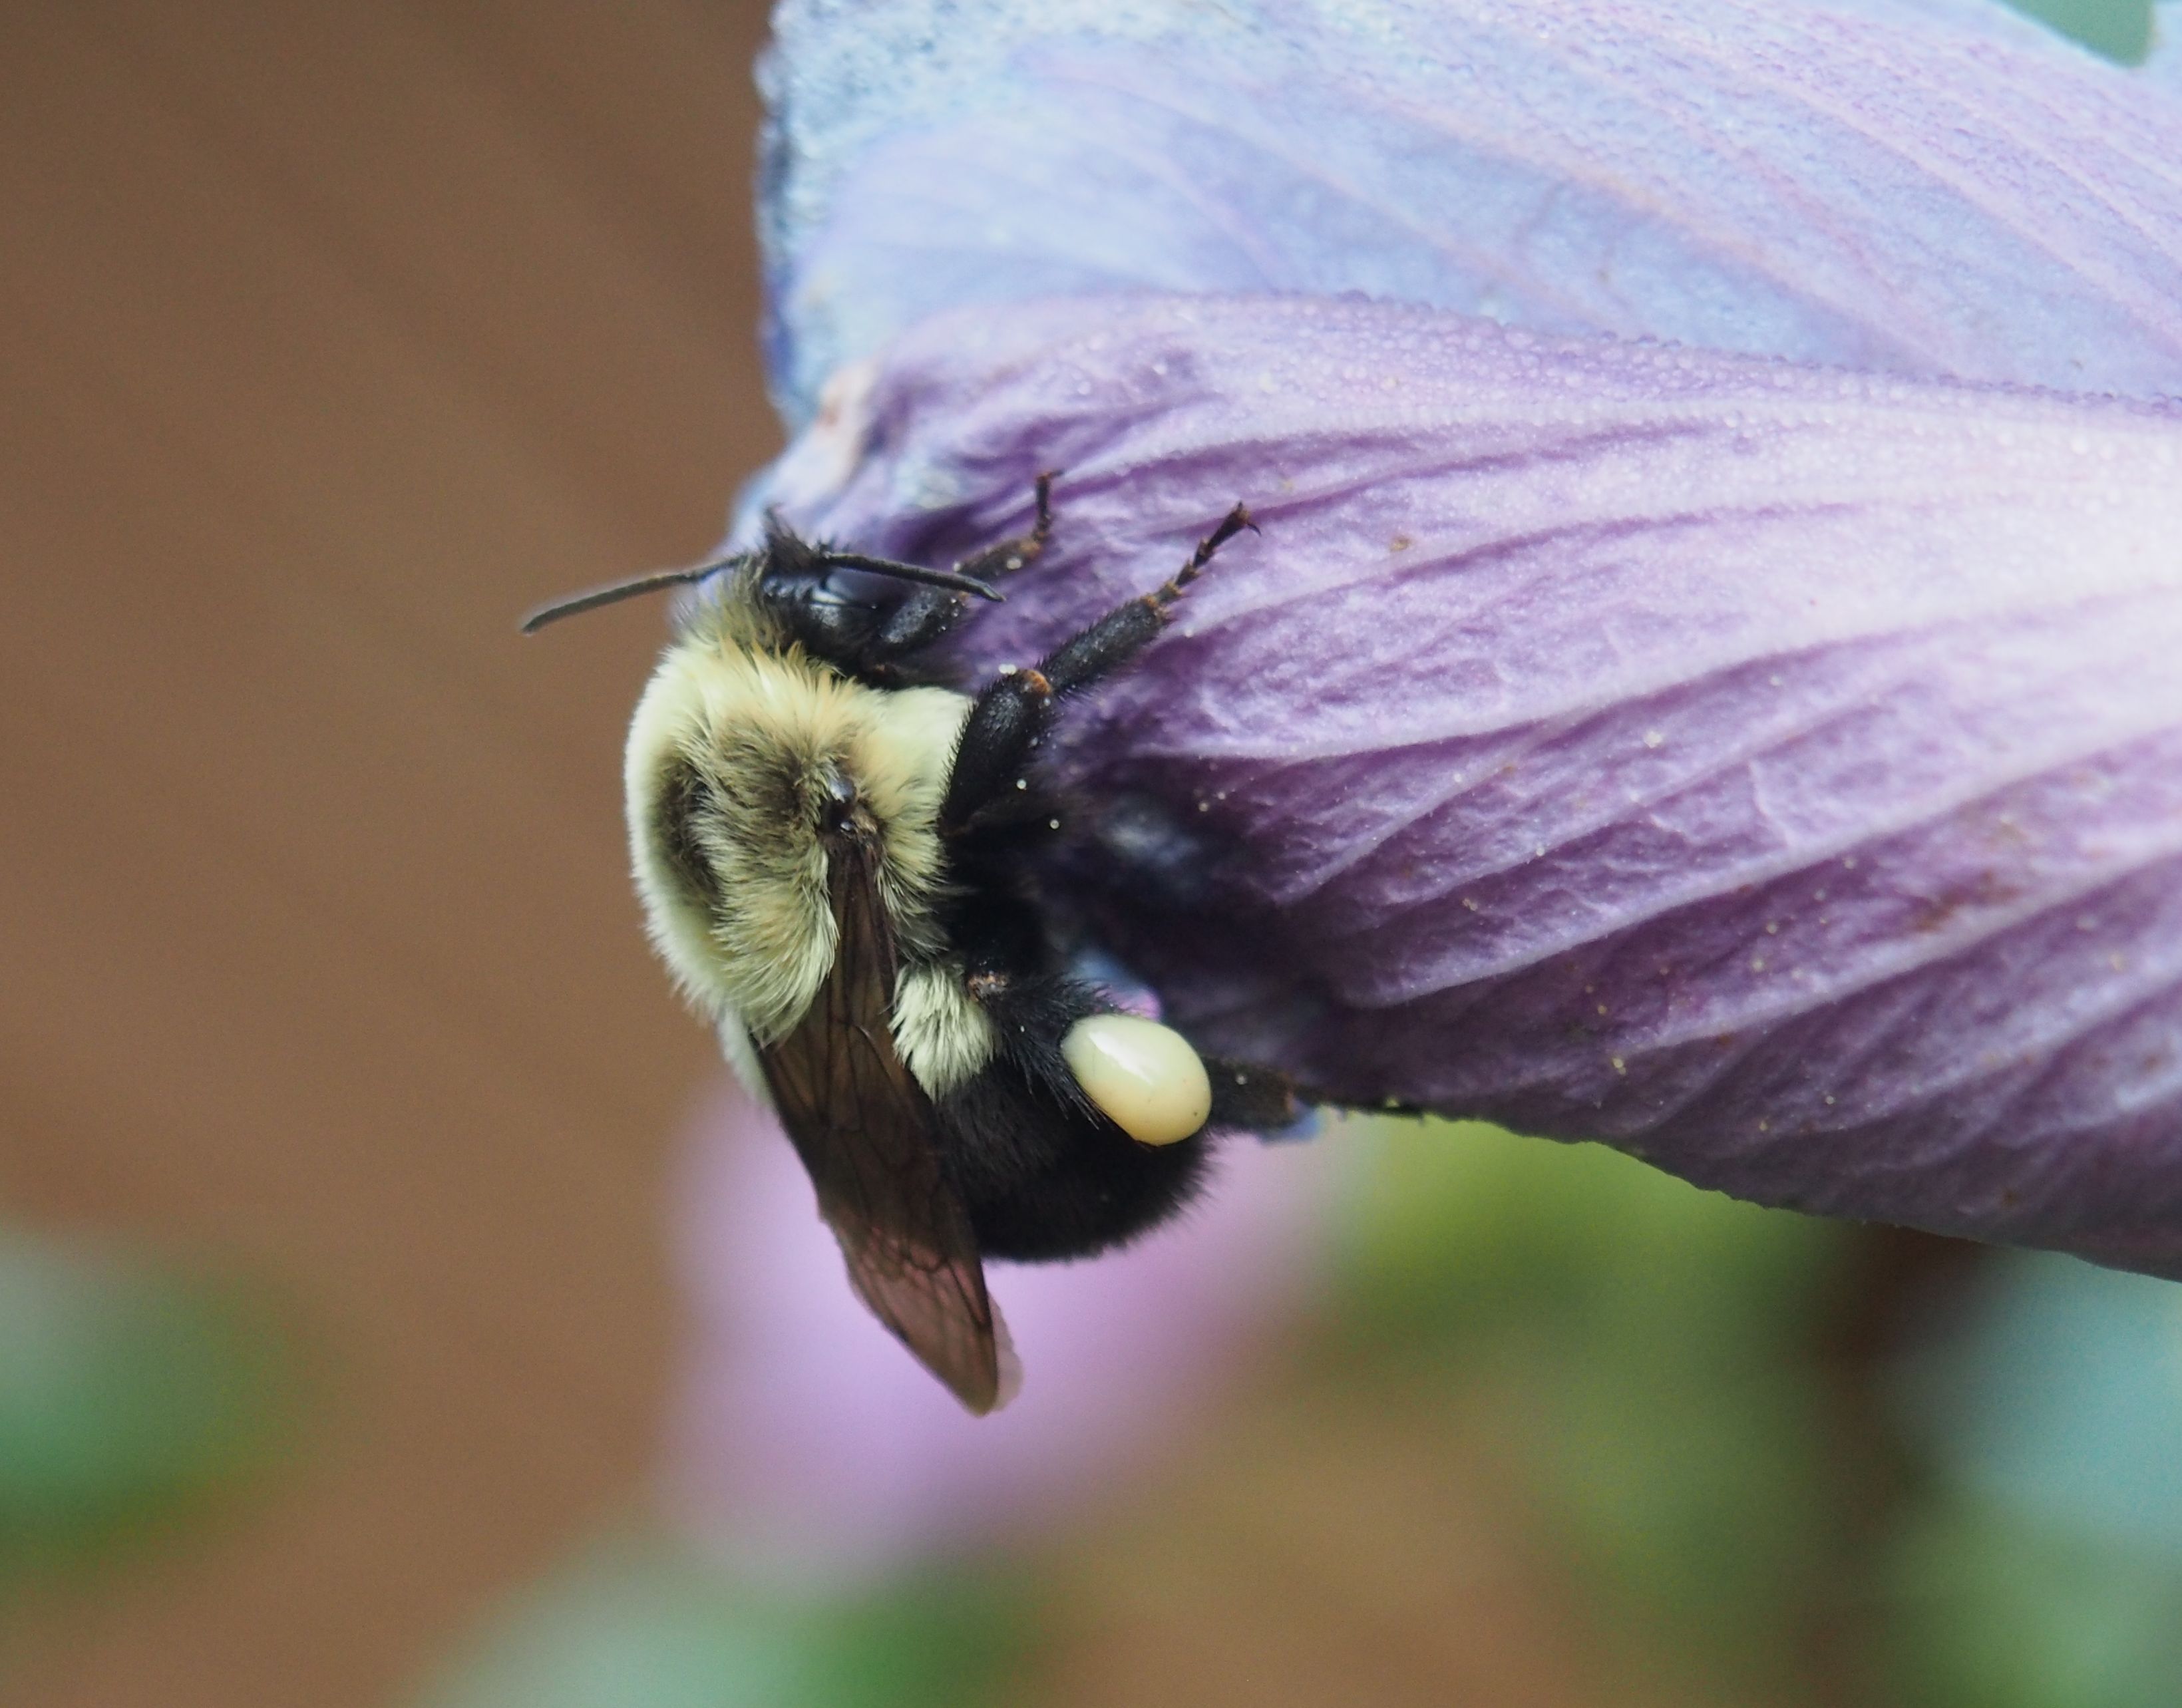
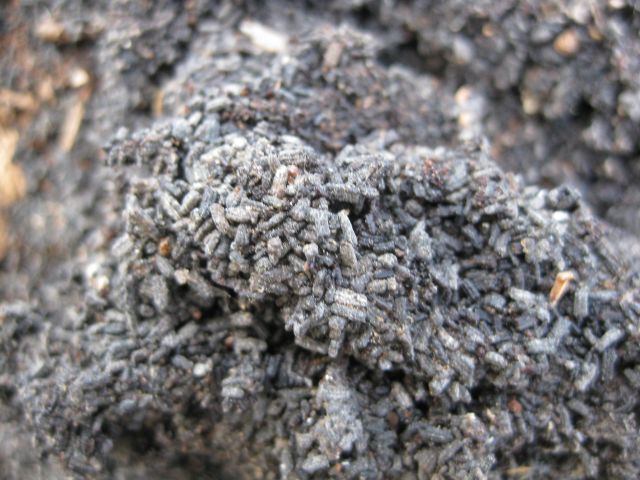
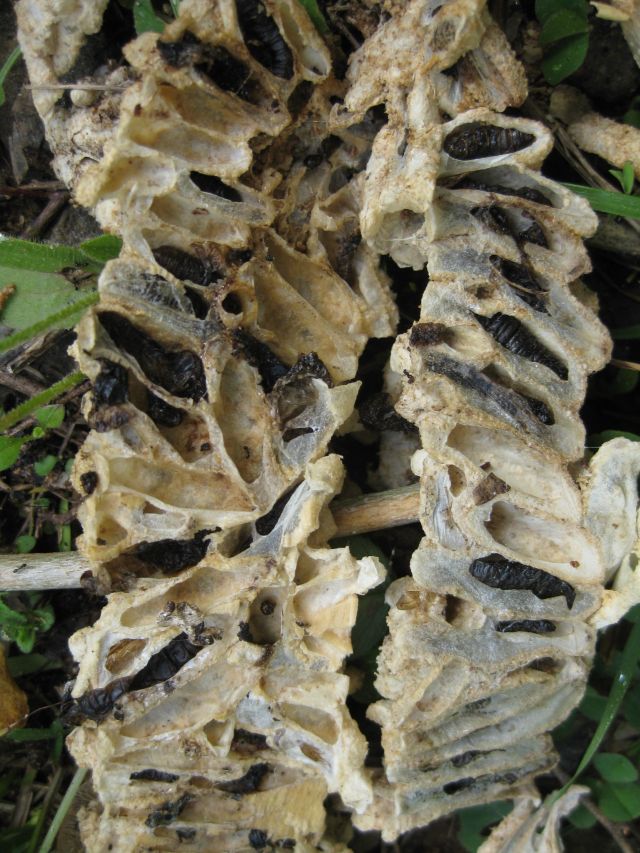
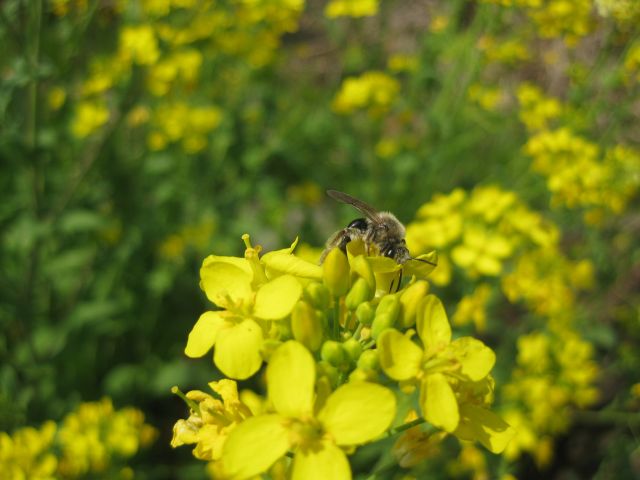
After removing one limb and spraying my handsaw with alcohol and then oil, I decided to apply a neem treatment to the wound.  Some 5 paces from the tree I was stung twice successively with little yellow buzzers chasing after me as I took off.  With more control and presence of mind,  I may have paused to observe if these were bees or wasps, but when you are attacked, the first instinct is to get away.   noticed a stinger on my arm and thought they could be bees since wasps don’t leave a stinger.  I put on my bee suit and went back to the assault location.  After a short while I saw bees going into and out of an underground location.  I must have stood on the entrance.  Armored with bee suit and gloves I sprayed the cherry tree  wound with the neem and will watch developments with interest while treading carefully.  And the bees I will leave – good luck to them, and they may provide the drones to fertilize my next queen.   And with close on 3 gallons of honey  harvested in August, I am good until next year.

Postscript – after more thought I decided that the little yellow insects were not honey bees and they were a risk to me or any visitors.  One of the stings I received, tho not much swelling, nonetheless entertained me between 2am and 3am the next morning.  So I determined to eradicate them which I did early one morning, regretfully.

what’s coming in

Before the harvesting roundup I must return to my favorite – the industrious bumblebee.    The Rose of Sharon, hibiscus, thrives alongside the deck and each morning their pollen offerings bring in the bumblebees.

pollen covered worker

They scramble deep into the flowers and their activity sprays the air with pollen which bespeckles them.

OLYMPUS DIGITAL CAMERAAnd they load their saddlebags with food.

OLYMPUS DIGITAL CAMERAMuch as I like my honey bees and appreciate their excellent honey, the bumblebees cannot be supplanted in my affections.

The tomato season will soon end.  What a luxury it has been eating delicious tomatoes at every opportunity specially tomato, cucumber and onion salad seasoned with vinaigrette.  And tomato sauce is in the freezer for the winter months.  A favorite in this region, but perhaps less well known elsewhere, is okra.  Best to pick them when small and they can be eaten off the plant or we grill them since we are not into frying.

some of these okra were picked too late, but the smaller ones were delicious

My apples are staggered throughout the season and there is always a tree with offerings, though up to 50% must be shared with the smaller apple lovers.  The one fruit tree which to date has been complete immune to pest pressure and which provides the best fruit of all is the Giant Korean Pear.  Unlike the regular pears which are soft and sweet, this has a firmer texture and a haunting delicate sweetness.  The pears are the size of baseballs and weigh around 1lb each, as shown below.

Giant pear on the scales

The pear tree is modest sized and provides about 20 pears a year, but they are all delicious.  The corn was disappointing probably because it was the first time I had grown corn in the area and I had under watered.  Cucumbers were delicious, the beans are still coming in, and a pleasant surprise has been the carrots which took their time to appear on the scene.  Unusual have been the purple carrots which I understand was their original color before they were re-colored for the House of Orange.  Next up will be the muscadine of which the scuppernong is the sweetest and most delectable.  And now too, my thoughts turn to fall planting and I am preparing the beds and provisioning the seeds.

late freeze, black locust, a broody hen, frass and swarm lure

The average date for last spring freeze where I grow  should be after March 30 and before April 10 based on a map provided by the National Weather Service.  On April 16 the temperature in our area fell to 30 deg F and caused some damage.  The potato plants suffered – the volunteers on the ground surface were almost wiped out –

freeze damaged potato plant

While the potatoes I had planted in a trench had less extensive damage –

potato plant in trench showing some freeze damage

I was concerned about my apple trees some of which are in blossom but they seem fine –

this apple blossom a couple of days after the freeze was unaffected
and this apple blossom seems happy too

But there were many signs elsewhere of freeze damage such as kale plants showing whitened or yellowed leaves.  My pears and peach had already blossomed and set so they were past danger.

usually my peaches are nailed by late frosts/freezes but this time the freeze was too late and this will be a peach in the summer

And my blueberries appear unaffected, tho some gardeners in Atlanta complained of damage.  And my muscadine are now accelerating growth.

muscadine are hardy, greening well and with long growing horizontal roots seem to do well anywhere in this area

Black locust

A couple years ago I bought Black Locust seed and germinated 10 seeds.  I decided a few weeks ago to transplant the saplings to my orchard where I am increasing the diversity.  The roots fix nitrogen and the tree is popular with bees.  There must have been 100 seeds in the packet I received.

my source for unusual seeds including recently 3 varieties of Amarinth, and stinging nettle,quinoa and
my source for unusual seeds including recently quinoa, stinging nettle, epizote and 3 varieties of Amarinthe

I decided to try germinating more black locust since I have spots on the hill which I seldom visit where they will thrive.  The “seldom visit” caveat is important – they have nasty thorns as you can see on this young specimen.

Young black locust with thorny protection

Broody hen

I have kept chicken for several years but this was my first encounter with a broody hen.

broody hen
broody hen

She refused to leave the eggs she was guarding, pecked sharply, fluffed out her feathers and made an unusual warning sound.  I was undecided what to do.  Part of me recognized this is natural and far more natural than incubating the eggs which I have done successfully on two occasions.  But there were other considerations.  When I incubated the eggs four viable chicken of which one was a rooster, were produced each time.  I was lucky there were only two roosters and doubly lucky that a nearby farm agreed to take them  both and I now see them in the field whenever I drive past the farm.  But what to do with more roosters?  Our one rooster takes good care of his 10 hens and a 2nd rooster will create considerable stress as occurred previously.  A second factor is the hen is the daughter of the rooster and the eggs she was sitting on were hers or her sisters so with this inbreeding there is an increased likelihood of non viable chicken.  In the end I removed the broody hen from the 5 eggs she was guarding and cracked them open over the compost heap.  Four of the 5 eggs would have produced chicken – my bad – I should not have waited as long as I did.    I temporarily separated the broody hen but as soon as I released her she gobbled down some food and headed to the nest box to sit on more eggs.  I shall have to keep an eye on her and remove her from the eggs each day until the habit is broken.

Other hen news

Two of the hens are fliers and wanderers.  They have discovered the grass is greener on the other side and they regularly fly over the 5ft fence.  The first to do so was the black hen who we call Wanda being a wanderer and the second is named Randa.

Wanda and Randa
Wanda and Randa

The cold weather did not affect the chicken except that the points of the rooster’s comb turned black.  I massaged them with vaseline – since he has fierce spurs you have to grab him quickly when he is eating and grip him between the knees – he seemed to appreciate the ministrations and quickly forgot the indignity when released.  When spring arrived the black tips either fell off or were removed by one of the hens.  He now has a rounded comb.

rooster with rounded comb

Frass

Frass is poop of insects.  In this case the larva of the wax moths which colonized the honey frames I put into storage.  I had placed the honey frames in contractor grade black bags securely tied.  Didn’t help.  What I should have done was to freeze the frames and then place in storage – next time.  The black bags were ripped in many places and the wax on the frames mainly gone and replaced with black frass on the lowest surface.  The frass I collected and added to the compost heap, maybe it will do some good there.

frass
frass derived from wax and honey

The frames were covered with cocoons and in each one there was a black slug, maybe from the larva as it grew – reminded me of a belt for machine gun bullets.

underside of larva cocoons scraped off my honey frames

I removed the plastic foundation from the frames and spent considerable time scraping and scrubbing them clean.  I decided to discard some of the badly damaged wood frames.

I used a salvaged deep, 9 frames and foundation to make a swarm lure hive.  I bought swarm lure last year and had a couple surplus refrigerated vials.  I added the contents of one vial to a small piece of paper towel inserted in a small ziplock bag held open by a stone at one end.   Hopefully this hive will attract a swarm.

swarm lure hive on a deck away from humans

at last some growing activity

The occasional cold temperatures in March dissuaded the plants from growing.  This was evident from an experiment with peas.  I moistened the peas and those which appeared to be growing the fastest I planted outdoors and  the remainder I planted in a soil container in the greenhouse.  Until a week ago very few of the peas planted outdoors had broken surface.  Those in the greenhouse grew steadily.  Today I transplanted the greenhouse peas.

the pea plant on the left was planted in March, on the right are two siblings from the greenhouse planted today

Of course the daffodils are out and my comfrey plants have surfaced from the root fragments I planted in December.

the comfrey is the small plant to the left of the apple tree trunk

The pear and peach trees are the first to blossom – here is a well bedecked pear tree.

white blossomed pear tree

A couple days ago I again sprayed the trunks of the fruit trees, but not the blossoms, with neem oil and will keep a good look out for pests.  I probably mentioned that my bees survived the winter.  They are now very active together with many other types of pollinators.

busy bees arriving and departing

The precocious kid next door looked at them and said “buzzy bees” and then with a smile looked at me and said “get it?”  Some of the greens are flowering.

a mass of yellow flowers beckoning pollinators

And if you step closer you see the pollinators.

a bee at work
a bee at work

The spinach, kale, mustard and garlic are now beginning to grow.

spinach kale and garlic are stepping up,  all are transplants
spinach kale and garlic are stepping up, all are transplants

Of the vegetables seeded this year, the radishes are doing best.  Here they can be seen with yarrow and some daffodils to add cheer to the scene.

a sparse array, though many other vegetables such as lettuce and collard have now germinated in the soil

Last year I grew yarrow from seed and it did so well in January I took root segments and planted them in each of the raised beds.  They have all surfaced and are growing well.  Plus the many onion bulbs I planted out in January.  I will replant the daffodils.  A big annual event for me is releasing the ladybirds.  For whatever reason each year they hibernate in the one bathroom – they disappear in the crevices and then suddenly one day, there they are.  I collect them by tipping/knocking them into a yogurt container and then I cap the container and walk them to the vegetable area.  The photo below is horribly blurred but I kept it since it records the date the ladybirds arrived – all of them within a two day period.

some of the ladybirds in a yogurt container

I made 5 trips and with approx 20 ladybirds in each container, I guess I added 100 beneficials and I was pleased to see one of them this morning sunning on a leaf.

I built a large compost heap this year from approximately 200 leaf bags.  I previously commented that I have too much brown and too little green ingredients, so I added horse manure which comes with straw to help balance it out.

assembled compost heap - it should be ready by August and then look like the finished heap at the end
assembled compost heap – it should be ready by August and then look like the finished heap at the end

And the chicken are producing – an average of 8 eggs a day from 10 hens two of which are seniors.   Two of the younger hens frequently fly over the paddock fencing to explore and feed.  Today I noticed Wanda (abbreviated from wanderer) had discovered the compost heap.  She is the daughter of our Buff Orpington rooster and her mum is a New Jersey giant.  The only trace of dad is the gold coloring on her neck.

Wanda the wandering hen


some winter tasks

charging the Takeuchi

After some cold nights (12 below freezing) my Takeuchi bobcat refused to start.  Cold and tired battery.  The best way to charge the battery is to pull the cab forward on its hinges and then you have direct access to the battery.  It is heavy and best done with an assistant.  In the past I had an anchor point in front of the Take and winched the cab forward.  However, there was no anchor point for the Take this time just a 2,400 gal rainwater tank.  The last time I had no anchor point I attached the negative charging wire to the body and the positive to a nail which I inserted into a slot in the fusebox.  I really didn’t want to do this again.  So I pondered and created my own anchor point.  I found an 8ft fence post, located it between the loader and the body of the Take, attached a hook and winched the cab up.  Effortless and the charging was uneventful.

raising the cab of the Take

work in the orchard

This year, for the first time, my first row of apple trees produced apples but the second row which is nearest my neighbor’s fence did not, and the trees appeared lackluster.  I diagnosed this to competition from vines, shrubs and small trees, some of which have thick roots 10ft long which have been out competing my apple trees for compost nutrients.  I am avidly reading The Holistic Orchard by Michael Phillips in order to thwart the pests that nourished on many of my apples.  He makes the interesting point that wood chips from hardwood trees create beneficial fungus for fruit trees.  So I have worked hard to clear the growth between my trees with an eyehoe (what a wonderful invention).  I then spread manure from the stables, layer newspapers thickly and now, with my Take recharged I ferry loads of woodchips and dump and spread over the newspapers.

mulching the orchard

When the orchard is respectable I will bring in a flock of helpers to scratch and turn up over wintering pests.  A couple years ago I improvised a simple chicken shelter which has a couple of nestboxes and I will clean it up for my chickens.

simple chicken shelter in the orchard

water and nutrient infiltration

I dug a trench alongside part of the orchard to capture and infiltrate rainwater run off.  I am now filling it with hardwood (mainly) logs, the idea is that the wood will decompose and the nutrients and fungi will benefit my fruit trees along the lines suggested in The Holistic Orchard book (and will also physically block the growth of tall weeds in the ditch).

various logs stacked in the rainwater ditch

clearing the slope bordering the vegetable growing area

My main vegetable growing area is fenced in and along the southeast border a thicket of privet and briar sprung up over the past several years.  I tolerated the growth since I reasoned it provided vantage points and shelter for insect loving birds which were helping me control pests in the vegetables.  However there were two problems – a) the roots invaded my raised beds – there is one type of small tree which has very long wily roots which evaded all my attempts to obstruct it; b) in the winter, when sunlight is dear, the wild hedge blocked the sun from my frost ridden beds.  So I worked hard to cut down and remove the growth and have been chipping away with the chipper, carried and powered by my tractor.  This mulch I have also been adding to the orchard.  Some chipping remains and when the clay soil has dried I will bring out the tractor again and chip away.

some of the small trees awaiting chipping in the foreground and the fenced growing area at the top of the slope

winter hive protection

My bee hive faces south.  Chilling winds tend to come from the west and north.  On the west side I have a window which allows the sun but not the wind access to the hive, and on the north side I have plywood protection.

the sheltered winter protected bee hive

how the clover fares

I recently installed a 20ft by 4ft raised bed and sowed half of it with crimson clover and the other half with white (ladino) clover.  The crimson clover is larger but both seemed to germinate equally well.  However, following the recent cold, the ladino clover almost disappeared while the crimson is holding on well.  Will be interesting to see how they comparatively perform in the spring.

the crimson clover is on the left of the divider and the barely surviving ladino clover is on the right

veggies for eating

.I am not using crop covers right now and my collard and turnip and mustard greens are surviving, tho at time the collard looks a little bedraggled.

tasty collard for the picking

A tasty (and healthy) dish is newly hatched eggs (yes my younger hens are laying in the winter without artificial lighting), collard, greens and garlic stir heated, eaten with home made whole wheat bread.


lots of winter greens which keep growing in the winter

So these are some of my winter tasks.  And on the inclement days, Coursera, the free online college course compendium, awaits.  I just completed calculus, precalculus and a fascinating history on mankind from 250,000 years ago to the present.

2 good talks – EpiPen and chestnuts

Bee Stings & Allergic Reactions

Last Thursday was the monthly meeting of the Cherokee Beekeepers’ Club meeting and the speaker was a MD who specializes in medical emergencies and is also a beekeeper.  Well qualified in all respects.  He outlined the differences between a local reaction to a bee sting (swelling, pain, redness) which is normal; a large local reaction where the symptoms persist for up to a week; and an allergic reaction of which anaphylaxis  is the most serious and is life threatening.  He said less than 5% of allergic reactions are anaphylaxis, that less than 50 people die each year from bee stings and for most this occurs within 30 minutes of being stung and usually from asphyxiation from swelling of the breathing passages.  He outlined symptons and treatments and when and how to use epipen.  Cost without insurance exceeds $300 and with the right insurance may cost approximately $30, it requires a prescription and expires after 1 year but has some efficacy thereafter.  There were a lot of cautions and good advice including the difficulty of distinguishing between a panic attack and a serious allergic reaction. This for me was the most interesting part and he brought a practice epipen syringe which I tried out and heard the click as it pressed into my thigh.  His key take aways were to remove the bee stinger as soon as possible by scraping not gripping, to stay calm and not panic, and to get to the emergency room as soon as possible.

the American Chestnut

Friday evening was a cocktail reception and talk by the southern science coordinator of the American Chestnut Foundation (“TACF”).  I arrived early at the Kendeda Center HQ of Trees Atlanta, which is south of downtown in an area which during my London accommodation hunting days would have been described as “not salubrious”.  The premises however are impressive – about 30 varieties of trees planted around the car park which you are challenged to identify, large rainwater collection tanks, water infiltration techniques and a large well equipped building.  I found some like minded guys and had good discussions.  A spirited anti-exotic animus prevailed and I was encouraged, and have now ordered, the book by Tellamy “Bringing Nature Home”.  After the reception we settled in the auditorium where the speaker passionately outlined the history and attributes of the American chestnut and the program the past 30 years to develop a blight resistant American chestnut.

Until 100 years ago the American chestnut dominated the eastern forests and accounted for up to 40% of the canopy.  Fast growing up to 100ft high and 5 ft diameter (though up to 10ft diameter could be achieved), a straight, rot resistant, light weight valuable timber trees for siding, split rails, shingles and furniture.  It was a large annual producer of chestnuts (mast) for wildlife and humans.  with apparently three times the mast of oak trees.  Plus the chestnuts could be ground to flour for bread making.  The iconic chestnut was to the east as the redwood is to the west.  The blight from Chinese chestnuts arrived in NYC in 1904 and by 1940 in Georgia, and wiped out about 4 billion chestnut trees.  Because the wood is rot resistant the stumps persisted and continue to produce sprouts, which die after a few years when attacked by the blight.

The TACF was founded in 1983 and the approach is to transfer the blight resistance of Chinese chestnuts to American chestnut trees by using the backcross breeding technique where you keep the American chestnut phenotype (physical characteristics) but breed in the blight resistance of the Chinese chestnut.  An objective is to have diversity in blight resistance strains so as the blight changes the trees can respond.  The Chinese chestnut is low and sprawling like an apple tree and quite unlike the tall straight limbed American chestnut.  The speaker showed a picture of himself in a bucket truck manually pollinating trees.  There are TACF chapters in 21 states and trees are grown in 300 orchards.  The “Restoration Chestnut 1.0” has at least moderate blight resistance and is being planted out in national forests and strip mined areas.  The hope is it will have enough resistance and sexually reproduce.  Work is continuing to develop an even better chestnut.  8,000 trees have been planted out which is a significant but small step to achieving their goal of re-establishing the 4 billion trees which once existed.  The speaker now works in Georgia which he says is one of the best chapters (maybe this was a comment just for our ears only) and he said an additional challenge in GA is developing chestnut resistance not only to Chinese blight but also to a root rot (phytophthora ) which occurs in clay soils such as found in middle and south Georgia.

If one joins TACF and makes a $300 donation you receive 5 Restoration Chestnut 1.0 seeds/seedlings.  For successful growing the site must be well drained, good sun, a deer fence and you must irrigate, monitor for beetles and voles and manage weeds.  And with some luck you may have an American chestnut.

harvesting an oak tree and growth rings

I really am not into cutting down trees gratuitously, especially not an oak tree, which is one of my favorite trees.  When I made a road through the woods I selected a path which would require the fewest and smallest trees to be removed.  But this week I needed wood posts.  I did not wish to purchase the treated 4″ by 4″ posts because they are loaded with preservatives which will leach and be absorbed by the roots of my fruit trees, vines etc.  Composite posts deform and are expensive.  Even cedar posts rot over time.  I concluded oak posts should hold their ground for several years, which is all I need at this time.  But which oak tree to cut.  Unusually, several oak trees have two trunks from the same base.  Eventually the tree may split.  It seems to incur little sacrifice to cut one of the trunks, the one which appears less vibrant.  Then the root structure can feed the surviving trunk which will put out branches on the side where the other trunk stood.

mid sized oak tree
twin trunked oak tree with left trunk removed at point where trunks met

It was quick work to cut down the one trunk and then slice it to leave a main trunk and six 8 foot length future posts.  Plus the branches will dry and provide good firewood.  The main trunk is too large for a post and I ordered shitake inseminated dowel plugs so I can have shitake mushroom logs.  I have been very successful with shitake growing from oak logs.  Some of the posts will be used to carry the trellis for my kiwi vines which I recently planted.

oak tree offcuts
products from the oak tree – the trunk on the right will make shitake mushrooms, the 6 8′ posts will be used for trellises and the branches on the left cannibalized for firewood

And there is always a use for oak posts.  My first beehive is well protected from winter winds but my second beehive needed protection.  With my clam posthole digger I dug 3 2 foot holes and grounded 3 small diameter oak posts to which I attached a surplus window for west wind protection yet still providing setting sun exposure, and a primed plywood rectangle for north wind protection.  My woods provide a windbreak to the east and I leave the south side open for the south facing entrance and because winds from the south are less common.

oak tree posts to support beehive protected sides
#2 beehive with west facing window and north facing plywood protection from winterly winds held in place by oak tree mini posts
winter protection held in place by mini oak tree posts
#2 beehive seen from east side, the three small diameter oak tree posts sunk 2 ft into the ground are clearly visible. also a strap to protect against upheaval from nocturnal visitors

I happened to notice the growth rings on the stump of the oak tree and this got me thinking as to why there are growth rings.  I know about heartwood and sapwood – the heartwood which is at the center of the trunk is darker in color (from accumulation of compounds), provides structural support and no longer transports water and the lighter colored sapwood conducts water.

face of oak tree
heartwood, sapwood and growth rings on trunk of oak tree. I must still saw the face smooth and at an angle to shed rain

But what causes the growth rings which are the alternating bands of light wood and dark wood.  The light ring is produced by large thin-walled cells and the dark ring by small, thick-walled cells.  The large cells are formed during the rainy season when the cells grow and the small cells during the period of dormancy or no growth.  Dormancy occurs during the winter in cold climates and during the dry season in tropical climates.  I suppose if it rained evenly throughout the year you would not get growth rings?

unwelcome sight – upset bee hive

I inspected the bee hive last Sunday and on Tuesday I happened by and quickly glanced at the #1 hive.  I kept on walking and stopped as my mind deciphered the image – the hive had been attacked.  This is the first time it has happened.  The hive cover was on one side, the top super was on the ground, the second super half way off, a frame on the ground and the deep slightly askew on the bottom board.

dishevelled bee hive
the bee hive after the attack. the wooden frame around it is stapled with plastic in the winter to provide additional protection from the wind and elements

I studied the frames – no honey had been removed.  The bee hive boxes were undamaged and there were no claw marks.  Was it human or animal?  If human, since no honey was taken this must have been a prank.  But unlikely to be human since the super on the ground was upside down and a human presumably would have picked it up and placed it down right side up.  More likely an animal.  But why?  It it was after the honey why didn’t it take any – unless the bees drove it off?  So a mystery.  I reassembled the bee hive and hope the queen is ok.

I mentioned in my previous post that goldenrod and prairie fleabane (member of the aster family) are blooming and a bee favorite.

bee like fleabane
fleabane – the head of the flower is comprised of lots of little daisy like flowers
fleabane a bee favorite as well as others
here is a visitor who in one day removed half of the flowers above it

And the goldenrod is a hot favorite for wasps.

a bee and wasp favorite
a wasp visiting the goldenrod

And of course for the bee.

goldenrod visited by a bee
a bee takes last opportunity to gather food before winter

Fall inspection of the bees

In Cherokee county bees attract a lot of interest.  I attended the beekeepers’ monthly meeting last Thursday.  We are fortunate to have a commercial beekeeper as our coach and guru.  I had missed the previous month’s meeting where they discussed inspecting for mites and chemical treatments.  The meeting last Thursday was about Fall inspections and feeding.

First as to mites – most of the attendees were doing sugar dustings and mite counts -you sprinkle sugar on the bees and they vigorously groom themselves and each other and the mites fall onto a sticky board at the bottom of the hive and you count them and decide whether chemical treatment is necessary.  Seems like most were applying chemical treatments in any case.  Now I am still a beginner beekeeper –  I think I have graduated from “novice”  since I have kept the same bees (or rather their descendants) going since early 2010.  And from philosophy or laziness I don’t count mites or do any chemical treatments.  The philosophy springs from the belief that intervention usually causes more harm than good.  I had some mishaps with some chicken where I tried to help and believe I exacerbated the situation.  Even humans (if newspaper accounts are accepted) occasionally/often experience setbacks in hospitals from mishaps.  As for bees, I think the lesser experienced of us can harm the queen and upset the equilibrium each time we intrude in the hive, even though with the best of intentions.  I think the vigor of the bees and their  ability to resist mites etc. is weakened by the poisons we spray in the environment, the poisons we treat them to make them stronger and the stress we create when we open the hive and disturb them (though I have often opened the hive for cursory inspections and not disturbed them at all).  I grow organically, my immediate neighbors don’t spray and my bees have been doing fine, though our guru told me it is just a matter of time until the varroa mites and other dreads afflict me.

As for the feeding.  Most of the attendees were feeding their bees with sugar mixed with water.  Our coach asked who wasn’t feeding their bees and no one raised their hand and I didn’t, since I don’t want to appear controversial.  If the bees have no food then now is the time to feed them since if you wait until temperatures fall below 47 degrees it will be too cold for the bees to feed on their sugary liquid food.  So you feed them now and they store it in their cells and they partake of it during the wintry months.  I don’t feed my bees – if I want them strong and healthy for the tough winter months they will survive much better on their honey than on sugared concoctions – after all that is why they harvest the honey in the first place.  However, after all the dire warnings issued at the meeting and given that bee mortality over winter is high (around 30% I think), I concluded that I should take a look at my bees.

The last time I visited the bees was on July 29 of this year.  I am certain of the date since I harvested about 4 gallons of honey from my # 1 hive (34 bottles all lid marked “072912”, nominally 12 0zs but filled to the top, say 15 ozs each = 510/128 = 4 gallons).  It was my third harvesting in this year from the #1 hive.  My #1 hive consists of a deep and two half deeps and I left 4 half frames for the bees expecting they would have sufficient time by summer end to replenish their supplies.   During the July harvesting I also inspected my second new hive, which I started earlier this year with conscriptees from the #1 hive plus a new queen bee.  It did not have much honey and, since it was its first year, I decided to leave it be.

This morning I inspected both hives.  Lots of worker bees (phew! not drones which would indicate no queen) and lots of activity.  The #1 hive, disappointingly did not have a lot of honey supplies.  The top super had say 30 lbs, very little in the middle super, and the bottom deep had pollen and brood and some honey.  I decided to intervene and since it will soon be getting cold, I reversed the supers by putting the top super with the honey above the deep containing the brood.

The #2 hive which consists of two deeps is in good shape.  There are 10 full frames in a deep and the top deep, apart from the two outer frames on each side had 6 frames filled with honey.  The bottom deep, again with the exception of the outer frames, had honey, pollen and well placed brood.

Conclusions.  Now we have the goldenrod and aster in bloom and the bees are hard at work.  When the blooms are finished and there is no more food to gather, I shall inspect the hives again and, if the #1 hive is looking thin on the honey side I shall give it a couple of deep frames of honey from the #2 hive.  And hopefully that will be enough to get them through the winter.


while walking

I notice the butterflies love the zinnia plantings in the vegetable patch.

butterfly on zinnia
this large butterfly flies away when I approach but then returns

I have  not lost any more chicken to predators, for which I thank my handsome rooster.  His aggressiveness to some of the chickens seems to have abated.  Here he is with Lady Macbeth, who is still missing feathers from the back of her head, but they now seem on cordial terms.

buff orpington rooster and hen
Buffy the rooster and his sister and fellow Buff Orpington, the Lady Macbeth

And the rains we have fortunately received have promoted sprinklings of mushrooms throughout the woods and perhaps encouraged the turtles to explore their surroundings.

turtle on the move
yet another turtle on the footpath

Finally, I gave some of the wax collected from the last honey harvesting session to my neighbor and she worked some magic and produced a wax cake (or so it looks).  She said she will melt and strain it one more time, perhaps with cheesecloth.

wax from the bees
wax from the bees