Takeuchi electrical problems

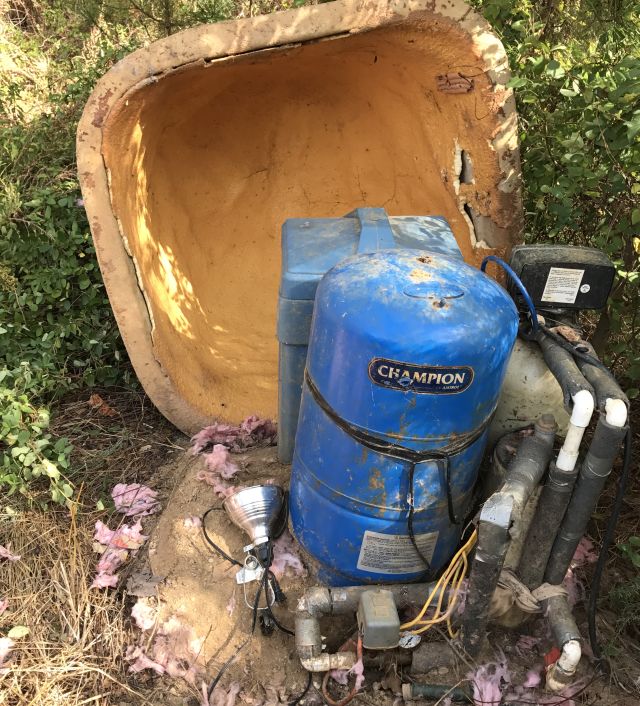
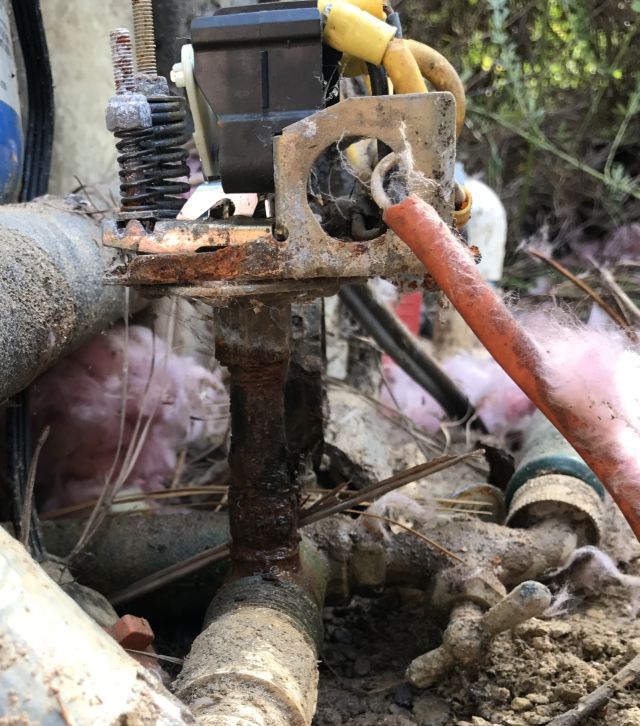
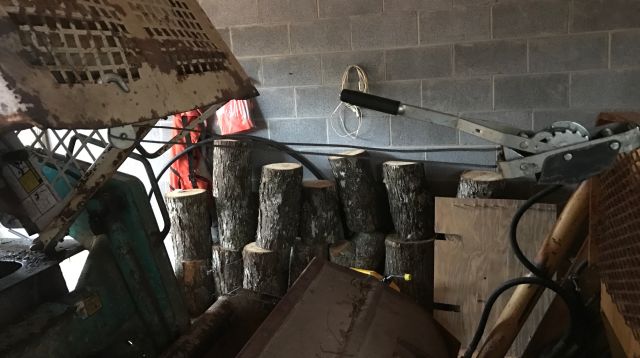
Much time since my last post.  My uncovered greens have held up well through the cold and I have begun germinating tomato seeds.  Read some excellent books and took a MOOC on software design in connection with 3D printing.  And I have spent considerable time diagnosing and fixing my silent Takeuchi TL26 (bobcat).

I don’t use it much but the compost heap needed turning and I wished to grade some ground for additional rainwater tanks,  and it stayed silent when I turned the key.  Not good.

Previously I had looked at the electrical system diagram (wiring diagram) but did not really understand it.  It is one thing to wire components together or replace components (see my posts on replacing failed capacitors), but it is a different ball game actually understanding what’s going on when you turn the key.  So this time I resolved to understand how the electrics for starting the bobcat actually work and to step by step test each link and find out what was wrong.

I write up the whole experience separately on this website – if interested please follow this link

The testing process was a slog in part because of poor testing procedures.  Here I will mention the problem I had testing the battery.

Warning – a friend, who is a former eye surgeon, told me he had many patients whose eyes were damaged by battery acid.  He said an exploding battery is a nasty thing and I should always wear eye protection and keep water nearby for washing off acid.

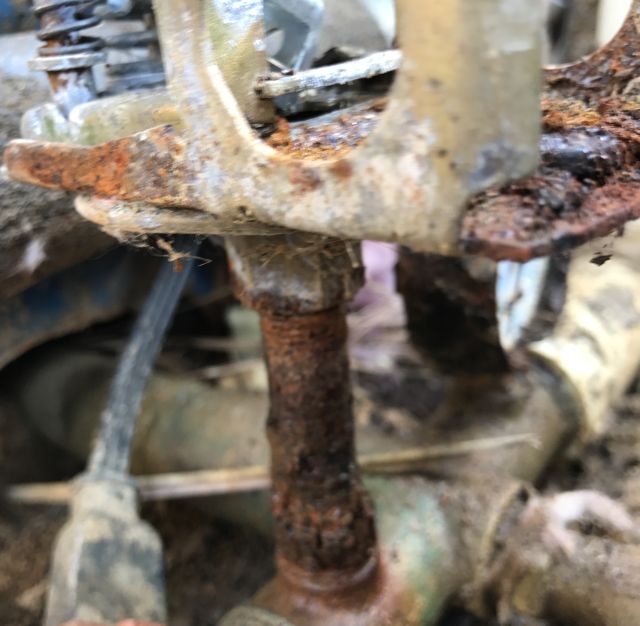
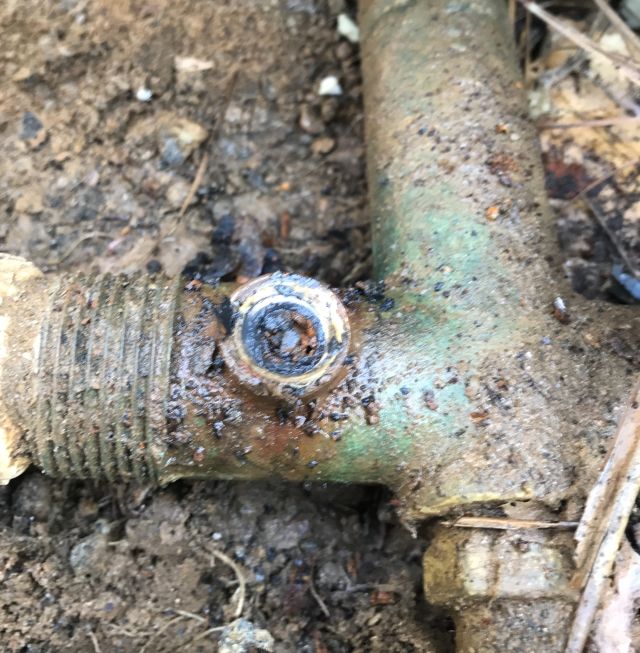
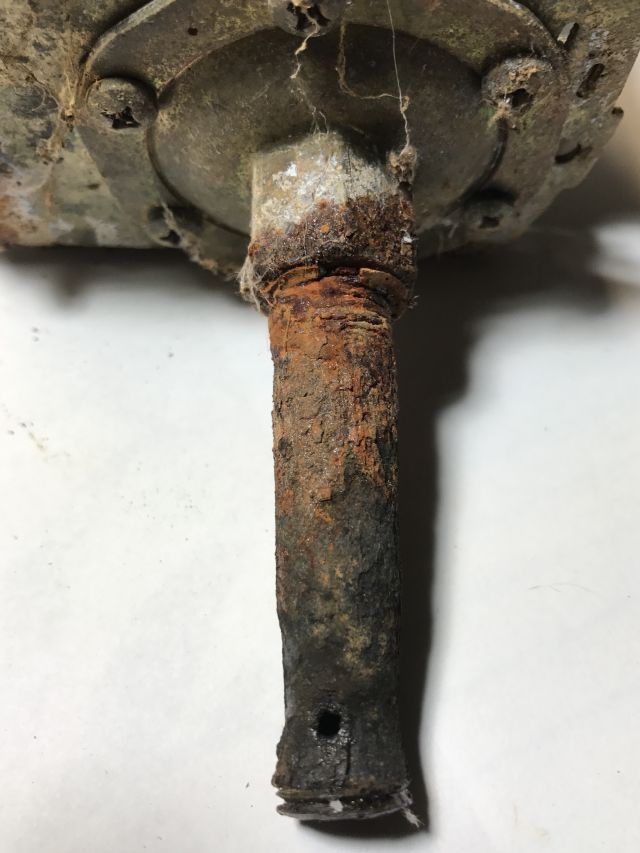
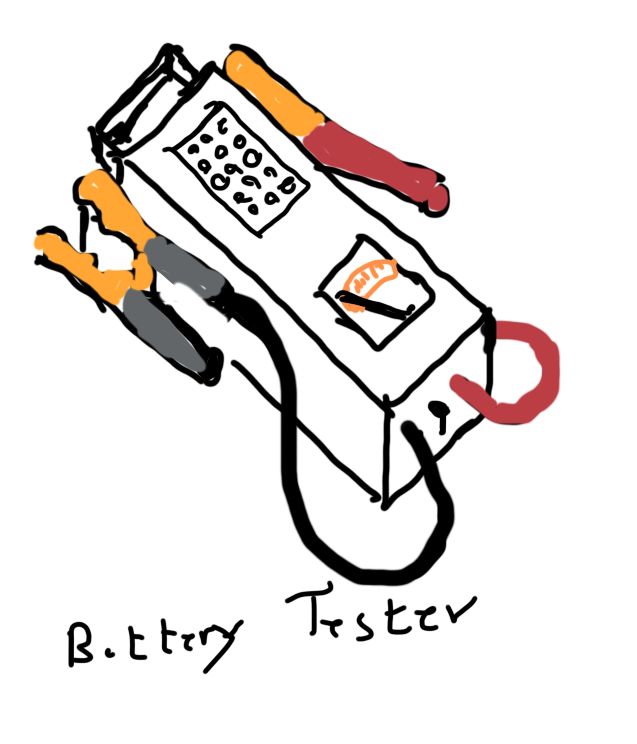
When I pulled the cab forward over the bucket (actually I winched it forward – see photo above), I noticed the negative terminal/post was badly sulphated (covered in white guck).  Apparently a sulphated negative terminal can indicate undercharging by the alternator, and a sulphated positive terminal overcharging – just something I read, don’t quote me.   I was not surprised since I suspected the alternator was not charging properly and had previously resolved to test it, but never got around to it.  I cleaned the ground terminal and charged the battery for a couple of hours.  This is a relatively new battery purchased in second half of 2014.  Then I decided to test it with Schumacher battery load tester – this is the tester with the big battery clamps and you hold the switch toggle on for 10 seconds and it applies a load and you can tell the real condition of the battery.

my Schumacher BT-100

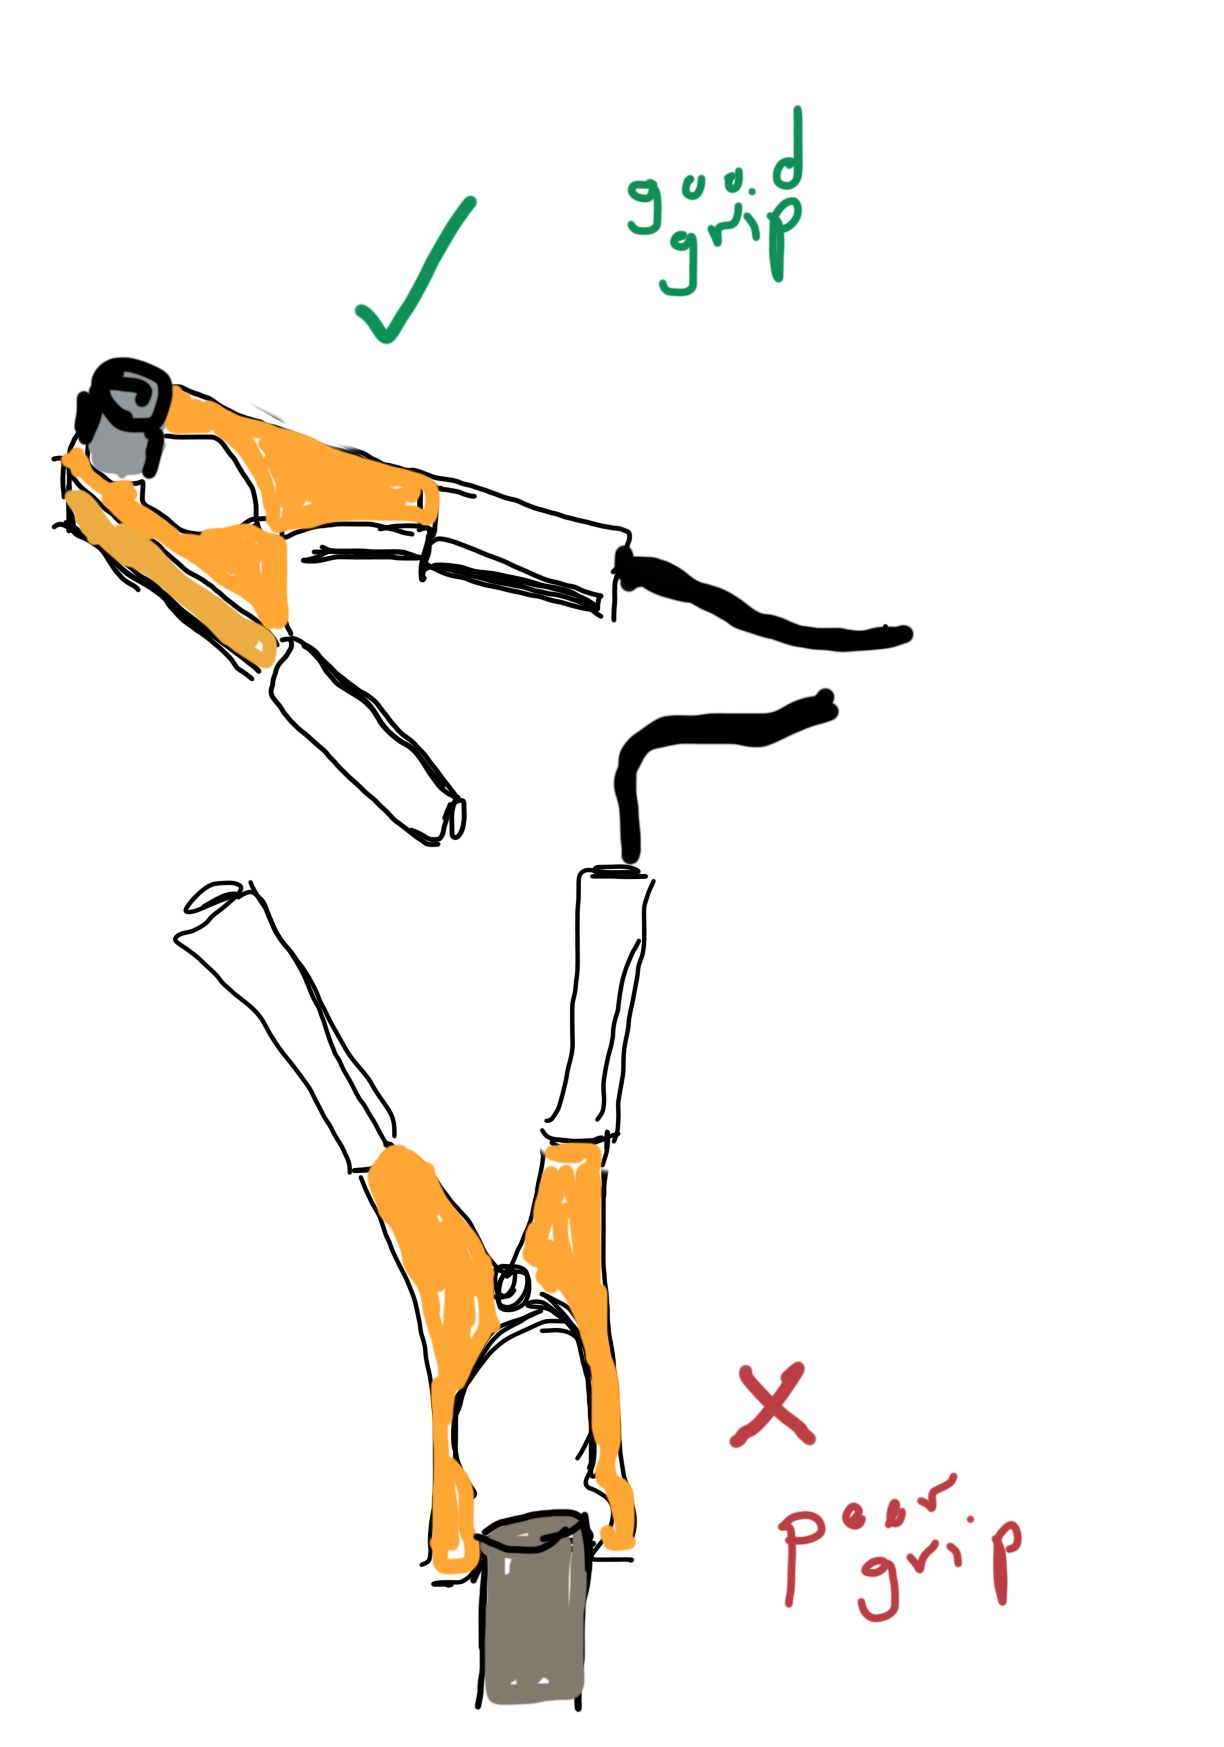
The tester showed 12+ volts before I applied the load and nothing when I applied the load.  I was surprised and hauled the battery out of the bobcat (pulled it forward between the lip of the bobcat and the raised cab, which is easier than climbing into the engine area and lifting vertically) and took it indoors and charged it with a sophisticated charger.  After 1 hour it said the battery was fine.  I tested with Schumacher with 10 second load and it was fine.  Took it back to the bobcat connected the terminal clamps, and no response from engine.  Decided on a hunch to test again with the Schumacher – nothing.  How was this possible?  Removed the terminal clamps and applied the Schumacher clamps directly to the battery terminals – read fine.  So either the terminal clamps were not making good contact with the battery posts or the Schumacher clamps were not making good contact with the battery terminal clamps.  I cleaned the terminals and terminal clamps, reconnected and applied the Schumacher clamps.  Tested fine.  I removed the Schumacher clamps and then reapplied them – nothing.  But now I was concentrating and there was a fizzing/spritzy sound from the Schumacher clamps and the terminal clamps.  So  this was a problem solved – to get a good load test I had to make sure the Schumacher clamps are tightly seated before applying the load.

8 clamp teeth gripping are better than 4 teeth

A long description of a faulty testing procedure.  But I learned.  In the link to my detailed testing you can read how I took several wrong turns as a result of faulty testing procedures.

I should mention that an internet authority recommended 3 battery tests – 1) voltage >12.6v; 2) battery load test (described above); 3) use an electronic battery tester.  So I purchased a Solar Battery Tester (model BA5) and followed the procedures including inputting the battery CCA of 925.  The tester said the battery was fine and calculated the CCA at 830,  which should be more than sufficient to start the engine.  I would have been surprised if the battery had failed since, to my mind, if the battery passes the load test it should be ok for starting the engine.  With 2 testers both indicating the battery was fine, I ruled out the possibility of a bad battery.

what’s growing

It’s December 18, we have not had temps below 20 deg F, and greens are holding up well.

some of the growing beds. the bare beds are planted with garlic

Usually I plant out the garlic cloves in October or November but we had no rain in those months and the ground was dry.  When I returned from Australia and New Zealand early December the ground was moist and it was pleasurable to clear the beds, turn in the compost and populate with garlic.  I have noticed some leaves emerging and hope the delay will not affect their growth.  I used to store the garlic heads in mesh bags in the basement but they became moldy and now I string them together in bundles and store them in the carport and they do fine.

we snip off the garlic heads as needed. garlic grows very well in my area and I am preferring the larger cloves for replanting

Growing well now are turnip greens, purple top turnips, collard, kale and radishes.

no signs yet of cold damage and lots to pick and eat and share with neighbors.  some of the untreated wood sides of the bed are deteriorating and I will replace with composite planks which cost 2x to 3x more but appear immune to weather

Our greens taste like greens should – so much of the store bought stuff is anemic.  I planted out some winter cover in October, not much because I was water constrained, and it too is growing well.

the mix included winter rye, winter peas, hairy vetch and crimson clover

I have not yet added additional storage tanks to harvest surplus rainwater.  So, in the meantime, since my tanks are full, I am pumping the water to the contour ditches and the fruit trees to infiltrate the water where it will be useful.  I am continuing to prune my fruit trees.  The pears have a strong vertical habit and need extra attention.  My Asian pear is my best producer and I deferred pruning in the past since it was doing so well by itself, but today I pruned and then bent towards horizontal it topmost boughs.

you can spot the wires holding the stems in place

And my big project this time of year is to bring in the leaf bags of my Atlanta neighbors.  Leaf fall was delayed and now is busy time.

when I have all the bags I will rebuild my compost heap with help from my bobcat


Australia and New Zealand

I just returned from a trip to Australia and New Zealand.  Perth to attend a nephew’s wedding and New Zealand because a) the cheapest tickets were via Auckland; b) I have never been to NZ.

I have visited Perth numerous times since the 90’s and seen it grow on the mining roller coaster to a significant city.  Australia has also grown and was rated best country in 2014.  As it made more money from mining (iron ore, petroleum, etc.) sales to China  its labor costs increased and manufacturing became less competitive.  Ford ceased production in 2016 and Holden (GM) and Toyota will stop manufacturing in 2017.  It seems that Australia is becoming more dependent on China.  Reminds me of stories of some big farmers – as they chase more revenues, they need more expensive equipment and continuing big harvests and the cost is loss of their resilience and perhaps, independence.

We only had 3 full days in NZ and decided to spend them on the South Island in the Fiordland area.  A fjord is created by glaciers sliding down to the sea and by erosion creating steep sided cliffs.  We flew from Auckland to Queenstown and rented a car for the drive to Te Anau (170km) where we lodged.  Our main activities were to hike parts of the Kepler Track and Routeburn Track, take a nature cruise on Milford Sound (120km from Te Anau) and visit the Te Anau Wildlife Centre.  Tourism is the main revenue generator of NZ and all the tracks and facilities were immaculate and everyone was friendly.

Manuka honey is a big deal in NZ and there were numerous honey stores.  Manuka honey has beneficial ingredients which are assessed by a UMF rating system – so you can get UMF 5+, UMF 10+, UMF 15+ and UMF 18+ with exponential increases in price.

Manuka honey sales
Manuka honey sales

Rainfall in the Fiordland is staggering – an average of 7 meters (about 23 feet) so there is lots of growth in the forests:

deep luscious forests

and rivers to cross:

well maintained bridges and trails

and stupendous waterfalls:

this is much higher than it appears to be

And surprisingly, given the excessive rainfall, there was also a rainwater harvesting system:

the 2 notices read: "Rain water may run out during dry weather." and "Warning! In general the water provided at this facility is clean and able to be drunk without treatment. But users may prefer to boil or treat the water before use, for their own protection."
the 2 notices read: “Rain water may run out during dry weather.” and “Warning! In general the water provided at this facility is clean and able to be drunk without treatment. But users may prefer to boil or treat the water before use, for their own protection.”

In the absence of predators NZ’s bird population became flightless and thrived until, with humans there also arrived stoats, weasels, rodents and possums.  And many birds became extinct.  The stoat was introduced in the 1880’s to control rabbits and hares and is considered “public enemy number one” for NZ birds.  Stoats are controlled with biodegradable 1080 poison and traps.

numerous rodent traps are stationed along the trails
numerous  traps are stationed along the trails

We took the Routeburn Track to the Key Summit and passed several groups of fast striding, cheerful Japanese sightseers.

they like us were exhilarated by the surroundings

We visited the local Te Anau bird sanctuary during feeding hour and saw the rare flightless tekahe.

an elderly bachelor, but we also glimpsed a couple who had been given a chick to foster

and many other unusual birds.

And the boat ride in Milford Sound was spectacular:

we were lucky it wasn't raining since it rains most days
we were lucky it wasn’t raining since it rains most days.  we saw penguins and seals and powerful waterfalls.

And then, after a quick tour of Auckland on the Hop On, Hop Off Explorer bus and the excellent NZ Maritime Museum, we were back home in Georgia.  And it was raining and all my storage tanks were filled and life had returned to the soils.

making do

And so the north Georgia drought continues.  Yesterday was hellish – rolling clouds of smoke streamed down from Rabun county, where some houses were being evacuated, and from areas of South and North Carolina.   From my neighbors, who are weather hardened house builders, I heard hacking coughs and mine joined theirs as I pruned my trees.  And rain not in sight and maybe none until next spring.

My house is on a well and I could pump water for irrigation but this depletes my well (and probably my neighbors too)  and though dry, dry conditions are bad, nothing is as bad as a house without water.

the slump in the tarmac indicates this is not the usual 12 leaf bag freight but a change in the mix
the slump in the tarp indicates this is not the usual 12 leaf bag freight but includes a change in the mix

So I decided to enlist my pickup.  Already it has begun making the trips to and from Atlanta to relocate my neighbors’ leaf bags to my compost heap.  Why not bring some water as well?  There are not yet watering restrictions in Atlanta and our Atlanta house has an irrigation meter which I installed years ago and from which we draw about 4 gallons a month for the bird bath.  So time to use the irrigation meter again.

now I move 7 leaf bags and 45 gallons of water

I recommissioned my 35 gallon horizontal storage tank from compost tea maker to water carrier.   A gallon of water weights 8.3 lbs so this tank full will weigh about 300 lbs.  And if it slides around the truck bed it can do some damage.  I fashioned from 2×4’s a brace to hold it in place in the center of the bed up against the cab.  I decided to add 2×5 gallon containers on the right side of the bed so that their weight (10 gallons x 8.3lbs per gallon = 83 lbs) plus Trudy’s (my 46lb canine companion) will somewhat counterbalance my weight in the driver’s seat.  And so I now transport 45 gallons of water to my logcabin, plus 7 leaf bags with each trip.

you can see the brace which secures the tank -2 long 2x4's fitted between the cabin and tailgate (to prevent sideways movement) held in place by spacers at the cabin end and front end and a grey 2x4 secured to the 2 long planks to prevent forward sliding
you can see the brace which secures the tank -2 long 2×4’s fitted between the cabin and tailgate (to prevent sideways movement) held in place by spacers at the cabin end and front end and a grey 2×4 secured to the 2 long planks to prevent forward sliding

The 2 -5 gallon water containers I transport in a barrow to the orchard and upend each at a fruit tree.  Not much, I agree but better than nothing for trees which have not savored water for several months.  The fruit trees are surviving and I attribute this to the contour ditches which straddle the hill and infiltrate the rainwater runoff and heavy mulching.

a black pipe drains the water to the 4" pipe which moves roof water to a storage tank
a black pipe drains the water to the 4″ pipe which moves roof water to a storage tank

The 35 gallons of water I pour into a storage tank from which I can pump to the vegetable garden or wherever it is most needed.  From watering the vegetable garden > 100 gals every day I am down to 40 gals every 3 days although of course the summer heat is past and evaporation and transpiration are also greatly reduced.  I have cut back on plantings and if there is any consolation for this unusual weather, at least I am getting good tasting organic tomatoes and peppers and lots of greens in the middle of November.

you can see the barn at the bottom of the hill which houses 2 -1,400 gallon tanks

cord-cutting and enhancing connectivity

It all began when the tv satellite bill for the Atlanta house jumped unexpectedly.  The company explained I was beyond the 6 month special discount period and offered to split the difference between old rate and new rate.  I decided to become a “cord-cutter” and canceled the contract.  They sent me a shipping box and I disconnected the LNB from the satellite dish and placed it and the receiver and remote in the box and bade farewell at the UPS office.

“Now what?” M. demanded to know.  She did not watch shows or movies but was hooked on Classic Arts Showcase (“CAS”).

I decided to switch to a mix of antenna tv and internet tv.  For the antenna I followed lessons learned while installing an antenna in the log cabin (see my Sept 6, 2016 post) and with a 16dB amplifier at the mast was able to access > 30 stations, none of which appealed to M.

For internet tv, after briefly considering the Google and Apple options, I plumbed for Roku.  Roku does not have a recorder as did my satellite service but I can access previous output so a recorder is not critical.  I discovered Pluto which consolidates a number of stations and it has “The Opera Network” but M. was not appeased.   Met. Opera on demand was interesting to her but not the same.  Then I discovered Qello channel for concert films and music documentaries, and peace appeared to return for a monthly cost of $7.95.  But then I was told Qello was not as nice as CAS.  CAS is broadcast but my antenna could not access the broadcast channels.  I found I could access CAS via laptop and watch on tv via hdmi cord.  M. thought this was cumbersome.  I then discovered CAS is available on Nowhere TV which is available as a Roku private channel with input of a special code.  Peace is restored.

Roku made obvious that our Earthlink dsl 6mbps speed was inadequate for simultaneous video watching and computer use.  After lengthy calls with ATT and Earthlink I again decided to support the little guy (as I did with the Roku decision) and signed up for the Earthlink hyperlink connection which now provides download speeds of 18 mbps to 24 mbps – great.  The ATT installer (although the contract is with Earthlink the service is provided by ATT) explained that if our house was closer to the fiber optic connection point the speed would be much faster (at least double) but we are towards the end of a long copper run.  By eliminating some unnecessary POTS services, the additional cost for hyperlink is minimal.

Instead of a separate dsl modem and wireless router, the 2 are combined and this simplifies accessing my cameras remotely.  The modem and router both act as firewalls and both had to be programmed to permit external access to the dvr (digital video recorder) which controls my cameras.

schematic
with a dmz (demilitarized zone) the modem and router no longer bar external access to the dvr

Now with dsl and router combined only one device has to be programmed.

schematic
of course there is a risk that with firewall removed my cameras may be hijacked & so I have to use strong passwords

And finally, after saving some by fixing a water well problem and by eliminating monthly satellite bill, I splurged and upgraded my iPhone 4 to an iPhone 7.  The iPhone 4 works fine for calls, texting and email.  However, several important apps such as the app for remotely viewing my house cameras now require IOS 8 or higher and iPhone 4 does not support IOS 8.  Reluctantly I decided, it was time for a change and I am enjoying all the upgraded apps not previously accessible and a very good camera.

well repair – part 2

In my previous post (part 1) I describe the temporary repair I made to the expansion tank pressure switch.  However the pipe/nipple connecting the pressure switch to the water manifold is badly rusted and seeping water and just a matter of time before it disintegrates.

I want the repair to proceed efficiently and so I researched how to removed broken nipples – Bob’s plumbing video (how to remove a broken pipe) was very helpful.  So prior to commencing the repair I bought and assembled all the tools and parts I would need – new pressure gauge; new pressure switch set for range 30psi to 50psi; 4″ long 0.25″ diameter brass pipe; an extractor kit for broken pipes; assortment of brushes to clean threads; rust penetrant oil; and my usual assortment of standby tools.  And then off to the well head.

Caution – following involves working with 240 volts and can result in serious injury or death and should not be undertaken by anyone not competent in this area.

I first switched off the power, then removed dome and pressure switch cover and photographed the wires so I could remember later which were connected to which.  With a tire gauge I measured the air pressure in the expansion tank – it was 45psi.  I opened a faucet and drained the water from the expansion tank.  Then I looked at the nipple and, as previously mentioned, it was in bad shape.

with the switch disassembled you can see the extent of rusting of the switch and nipple
with the switch disassembled you can see the extent of rusting of switch and nipple

After dowsing with rust penetrating oil I tried gently undoing the nipple from manifold and it turned for a bit and then broke away leaving some pipe in the hole.

some rusted pipe remaining in whole after unscrewing the nipple
you can see the rust and the small water hold and the little bit of thread which unscrewed
you can see the rust and small water hole and little bit of thread which unscrewed

With my nipple extractor the rest of the pipe in the hole appeared to disintegrate and I then cleaned the female threads with brass brushes.  While I was at it I also removed the broken water gauge.

the 2 cleaned holes - 1 for the nipple, 1 for the gauge, and the old gauge
the 2 cleaned holes – 1 for the nipple, 1 for the gauge, and the old gauge

And installed a new gauge and was disconcerted to see that somehow I had cracked the glass cover.  I used pipe thread sealant and connected up the  new pressure switch and pressure gauge.

the new parts in place and the expansion tank charged. I will try replace the cracked glass cover of the gauge soon.
the new parts in place and the expansion tank charged. I will try replace the cracked glass cover of the gauge

And then switched on the power and watched the gauge rise to 50psi and heard the switch click open and stop the pump.  Everything was working fine.  I checked the expansion tank pressure with my tire gauge and it was 45psi.  Mission accomplished.


well problem – diagnosis & repair – part 1

Unexpectedly, Friday evening, no water in the house.  No warning signs such as discolored water which could indicate the well was running dry.  Checked the power supply board and the switch was on.  Called the well repair guy and asked if any wells were running dry.  He said 12 in the mountains but none at my level and he would visit Saturday 6pm.

Caution – following involves working with 240 volts and can result in serious injury or death and should not be undertaken by anyone not competent in this area.

the grey box in the middle is the pressure switch for the blue expansion tank

Saturday morning I lifted the dome cover over the wellhead and removed the cover over the wires.

with cover removed wires carrying 240 volts are exposed

Yes, the wires from the house were carrying 240 volts.  I then switched off the power.  So what could be the problem?  The well is about 400 feet deep and that’s where the pump is located.  The problem could be a break in wires to pump, pump itself, water pipe from pump to surface or from wellhead to house, or worst case, a dry well.  The the pump was pulled and replaced in 2007 – cost $1,200.  Pumps usually last longer but ground lightning strikes can prematurely age a pump.  My neighbors well ran dry a few years ago and to drill, fracture and install a new well cost around $12,000.  The potential costs could be high.

The ground from wellhead to house was rock solid dry which is what you get in the extreme drought situation in north Georgia – so no leak between wellhead and house.  While I was at it I walked over the septic tank and pipeline area and it was dry, so no ongoing leak in the house draining the well.

Back to the wellhead.  Could there be another issue?  The expansion tank for this well is located at the wellhead.  The function of the expansion tank is to extend the life of the pump by holding reserve water under pressure for the house and when the water pressure in the tank falls below a set level it then switches on the pump.  Typically it switches on the pump when the pressure falls to 30 psi and switches off the pump when the pressure reaches 50psi.   Thus the life of the pump is extended since it does not have to cycle on and off every time water is used in the house.   The expansion tank is connected to a pressure switch which is normally in the closed (on) position and it opens (cuts power off) when the expansion tank is fully charged.   I looked more closely at the switch and noticed the plate which should be closed when water is needed was loose and not touching and providing continuity to the terminals (if you look carefully you will see there is no contact between the plate and the terminals).

There is a spring which holds the plate to the terminals and it must have broken and was not in sight.  It seemed there were 2 ways forward – replace the entire switch or just the spring.  The small pipe called a nipple, which connects the switch to the main pipe is badly corroded and I am quite sure will not come undone without disintegrating.

corroded pipe which joins pressure switch to water manifold
corroded pipe which joins pressure switch to water manifold.  not only badly rusted but also leaking water

I wanted a quicker fix for the time being and decided to try replacing the spring.  Fortunately I have a spare previously used switch and so I headed to my workroom and, after brewing a fresh mug of coffee, began dismantling the spare switch to figure out how to access the spring which is below several other parts, and how to re-assemble it.  First attempt took about 20 mins, second attempt 10 mins, and by 4th attempt I could do it from any angle in about 5 mins.  I removed the spring and some adjacent parts from the spare switch and headed back to the wellhead.  And about 10 mins later the switch was repaired and I switched back on the power and the house received water and, as expected, once the expansion tank was charged, the switch snapped open.

you can see the old spring which failed (right clasp broken) & 2 other parts which I replaced as well

So the switch appears to work ok and I canceled the visit from the well repair guy, and I am now thinking how I will remove and replace the corroded pipe.  See part 2.

Q&A – gravity fed irrigation

I received some comments on my rainwater harvesting and gravity feed irrigation system.  Luke from Australia is surprised at the amount I collect.  There are simple formula on the internet where you multiply annual, or monthly or daily rainfall in inches or cm by the area of the roof and can easily derive in gals or liters the amount collectible.  And the volume is often bigger than you would expect.

Because of our continuing drought in N. Georgia I am going to expand my storage system from about 6,000 gals to about 10,000 gals so I can retain more of the rain that falls and not lose so much from tank overflow in the rainy months.  The rain that does not fall on my roofs I try infiltrate into the soil with contour ditches thus minimizing or eliminating  ground runoff altogether and soil erosion, and the soil to some degree acts as my storage tank.

Benjamin from Florida mentions that Geoff Lawton says algae in the irrigation storage tank are beneficial.  I seem to remember Geoff saying this in his pdc.  I think life in irrigation water is good and I make and use compost teas throughout the growing season.  Problem with algae is it clogs the bubblers I use for watering my orchard, but is not a problem when I use a hose.   I find algae comes out mostly at the beginning of the irrigation cycle, because it has settled near the outlet, or when you use the last remnants of tank water and the outlet is pulling horizontally what has settled at the bottom.  The quick flush I do at the manifold to eliminate air pockets also clears a lot of the starting algae  http://www.nutrac.info/2016/05/20/additional-thoughts-on-airlocks/.

my manifold at bottom of hill.
my manifold at bottom of hill

Water comes down the hill in 1.25″ pipe and if the pipe is empty I flush out the air through the white ball valve.  The water jets out and the stone is to slow it down and direct it in a channel to an apple tree.  Plastic ball valves are best – they are cheaper than bronze, less likely to crack from icing and shut off water better than gate valves.   There are 3 valve controlled lines to the orchard and one to the vegetable growing area.

With the water flowing to the orchard I unscrew the furthest bubbler in the line because by removing it for inspection and cleaning, it allows water to flow down the line removing air bubbles and collecting and ejecting any debris along the way.

2 bubblers connected to 3/4" pipe connectors. The one on the right I use at the end of the pipe. The bubblers come with plastic filters which are helpful.
2 bubblers connected to 3/4″ pipe connectors. The one on the right I use at the end of the pipe. The bubblers come with plastic filters which are helpful.  The black pipe connector on the left bubbler is for illustration only  – typically it is at least 4 inches long so the bubbler stands well above ground level for easy visual inspection.

Then I visually inspect each bubbler to check that water is flowing and unscrew and clean those which are clogged.

For the vegetable area I split the incoming line into 2 each with its own valve and hose.

there are 2 hoses in the veg area to save me lugging one all over


am I a Maker?

There is a Maker movement afoot and a few weeks ago I visited my first Maker Faire, which was in Atlanta.  A few weeks prior I signed up for a MOOC (online course) on 3D printing and I was deciding which 3D printer I should buy – the large one in the photo above costs around $30k, I was thinking of $300.  Makers enjoy tinkering and making things most often using new technologies.  I think this is different from DIY where the focus is on repairing or installing things, which would usually be done by a contractor.

I enjoy understanding how things work – both natural and fabricated.  So therefore my organic growing activities where I interact with a complex changing natural force.  When I was 16, just  for the heck of it, I separated the rear engine of my Mom’s Renault Dauphine car from the rest of the body.  And hastily re-assembled it when confronted by my irate Dad.  During my London years (1978-1986) I did a lot of work on an old, neglected house including installing 17 hot water radiators – see my  write up referenced on “self reliance & projects list.”  So I suppose I have a Maker’s instincts.

The Faire was absorbing – there were a number of 3D printer vendors who were happy to engage in discussion.  I chatted to the folks at Freeside Atlanta who describe themselves as ” a community of makers, tinkerers, engineers, programmers, artists, teachers, and lunatics”.  Lincoln Electric had a welding simulator which charitably graded my wobbly bead at 47%.

arenas for battles between autonomous grappling machines or ball hurlers which gather up a white ball and propel it into the air
there were several arenas for battles between autonomous grappling machines or in this case a ball hurler(1746)  which gathers up a white ball and propels it into the air

Fun was watching the drone racing competition as these screaming fast moving airborne objects chased around the course and then dived through rectangular frames at different heights.

a serious contest of technology and human reflexes

It was fun, I learned some and a week later after more research  I purchased a HICTOP self assembly 3D printer for $316.  I will write separately of the assembly, calibration and first print experience.  If you are curious you can read my review today on Amazon.

And now I have the opportunity to become a Maker.


bees – preparing for winter

You can see my bee hive above.  It faces south, has an umbrella for summer sun protection and a window on the west side to allow the winter sun but not the winter winds.  Now that Fall has arrived I begin my winter preparations.  There are 2 larger boxes at the bottom, the brood boxes, where the queen resides and the 2 smaller boxes above are supers from which I collect honey.  My last honey harvesting was from the top super and I returned the super and its 10 frames to the hive for the bees to repair the comb damaged in the extraction process.

a side view of the hive from the east (access) side
a side view of the hive from the east (access) side, the divider between the bottom 2 and top 2 boxes is a queen excluder – it prevents the queen from moving from the brood boxes to the honey supers and laying eggs where there should just be honey

The bees will go through winter in just the 2 larger bottom boxes and they must have adequate food supplies.  So I have to transition out the top 2 supers and then supplement feed the bees.  Today I examined the top super and noted the 10 frames had drawn comb but no honey.  So I carefully lifted each frame vertically, gently brushed off the bees and put the frame in a separate box.  The bees were docile since I was not stealing their honey just rearranging living accommodation.  The super below also appears to have no honey and I will remove it in a few days.  But first I must deal with the frames I removed.

some excess wax on top of the frames which I removed

I scraped off the excess burr comb for my wax collection, and then placed the frames into kitchen trashbin liners, (1 liner had 4 frames, the other 2 liners 3 frames each) and put the 3 bundles into the deep freeze section of the refrigerator.  From experience I know I must freeze and kill off the secreted wax moths and other despoilers, and this will take a few days.  Then I will store the bundles in black trash bags in the house where they will remain until spring when I will give them back to the bees for the spring nectar flow.

an end frame with some drawn wax, not v. much but enough to give them a headstart

The bees are more productive when they have drawn comb available and do not have to manufacture new comb.  So in a few days, when there is room in the freezer I will freeze the frames from the other super.  And then I will begin supplementing the feed of the bees with cane sugar water (sounds terrible).  But, before then, I hope the good rains we had over the weekend will help the goldenrod and other fall flowers produce lots of nectar for the bees to harvest.

I do not give chemicals to my bees and have been assured that they will die from infections vectored by varroa mites.  Maybe not this year, but certainly next year, I am told.  I just don’t like chemicals – I don’t take any and I do believe that a strong immune system helps wonderfully.  Also I hear the problems – one bee club member dowsed her 3 hives with varroa treatments and now the 3 queens appear impaired (I wonder why) and she wishes to replace them.  I also heard that a major queen producer(s) – I won’t say where-  had problems with mites and to secure the sign off of inspectors, gave the bees the treatments, was successful with the mites and shipped the queens.  Apparently the viability of the sperm of the drones was affected and the egg production of the queens has not been satisfactory.

It seems there are 2 factors – the attacks of the mites and then the diseases which the mites introduce.  The varroa treatment nails the mites (until they become resistant and we have to use more toxicity) but also adversely affects the bees and their immune system.  Not really understanding all this stuff, I decided I will not medicate my bees and if they make it well through the winter I will maybe do a mite inspection next year and, if necessary, maybe treat them.  And maybe its time the queen producers focused more on hygienic (mite grooming) queens with good genes acclimatized to our areas than very productive early season kickstarting queens.  But please keep them friendly.