revising practices

As the months and seasons roll by and I learn what works and doesn’t, I change my practices.  For me, raised beds work best.  I produce mainly for my family and the area under cultivation is about 1/4 acre and worked by hand (my hands).  For this situation raised beds are optimum –  they drain better, they resist weed invasion better, easier to work (less stooping) and warm up quicker in the winter.  I have 8 beds now – mostly 8 or 10 ft by 4 ft, though I just installed a 20ft by 4ft addition.

my new raised bed
my new raised bed

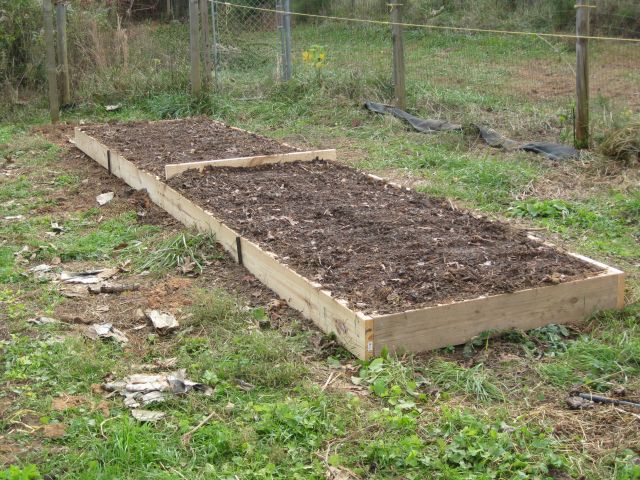
For this bed I used 10ft by 10″ untreated planks screwed together at the corners and in the middle a left over 4ft by 12″ wood with steel stakes in the middle of each of the 10ft lengths.  I filled the bed 80% with soil from a contour ditch which I had mixed with wood chips a couple years ago, and the balance with my compost plus liberal scoops of lime.  I sowed one half with white ladino clover and the other with crimson clover.  I should have done all this a few weeks ago and not just before our first big winter storm, but I was delayed with more pressing tasks.  Hope my winter cover will germinate and then late spring I will cut and plant out edibles.  The yellow raised line to the right of the beds is my deer dissuader – it is supposed to make a simple hop over the fence a complicated maneuver (and to date I have not had any deer visits).

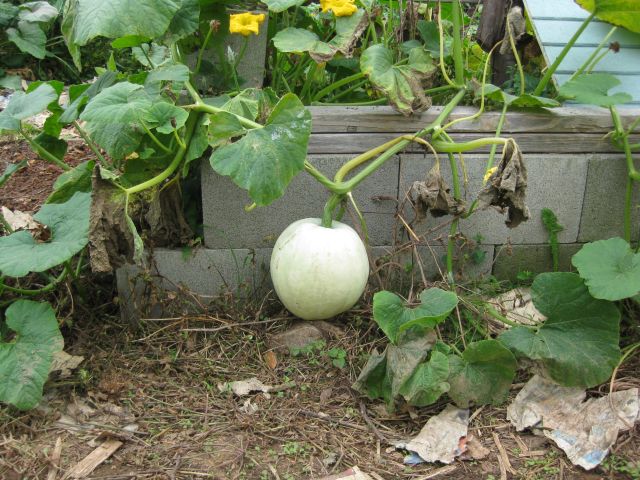
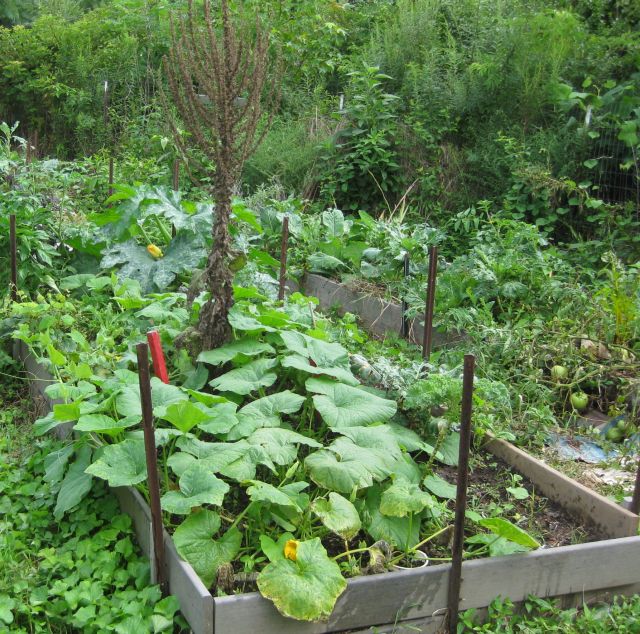
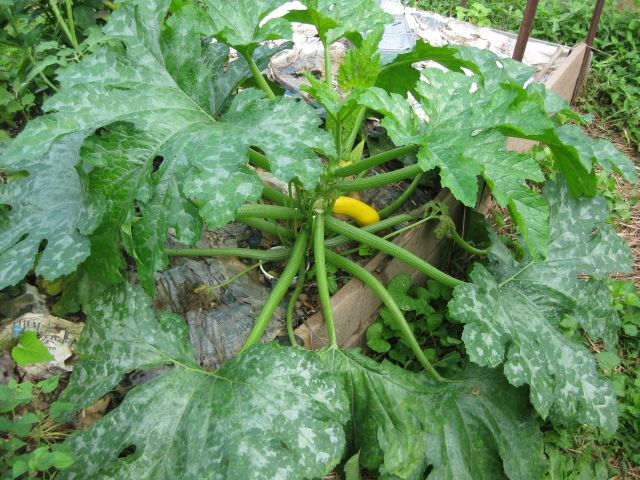
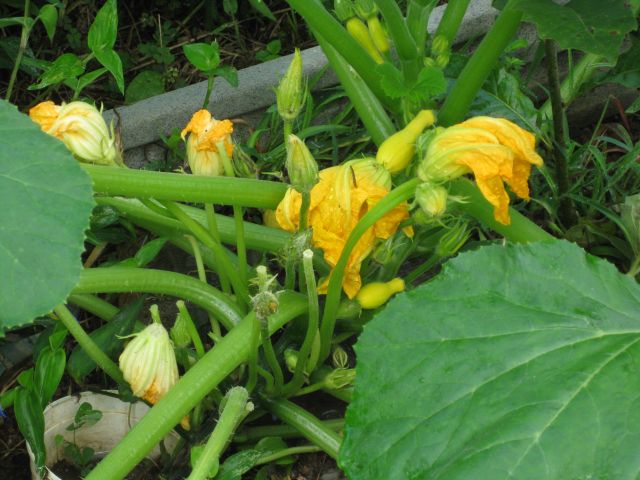
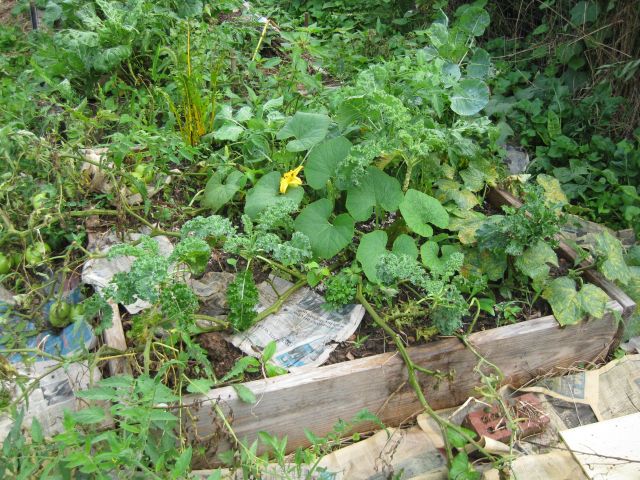
My most productive bed this season was this 4ft by 4ft which is not well sun exposed.  As I cleared the tomato, cucumber and squash vines I saw and remembered how this was different from the others – when I first filled the bed I used about 50% (at least) compost and this made the difference.  For an organic grower it is all about the compost.

my best raised bed - it endlessly pumped out tomatoes and cucumbers plus kale and more
my best raised bed – it endlessly pumped out tomatoes and cucumbers plus kale and more

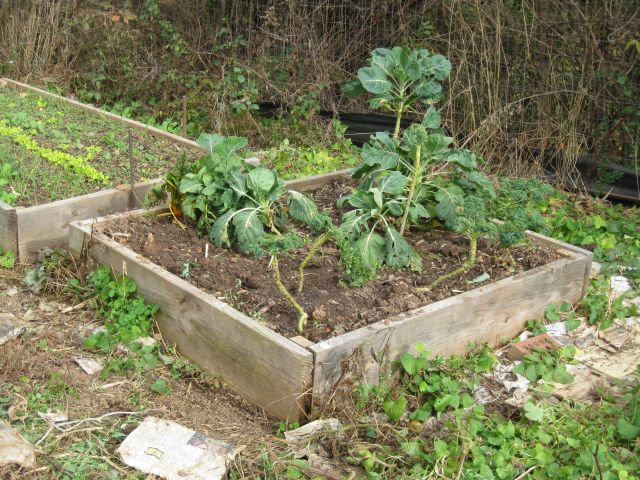
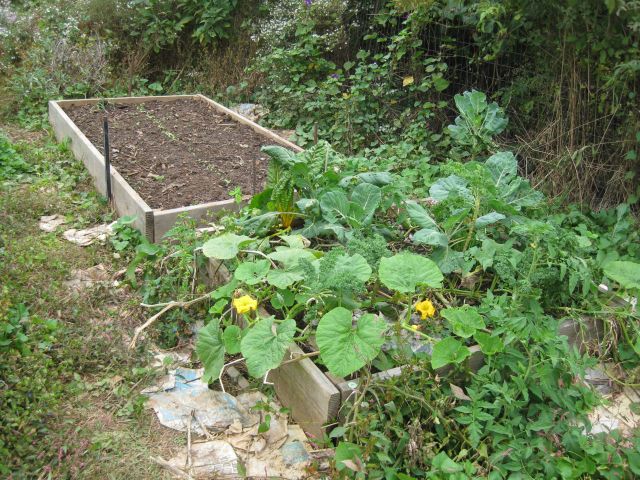
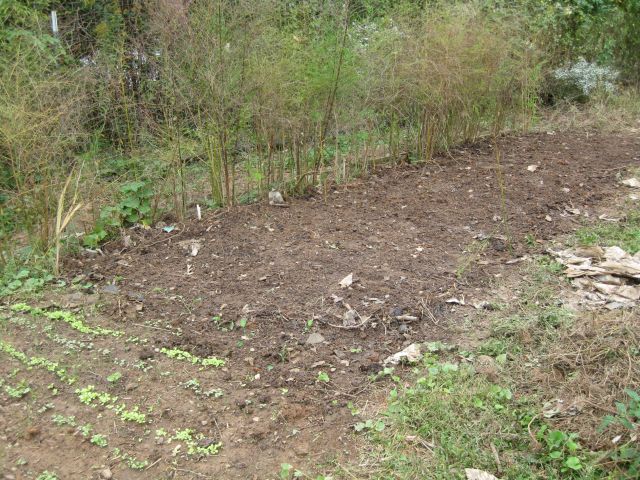
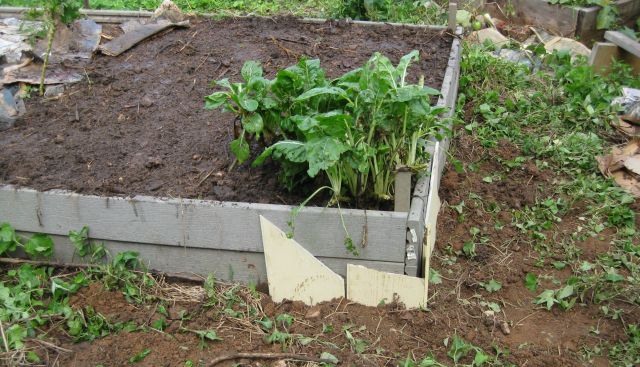
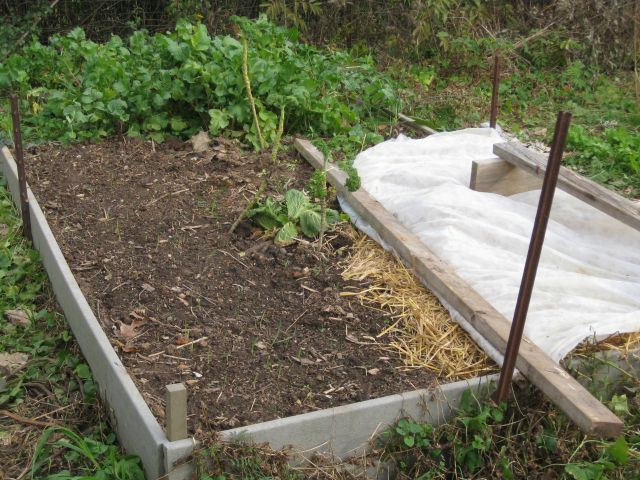
I have cleared and recomposted most of my beds and sowed cool season vegetables and will use row covers if it gets very cold.  My favorite planting is garlic – from a few organic heads purchased a few years ago I now produce sufficient garlic for use throughout the year plus lots of cloves for planting in the fall.  Here is a typical bed going into winter.

typical bed going into winter with lots of garlic among the veggies

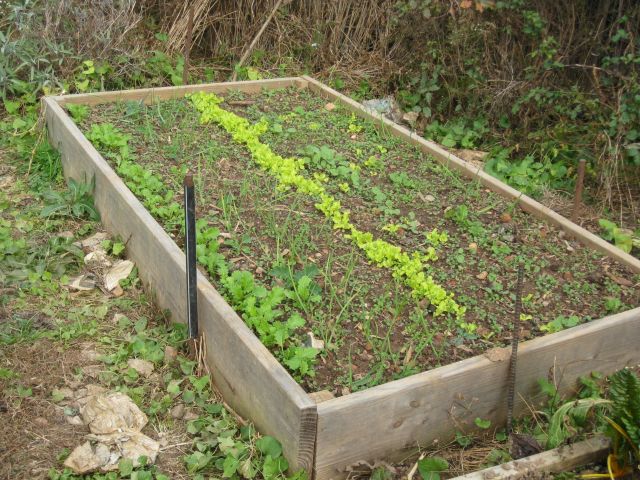
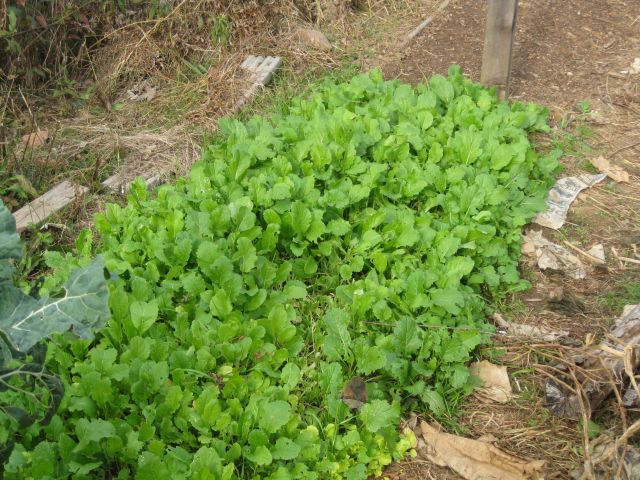
I still plant directly into the soil and here is mustard growing well – I just scattered the seed, they took off, and now I haircut the leaves as needed and they grow back quickly.

abundant regenerating mustard

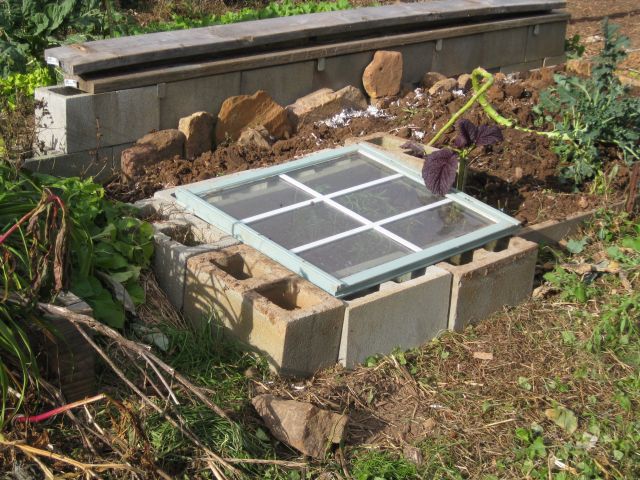
Previously I built elaborate above ground cold frames – which worked but were a bit clumsy.  I will take my chances this year (I do believe the climate is warming) and make do with row covers except for some delicate herbs – rosemary, oregano and parsley for which I made a very simple, sun exposed cold frame.  It is not airtight which means the plants will not overheat on warm days but how will they do on the cold days?

cold frame for the herbs

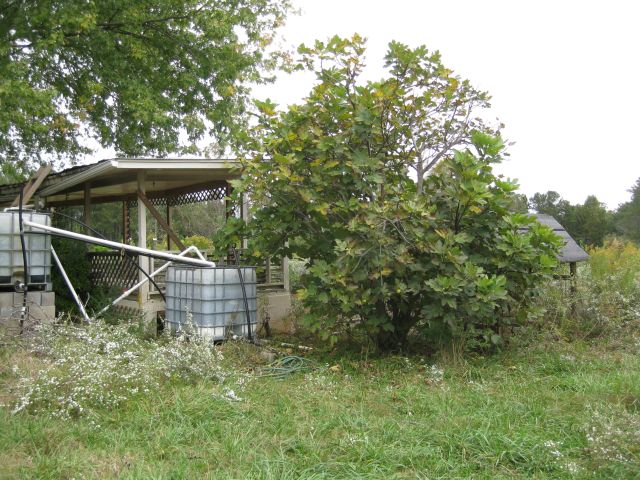
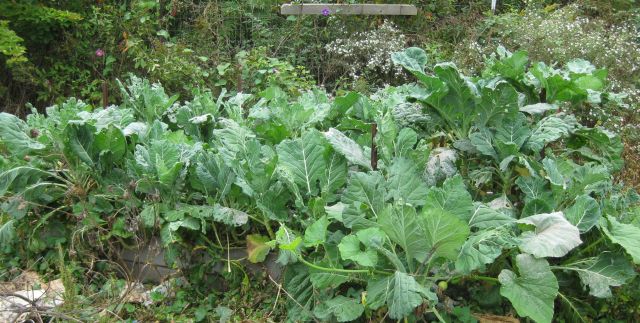
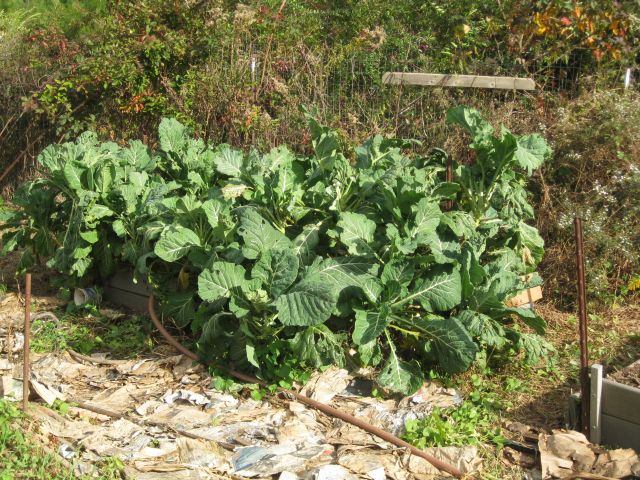
Another change I made was hand watering my vegetables with a hose – I still use bubbler irrigation for the two orchards.  (All water used is rainwater collected from various locations and pumped to large storage tanks and then to smaller elevated tanks for gravity fed irrigation).  Now I have my feed tanks at the top of the hill the psi is sufficient to enable quick watering.  When I began growing, I did not own the hill and my gravity fed system produced only a slow flow and I used bubblers for everything.  Hand watering is quick and I can see what is going on – where pests are developing, where diseases, what needs more and what needs less watering.  I use a 3/4″ hose which can be spotted in this pic of my collard bed where the collard is growing well – it tolerated the Georgia heat well, now to see how it does in the winter.


raised bed containing lots of collard, with less pest pressure the collard leaves look great

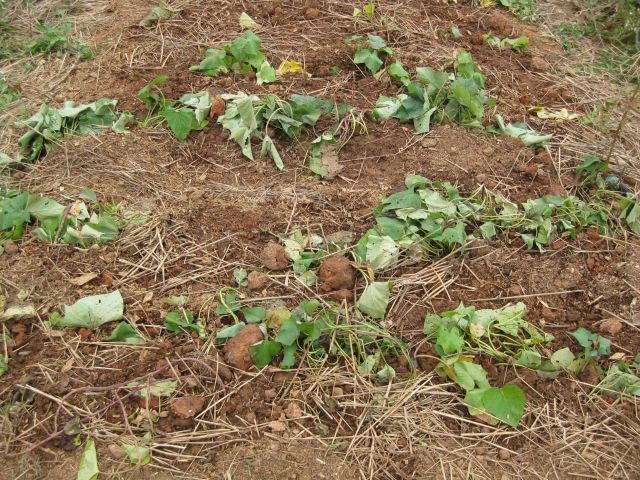
My first attempt with sweet potato was middlin – they tasted fine but not a big crop.  After harvesting, I buried the vines in close proximity in a raised bed and with freezing temps just a few hours away I covered them today with hay and placed a doubled row cover on top.  Hopefully they will make it through the winter and I will plant them out earlier next year and should do much better.  You can also see in the rest of the bed some fine  garlic heads and radish at the end.

an experiment with sweet potato stalks covered with hay and row cover

an experiment with sweet potato stalks covered with hay and row cover

And finally my compost – I have a lot left over and will contribute it to my fruit trees. I had lots of apples this year (with lots of invaders as well) and  my goal next year is to minimize the pests and good nutrition from good compost is a good starting point.


 r
lots of compost left over after repriming all the vegetable growing areas

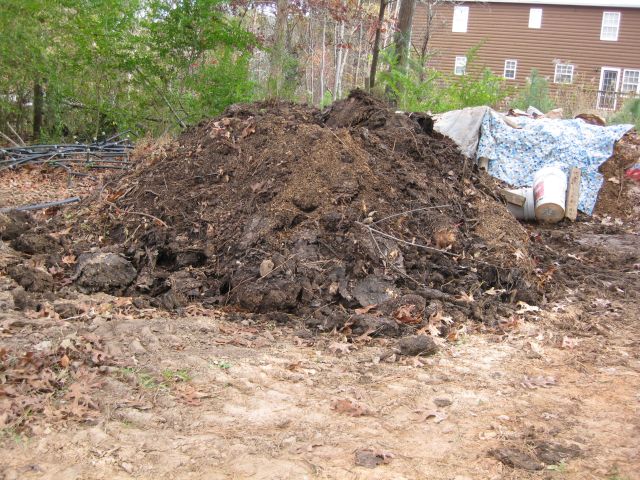
The closest heap was begun last fall with leaf bags.  Behind the heap you can see the second heap gathering – it already has 36 leaf bags from neighbors and 2 truckloads from the stables plus cleared vegetation.


as the season winds down

It has been some time since my last post.  Coursera, the online education system, has absorbed a lot of my time.  I can spend 10 to 15 hours a week just on the calculus course with The Ohio State University. Plus I am enjoying Animal Behavior with the University of Melbourne, Australia, and What a Plant Knows with Tel Aviv University.  And for an unconventional outlook there is A Brief History of Humankind from the Hebrew University of Jerusalem.  Plus I am busy with Fall tasks.

This summer has been good for me – plentiful rains, good food and limited pest issues.  My apple trees were bountiful and the Giant Korean pear outperformed everyone else.  As the season winds down there are still figs to be picked.

still some figs remaining tho the best are gone

This fig tree is at the top of the hill with 2 small tanks which gravity feed to the plantings.  The higher tank provides water for the fig tree level – the pressure is unsatisfactory and I have devised a method using several valves to have the pumps at the base of the hill directly pressure irrigation at the top level.  This additional pressure now makes hose watering feasible and I am relocating strawberry and sweet potato plantings to the top of the hill.  My first year of sweet potato production was meager but the microwaved sweet potatoes were delicious.  I hope to do better next year with more sun at the top of the hill.  Below are some of the sweet potato leaves I trenched and will cover later with hay.


3 varieties of sweet potatoes which I hope will provide starter stock next year

Last weekend was a muscadine pickers delight – one vine was overladen with large delicious scuppernong.  I have muscadine at several locations.  The best performing are those on the hillside.

these muscadine did well - notice the central contour ditch filled with logs
these muscadine did well – notice the central contour ditch filled with logs which store water and provide nutrition

I allow wildflowers to run rampant and now the daisy and goldenrod are filled with my honeybees.

101513 wildflowers
a field where I bush hogged a path. I have planted out various saplings grown from local nuts and in a few years hope for a more foresty look

In my vegetable area I am allowing the squash plants to have a last fling – this is the first year I actually had such plants since previously they were leveled by the squash borer.  Probably attributable to increased diversity of flowers whose nectar may have attracted borer predators.


squash and melons on the run - the squash is not great but the chicken like it
squash and melons on the run – the squash is not great but the chicken like it

And here is a candidate soon for harvesting.

a melon soon for the table

Elsewhere I am clearing raised beds, composting and planting out lots of garlic as well as kale, radish, lettuce etc.

the bed at the rear has been seeded, the closest bed has been an excellent producer throughout the year

the bed at the rear has been seeded, the closest bed has been an excellent producer throughout the year probably due to liberal doses of my compost

I have had most success with raised beds though here, alongside the asparagus I am seeding directly into the ground.

mainly seeded with garlic cloves tho lots of cool season vegetables have been included

My collard performed well throughout the year.  They were healthy and grew strongly and even when attacked by pests there was always some for me.

some collard plants were relatively unscathed.  I did do occasional dustings with diatomaceous earth
some collard plants were relatively unscathed. I did do occasional dustings with diatomaceous earth

I mentioned my best muscadine was on the hillside.  Altho these vines at the base of the hill have produced large grapes they are not tasty.  Next year I will prune more severely and feed with lots of compost and stable manure and try again.


muscadine looks good but really isn't
muscadine looks good but really isn’t

All my chicken are doing well.  The four I incubated in June have grown largely, though the hens are not yet laying eggs – may have to wait for the spring.  And the young rooster is bigger than his dad, tho he has no spurs (yet) and is somewhat timorous (soon to change, I am sure).

young rooster on the raised bed for plantings for the chicken.
young rooster on the raised bed for plantings for the chicken which they have demolished

And finally one of my busy unpaid workers on goldenrod.


goldenrod with a bee worker


lawn tractor transmission problem

When a neighbor departed I purchased from her a Murray 14.5hp 40″ lawn tractor.  The engine fired but the tractor wouldn’t budge.  After some basic repairs I got it running fine and have kept it going the past 3 years.  Since I use it over rough ground it occasionally needs repairs – such as replacing shattered mandrels when the blades hit concealed rocks, beating out the housing from rock collisions and replacing the mower drive belt.  I now use my big tractor with a pto bush hog for the rough ground and tough grasses, and hope to nurture this lawn tractor along and use it for more confined areas such as the chicken paddocks and between the fruit trees.  I also use a scythe for occasional clearing.

All was well until a couple days ago when after cutting a chicken paddock area and closing the gate, I shifted the gear selector to forward and, though the engine continued to run, the tractor was stationery.  I selected each of the other forward gears and the reverse position and the tractor did not move.  A new challenge.

Today I worked on the tractor.  My reasoning was the problem could be one of 3 things:  the gear lever was not communicating with the transaxle (transmission); the transmission was defective; the transmission and the gear lever were fine but the transmission was not receiving power from the engine.

First step was to access the transaxle.

view of rear of lawn tractor showing rear wheel, transaxle and below upraised seat, the battery housing
view of rear of lawn tractor showing rear wheels, transaxle and below upraised seat, the battery housing

I disconnected and removed the battery from its housing.

a simple step to remove the battery - disconnect the terminals (negative first) and then lift and remove
a simple step to remove the battery – disconnect the terminals (negative first) and then lift and remove

With the battery removed you can see the big pulley which is attached to the transaxle.  The engine at the front of the tractor turns two drive belts – one belt rotates the mower blades and the other, which is well concealed, provides the power to drive the wheels via the transaxle.

with battery and housing removed you can see the drive pulley attached to the transaxle

Also visible above the pulley is a large spring.  This is attached to the idler pulley.  There are three pulleys – the pulley the engine turns, the pulley attached to the transaxle and the idler pulley which keeps the belt taut when the tractor is moving.

So what was wrong – there was a belt on the big transaxle pulley so it seemed the transaxle must be receiving power from the engine.  I selected a gear and pushed the tractor and to my surprise the big pulley turned.  I put the gear selector in neutral and pushed and the pulley did not turn.  I selected reverse and pushed and the pulley turned again but in the opposite direction.  I then breathed a big sigh of relief.  The gear selector was working, the transaxle was working and the belt must be loose.   I navigated to the engine end and felt underneath and found the pulley which drives the belt to the transaxle and the belt was also there and intact but it was not on the pulley.  So the belt had come off the pulley.  Now why had this happened.  In maneuvering my hand under the engine I pulled on the engine and it rocked forward.  It typically has 4 engine bolts and the rear two were missing.  Incidentally when I first got the tractor the same 2 bolts were missing and I replaced them – so I was familiar with these bolts.  I surmise that when I engaged the gear the engine rocked forward which meant the pulley underneath rocked back and the belt came off.  Probably also because the belt has stretched.  Rather than replace the belt I decided, for the time being, to reseat the belt and order and install the 2 missing engine bolts.

But it is very difficult to work on the pulley under the engine – it is barely accessible and there is no room to apply leverage on the belt to force it back onto the pulley.  Then I remembered the idler pulley – if I could move it aside it would free up a lot of belt slack.  I tried approaching the idler pulley from underneath and then concluded that a long crowbar via the battery housing   would secure a good grip and move it aside, which it did.  But I could not hold the crowbar in place at the rear of the tractor and reseat the belt under the engine at the front of the tractor at the same time.  I needed a helper.

a view of the idler pulley, limited access space

I cut a piece of strong wire and shaped it into a loop.  Then with the crowbar I pushed the idler pulley to the side and with the wire band secured part of the idler assembly to the shaft of the gear selector which acted as my anchor.  With the idler pulley now held out of the way by the wire band, it was then a simple matter with one hand to reseat the belt over the engine pulley.

you can spot the wire band which is holding the idler pulley assembly out of the way of the drive belt
here is the wire loop or band which was my assistant with this repair

When the engine bolts arrive I will complete the repair and in future make a careful check that all the engine securing bolts are in place.


coursera – it’s great

Coursera, the MOOC (massive open online course), has kept me very busy.  Last year I took the sustainability course and earlier this year, 2 physics introductory courses.  My background is accounting, business and the humanities.  Now, with access to excellent tuition from top flight college lecturers, all for free, I am greedily imbibing the sciences.  I am currently taking 4 courses: Animal Behavior (University of Melbourne, Australia), Preparation for Introductory Biology – DNA to organisms (University of California, Irvine); Calculus One (The Ohio State University); and the most intriguing A Brief History of Mankind (Hebrew University of Jerusalem).

The biology course is unusual in that it is provided for 2 levels of students – I am taking the basics level while first year students at the college are required to take the scholars level which involves considerable additional research and peer assessments.  We all watch the same videos and take the same quizzes.  I am content to receive a basic understanding of the functioning of the cell and DNA, alleles etc.

Animal Behavior answers so many of the questions you would have from watching wild animals.  Good videos and additional reading material – a fun course.

Calculus can be fun but I struggled mightily in the beginning and only pride prevented me from un-enrolling.  The problem is I never did calculus at school and my algebra and trig was at a basic level and a long time ago, so from the get go I was adrift with almost all the terms tossed about (radical #’s, rational #’s, real #’s, polynomial etc.). I borrowed a couple precalculus books and have been working hard to catchup.  Why mess with calculus?  I like #’s and often competed against the clock to solve internet sudoku problems – grappling with calculus is a more worthwhile use of leisure time and more challenging.

The most intriguing course is not about science but is listed under the humanities section of coursera and is a brief history of mankind by Dr. Harari.  He speaks directly and effectively and traces our history to to the different homo species (such as homo erectus and then Neanderthal man) and describes how between 70k to 100k years ago, unaccountably, homo sapiens developed superior communication skills and emerged victorious over the other homo species.  From being a scavenger of the bones of victims of predators, homo sapiens became triumphant over all animals.  For anyone interested in the palio diet or the advantages of hunter gatherer culture over the lives of humans in the subsequent agricultural revolution, this is a must see course.  We just covered the onset of the agricultural revolution – lesson 5 titled “History’s Biggest Fraud” and I eagerly await new installments.

So the above have taken much time.  But the growing season has been good for me – my Giant Asian Pears are excellent – they are huge (bigger than a baseball) crunchy and sweet and plentiful.  Muscadines are ripening now but not as plentiful as they were when sited in my vegetable growing area where they could tap into my compost rich beds.  I have a prolific apple tree producing though the apples are not as sweet as some of my other apple trees.  They need selective slicing to remove visitors but are entirely toxin free.  Squash are plentiful and some have visitors in which case my chicken receive a treat, and some are fine.  Tomatoes are still coming in and, as always, there is lots of kale and collards.  I have begun seeding and planting out kale for the fall and as soon as the tomatoes and squash are past I will commence in earnest, together with garlic, which again did very well this year and is the easiest of all vegetables to grow.

growing update 0822

Good news – my squash have not (yet) been visited by the dreaded borer and are growing rampaciously.

squash growing vigorously in raised bed
squash growing vigorously in raised bed with a mullein scaffold available if needed
0822 squash a
another squash plant in production – but there is a problem, someone has been snipping off the squash buds – you can see some single squash stems
here is a closeup of another plant and you can clearly see someone has been snacking - I suspect a rabbit
here is a closeup of another plant and you can clearly see someone has been snacking – I suspect a rabbit

So I have a new pest to respond to and I have set a live trap with some enticing carrots to try catch the rabbit.  A more tedious, though inevitable response will be to better secure the growing area and the fence which surrounds it.  Here is a welcome visitor.

a welcome visitor to a squash flower, most of the pollinating is done by bumble bees, this may be a yellow jacket

My most productive bed which is just 4ft by 4ft and was an afterthought, in addition to pumping out tomatoes and cucumbers and kale and chard is now sporting a new squash plant.

this 4ft by 4ft bed does very well and you can spot a new squash flower amongst the regular residents

this 4ft by 4ft bed does very well and you can spot a new squash flower amongst the regular residents


I have a few pepper plants.

green peppers are looking good

And am pleased some holy basil (I planted two varieties) is growing well.

a variety of holy basil

I was preparing a raised bed for a seeding of radish and beets and noticed the soil looked drained of its vigor.  Forking a bit deeper I was not surprised to find invading roots.  I traced them to their entry point and from the outside I chopped the roots and then inserted a few left over pieces of cement siding.  This should stop the roots for a while.

newly seeded radish and beet bed with added compost and cement siding below ground to stop roots

Finally, the 4 chicks which hatched last week were getting frustrated in their lamp heated chamber, so I screwed 4 old windows together to make a square on the grass in the shade, and placed them and their water and food inside and covered the top with wire mesh.  At first they were terrified by the big circling chicken giants but then settle down and enjoyed themselves until the rain showers ended their first outdoor adventure.

outing for the week old chicks


growing tomatoes – a curious result

Why is one plant outperforming the other tomatoes?

This year, as in other years, I grew several varieties of tomatoes in my greenhouse and in May planted out 32 tomatoes in wire cages in a new growing area.  We had heavy rains and this set the tomatoes back but now they are producing, though with average/poor yields.

some of the tomatoes

In a nearby 4ft sq raised bed I planted a few vegetables including a tomato and a cucumber plant.  Both have been growing gangbusters.

my strong plant with tomatoes each day for the picking
my strong tomato plant.

I pick 3 to 4 large tomatoes each day from this plant.  But why the difference in yield?  The soil, compost, sun exposure and watering are similar.  This plant was an afterthought and I did not record its variety though it appears it could be a Mortgage Lifter.  Perhaps the plants in the wire cages resent their imprisonment (just read D Chamovitz’s book “What a Plant Knows”) or they don’t like being crowded together and relish the opportunity to spread without competition from other tomatoes.  Or there may be a companion plant synergy at work?  Or maybe it has to do with the raised bed – drainage is better in a raised bed and the tomatoes may prefer that, but then I remember that tomato plant roots extend deep into the ground so an 8 inch raised bed would not make that much difference.  A way out thought is this is not the plant I planted but it seeded from the compost, in which case I must certainly save its seeds.  I am developing a theory that although my 4 year old tomato seeds still germinate they may not be as vigorous as fresh seeds?   And now a solution occurs to me –  although all the tomatoes get full sun, their exposure is different – a plant in a cage surrounded by other cages only gets direct sun at the top (which is why in the first photo there is so much growth at the top), but the plant in the raised bed sprawls horizontally and so each stem and leaf enjoys its own direct sunlight. If this is the case then there is little point growing tomatoes in adjacent wire cages – if I do use wire cages they should be separated to permit full sun exposure on all sides.  But even this will not be as efficient as allowing the plant to spread horizontally.  The problem with horizontal growth has been the increased contact with the soil and potential transmission of disease from the soil, which has not happened this year.

I have notice much less pest pressure.  Last year most of my cucumbers were afflicted with a pickel worm (see post dd 081212) and this year, so far, not a sign of them.  Here is an oversized cucumber which I discovered in the raised bed – if it is like its even larger sibling which I found nearby a couple days ago, the inside will be crunchy nice.

vigorous cucumber plant

And the notorious stink bugs are absent – maybe the heavy rains had something to do with that.  My squash plants are growing well – usually at this stage they are felled by the notorious borer and this may well happen during the next few weeks.  But if it doesn’t then I will be drawing some happy conclusions about the improved biodiversity and the activities of the Brown Thrasher (our state bird) which I have seen hard at work in the vegetable area.  Still early days.

one of the squash plants

And now back to the salad of organic tomatoes and cucumbers!

organic tomato cucumber salad


hatching chicks

My second round of hatching chicks

In my May post I described my process for hatching chicks.  I hatched 5 chicks from 7 eggs using a Brinsea incubator.  I did not mention that one of the chicks had part of its intestine protruding, presumably could not digest food, and died 2 days later.  The 4 remaining chicks grew at a steady pace and are now almost the size of their mothers.  It appears they are all hens.

hatching chicken
in May they were new born chicks, now they are big teenagers

I began chicken keeping with 8 purchased (1 rooster and 7 hens) and 6 gifted hens.  Of the original 14, I am down to 5 including the rooster who is as vigorous as ever.  Since the surviving hens are tough, well adapted birds and almost all their eggs are fertilized, I decided to do a 2nd round of hatching chicks while I still enjoyed their company.
Same procedures for hatching chicks as in May, with 7 eggs in the incubator.  On the 19th day the first egg hatched and 4 more on the 20th day.  Of the remaining 2 eggs one was not fertilized and the other grew but could not emerge from its shell.  Of the 5 that hatched, one was very weak, chirped continuously and did not survive to the next day.  So I have 4 healthy chicks from the 7 eggs I incubated, the same result as my first go at hatching chicks.
I spent much time watching the hatching chicks and took pics along the way.  I placed the camera on a tripod – here is the setup.

hatching chicks
photo setup – old tripod and old manual focus lens with new digital camera

The chick inside the egg chips away at the shell to form an elongating crack.

hatching chicks
hard at work preparing to emerge

It can take hours for the hatching chicks.  When the crack is well developed the chick applies considerable effort to split the shell.

hatching chicks
the shell is broken and the chick is about to emerge

And then, with a final heave the shell remnants are scattered and the chick emerges.

hatching chicks
a new arrival

And here are the 4 of the hatching chicks the next day.

hatching chicken
4 new chicks – one from the New Jersey Giant, one from the Buff Orpington (blondie) and two from the Americauna

So I now have 13 chicken (almost back to the original numbers) – 5 of the original crew, 4 hatched in May and 4 hatching chicks in August.


seized engine repair

how I diagnosed and repaired a seized engine

I heard of  a seized engine and hoped never to experience one.  And then my luck ran out.  Not really a matter of luck as carelessness.  At the Atlanta house I use a chipper/shredder for branches and foliage en route to the compost heap.  The shredder has functioned flawlessly since 2000, except for one bearing which was easily replaced.

chipper with seized engine
my 10.5hp Troy-Bilt chipper/shredder – branches chipped through the long funnel and foliage shredded through the hopper at the top

I regularly checked the oil level – by positioning the machine on level ground, removing the oil plug and ensuring the oil was level with the lowest threads for the oil plug.

the offending yellow oil plug and the oil check tube into which it is threaded

And then one morning, while chipping away, something unusual happened – the engine puttered out.  I thought it was short of gas but there was gas enough.  I tried cranking it by pulling the starter rope and it turned easily – too easily.  I assumed either the rope was not turning the engine – a quick check told me it was, or that the engine had lost compression.  And then I noticed that the yellow oil plug was missing.  And surmised that as I was operating the machine it had dislodged the oil plug, pumped out all its oil through the oil plug hole and then became a seized engine.  Initially I hoped that the valves (there are two one for intake and one for exhaust) had stuck in the open position and this was why there was no compression.

the intake and exhaust valves, but the I had a seized engine
the intake and exhaust valves

But the valves were fine, so it had to be the piston.  I removed the spark plug and inserted a pencil through the spark plug hole and found the piston.  I pushed down on the pencil and the piston slid down the cylinder.  So, good news – the piston was not seized/melted onto the cylinder and bad news, the rod which connects the piston to the crankshaft was broken.  I had a seized engine.
Next step – 3 options: a) trash the chipper – it had given me many years service and I could transport branches to my farm and use my large tractor driven chipper; b) buy a replacement engine – cost approx $350 before transport costs; c) fix the engine.  I opted for (c).

Disassembly
Relatively straight forward to remove the engine from the chipper frame.

chipper with engine removed for seized engine repair
chipper with engine removed

I took the engine with me to my farm – something to do in the basement during the middle of the hot summer days.

seized engine in transit 0806
seized engine in transit to the farm

Also straightforward to disassemble the engine.  I rethreaded screws and washers where possible to minimize the conjecturing effort required during assembly trying to figure what goes where.

obvious damage visible when crankcase cover is removed
obvious damage visible when crankcase cover is removed – the results of a seized engine
another pic of the damaged parts
another pic of the shattered parts from the seized engine

It appeared that  with my seized engine the piston rod disintegrated – parts of the aluminum rod were melted onto the crankshaft journal.  I removed the piston and felt the interior of the cylinder.  No noticeable scoring – phew – minimal damage for a seized engine, so all I had to do was buy a new rod, new piston and rings and gaskets and sand the fragments off the crankshaft journal.  I thought the replacement parts would be inexpensive, but they cost in total approx $90 from the cheapest internet supplier.

I scoured the internet and found a free downloadable workshop manual for Briggs Stratton engines including my model.  This was immensely helpful for all the subsequent procedures.
The piston assembly came with piston rings, which have to be fitted, but no piston pin bearing which is the pin which connects the rod to the piston.  So I removed the pin from the damaged piston and I then connected the rod to the piston using this pin, ensuring that the arrow on the piston pointed toward the “mag” on the rod as directed by the manual.

Next step was to install the piston rings.  There are 3 grooves.  On the bottom grove goes the oil control ring and on each side of it, two thin rains.  The center ring goes into the middle groove.  It has two paint stripes and they are installed with the stripes to the right of the ring gap.  Finally the top ring is installed in the top groove of the piston.  It has one stripe which is installed with the stripe to the right of the ring gap.  friend lent me his ring compressor –  it was a simple matter to tighten the rings with the ring compressor and insert the piston with the rings into the cylinder. 

piston rings are compressed as the piston is slid into the cylinder

Connecting the rod to the journal
The torque specs for the connecting rods is 100lb-in and my 0.5” torque wrench only goes down to 20lb-ft which is the equivalent of 240 lb-in (multiply by 12).  So I have to pause my rebuild until I have acquired a 0.25” torque wrench which is calibrated for 100lb-in.  At my favorite internet shopping site I surveyed the 0.25” torque wrenches available.  There are expensive wrenches costing more than $100 and presumably these are superior to the <$40 wrenches.  I am hopeful that I will not have to repair too many engines and so, after reading numerous reviews I purchased the new model Tekton, which arrived quickly and appears well made and up to the task.

My plan is to secure the bolts into their threads using loctite which is a special glue made for this purpose.  I have learned from bitter experience that for important tasks I should do a trial run first – so instead of applying the glue to the threads and then torquing each bolt to 100 lb-in, I first torqued the bolts without the glue.  At 100 lb-in the piston wouldn’t move.  So I backed off the torque to 50 lb-in and the piston still wouldn’t move.  I concluded that the sanding I had previously done was insufficient and there was still a coating of the aluminum from the rod cap on the crankpin journal.  So this meant a lot more sanding. 

hand sanding the crankshaft journal, with a piece of wood to prevent rotation

I figured out how to sand the journal effectively without removing the assembly from the block – I sanded with my hands pulling the sandpaper down and with the journal in four different positions  90 deg, 180 deg, 270 deg and 360 deg, initially with 180 grit paper until there was no aluminum residue and then with 220 grit and finally 340 grit.  I retorqued the rod cap bolts to 100 lb-in and the piston moves, so after this detour I can move forward again rehabilitating the seized engine.

Valve grinding

 Since I have dismantled the engine and the engine was used for more than 12 years it seems appropriate and convenient to regrind the valves.  I first removed the rockers which blocked access to the valves and their springs.  The difficult bit is releasing the valve stem from the spring which holds it tight against the cylinder head.  I have a valve spring compressor but it is really meant for car engines where there is more space to use it and the car springs are stronger.  So after maneuvering unsuccessfully with the valve spring compressor,  I simply pressed down with my thumbs on the valve spring retainer and removed the two retainer rings (actually one hurtled across the room and was eventually located).  I applied some valve grinding compound onto the valve and using an old valve grinder from my London days, rotated each valve quickly back and forth in its seat. 

hand operated valve grinder for seating the valves

Then I compressed the springs and reinserted the retainers.  

So, with the repair work done it was just a matter of assembling the engine following the torquing  specs in the manual, and then attaching the engine to the chipper and starting it up.  It started immediately but there was a problem – the engine was racing.  A whole new field for study – how the governor works.
The throttle on the carburettor is held in the open position by a spring.  Open position means there is no obstruction to air entering the carburettor which means the engine goes faster.  But if the engine goes too fast it will be damaged.  You only want to open the throttle when the engine is under load such as chipping.  So the governor is a clever device – as the engine speeds up, centrifugal weights slide outward and their motion via linkages counteracts the pull of the spring.  When the engine is chipping it slows down, the centrifugal weights slide inward, the governor ceases to oppose the spring and the engine speeds up.  It took me some time to figure this out and how to correctly set the governor.  My repair of a seized engine is concluded, the chipper runs fine for now – the real test will be for how long.


building a bookshelf

how I built a large bookshelf

My logcabin has a large basement and I have many books in piles around the living areas – time for a large bookshelf.  The Atlanta house we bought 20 years ago had a built in bookshelf in a couple of rooms (that’s what attracted us) and in the attic was surplus wood shelves of varied lengths – 36″, 33″ and 32″.

Preparation
I cleared a wall and corner in the basement, polyfilled the holes in the sheetrock, painted the wall with the color I will use for the rest of the room and began construction of the bookshelf.  The shelves are 11″ wide so I purchased two lengths of  16 ft by 12″ wide wood and had them cut into manageable 8 ft lengths at the store (although described as 12″ wide the wood is actuall 11″ wide).  I selected the wood carefully avoiding bowing, splits and disfigurations.  I also bought 3 10ft lengths of 2″ by 4″ wood.

Construction
I will not go into too many details since the design is simple and evident from the photographs.

completed bookshelf 0805
the completed bookshelf

The bookshelf is 8 ft high and the 3 sections are respectively 36″ wide, 33″ wide and 32″ wide.  The shelves for two of the sections are aligned.  The furthest section has extra height at the lower shelves for very large books.  To prevent toppling, the four vertical lengths are screwed into horizontal 2-4’s  at the top and also to a 10′ 2-4 at the base where the wall meets the floor.  A 3rd 10′ 2-4 in the front secures the front edge of the verticals and provides extra footprint stability.

securing the vertical to the top of the wall

The horizontal 2-4’s at the top have two functions – to keep the vertical the right distance apart and to secure the verticals to the wall to prevent toppling.  As shown, a scrap piece of wood is all I used to secure the vertical to the horizontal 2-4.

flashing at base of vertical
I used flashing at the base of the vertical

Since the vertical rests directly on the concrete floor I decided to place some flashing between the base of the vertical and the concrete floor, lest the vertical wick moisture from the concrete.

securing the base of the vertical

I also secured the base of the vertical to the rear 2-4 using scrap wood and screws, and a single screw to the 2-4 in front of the vertical.

For the horizontal ledges for the shelves, I cut 10.5″ lengths 1.5″ wide from scrap wood and plywood.  I predrilled the ledges  for 2 screws to reduce splitting and effort of screwing them into the verticals.

horizontal ledges for shelves

The procedure is to place the lowest shelf, then measure the height for the next shelf and draw a horizontal line with a square, screw the ledge into place, then rest the shelf on the ledge and with a spirit level ensure it is level, pencil in the line on the other vertical.  This ensures each shelf is level each time.

Now the bookshelf is done I will begin populating the shelves.


erupting fungi

Rain continues to drench our region and, unsurprisingly fungi are erupting in the woods.  Domes up to 1 ft diameter shoulder aside pine needles and mulch.  The underside where new life is stored and released is mysterious and almost cavernous when you get close enough and small enough.

underside of a large ageing mushroom

There is no shortage of feasters – here is a slug at work

a small slug continuing where others left off

And no shortage of color, sizes and shapes


bright colored small mushroom

Some seem a bit drab


drab but stolid
drab but stolid

And some are half eaten


half eaten snack
half eaten snack

And some are all frilly and dressed for dancing


frilly eye catching
frilly eye catching

All of which adds to the pleasure of walking in the woods after days of rain.