During the summer I allow the tall “weeds” to grow as they wish. In fall the goldenrod, fleabane and horseweed (and cosmos which I planted) are transformed to food delights for the bees and wasps.


new life tracks – growing organic, self reliance, permaculture
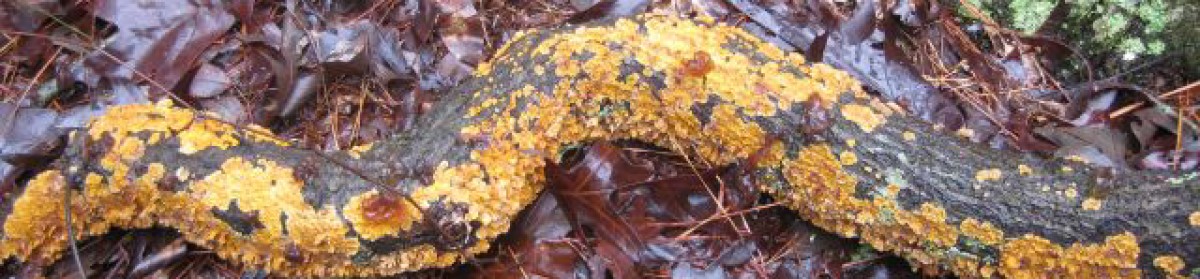
During the summer I allow the tall “weeds” to grow as they wish. In fall the goldenrod, fleabane and horseweed (and cosmos which I planted) are transformed to food delights for the bees and wasps.
Today, September 23 is the first day of Autumn. And our rain and weather the past week has been great – > 2.5″ past 48 hours.
I see so much activity among the fall blooming flowers that I googled macro photography and then downloaded my small camera’s manual and discovered there is a setting for close up photos. So I have been snapping away. The drawback with my camera is I have to get real close and the wasps flew off before I got into range and the bumblebees also began to get irritated (I assume they are bumblebees not carpenter bees).


Buffy, the rooster, had a good beginner’s crow a few weeks ago, such that the older girls on the other side of the fence became seriously interested. And then he lost his crow. So I did a lot of thinking about what could have caused this. And then I remembered. When we first purchased the chicks, they were just 8 weeks old and Buffy used to come right up to me and ask to be picked up. After he got his crow I thought it would be a good idea to pick him up again since I know they can get aggressive later so why not stay on familiar terms? When I eventually caught him, he shrieked maniacally, but I held onto to him and he quieted down and his flock came by to see and, with hindsight, I think he was so humiliated to have his flock witness his subjugation, that he lost his crow. So, since I like his crowing which has become louder and longer, I will leave him be and we will keep out of each others way.
There is something about us amateurs that either through haste, ignorance or a desire to perfect, we usually take too long to complete tasks. An example of haste is not setting up carefully before painting and then afterwards spending extra time removing the splash paint from borders or wooden floors or carpet. Our desire to perfect often compels us to give extra effort to behind the scene details which the pro bypasses.
Not that the pros get it right all the time – when I purchased the log cabin I decided to have the exterior professionally painted since some of the siding is more than 40 ft from the ground and, as I work alone, I didn’t want a fall with no one around. The west facing sides of the cabin are exposed to the sun and had black mold. The painters pressure washed with chlorine and then painted. I questioned whether the surface shouldn’t be scraped clean before painting and they assured me the chlorine and pressure wash had killed the mold and the surface was good. I painted the barn and I similarly applied chlorine (and in the process spotted and destroyed a perfectly good shirt), but went a step further and, with a large scrubbing brush, physically removed the mold from the wood surface before painting with a similar type but cheaper paint. Fast forward 3 years – every year the pros have had to “touch up” the sun facing areas where the paint flaked off. Since I have a 5 year guarantee the cost to me for their annual visits has been limited to the cost of a pressure wash. And my paint job with the cheaper paint – no sign of flaking at all.
But it is always gratifying to find a legitimate short cut. I hope the shortcut I am about to describe will prove, over the next year to be a legitimate short cut.

I have two rows of berry plants 12 ft apart and each 66 ft long. The 12 ft separation consists of a 4ft border, a 2 ft contour ditch and a 6 ft border. Both borders are populated with thick local grass interspersed with bermuda grass. I want to transplant my strawberry plants (Earliglo – early season) which seem to thrive in local conditions, produce medium size very sweet strawberries and spread aggressively, to the 6 ft wide 65 ft long border area. So how to prepare the area for planting the strawberries. I decided to spread horse manure 2 inches deep along the area, then cover the grass and manure with thick builders’ paper (purchased 140 ft, 3ft wide for approx $11) and then cover it all with mulch. My hope is that in 6-8 weeks time the grass will have died from lack of sunlight, the manure will accelerate the decomposition of the grass, and the mixture of manure, dead grass and topsoil will provide a healthy welcome for the transplanted strawberries. The mulch should enable the strawberries to thrive without weed competition. I would not have attempted this shortcut earlier in the year when the grass grows strongly but now, in the second half of September, with shortening daylight and with even the poson ivy faltering, it seems a reasonable bet. The long way round would have been to remove the grass but to do this I would have had to remove the topsoil as well and then have had to add back compost to provide nutrition. A lot of work even if I had used the bobcat.

Incidentally, talking of manure, there is manure and manure. In the 1800’s before the advent of modern fertilizers, much experimentation was done on different types of manure and how manure should be stored. Books were written on the topic and these are available free for download at www.Gutenberg.org. An interesting conclusion is that the best manure is that stored outside in a heap, second best is manure stored in a heap under cover, and worst is manure spread on the ground outside. See chapter XV of Talks on Manure by Joseph Harris dated 1919. I mention this because there is new management at the horse stables I visit and, instead of piling the manure in a heap and loading my pickup directly, they have have spread it out on the ground and then drive around in their tractor to gather it up and load it. It seems the weight is half what it used to be (in the past I had to adjust the rearview mirror because the weight at the back depressed the truck significantly, now no adjustment is required) and, from my perspective, I am getting half the nutrients I used to get. Though it requires much less effort to offload, the maxim “no gain without pain” is again validated. Maybe I should find a new source of supply!
As the heat subsides it will soon be time to plant garlic again. Last year, influenced by several fall articles, I bought four varieties of garlic and planted them in October. They were: 1) organic California Early White – softneck ($4.99 lb); 2) Elephant garlic – very mild like a leek ($4.99 lb); 3) organic Music Garlic – hardneck ($12,99 lb.) – the only reason I bought this more expensive variety is because my family is into music; 4) organic Dujansky – hardneck ($9.99 lb).

I know that my raised beds drain well (because they are raised) and I had read it is important to have good drainage, I did most of my plantings in two 8x4ft raised beds and the balance in a long bed alongside the fruit trees. The bed is an excavated trench filled to surface level with compost. The raised beds are in the main growing area encircled by a fence, the trench bed is accessible to footed wildlife. The instructions from Peaceful Valley, the supplier, referenced gophers and, although we do not have these, I was concerned about subterranean attacks and enclosed some of the plantings in hardware cloth. I watered the raised beds regularly but only occasionally watered the trench bed. All the cloves grew, those in the raised beds grew better. There was no evidence of pest damage to any of the garlic.
 When the scapes appeared I removed them and in mid-June I harvested all the garlic. Initially I left them to dry in the greenhouse but it was too hot so I stored them in the open carport until they had dried. I then placed them in mesh bags which I have suspended in the basement. The garlic tastes great and we especially like the elephant garlic. This garlic was for personal consumption and friends and we have a lot left over. The elephant garlic is our favorite and I will plant out all the elephant garlic cloves and just some of the other garlic. Next year I shall add garlic to my list of produce to sell at the local market.
The Peaceful Valley planting guide says to avoid planting garlic in the same place where I previously grew garlic, onions or other alliums, so I will have to prepare new beds, perhaps at the top of the hill where there is good sun exposure and drainage.

Last year I bought a Takeuchi TL26 track loader. This machine was made in the 90’s and because it has tracks rather than wheels is ideal for grading or re-shaping the ground surface. It has 61hp, which makes it a mid-size loader and just right for my limited needs. In the article on the fading battery I mention some of the repairs I have made to it.
Since the temperature tomorrow is expected to be back in the 90’s and today we are only in the 80’s, I decided to cut a ramp down to the lower field. My tractor access to the lower field is blocked by the fences I installed for the chicken coop and I figured it would be cheaper to make a new road to the field than to purchase two 10 ft gates for access through the chicken free range.
I like thickets for the cover and food they provide to the wildlife. However, this morning it was necessary to cut a road through vegetation. The process took less than a couple hours. I placed the cutting edge of the loader’s tooth bucket a few inches below ground surface and ripped the bushes and small trees out of the ground. Once the roots were free I climbed out of the loader and manually pulled the branches out of the way and stacked them in a pile to be chipped at a later date. The roots will be stacked in a pile for slow decomposition and to be added to the compost heap.


Grading the hill i.e. cutting a ramp down to the lower field was more of a challenge. I work by myself and try to avoid situations where I get into trouble, though I always keep my cell phone at my side in case I have to call for help. So I proceeded with care filling the bucket of the loader with soil as I cut a decline into the ground and then advancing to the edge and dumping the contents down the hill. In this way I fashioned a road down the hill. Then it was a matter of leveling the ramp and removing some of the boulders embedded in the hill. My loader is 5ft wide and the tractor is 7ft wide (it has wide rear wheels which increase the width from 6ft to 7ft), so I widened the ramp a bit for future access by the tractor and pickup truck. After it has rained and the soil re-settled I will smooth out the ramp one more time with the loader and then bring the tractor down to bushog the field, chip the branches and small trees, and augur post holes for the new insulated coop I will be building towards the top of the field where it catches the winter sun.


During the past week the cantaloupe have shown they are ready for picking. Quite suddenly their color changes from green to yellow, their stem withers and they exude a strong musk aroma.
I planted the seeds directly into a raised bed (8ft x 4ft) on Sunday 6/26. I had purchased a packet of Burpee’s Ambrosia Hybrid which cost $1.89 (before taxes) and I was disappointed there were only 12 seeds in the packet. I formed two hills in the bed and placed 6 seed in each hill. Previously I had harvested my garlic from the bed and I just added some more compost before planting the cantaloupe seed. I watered well and often with a hose and initially did some light weeding. All seeds became seedlings and, with watering, developed into strong plants. Unlike my struggle with squash, the cantaloupe plants were not visibly visited by any pests.

The melons are well formed and look great. Of course there is usually a snag and it is the taste which is tending to neutral and only slightly sweet. I wonder if that has to do with their nutrition or growing conditions or perhaps I should have planted them earlier in the season, as suggested by the packet. However, the most recently picked are sweeter to the extent we are enjoying them ourselves and not giving them to the chicken. I have decided to save seed from the sweeter melons for next year.
The chicken, both flocks, love the melons which I provide after removing all the seed. Interestingly, only the older birds like bananas.


Thank you Ms.Lee
for deep drenched soil,
weeds that pull easily free,
storage tanks filled,
heat index chilled,
raindrops that smile
with me.
For me to say I grow organic requires me, at a minimum, to understand what this means. The simple definition from the EPA website is “Organically grown” food is food grown and processed using no synthetic fertilizers or pesticides.
But what about the use of horse manure in my compost, or my chicken patrolling the growing area, or preservative treated posts to anchor the cables for muscadine, tomato cages, berry plants?
I am not an attorney or expert in this area and the following are my layperson’s understanding of some of the regulations – so don’t rely on this!
The National Organic Program (“NOP”) states that organic production must comply with the Organic Foods Production Act of 1990 (“OFPA”) and title 7 part 205 of the Federal Regulations. Part 205 includes very detailed requirements for processes, record keeping, inspections and state certifications.
For my particular situation, where my gross annual agricultural income from organic produce is less than $5,000, I do not require certification but must nonetheless comply with the applicable organic production, handling and labeling requirements. However, at the local market where I sold my lettuce earlier this year, as well as at a larger market in Atlanta where I had preliminary discussions, the organizers made it clear they would not permit anything to be labeled organic in the absence of organic certification.
Section 205.202 clarifies that there is a 3 year look back period i.e.the field which produces the crop must have had no prohibited substances applied during the 3 years immediately preceding harvest of the crop.
Section 205.203 requires nutrients and soil fertility be managed through rotations, cover crops, and the application of plant and animal materials. Raw animal manure (my chicken manures?) cannot be incorporated into the soil within less than 120 days from the harvesting of a product whose edible portion has direct contact with the soil surface (carrots or onions?) or 90 days for a product where the edible portion does not have direct contact with the soil (tomatoes?). As for composting horse manure, there are required initial Carbon:Nitrogen ratios and temperature ranges and duration.
Section 205.236 for chicken to be organic they must have been under continuous organic management from the second day of their life; and cows producing organic milk products must have been under continuous organic management for 1 year prior to the production of the milk. The inputs such as the seeds or food consumed by the animals must, with some exceptions, be organic and not have come into contact with prohibited substances. Therefore, according to my understanding, no treated posts in the planting areas.
There is a debate about whether honey can be organic since to qualify, the inputs, which are the nectar producing flowers visited by the bees, must be organic and since bees have a flying radius of up to 5 miles can anyone confidently assert they did not visit a chemically treated plant?
Just a culling of some of the provisions and my potted understanding of them!
I should add that I have been a member of Georgia Organics for at least the past 5 years and they have excellent materials on their website on organic farming as well as “sustainable agriculture.”
 Eight young chicks arrived as a group
into a shed converted to coop
two Golden Comets who jump on your knees
when sitting you offer some morsels to feed
two Black Giants so skittish and shy
they keep the most distance when friendship you try
two Speckled Sussex the smallest of all
but quickly chase Comets to far away wall
and then the last couple, so striking indeed
a hen and young rooster of Buff Orpington breed
as coop door unshackles
they cluster around
then chortle and hustle
with wide legged bound
first to the weeds for a nibble or peck
then claw in the mulch
and sound a loud cluck
when worm comes to view and
seals their good luck
 but Buffy is different
he has just learned to crow
red comb and gold cape
held high and held low
a matador turn, but is he a fake?
while coop mates ignore him
and focus on feed
across the fence barrier the
Rhode Island Red
has heard his first crows and though
twice months in age
is curious to meet the
tenored young sage

she paces the fenceline and he saunters closer
though pretext is food, a purposeful loiter,
he faces and tip toes, his chest full of swagger
she responds just as quickly with unrestrained vigor
and then he departs and she wistfully eyes
the untutored young rooster and if she could,
sighs,
but tomorrow will come and who knows by then
Buffy be back and gladden the hen.
I had a lot (for me) of visits to my site yesterday but not many comments – if you visit and would like to add or question, please do. I think a number of visitors were interested in rainwater harvesting and this is one of my passions.
I read a review in the FT (Financial Times) for Wednesday August 31 titled “Water is the new weapon in Beijing’s armoury”. Apparently China is the source of cross-border river flows to the largest number of countries in the world, including Russia and India, and is rapidly building mega-dams to control this water. The Amazon description of this new book by Brahma Chellaney says: “The battles of yesterday were fought over land. Those of today are over energy. But the battles of tomorrow may be over water.”
Our local paper (the AJC) reports this morning that most of Georgia south of the mountains is now in “extreme drought”. This may change, and hopefully it will change for Texas too (otherwise our food prices will continue to escalate) but who can tell the future. So I conserve whenever I can.
All the houses around my property use well water. The precariousness of this supply was brought home to me in 2009 when my next door neighbor’s well ran dry. They told me their well was 600 ft deep so all the more surprising it should fail and all the more concern for me since my well is less than 600 ft. I took some ‘photos of the equipment for drilling their new well.

Their new well was drilled a couple of hundred feet distance from their old well. The new well was also 600 ft which, at a cost of $10 for each foot, came to $6,000. There was insufficient water at the bottom so plus $3,000 was incurred to hydraulic fracture the bottom of the well, then an additional plus $3,000 for the pump, wiring and piping.
Interestingly, the drillers used rolls of poly pipe. Another driller told me that if the well is more than 300ft you have to use rigid 20ft pipe lengths (threaded pvc drop pipe) since the poly pipe stretches each time it is removed. It costs much more to replace a well pump if you have rigid pvc pipes since each has to be lifted out of the well and uncoupled, whilst with poly pipe you thread the pipe over a pulley, attach it to a pickup and drive down the road a couple of hundred yards and the pipe, cable and pump are quickly pulled to the surface.
I digress, the point is that the new well cost my neighbors in excess of $11,000. For this reason as well, I use my well water sparingly and try squeeze every drop I can out of my rainwater harvesting system.