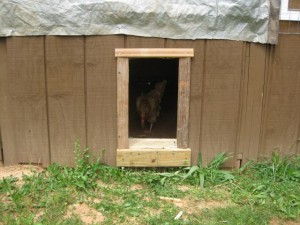
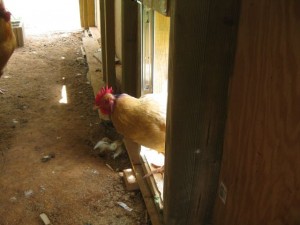
Ever since I built my new chicken coop late last year, I have toyed with the idea of an automatic door opener. With daylight ever earlier each morning I feel obliged to be at the property by 9am to let the chicken out and I need more flexibility with my day. All that needs done in the morning is opening the door to let them out. In the evening it is more complicated – they must be counted to ensure all present; they must be segregated with the rooster on one side of the partition and his favorite victim on the other; and the feeding bowls must be filled. Also a last collection of eggs and dispensation of required treatments (all organic, primarily neem oil diluted with baby oil for mites etc.) So I have to be there at day end but not in the morning. An automatic door opener will improve my life. I summarize below my road to my automatic door opener – this is for informational purposes only, I make no recommendations and accept no responsibility or liability if you go the same route.
I scoured the internet and found several versions for sale and good ideas for construction. Two often mentioned issues were sticking doors and concerns that predators could lift the door and enter the coop. I mulled these over. I recently installed a heavy duty drawer slide (rated for 100 lbs weight) and I thought a similar 22″ slide (cost $15) would be the solution to vertical door binding. This was the most expensive of the components. I decided to use 0.75″ thick plywood sized 12″ wide, 22″ high – the weight of this door will secure it from most predators. So two issues conceptually solved.
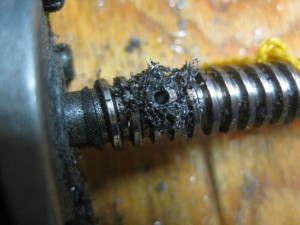
I decided to build the contraption away from the coop – much easier to sit and ponder each step in comfort with tools and coffee and NPR at hand, than to shuffle amongst the nutritional gifts of the chicken in the coop. So I measured to ensure the frame would fit snugly in the coop and departed to my workshop. And just as well I did, since it took way longer than I had conceived. To raise and lower the door would need a motor of some sort. I could have sprung for a drapery motor (circa $82) which comes with a timer, but this would be circumventing the challenge. I needed a motor that turned slowly. I have read of using a power drill or screwdriver. I needed something which turned real slow and operated on 12 volts DC (intermediate plan is to install a solar panel and 12 volt battery, so I was trying to plan ahead). And then, in the course of my googling, I found a 12VDC automobile seat motor, spins at approximately 190 rpm (revolutions per minute) draws 1.5 amps and cost (at the time $12.50, before $5.95 shipping. My solution. I ordered one.
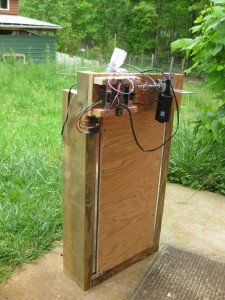
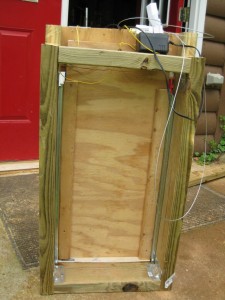
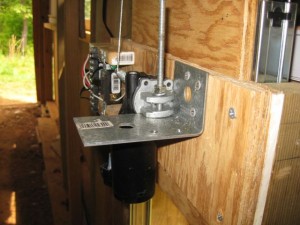
So, with my two main components at hand (the drawer slide and the motor), I began construction. I used surplus lumber to build a frame for the door, then I installed the drawer slide and then attached the door to the slide. I noticed that the drawer slide has a self-close mechanism which pulls the drawer to the closing position and therefore presents additional resistance when the door is first moved – to overcome this feature I placed a strip (.25″) of wood along the threshold to prevent the slide from fully seatings. The motor has only 1 securing bolt hole at an odd location – I was determined to bolt the motor to the frame rather than use straps as I have seen done on the internet, since I am concerned that straps can shift with continuous, heavy use. Staring and humming (silently) and staring some more, I eventually figured a way to bolt the motor to the frame.
Now all that remained was the electrics. I am not an engineer and do not have the software to show the circuit, so I will describe it – it is very simple. The circuit starts with a 120VAC cable from the barn which goes to a $5 two prong timer set to go on at 7.30am and off 10 minutes later. There are two outlets from the timer, one connected to a $2 night light and the other to a transformer which converts 120VAC to 12VDC at 1 amp (more about the night light later).
|
|
|
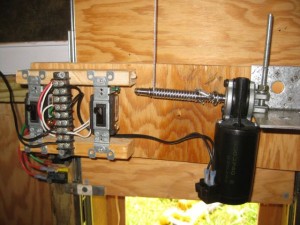
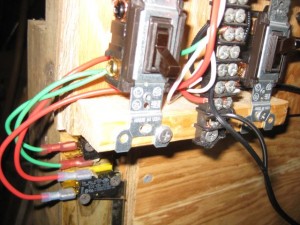
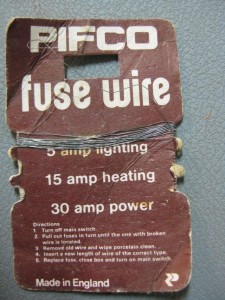
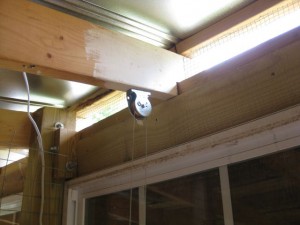
When the transformer receives power via the timer it turns and, using 1/16 steel cable, lifts the coop door vertically and smoothly, thanks to the drawer slide. When the door is about at the top of the slide, a plate on the door contacts the lever of an on/off switch and this contact breaks the circuit and the motor stops moving. A few minutes later the timer switches off power to the transformer, so no more electricity is consumed. I have installed another on/off switch, which is triggered when the door is lowered and reaches the bottom of the frame. These switches cost just under $2 each. If the accompanying photos raise a question about the exposed wiring, remember there is only 12 volts running and, as one of the photos shows, I did include a 5 amp fuse wire breaker.
|
|
According to the plan, the chicken will disembark the coop just after 7.30am and a few (or some) hours later I will arrive. At the end of the day, the coop door must be lowered. I know that if I reverse the current to the DC motor it will spin the other way. So to lower the door I have to switch on the current (it was switched off by the timer) and reverse the leads to the motor.
A two way light switch is common about a house. What it does is enable the house lights to be switched on or off from two locations. Essentially, when it is in the up position it sends current from one terminal and in the down position the current exits from another terminal. I bought two of these switches for about $1.50 each and affixed them side by side and wired one switch to the positive and the other to the negative wires from the transformer. When both switches point up, the current flows via the on/off switch to the motor and the motor spins in one direction and raises the door until the circuit is broken by the on/off switch. When both switches point down, the current flows via another on/off switch to the motor but the wires which arrive at the motor are reversed – the positive current goes to the terminal which previously received the negative current, so the motor spins the other way and the door is lowered until the circuit is broken when the door reaches the bottom and triggers the second on/off switch. Since I made this post it has been suggested to me that it would be simpler to replace the two two-way switches with a single DPDT (double pole double throw switch), more elegant and since both poles will be switched simultaneously, I don’t have to go through my present routine of ensuring the current is off before I use the switch (see below).
So to lower the door I need to be present, which is ok for the time being. Eventually I will add some components so that the door can be raised and lowered automatically, but this will be just for emergencies since if it comes down too early not all the chicken may be in the coop and, if I set it late enough for stragglers, there is the possibility that a predator may join them for the night. Plus they need to be fed (I suppose an electric food dispenser can be organized) and eggs collected. Another concern is that if there is dirt or a twig across the threshold, then when the door descends it will not reach full bottom and so will not trigger the on off switch and the motor will keep turning and wind the door up to the open position – hello predators!
Oh, I forgot – the night light. It is critical that the two two-way switches be moved simultaneously since if one is moved just an instant before the other, it could (I have to think this through) create a short circuit and destroy my transformer (this is an old transformer I found laying around but I would hate to have to replace it). So the best is to ensure the current is off when I move the switches – my end of day routine is to point them down, then switch on the current and have the door descend, then switch off the current and point them both up, so that they will be ready for duty 7.30am next day. To ensure I know when the current is on I have the night light and I simply have to remember not to move the switches if the night light is on. Switching the current on i.e. bypassing the timer is simple since it has a lever to flow the current when the timer has switched off the current.
|
|
Finally, I just ordered another motor (price has jumped in 2 weeks from $12.50 to $14.50) so I can build a second door to cater for the segregated housing arrangements. But for the time being I will either leave the partition door in the coop open or house the rooster’s target with two companions in a nearby coop which has a little courtyard (if such be the term) so the three companions can stretch their legs while awaiting my arrival.
postscript – after 4 night’s use, the door so far works flawlessly. The only issues have been lowering it at the end of the day – I have to make sure the threshold is clear of debris otherwise the motor winds it back up. A solution could be to have it stop say 1/4″ above the bottom and position a 1/2″ strip of wood between the door and the outside so a predator cannot get its claws under the door in the 1/4″ space and try raise it. I will focus on this when I fully automate the door later. I have now completed and installed my second coop door – for details click here.

I just want to say, I really appreciate your taking the time to write what you have done.
If you don’t mind, and if you would be so kind, I would be more than happy to pay you $20 for complete set of instructions how you constructed. (i.e. #1, #2, 3, etc. from start to finish)
I am in the same boat that I cannot afford a fancy systems when all I need is to temporarily open the door and close at will. It doesn’t have to be timed because all I need is to be able to control it from say 10′ distance.
I need to tell you as to the reason why I do really NEED something like this:
I rescue dogs animals and some of them have simple health problems such as (i.e. being trained to potty on pads and as much as I like to put up with this, I am trying to retrain them to do it outside.) I am proud to say that I pretty much trained one of them with say 98% success rate (but still, I cannot leave any rugs on the floor because she seems to want to reverse her behaviors) so without rugs in the summer is doable but in the winter is pretty miserable for most of us human and other dogs that doesn’t have the same problem as she is.
The reason why I would like to install this or make a baby gate is because I have NEUROPATHY on my feet and for the most parts this particular dog barks a lot but of very annoying sound whenever she want to be let out. It is painful for my feet but I do it anyway and I thought WOW to have something like what you have done here would reeeeeeaaally help me out with having to get up and run to let her out.
So, if you would and if you don’t mind can you provide me with the instructions (also I would like the instruction to include the exact parts that you buy etc.)
I will send you a check or whatever, and will ask my handyman to build this little gate for me.
Thanks a million!
Maile Moore
Thank you for your detailed comment and question. You mention you would like to control the door from a 10 ft distance. My first thought is have you considered a simple pet door which has a vertical hung flap which the dog nudges to get in or out of the house. The flap returns to the closed position to stop draft and is often held in place by a magnet. This way your dog can always get in and out. Problem is another animal could also come through the flap door. If you are there during the day and your concern is other animals coming in during the night then the pet door could be augmented with a hinged solid door and latch which you could secure at the end of the day.
As for a motorized door, I notice from my post’s date that I installed the door more than 5 years ago. I have used this door every day since it was built and it works fine except that after a few years I had to replace the transformer and occasionally debris at the base of the door prevents the shut off switch from working. To operate it from 10 ft distance will require either a trailing wire which can become a nuisance/tripping hazard or a remote controller, like what is used to remotely open and shut a garage door. This will add to the expense. So you have several options to consider.
I reread my post and it is reasonably detailed and if you print and give it to a handyman he/she should be able to follow along and I am available via this website for any questions which may arise.
Good on you for rescuing animals. My dog Trudy (12 years old) came from an animal rescue shelter and she has been my daily and faithful companion.