catching the rainwater
Most of the catching is from the roofs of various structures. I have six capture sites: carport; house; barn; deck, chicken coop and the tractor building. Additionally, I snare the groundwater with contour ditches so it will infiltrate my growing areas rather than fill the streams and rivers – see the “earthworks”.
I have 3 largish tanks – 2,500 gallons in the carport and 2 – 1,400 gallon tanks in the barn area. I also have 285 gallon tanks at the tractor building and the chicken coop. Water in the tractor building and chicken coop tanks, when not otherwise used, is pumped to the large barn tanks. Rainwater is pumped from the carport and barn tanks to two 285 gallon tanks on the top of a hill from where the water gravity feeds to various plantings. The higher gravity feed tank irrigates the berry plantings (blackberry, raspberry, blueberry ) and vegetable plantings on the top of the hill and a new small orchard on the side of the hill. The lower gravity feed tank irrigates the orchard and vegetable growing areas at the base of the hill.
On the top of the hill, adjacent to the gravity feed tanks is an old deck (used to be attached to a mobile house) and rain from it goes directly to the gravity feed tanks. The valves on the gravity feed tanks are usually open, so that when the rainwater is received it circulates directly to the crops. However, when it rains, I close the valves in order to retain the water from the old deck.
tractor building
The tractor building is 16” by 32” for a total of 512 sq. ft on an East West axis with asphalt shingle roof and gutters.
The two storage tanks are located on the north side of the building to reduce sun exposure. Rainwater from the south facing roof is conveyed by 1.5” pvc pipe feeding into corrugated 4” drainage pipe to the lower placed storage tank. Rainwater from the north facing roof is transferred to the higher placed storage tank. Each tank has a capacity of 285 gallons.
The rain gutters require occasional cleaning to remove leaf litter. The rainwater entering these temporary storage tanks is not screened, but is screened when it is later pumped to the main storage tanks.
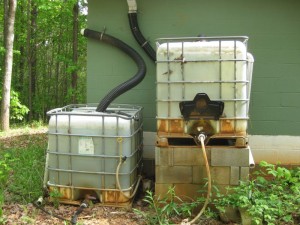 The reason for the higher placed tank is to provide sufficient water pressure (psi) to operate a toilet in the tractor shed and also so that it can drain into the lower tank when water is pumped from the lower tank to the main storage tanks. The higher tank also provides irrigation for a mushroom shelter. Both tanks have overflow outlets to ensure excess water is directed well away from their bases. When the tractor shed was first built, all the rainwater was funneled to the lower tank and then pumped to the second tank located on a rise. The second tank, being higher had the pressure required to flush the toilet. On reconsideration, it was much more efficient to simply locate the second tank on cinder blocks and capture the water directly at a higher point, thus obviating the need for pumping.
barn
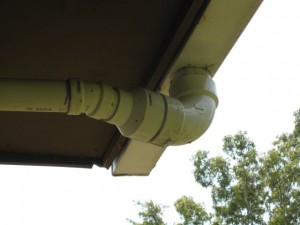
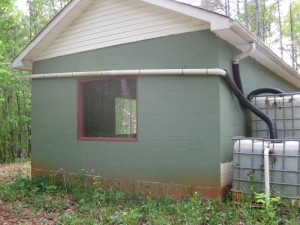
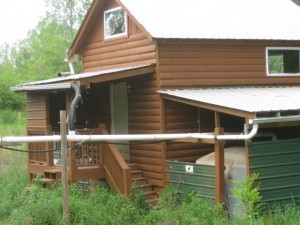 The barn is on an east west axis and the ‘photo is from the south side. Water from the north side drains via a pipe onto the west facing roof and water from this roof drains vertically into the 2” pipe which is bringing water from the house roofs. Water from the south facing roof also drains into the 2” pipe which transfers all the rainwater into the first of the two 1.400 storage tanks.
carport
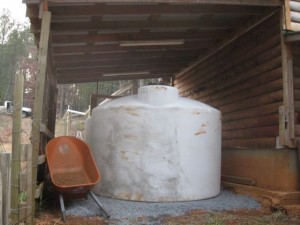
Water from the gutters on both sides of the carport are transferred to the main inlet point. The ‘photo also shows the overflow pipe.
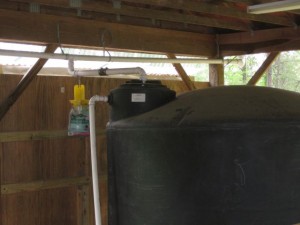
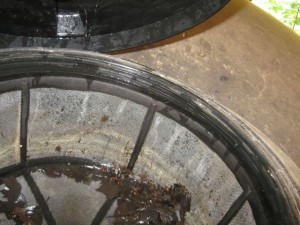
The tank has 2,500 gal capacity and a basket screen.
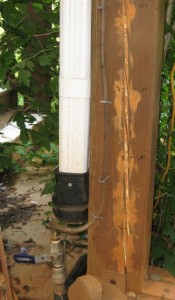
The water level in the black tank is shown by a tube (stapled to a post – see picture below) connected to the outlet pipe. The tube is calibrated to match the volume markings on the tank. When pumping, the tube must be shut off (see valve in off position) otherwise the pump sucks air through the tube.
On July 25, 2016 I replaced all the pipes with 4″ thin wall – see my post dated 7/25/16 for more details.
water level indicator
gravity feed tanks
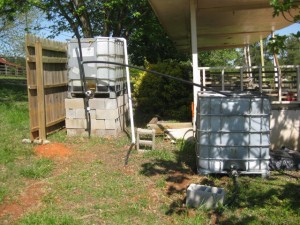
I often have to learn, through trial and error , the best way to move the rainwater. My two (285 gal) tanks are located at the top of the hill. The higher tank irrigates the plantings on the top of the hill and on the side of the hill and the lower tank irrigates the plantings along the base of the hill.
I determined that for each watering cycle the higher tank would have to be 50% full and the lower tank 100% full. My initial solution as shown in the adjacent picture was to connect the higher tank to the lower tank via the outlet from the higher tank and to have the transfer pipe set horizontally at the halfway point of the higher tank. The theory was that when the water pumped into the higher tank reached the halfway level it would then transfer to the lower tank through the outlet pipe.
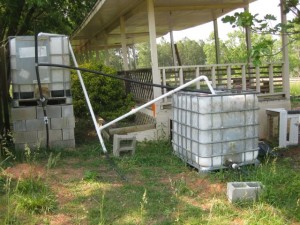
However, in practice, the transfer occurred at a slower rate than the water entering the higher tank so the higher tank overfilled before the water could transfer to the lower tank. More significantly, I want the system to operate without my intervention and for this to occur the higher tank has to irrigate its plantings as it is filled, which means it will take longer for this tank to reach the point where it begins transferring to the lower tank and this results in excessive water usage.
So I scrapped this approach and instead, as shown in the lower picture arranged for the pumped rainwater to enter both tanks simultaneously. Since the pipe to the lower tank is lower than the pipe to the higher tank all the pumped water goes to the lower tank. To regulate this, I introduced a check valve and have set it such that the lower tank now fills at twice the rate of the higher tank. With a stopwatch I determined how long it takes for the tanks to reach their required levels and set the timer to pump for this duration.
Rainwater harvesting is a continuing challenge but I suspect its rewards will increase as I become more proficient and as water shortages become more exacerbating.

plia send me rainwater harvesting articles cos am doung research on the same topic………………
I don’t have any articles. I will answer any questions you have on my rainwater harvesting.
I only recently started thinking about harvesting rainwater, and I had no idea how much you could gather from your own house! I would not have thought it possible to fill up one 2,500 gallon tank, let alone 3 of them plus extras. It seems like you have made very efficient use of the structures around your home. I wonder if you would be able to harvest even more if you were to install some large, possibly corrugated metal, pipes elsewhere around your property.
See my post today. I mention I will expand my storage system to keep even more of the rain during the rainy season. Hopefully will not reach a point where I have to create impermeable surfaces to harvest more rain for storage. But our current drought has been bad.