With temperature in north Georgia back in the 80’s it was time to summerize the coop. On the south and west facing sides I atttached the pre-cut tarp pieces from prior years, silver side facing the sun to reflect heat away from the building. Then I plugged in the cord to the gable fan – and there was no response. I examined the cord from the power socket to the thermostat and noticed that the white (neutral) line had been chewed by rats (now why didn’t they chew on the positive line?). I replaced the cord, plugged it in and there was a hum from the motor but no rotation. The fan blade did not turn freely. Time for a new motor. I had purchased the gable fan at least 4 years ago for close to $100 from a big DIY store. Was there a cheaper option? Amazon to the rescue – their #1 best seller was $57 with Prime (so just sales tax on top of the cost). A click and it arrived 2 days later. And then my problems began.
WARNING – WORKING WITH ELECTRICITY CAN BE DANGEROUS – IF YOU ARE NOT COMPETENT IN THIS AREA, STAY WELL CLEAR
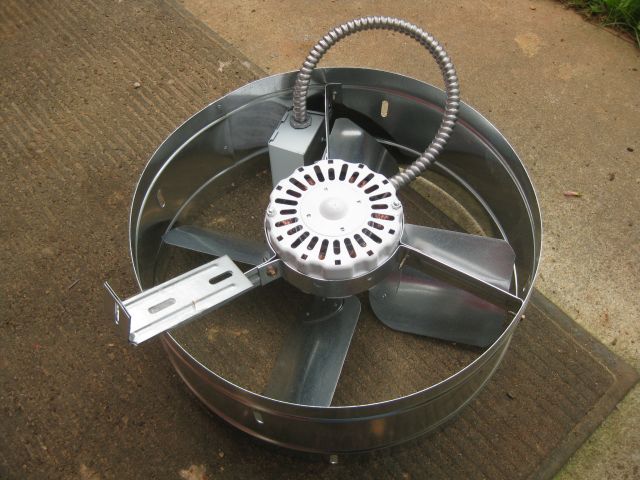
As may be seen above, the fan housing is attached to the wall with 4 brackets but there were no bolts in the package to attach the brackets to the fan housing. Also the fan has a 14″ diameter and the existing fan was 13″. The housing of the old fan could flex with the spinning of the fan so there would be less vibration, but the new housing was rigid – I guess that’s why it all cost much less.
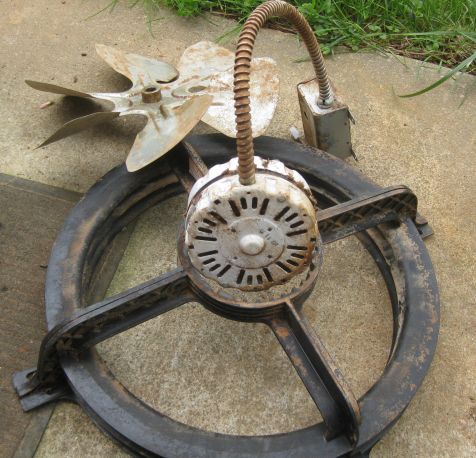
I didn’t want to delay to locate or buy bolts to attach the brackets to the new housing or to have to cut a larger hole in the exterior wall to accommodate the larger diameter fan. The old and new motors appeared identical. Which got me thinking – why not simply replace the motors and use the old fan blade?
So I removed the old fan from its location and with oil and sand paper removed the fan blade from the motor shaft and then extracted the motor from the housing and placed the old and new motors side by side.
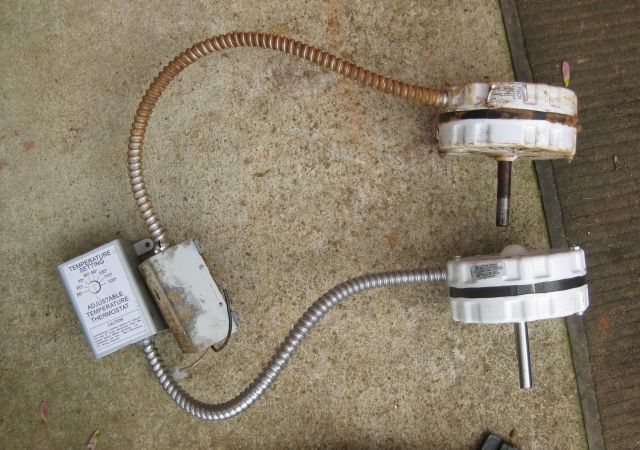
I installed the new motor in the old housing and attached the old fan blade to the shaft of the new motor. The thermostat wires were in the thermostat casing so I fished them out and connected them to the new cord and switched on the outlet. All was silent and I realized the thermostat was set too high so I turned it down and – pop. The socket shorted. How was this possible – could a new purchase arrive with a malfunctioning motor. I disassembled my installation and tried to open the motor to locate a wiring short. No luck. Then I noticed it was manufactured in Texas – got to be decent quality inspection procedures. So either the wire in the armored cable to the thermostat or the thermostat was the problem. I opened the thermostat housing and there was the answer.
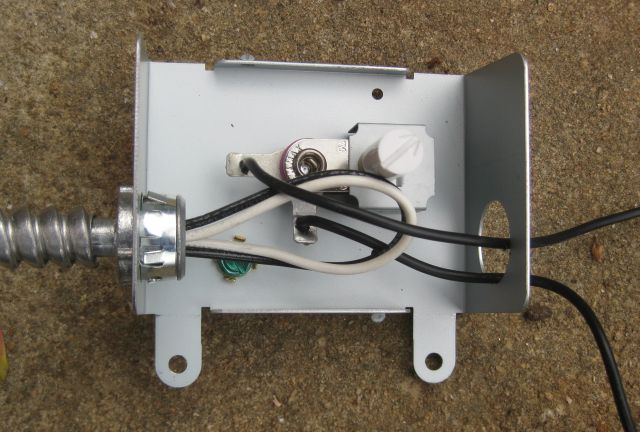
The 2 wires I had fished out were the wires to and from the thermostat and that’s why it kept shorting. Silly me – them being the same color should have told me. And you can see the black and white wires from the motor doubled over. It was a simple matter now to connect the black wire from the motor to a black thermostat wire and lead the white wire and the other black thermostat wire out the housing to the power supply. I reassembled all the parts and installed the fan back in the coop.
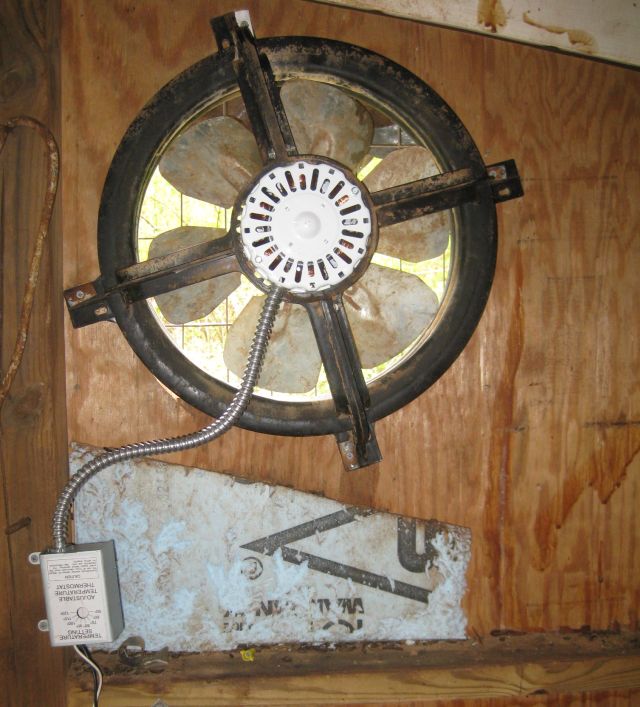
And, of course it worked. Some simple lessons there for me. It also would have been nice if the new fan purchase had come with some instructions and the nuts and bolts to attach the brackets to the housing. And the old motor – I will disassemble it some day and see if I can fix it.
