wanting to trust – concerns about honey

We think of honey as nutritious and pure, but it ain’t necessarily so.  Most of us want to trust others, and then we get burned and keep our guards up and become cynical.   Recently my emotions oscillated back and forth and I still don’t know where I come out.

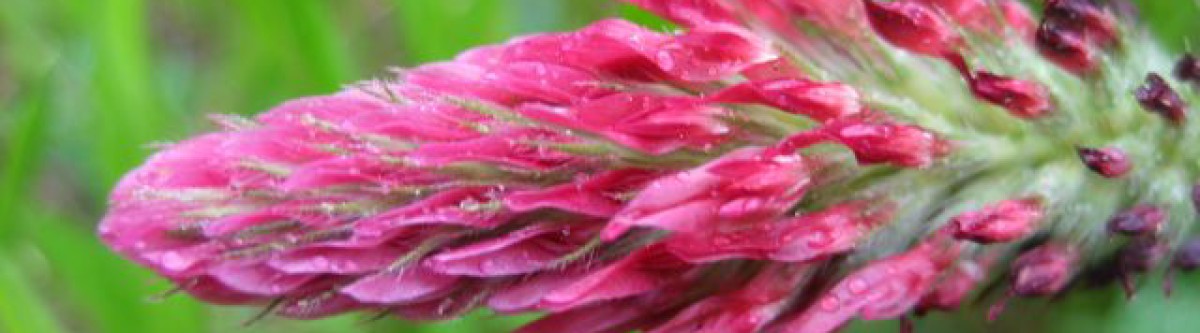
I produced just under 5 gallons of honey last year, which should have been sufficient to carry me through the winter and spring until my next honey harvesting sessions.  But it tasted so good and so many wanted a bottle that I ran out of honey early spring and decided to buy some to carry me over.

I bought a container labelled “North American Honey” which tasted ok, not great.  (stage 1 – trust, does not contain honey from China).

One day I scrutinized the label more carefully and read the statement “May contain product of the U.S.A and Canada”.  This caution surprised me – I thought it would say “Contains product of the U.S.A or Canada”.  To me “may contain” means it may or it may not contain.  (stage 2 – cynicism).

So the question for me was what percentage if any of the honey was from North America. I visited the packager’s website (to keep my life simple I will not identify the producer) and it extolled the wonders of their honey.  I did some googling and found they had some years ago filed a petition against alleged honey dumping from China.  My hopes began to rise – these must be the good guys.  (stage 3 – neutral)

So I emailed the packager and, to my pleasant surprise, within a few days received a reply that said: “The North American Honey you purchased is 100% USA. Our labels allow us to use Canada Honey in the product, but we have not done so for a few years.”  Great news, but why not make this clearer in the label by saying “Contains product of the U.S.A or Canada”.  Anyhow, issue resolved as far as I was concerned.  (stage 4 – trust, again).

I must clarify my antipathy for honey from China – not because it is sold at a very low price which undercuts U.S. producers – that’s life (actually I have very strong views on the trade deficit and will one day get onto this topic).  No, the reason is there are health concerns about Chinese honey as detailed in the American Bee Journal (“ABJ”), June 2011 p.593.  So how can you tell from which country the honey originates?  By analyzing the pollen in the honey – so called melissopalynology.  And what would make it impossible to determine the country of origin?  If all the pollen in the honey is filtered out.  California and Florida passed laws prohibiting the removal of pollen except where this was necessary to eliminate foreign inorganic or organic matter.  Well, recent tests found that a lot of honey sold as U.S. honey has been filtered to remove all the pollen – see ABJ June 2012 p.554.   And, guess what, the packager which I have been following is named as one of the producers which has filtered out the pollen from their honey.   (stage  – heading to cynicism, again).

Now the producers have reasons for filtering out the pollen – the honey looks clearer because it has been filtered to remove particles which make it cloudy, and is less likely to crystallize, etc.  But, given all the concerns about country of origin, why not leave the pollen in the honey so everyone knows what they are buying?

Now you may say I am unduly cynical but my experience goes back to a time when my family represented in South Africa one of the best known Bordeaux wine producers, which seeped class and prestige from every pore.  Until one day when the wine inspectors made a surprise visit, found cheap wine from another country in their cellars, and instantaneously this famous house was scandalized and destroyed.   So I want to trust all the representations and soothing explanations about the origin of  some purchased honey, but am not there yet.

battle of wits with a chicken predator

Matching wits with a chicken predator is not a contest I chose.  But I have no option but to contend, as best I can.

Some 3 weeks ago on a Saturday evening as I readied to close up the chicken coop I did my count and noticed that Goldie 2 was missing.  We searched the three paddocks and then the perimeter zone without result.  It was only when I went 50 yards into the woods that I noticed one of her feathers.  Golden Comets have distinctive gold colored feathers.  Goldie 2 was my favorite chicken – intelligent, trusting, inquisitive – and probably with less honed survival skills.  A few paces further I saw more feathers and then a bundle of feathers where she must have made her last struggle, and then no more feathers.  I suspected the culprit was a fox, probably a red fox I had spotted in the past.

Since foxes are supposed to be active early morning and late afternoon, I decided to reset the automatic coop door opener from 7.30am to 9am and I hoped the chicken would be safe until 5.30pm to 6pm when I typically coop them.  A week passed without incident.  Then I spotted the fox again one evening.  Then some more time passed.  Last Thursday at 4.30pm the rooster gave his serious distress call – four distress calls in quick succession.  Onto the deck I stumbled and I heard some commotion at the bottom gate and then I saw this lithe attractive fox head down the hill into the woods, alone.  Then two days later, Saturday afternoon at 4.15pm, we happened to glance outside and saw the red fox heading for the chicken paddocks.  Upon seeing us it swiftly turned around and moved quickly up the hill and, without seeming to slow down, under a gate where the space between the gate and the ground was approximately 5.5″ and then up the hill and it was gone.  Pity, a really good looking animal.

I decided to engage.  First make it more difficult to get past the field gate by blocking the space under the gate.

chicken
gate to #3 chicken paddock with 4 by 4 post blocking access between ground and gate

This quick fix will not discourage him/her, just motivate it to find another route and at least foster the realization that my holding is not a cafetaria where you can just saunter up for your next meal.

Then I turned my attention to the paddocks – some of the fences are 4 ft high and some 5 ft.  I laid one or more strands of barbed wire above all the exterior 4 ft fences.

gate to chicken area
barbed wire strands above 4 ft horse fence which surrounds some of the chicken paddock

Then I tried plugging gaps beneath the fences with large stones/boulders.  The next area of weakness was the gates – one is 7ft high, the other 3 about 4 ft high.  I encircled the top rail of all 3 gates with barbed wire to discourage climbing activities.

chicken paddock gate
4 ft gate to chicken paddock with barbed wire on top rail and interstices blocked with fencing material

Sundry other improvements were made including clearing the growth on the paddocks’ west exterior so that I and the rooster could more readily spot a stealthy intruder.

fence on west side of chicken paddock
west side of chicken paddock before clearing
west side of chicken paddock
west side of chicken paddock after clearing

My next steps will be to resort to technology and install motion sensors which may alert me to the fox’s approach.  I believe the coop will withstand a predator so my concern is about day attacks when I am deep in the woods or temporarily away from the property.  I have considered and rejected traps – would hate to ensnare my Trudy or a neighbor’s dog.  But there are other options and so I have cleared surrounding brush and obstacles for a clear line of sight.

a lucky save – rescuing my bobcat

Luck shouldn’t factor into daily events – maybe it has a role in investing, or coincidental meetings, but surely not when it comes to my tracked Takeuchi bobcat.  The way I am feeling right now is lucky and this is probably because I acted carelessly and was able to extricate myself from a sticky jam, actually muddy patch, without much loss.

I mentioned previously a trail I cut through the woods which ran close to a spring.  The spring fills a small pool from which it saunters down the hill, mostly unseen, below the surface of a dry stream bed.  My thought was to cut an access path from the trail to the spring and then enlarge the pool.  Because this is rough terrain my friend Mike volunteered to be on hand for the unforeseen.  Cutting the access path was relatively straightforward – we agreed on the route, then highlighted the route with yellow rope, then me with the bobcat and Mike with the machete, cut the path to the spring.

How to deepen the pool.  The lowest side of the pool was on the northwest but it was barred by briar necklaces.  So I initially approached with the bobcat from the higher west bank and quickly realized the incline was too steep.  So I backed out the bobcat and we hacked an approach from the northwest which shouldered between two large trees.  The bobcat loader made quick work of thick roots and, because I was tired from my previous attempt and lack of sleep the previous evening (to sleep at 1am and up at 5am to drop a relative at the airport), I was impatient and did not widen the new ramp or cut it for a more gentle approach angle.  I headed down the ramp in the bobcat, loaded the bucket with mud backed out and dumped the contents.  That was easy, so without pause I went in again, deeper.  As I backed out the bobcat’s tracks began to spin.

I have learned a lot the past 24 hours.  Tracks are great and provide much, much more traction on wet soil than wheels.  But, if the front of the bobcat is in water and you are backing out, the mud covered track at the front moves to the rear and slathers the dry soil under the rear tracks with water and mud.  The first, primeval instinct is panic, I gotta get out, so you increase the throttle and more mud and water are rapidly transferred to the back and the front of the bobcat settles deeper into the mud because it is digging a hole by the tracks scooping up the mud and water in the front, and transferring it to the rear.  I plunged the loader edge vertically into the mud and tried to use the leverage of the loader to push the bobcat backward up the ramp.  To no avail.

trapped bobcat
machete Mike and a mud ensnared bobcat

So I cut the engine and together with Mike we strategized.  When a vehicle is trapped in soft sand you place sticks and branches and rough material behind or in front of  the engine driven wheels for the treads to grip and, with some luck (again the “luck” word) you can get out.  We cut lengths of 4″ to 6″ diameter trunks (lots of trees around) and jammed these under the tracks – this was possible because using the loader I was able to move the bobcat forward onto its front edge and expose the rear tracks.  Then with full throttle and using the loader for leverage I powered the bobcat backwards – and barely moved.

I suggested to Mike that rather than place the trunks parallel and under the tracks we should place them at right angles to the tracks.  A lot of work and full bore throttle and – no progress.

bobcat trapped in mud
bobcat trapped deep in the mud

We thought the rear of the bobcat was catching the ground and so with long handled shovels we dug out the dirt and, with a lot of throttle, gained a few inches to freedom.  At this point, with 4 hours invested to little avail, Mike had to leave and kindly agreed to return the next day and his parting words were “you are tired, leave it for tonight, you can get injured.”  Which is good advice when you are deep in the woods with no one around.

Getting stuck in the mud, especially with a tracked vehicle, which should not get stuck anywhere, is an insult to ones sense of independence, self reliance, and ego.  Needless to say, I spent another hour digging, investigating and throttling and concluded a) remnants of the roots of the biggest tree were snagging the bobcat (revenge of the tree whose roots I had savaged); b) pushing wood under the tracks was a bad idea – the wood became slippery from the mud and water and because it did not span the width of the tracks, a good part of the gripping surface of the tracks was not getting traction; and c) the spring, which I had thought was a dribbler seemed more of a gusher and the water from the spring was transforming the area into a mud bath.

my trapped bobcat
a trapped bobcat is not much to grin about, except its a photo

After a really good night’s sleep and early next morning I was back at the muddy site – my hope was to single handed retrieve the situation and save Mike a trip.  I replaced the new chain on my chainsaw with an older chain and cut through some of the blocking roots – their diameter was 4″ to 6″ and I decided the old chain would be temporarily sacrificed cutting roots surrounded by soil and pebbles (until I could re-sharpen it).  This helped  and I got the bobcat back about 6″.  I then decided the rising water was a problem and with the machete cleared a path down the dry stream bed and then with shovel and pick axe dug a 40ft trench in the stream bed.  The bed appeared dry on the top but the holes dug by the shovel quickly revealed the water running just below the surface.  This helped to remove the water which had been building up around the bobcat.

But it still wasn’t moving.  I was convinced that the bobcat was snagging on concealed obstacles and, as I dug deeper around the rear of the bobcat and its tracks, these came to light.  By this time Mike had arrived and together, with an array of tools from long handled edgers, mattock, grubbing tools, hand saws and the rapidly blunting chain saw we cleared a path to the rear.  With the benefit of a night’s sleep we agreed that the tracks would grip better if they were not covered with mud and that spinning the tracks quickly in frustration just dug the machine in deeper.  So the new modus operandi after clearing obstacles, including belatedly all the wood we had the previous day shoved under the tracks, was to use our gloved hands to pull the mud out of the exposed treads in the track.  Then, in a frequently repeated sequence, with hopes high, I would fire up the bobcat, apply throttle and slowly power the bobcat rearwards and gain a few inches more to freedom.  Unlike the previous day we were thinking rather than just acting and we were following a procedure that appeared to have traction.  It was surprising how many times we were sure it would get out and it didn’t.  But, eventually, with Mike yelling encouragement I escaped the clutches of the mud and got to level ground.

Was it luck?  Probably not, but an education into new techniques, the importance of thinking it out and a good night’s sleep.

an improvised bug dispatcher, growing squash and figs

I have never had much luck with squash.   A clan of squash vine borers benignly observe my squash growing efforts and, just when the squash begins its dash for the finish line, they take up residence in the base of the stem of the squash plant, chew away, and the vine keels over.  In previous years I noticed mating stink bugs in the vicinity of the squash plants before their demise and, guilt by association, when I spotted them this morning, I quickly fashioned by bug dispatcher.  My bug dispatcher is based on a handy internet tip – a soda bottle, or in my case a plastic dish detergent bottle, sliced horizontally with the top third inverted into the bottom third and secured with duct tape.   Add a teaspoon of detergent, some water, shake, and this becomes the final destination for the offenders.  To secure the miscreants I use long handled rubber tipped tweezers – the rubber tips have a better grip on hard shelled insects.  So in to the soapy mix went the doting, connected couple. Another way is to locate the funnel of the bug dispatcher directly below the bug and then knock it or shake its perch and, with some luck, it will tumble into the funnel.  My squash plants are in a new location this year and I hope, probably unrealistically, that they will escape the attentions of the vine borers.

squash bugs
assembled bug dispatcher with long handled tweezers

for squash bugs
squash bug dispatcher – vertical view

The leaves of my potato plants were afflicted by all types of bug biters.  A biggish, slow moving feaster was easily taken and added to the dispatcher.

bug dispatcher
a potato plant leaf lover before entering the bug dispatcher

 Fig tree

I was concerned when my main fig tree did not sport figlets – my word for little figs, and I thought the tree was taking a sabbatical or I had over fertilized it with manure the previous year.  But suddenly, in the past week, figlets have appeared and I am now hoping for a bumper crop, what with the manuring, and having the overflow from my rainwater storage tanks directed at the base of the tree, and the removal of competitors.

future figs
future figs

Though there are bug visitors to the tree – large numbers a few weeks ago and just the occasional bystopper now – not sure who they are or their intent.

unusual bug
fig tree visitor – unusual bug

Tomatoes

Last year was not a great tomato year for me.  I have again planted out a number of different varieties and will keep an eye on them.  When I noticed two strong volunteers emerge from compost spreads I decided to embrace them with wire cages and I will water them well and hopefully in due course, learn their identity and enjoy them.

tomato volunteers
volunteer tomatoes

trail through the woods

The past few weeks I have been preoccupied with cutting a new trail through the woods.  The northwest part of the property slopes down a hill and its face is creased with contour ditches and berms installed I know not by whom or when.  There is a small spring which forms a stream which slides off the property.  My new trail is designed to give me access to the spring and to meander among the fast growing tulip poplars.  Since this is the north facing slope, which is sheltered from the sun and benefits from the contour ditches, it also has ferns and mosses and a wildness of growth.

lush wild area at base of hill

My trail is  maybe half a mile long.  I marked its intended route a year ago with yellow rope.  Two weeks ago I began construction.  Initially my thought was to make a road which my tractor could access, but my tractor is 7 ft wide and when hitched with a chipper cannot make sharp turns.  So the road would have had to be fairly straight.  My tracked bobcat on the other hand is 5 ft wide and can turn on a dime, which means it can easily dribble among the larger trees.  So I settled on a trail rather than a road and saved a lot of larger trees and a lot of work.

beginning of the trail

From previous experience I know not to leave any stumps, especially the smaller ones which upset the unwary, so instead of chainsawing and pulling the trees out of the way (and leaving stumps in place),  I used my tracked bobcat to clear the way.  Two alternative procedures.

For those trees with diameters up to 3″, I simply lifted them up out of the ground with a chain and slip hook.  A slip hook allows the chain to run freely through it so as the bobcat pulled on the chain the hook tightened on the trunk of the tree.  The other end of the chain was secured to the bobcat body with a grab hook which gripped onto a link of the chain.  The slip hook worked fine on most of the trees except for one kind where the bark peeled off easily.  In this situation I had to revert to the second procedure.

example of slip hook


example of grab hook

The second procedure, primarily for the larger trees, was to attempt to push the tree over with the bobcat loader pushing the trunk at about 5 ft off the ground.  If the tree refused to budge I would cut the roots on either side of it with the loader teeth and then it usually could be pushed sufficiently to expose the base of the tree.  Then, with the loader at ground level I would bulldoze the tree out of the ground and push it sufficiently far to sever its roots.  The trees are interlocked by vines, mainly muscadine (grape vines) and they would have been hung up if I had merely chainsawed them.  So the assistance of the bobcat was invaluable.

trail along slope of hill

Once the trees were down I limbed and bucked the trees, that is to say I cut off the branches where they joined the trunks, and I cut the trunk into 5 ft lengths.  The 5ft lengths of the hardwood trees fit into the bobcat’s loader and I brought them back to the log cabin and stored under shelter to dry for firewood use at year’s end.  The pine trees trunks I will leave to degrade and return nutrients to the soil.

small spring at base of hill

I made several additional trips with the bobcat – down the trail to collect the rootballs and dump them in a large gully at the foot of the slope, and up the trail to collect the 5ft wood lengths for transport to the storage area.

5 ft lengths of future firewood

Finally my tractor came into play.  I attached a woodchipper  to the rear, which is driven by the tractor’s engine, and I have begun chipping the branches and odd wood lengths.  The chippings will be spread along the trail.

trail along base of hill

So much strenuous pleasurable work and a good result to date.  I must acknowledge the contributions of Mike, who assisted on the first day with lassoing and removing the trees, and Simon, who on two days worked hard amidst the mosquitoes and diesel fumes to help me complete the task.  On the way back this morning along the trail almost stepped on a baby turtle – it was on 1″ long – see below.

the 1 inch turtle

remediation

This is not about environmental remediation, just correcting a few deficiencies in my nu trac environment.

Bees

When I split the hive a few weeks ago by taking bees and frames from hive 1 and creating a new hive 2, I noticed that hive 1 had no brood and apparently no queen.  In addition to the new queen I purchased for hive 2, I ordered a second queen for hive 1.  The second queen and several attendants arrived in a queen’s cage last Friday from an Alabama beekeeper. After again confirming that hive 1 was queenless, I inserted the queen cage into the hive.

I mentioned in a previous post how observation can be distorted, often by preconceived notions.  Hive 1 prior to introducing the queen was noisy, restless and it even looked as if robbing might be in progress.  Hive 1 has lots of honey and I am waiting for it all to be sealed before I harvest it, so maybe, with the colony demoralized and on the decline, they were being robbed?  Next day the hive seemed very different – no more agitated activity at the hive entrance and no angry responses to the slightest jarring of the hive bodies.  So, I concluded, the caged queen’s pheromones were being spread around the hive and the inhabitants were settling down.  Sunday I opened the hive to see how the bees were responding to the queen cage – they were gathered around it, could be easily brushed away (which indicates they were not attacking and trying to get at the queen) and seemed content.  So this morning, four days after introducing the queen cage, I removed the cork and some of the candy from the hole in the cage.  The bees should now remove the rest of the candy and I hope, in a few days when I reinspect, the queen cage will be empty and the queen will be busy egg laying.  I should mention that the new queen in hive 2 has settled down well and has laid eggs in a tight pattern on both sides of one of the frames.

Fruit orchard

In February 2011 I began a new orchard and installed 12 different 1 year old trees.  This spring I was sure 4 had died but, surprisingly, 2 unexpectedly produced leaves at their bases, so that left 2 victims – a Bing cherry and a Gold Nugett Loquat.

I took my first cuttings last fall and again earlier this year – most did not survive, but the fig cuttings looked strong, so I decided to replace the two dead fruit trees with a couple of cuttings.  I began with the Bing cherry – I thought it would lift easily out of the ground as is common when the roots have rotted, but this cherry was anchored.  I then found that though the  trunk was dead the root trunk was very much alive and well established, so I left alone and hope I will soon be rewarded with shoots.  The loquat lifted easily – just a short dead root trunk.  I enlarged the hole and added some chicken manure and then compost and then installed the small fig cutting.  I will water it frequently and I hope it will survive the transition.  Since the fig cutting is from  a nearby well established fig tree I know it will thrive in this area.


observation and analysis

I used to think observation was the key talent.  On trips through the Kruger game reserve in South Africa my siblings and I competed to spot the lion, cheetah, leopard or unusual game first.  On a river boat trip through north Australia we competed to be the first in the launch to spot the saltwater crocs (“salties”) lazing on the banks.  And for such contests a sharp eye was all that was needed.

But in my interactions with nature, observing the discordant object is only the first step.  Understanding why is equally important.

For several years my spring routine has been to spray roundup on the poison ivy alongside my walking paths in the woods.  I believe in live and let live, but my dog is an investigator which requires her to explore scents and droppings off the trail, which are often in the poison ivy patches, and she then transfers the poison to all who contact her.  So I use roundup for this purpose and this purpose alone.  There is a glade alongside the trail where poison ivy thrives, despite repeated attentions from the sprayer.  I observe the poison ivy, I drench and then later in the season spray again and the next year, there it is again, and more spraying.  This year, as I was about to spray, I received a cell call and so lingered at the spot longer than usual and then happened to notice two snake like vines heading up a tree.  Yes, they were poison ivy vines, which explains why, despite my ministrations, the poison  ivy continually resurfaced sponsored by seed from overhead.  Had I reflected on the persistence of the poison ivy I may have thought to look up and not always down.

poison ivy high in a tree
poison ivy vines climbing a tree

Of course, once you know about it, it is a simple matter to identify it elsewhere, as in this other tree, 10 ft away.

a smaller poison ivy vine

But often more is needed than just knowing what to look for.  Analyzing what you are looking at and being aware of the changing environment is a necessary skill.

A couple weeks ago as I passed my new orchard I happened to notice that one of the small trees (tanenashi persimmon) was suffering.  Half of its leaves had turned brown.  I remembered that I hadn’t watered this area for a week and, except for the previous day which had been cold, the spring weather had been in the 80’s.  None of the other trees was afflicted but I reasoned this particular tree was probably more susceptible to lack of water, so I promptly irrigated the orchard.  I did notice I had planted Russian comfrey too close to the small tree but reasoned this could not be the cause since comfrey is not allelopathic.  Then a little later that morning, I noticed that my tomato and cucumber seedlings were also afflicted – in their case I had watered every day, except the previous day which was cold.  This seemed unusual hardship for one day’s missed watering.  My mind wandered idly over these facts – perhaps there were root nemitodes attacking the one fruit tree and the tomatoes and cucumbers – such selective treatment seemed unlikely.  Then I noticed, in a separate planting the cucumbers were doing fine and they also had not been watered the previous day because it had been cold.  So why was the one lot ok and the other lot disaster.  Then it dawned on me – the previous day had been cold, but how cold – had there been a freeze?  I happened to meet my neighbor and he said the water in his hose had frozen the previous morning.

Now it made sense – the fig tree and the tomatoes and cucumbers are cold sensitive and had been hammered by the freeze.  And the reason the other cucumber planting was ok was because it is on the crest of a hill with no obstructions below it, so the frost, like water, slid down the hill away from it, which was not the case with the other planting which was on level ground.

frost damaged tanenashi persimmon alongside comfrey

All of this conjecturing and misdiagnosing could have been avoided had I, the previous day, just glanced at my min/max outdoor thermometer, which would have told me how cold it had been and then, with this knowledge I would have understood the changes.  So I need to remove distractions and attune myself better to my surroundings.

Or pursue a more analytical approach as Bill Mollison suggests in “Permaculture – A Designers’ Manual”: first make value-free non interpretative notes about what is seen; then select some observations and prepare a list of speculations; then confirm or deny the speculations by research, asking others, and/or devising more observations to test the hypothesis; then make a final examination of all the information to hand to arrive at a conclusion; and finally decide how to use the knowledge gleaned.  A disciplined approach for me to consider.

wildflower seeding

Last fall I collected a large quantity of wildflower seed and stored it in a cloth shopping bag.  Now that I have planted out my tomatoes and with rain in the offing, I decided to sow the seed – cosmos, sunflower, marigold and zinnia.  I was gifted two old cultivators – they are 5 feet wide and connect to the three point hitch at the back of the tractor.  The tines are spring tensioned.  I have a 60hp tractor which typically would pull a larger cultivator and so I had to make some adjustments to fit the cultivator to the tractor.  But the hitch fitted without a hitch, so to speak, and with my tractor in its lowest (slowest) gear I made several passes on contour across the sloping field.  The tines did a great job making furrows in the field and displacing stones.  I then hand sowed my collected seed in the furrows.  I probably should have finished the job dragging large planks with chains, which came with the cultivator, to bury the seeds.  I am hoping we get rain, but not too much, and the rain will settle the seeds in the soil.  Below is a ‘photo of the cultivator.

bees – a swarm trap

Bees swarm to reproduce the colony and a common cause is population density or, according to an Australian beekeeper, dissatisfaction with current living conditions, which can be the same thing.  A primary swarm is when the existing queen leaves with up to 60% of the population and a secondary swarm is when a virgin queen leaves with a large percentage of the bees.  I reckon in my first year of beekeeping my bees swarmed 4 or 5 times.

So one way to prevent swarms is to give them more hive space – more deeps and supers so they don’t feel pressured.  Some beekeepers believe that clippings the wings of the queen will lessen the likelihood of swarming, though this is contested.  First year queens are allegedly less likely to swarm so replacing older queens with young queens may help.  And then there is cutting out the queen cells – before swarming bees ensure that there is a new queen, or a queen on the way, for the hive from which they are departing.  It can take 15 to 17 days for a queen to develop from an egg.  So beekeepers may inspect their frames every 10 days to locate and cut out queen cells.  One beekeeper says he inspects every 7 days.  Before you cut out the queen cells you have to make sure there is still a queen in the colony, for if you cut out the queen cells and the bees have already swarmed then you can end up with a queen less colony which will become weaker and weaker.

All too much work for me.  So apart from trying to provide optimal living conditions – not too hot or too cold and ample living room, I am a minimalist and keep out of the way.  Until, at a recent beekeeping meeting I learned of swarm traps, and ordered one.  It looks like a hollowed out tree trunk with an access hole at the bottom and a removable lid and came with a swarm lure.  The lure is attached to the lid on the inside of the trap and the trap should be placed 9′ to 12′ above the ground and about 200′ to 250′ from the hive.  I secured the trap to a single standing tree about 180′ from the hive and about 15′ above the ground.   So, with some luck, I may be able to recover my bees if they swarm again.

swarm trap roped to tree beckoning scouts from the next honey bee swarm