My land slopes and since I rely entirely on rainwater for irrigation, I catch the rain however I can – in storage tanks or directly into the ground with contour ditches. Contour ditches are similar to swales – built on contour or dead level survey lines to intercept and hold water and to let it infiltrate the ground, therefore they are not compacted or sealed. While a ditch is narrow, a swale can be broader like a basin and, according to the permaculture bible by Bill Mollison, trees are essential to swales and must accompany swaling in arid areas.
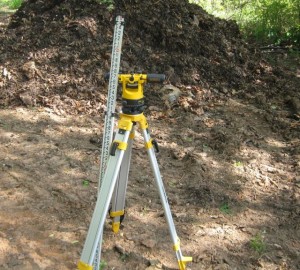
I start my contour ditches towards the top of the slope where there will be sufficient runoff (if the ditches were located at the bottom of the slope they could be overwhelmed by torrents of water). Once I decide approximately where the ditch will run I use my transit level and a helper (my rod man) to locate the middle and two ends of the ditch on a contour. I mark these three points with stakes. Usually, by this time, my helper’s patience is exhausted and I am on my own for the rest of the project.
|
|
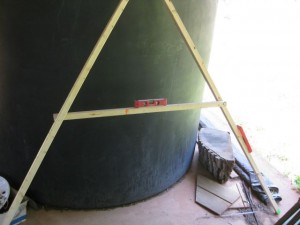
If the ditch is say 200 ft long, even with the three stakes in place, it can be difficult to figure how the ditch should run between the three stakes since the ground is uneven. So I use my A frame, which is simply three pieces of wood connected to form the letter “A”. The two sides of the A are 8ft long and the feet are about 8.5 ft wide. The horizontal piece is 4ft long and all the wood is 1.5″ (nominal) square, so it is not too heavy to carry about. A simple bubble level is attached to the horizontal and one of the vertical legs. I construct the A frame on a level surface and ensure that the horizontal piece (to which the bubble level is secured) is horizontal before bolting it in place.
I gather some rocks and a can of aerosol spray paint and with my A frame start from the stake which marks one end of the future contour ditch. One leg of the A frame is next to the first stake and I point the other leg in the direction of the next stake and move it along the ground until the bubble level tells me the A frame is horizontal and the second bubble tells me the frame is vertical. I place a spray painted stone to mark this spot and then swing the first leg around the second in the direction of the next stake until it too is horizontal and vertical. It is important to advance the legs alternately since this will counteract any inaccuracy in the A frame. I can tell how accurate I have been when my A frame eventually reaches the next stake – if the leg of the A frame is at the same level as the stake, all is well.
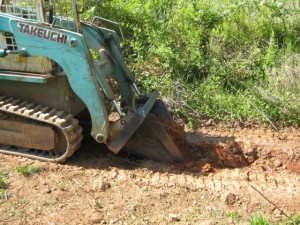
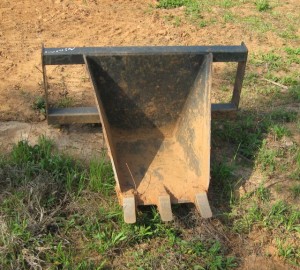
Having marked out the line of the contour ditch with the three stakes and painted stones, next step is to dig the ditch. I work mainly by myself – I will not engage paid workers and volunteers are scarce. So I have no qualms using my old machines, which I nurture along. My Takeuchi tracked loader (bobcat) has a stumper attachment, which is good for removing stumps and digging ditches. Digging the ditch becomes quite simple, I simply use the bobcat to carve out the ditch following the trail of spray painted stones and I save the removed soil in a heap for some future use.
I seed the ditch and sides with grass seed to stabilize the banks. And then I make my plantings on either side of the ditch. An earlier (shorter) contour ditch I dug for my muscadines (grape vines) has proven so effective at catching and holding water that supplementary watering will be minimal (the ditch is assisted by a diversion slot cut across an access road which directs water into the ditch). After planting up my new ditch with trees perhaps I will call it a “swale”.
 |


